What is IPMI?
Description and operation features of the server management interface - IPMI
We provide 24/7 access to IPMI for all dedicated servers.
IPMI (Intelligent Platform Management Interface) is an intelligent platform management interface designed for autonomous monitoring and control of functions embedded directly in server platform hardware and firmware. Key features of IPMI are monitoring, restoring management functions, logging, and inventory, which are available independently of the processor, BIOS, and operating system. Platform management functions can be accessed even when the system is powered off.
With IPMI, you can power on, shut down, reboot the server, and reinstall the operating system.
To work you need any browser and installed software Java Runtime which can be freely downloaded and installed for your operating system from the official site.
In My Account, under "iKVM/IPMI”, activate the web interface. Click "Go”.

Also, you can share the IPMI/KVM access by clicking on the corresponding button.

After starting the console, you will be able to download the Java application file, under Remote control.
If you get this error when installing the java console, you need to configure a list of security exclusion sites.
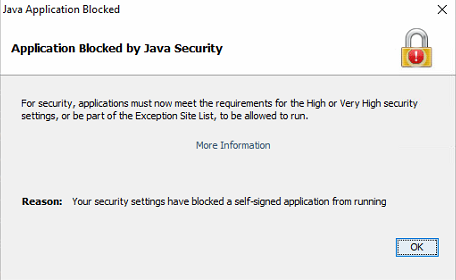
Instructions on how to put a site into java exceptions are available in official documentation.
Enabling, disabling and restarting the server
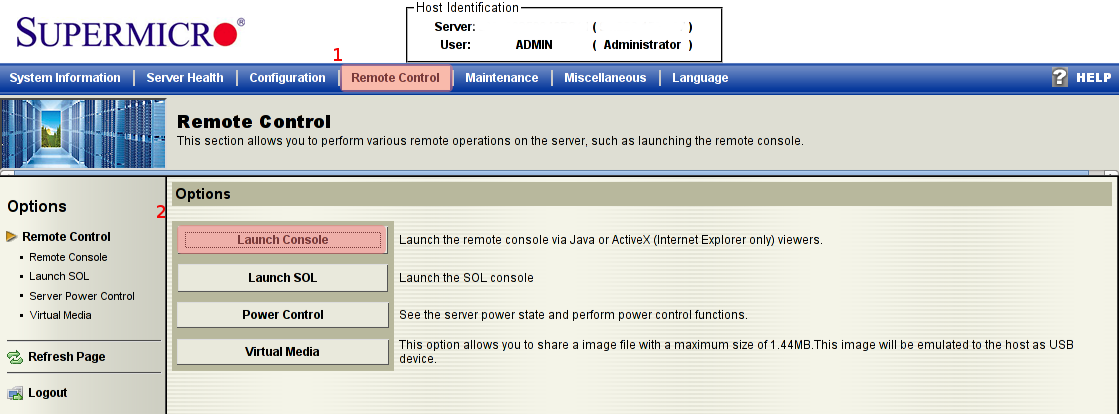
After connecting, you can control the state of the server - power off, reboot. To do this, select Remote control in the main menu:

And in the dropdown menu (or menu on the left), Power control:
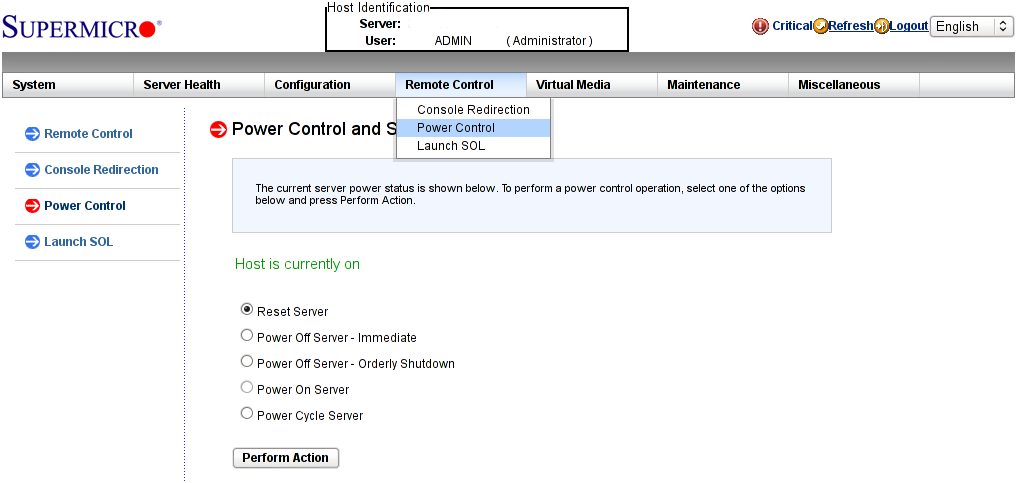
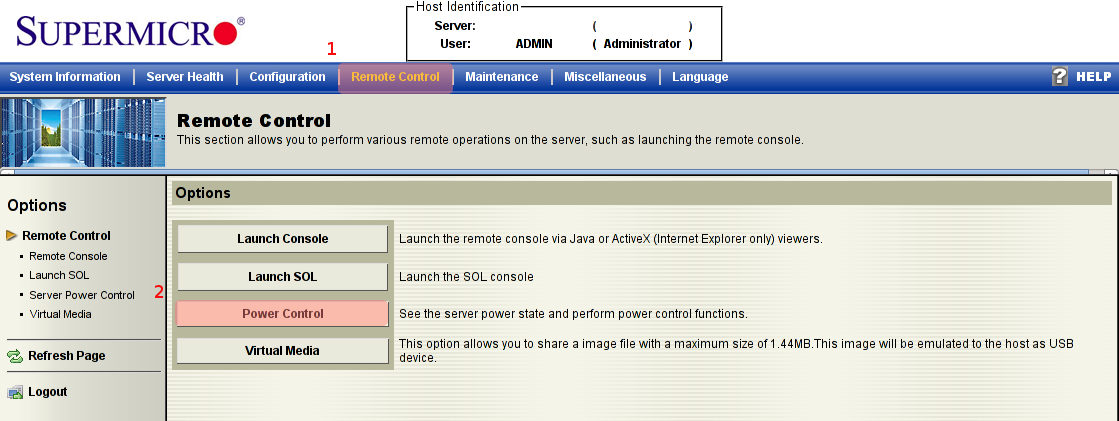
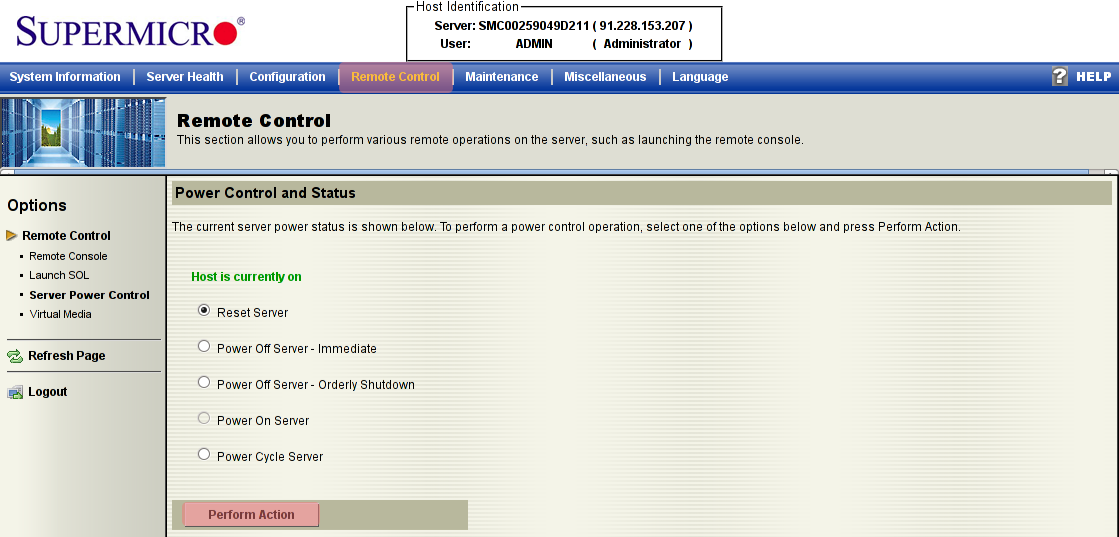
In another version of IPMI, the menu may look different, but the menu items are exactly the same, you click:
- Press Remote control, after that.
- Select Power control.
Launching the console
To connect to the server console, in the same menu Remote control, select Console redirection and click Launch console:

In the other version, just click the Launch console button:
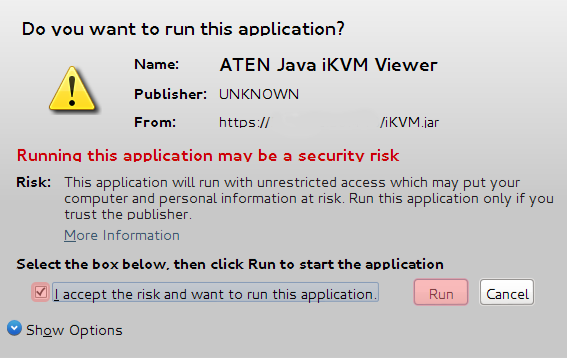
The Java Runtime security system may ask you to confirm that you want to start the application while launching the console, you need to confirm the launch:
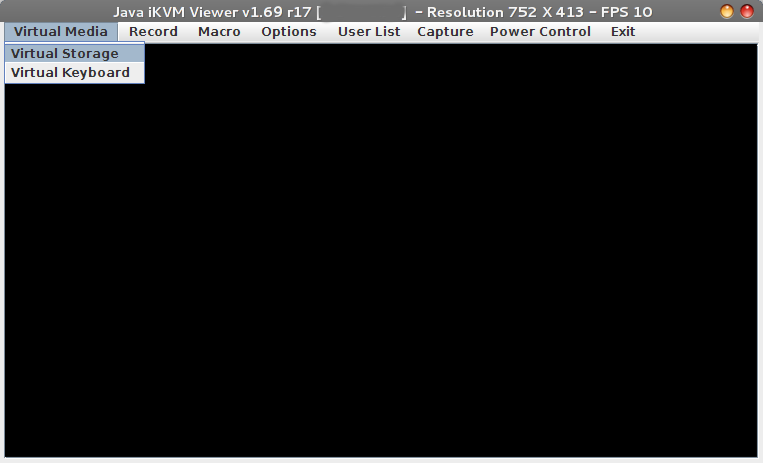
After that the console will start (the console window view is given below, in the next section) and you can remotely control the system, including changing settings in the BIOS and reinstalling the operating system (if necessary).
Connecting the disk image
*Note: Mount the disk image only through the management console, not through the IPMI web interface.
To mount a disk image (including a bootable disk), you must run the Virtual Storage manager in the Virtual media menu:
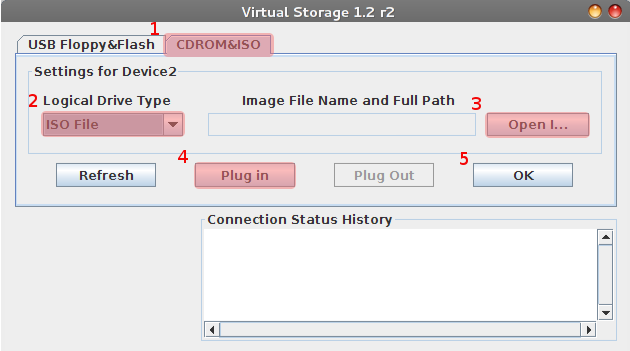
In the window that opens, you need to:
- select the CDROM&ISO tab
- Select ISO File as the mounting type
- select the file on your local disk
- connect it to the server (mount it) by pressing Plug in
- Close the virtual storage manager by pressing OK
After the disk image is connected you can reboot the server and select to boot from the connected device in BIOS. To do this while the server is booting press F11 (to access the boot menu) or Del (if you want to change BIOS settings).
*Your operating system can block (intercept) some combinations of keys, for example Ctl+Alt+Del - to pass them to the remote server you can use virtual keyboard or macros
Virtual keyboard
Some keyboard shortcuts cannot be entered from the local keyboard, this is because they are used by your local operating system. That's why Macros are provided in the control console:
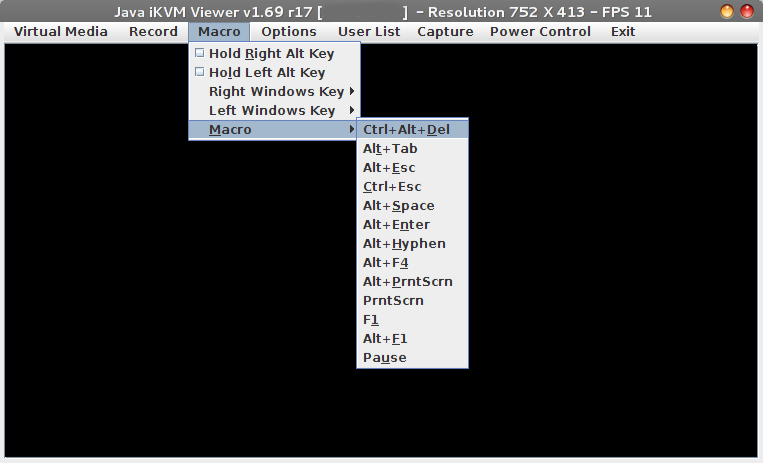
To activate them, just select the appropriate menu item, and the selected combination of keys you press will be sent to the server as if you pressed them on the keyboard directly connected to the server.
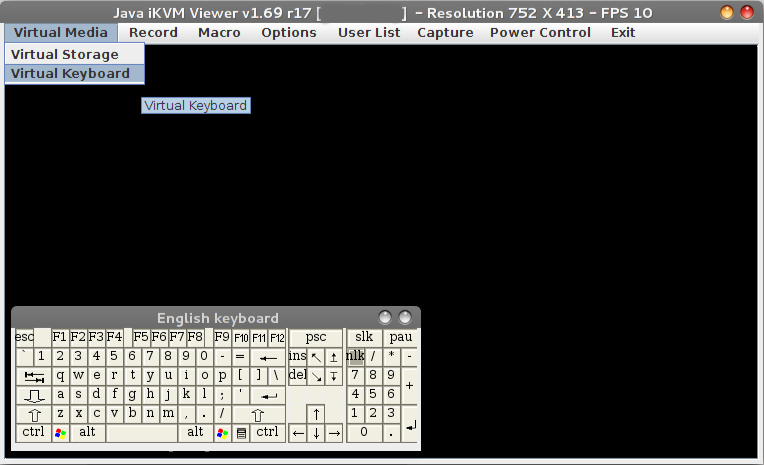
When the built-in macros are not enough, you can enable the virtual keyboard:
Info
If you have difficulties in setting up or have any additional questions, you can always contact our support team via ticket system.