Connecting to memcached on shared hosting
Instructions on how to set up memcached access in popular CMS on shared hosting.
On shared hosting, memcached is accessed via a socket, php memcache and memcached extensions are available. By default, each user is provided with 32 MB of memory, the limit can be increased by contacting the ticket system.
Depending on used php extension socket must be specified differently:
An example for the php-memcache extension:
Socket path: unix:///root_folder/.memcached/memcached.sock
Connection port: 0
An example for the php-memcached extension:
Socket path: root_user_directory/.memcached/memcached.sock
Connection port: 0
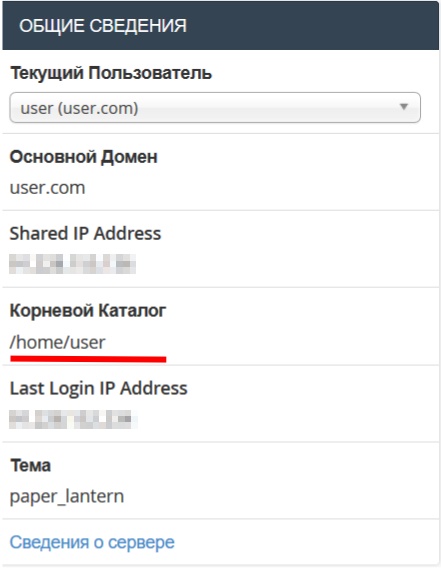
The correct user root directory can be seen in the main page of cPanel after going to it.

Example of connecting to memcached in Joomla 3.
As CMS supports memcached there is no need to install additional plugins.
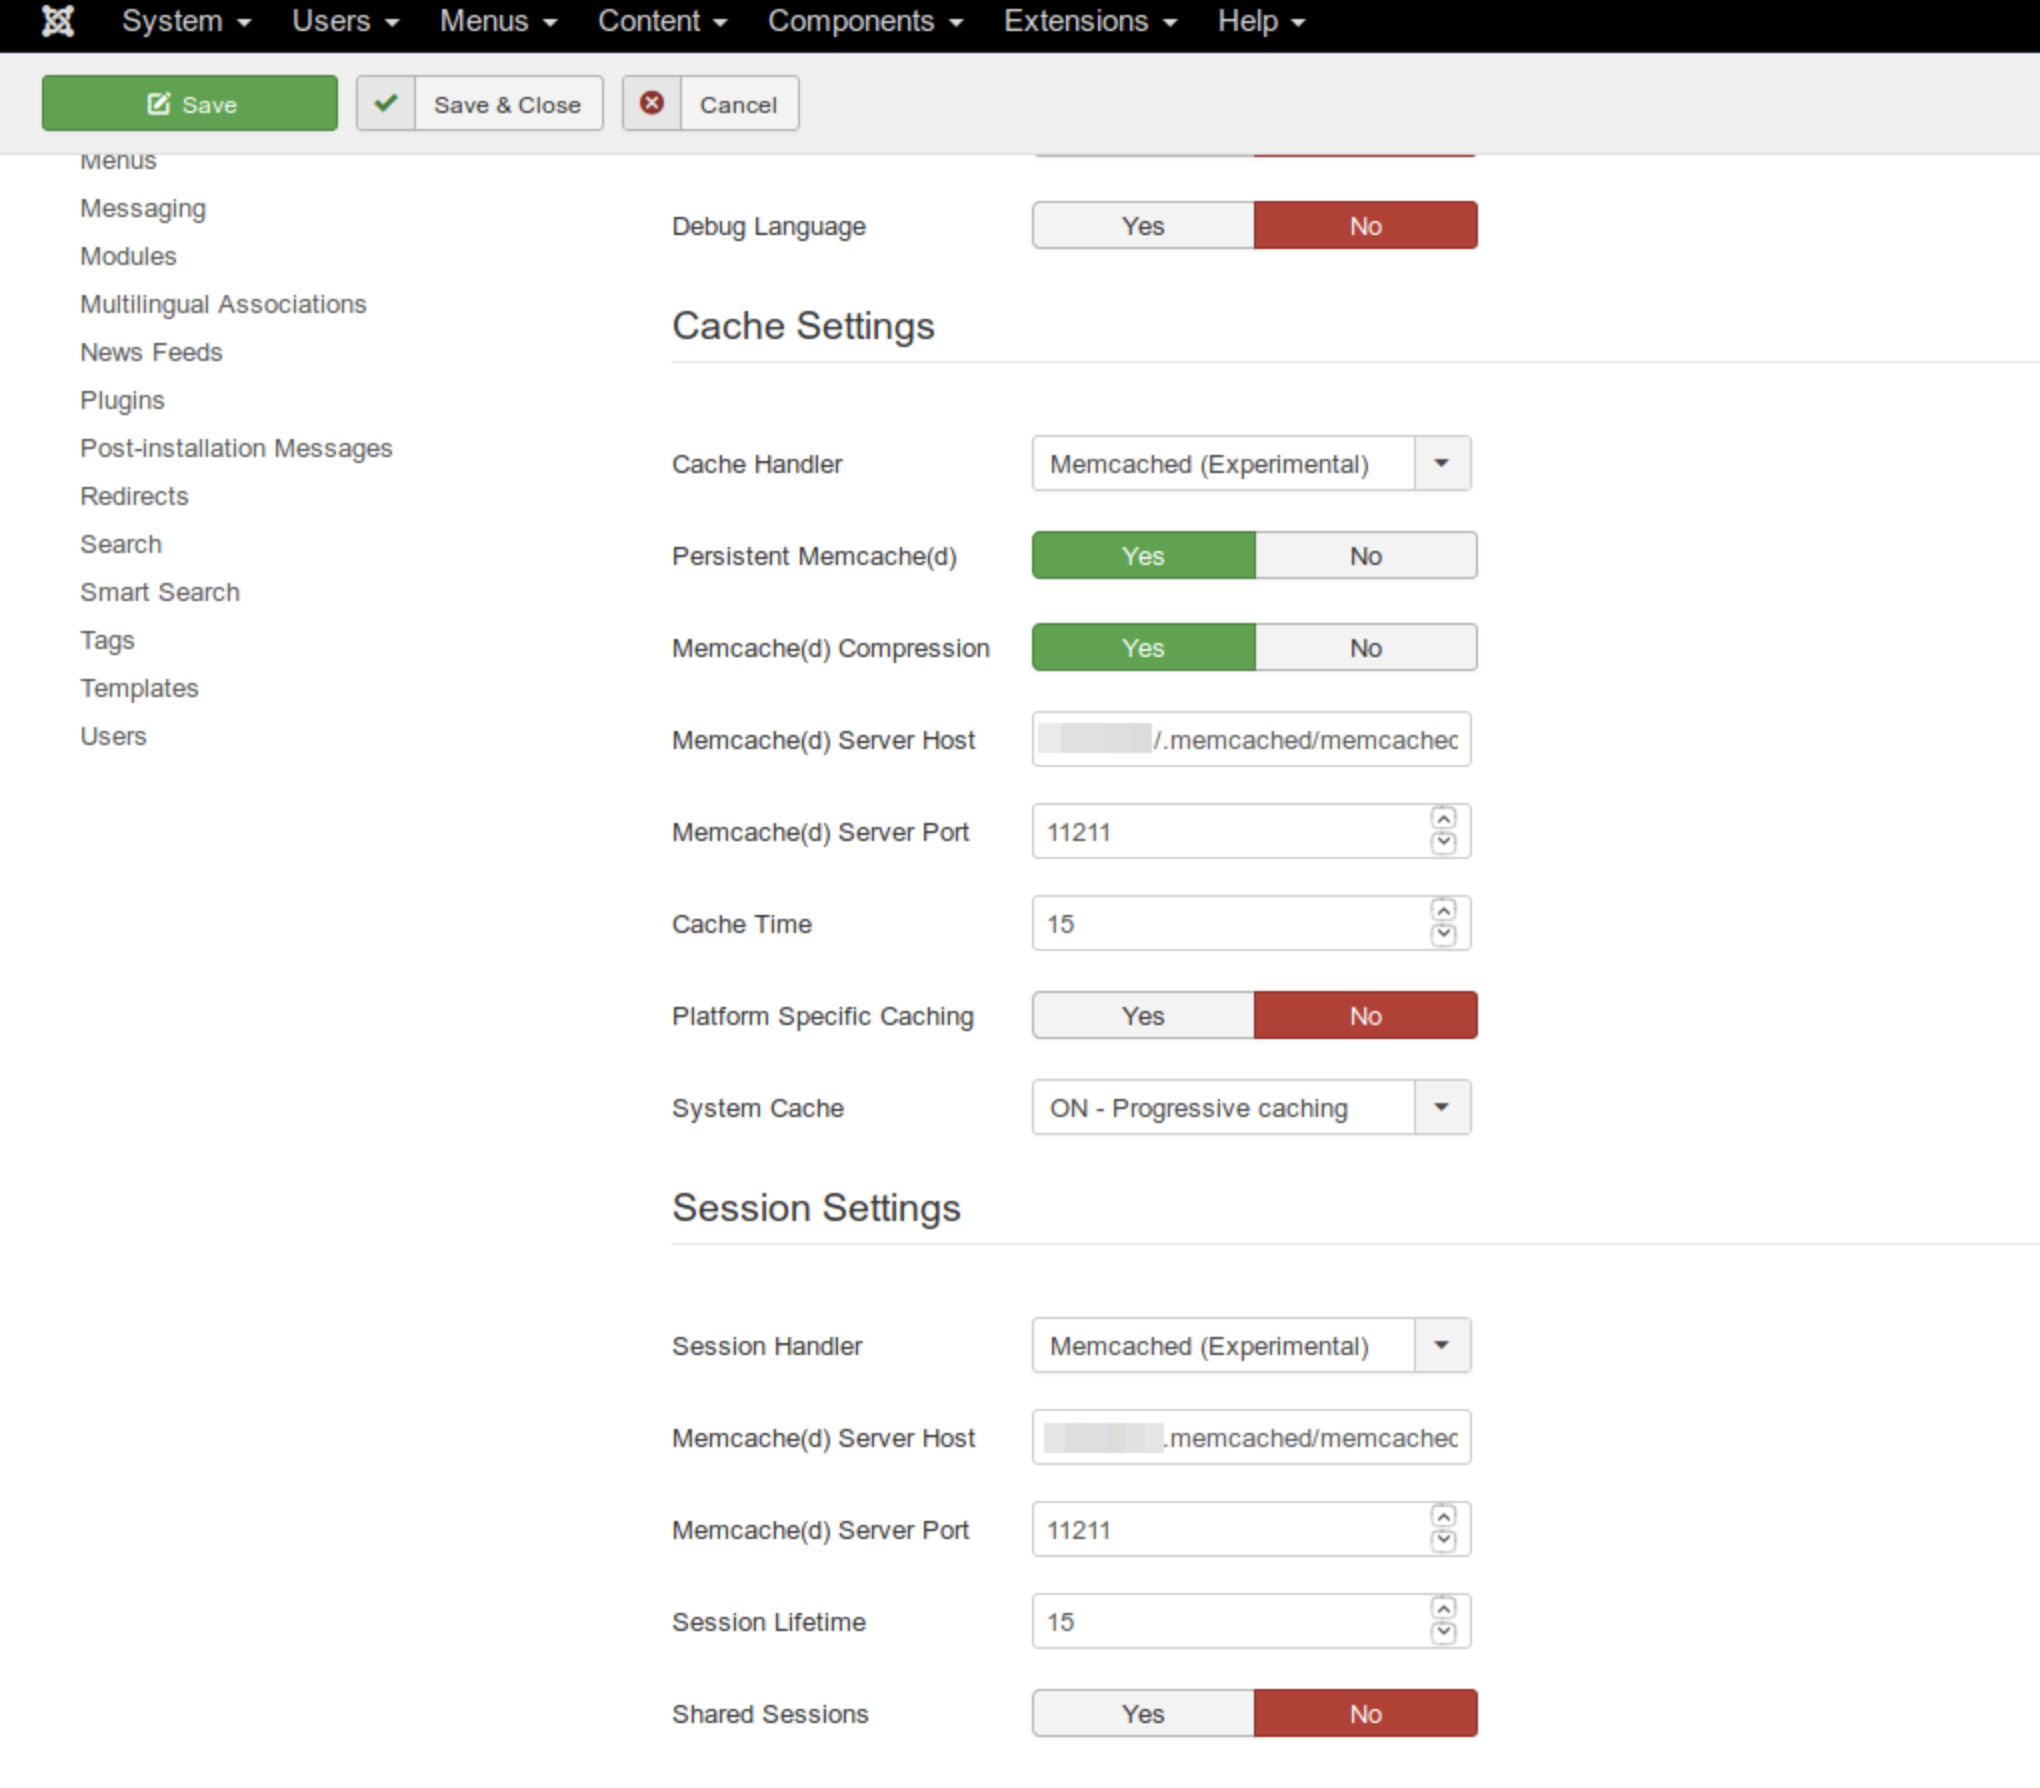
Login as an administrator to Joomla control panel go to System > Global Configuration > System tab.
Find settings of caching and saving session specify the following values
Cache Handler - Memcached
Memcache(d) Server Host - root_directory/.memcached/memcached.sock
Memcached(d) Server Port - 11211

Press Save to apply the setting.
Example of connecting to memcached in Wordpress
CMS does not have built-in support for memcached, but we can use different plugins, for example caching plugin W3 Total Cache.
Go to extension settings in the tab General settings type of caching (Cache Method) set Memcached

Next, for each cache item, you need to prescribe memcached access parameters. For example, go to the Page Cache tab , then go to Advanced.
In the Memcached hostname:port / IP:port: field specify the socket with the port as follows:
root_user_directory/.memcached/memcached.sock:0
Example of connecting to memcached in Opencart
This CMS has built-in support for memcached, you can switch the cache storage as follows.
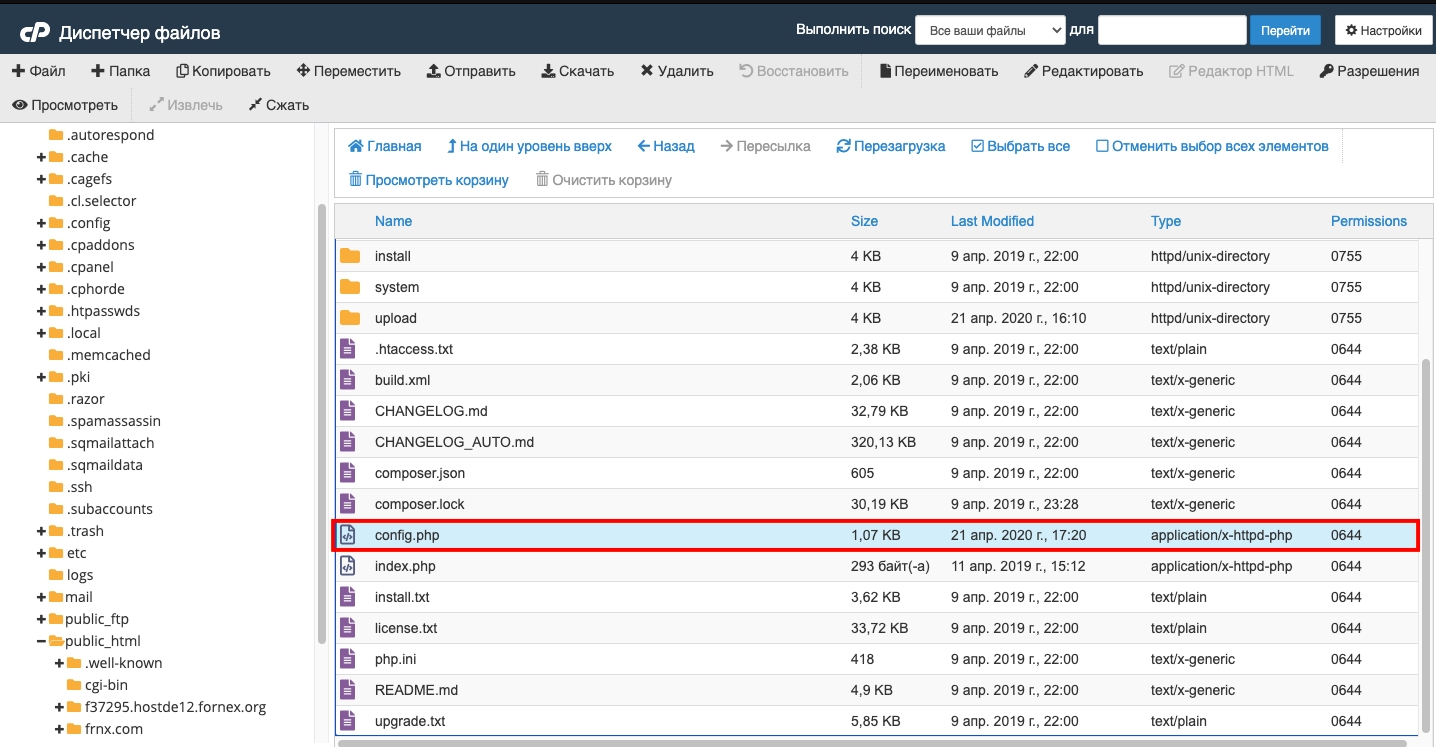
Open for editing config.php file in the root directory of the site in a convenient way and add the following lines to the end of the file.
define('CACHE_DRIVER', 'memcached');
define('CACHE_HOSTNAME', 'unix:///home/your_login/.memcached/memcached.sock');
define('CACHE_PORT', '0');
define('CACHE_PREFIX', 'opencart_');


The same lines are required in admin/config.php


##Example connecting to memcached in Bitrix
The CMS has built-in support for working with memcached, but it's implemented via the php-memcache extension and is only available on php versions 5.3 - 5.6.
To configure access you need to add the following lines to bitrix/php_interface/dbconn.php file:
define("BX_CACHE_TYPE", "memcache");
define("BX_CACHE_SID", $_SERVER["DOCUMENT_ROOT"]. "#01");
define("BX_MEMCACHE_HOST", "unix:///root_user_directory/.memcached/memcached.sock");
define("BX_MEMCACHE_PORT", "0");
Also in the file bitrix/.settings_extra.php make lines:
<?php
return array(
'cache' =>array(
'value' => array(
'type' => 'memcache',
'memcache' => array(
'host' => 'unix:///root_directory_user/.memcached/memcached.sock',
'port' => '0',
),
'sid' => $_SERVER["DOCUMENT_ROOT"]. "#01"
),
),
);
If bitrix/.settings_extra.php file is missing - you need to create it manually.
After entering the configuration in the files, the configuration is complete.
##Example of connection to memcached for DLE
This CMS has built-in memcached support, you can switch cache storage as follows.
You need to go to admin panel, then go to System settings -> Optimization. Then set Memcache for the Site caching type field, for the next parameter Data for connecting to Memcache server specify the path to the socket in the format.
root_user_directory/.memcached/memcached.sock
Example connection to memcached for Drupal
Since Drupal does not have its own tools for working with memcache, it is necessary to install the "Memcache" module through the "Extensions" -- "Install New Module" section (http://адрес_сайта/admin/modules/install ) before starting the configuration.
Link to download the latest version can be found at the end of the page.
After installing the module (also in the "Extensions" section) you need to activate it (check the box next to "Memcache" and click on "Install" at the bottom of the page)
After that you need to edit the file /sites/default/settings.php adding to its end, replacing "your_login" with the name of your hosting account:
Drupal 7
$conf['cache_backends'][] = 'sites/all/modules/memcache/memcache.inc';
$conf['lock_inc'] = 'sites/all/modules/memcache/memcache-lock.inc';
$conf['memcache_stampede_protection'] = TRUE;
$conf['cache_default_class'] = 'MemCacheDrupal';

// The 'cache_form' bin must be assigned to non-volatile storage.
$conf['cache_class_cache_form'] = 'DrupalDatabaseCache';

// Don't bootstrap the database when serving pages from the cache.
$conf['page_cache_without_database'] = TRUE;
$conf['page_cache_invoke_hooks'] = FALSE;
$conf['memcache_servers'] = array('unix:///home/ваш_логин/.memcached/memcached.sock' => 'default');
Drupal 8
      //Memcache configuration
      $settings['memcache']['servers'] = ['unix:///home/ваш_логин/.memcached/memcached.sock' => 'default'];
      $settings['memcache']['bins'] = ['default' => 'default'];
      $settings['memcache']['key_prefix'] = '';
      $settings['cache']['default'] = 'cache.backend.memcache';
Info
If you have any difficulties or need help, please create a support request via ticket system and we will be happy to help.