Database management in the Hestia CP control panel
Guide to working with databases in the Hestia CP control panel
Hestia CP - this is one of the most popular, simple and convenient panels for managing sites, with its help you can add new sites, work with mail and databases, Cron, updates, file manager, the ability to add SSL.
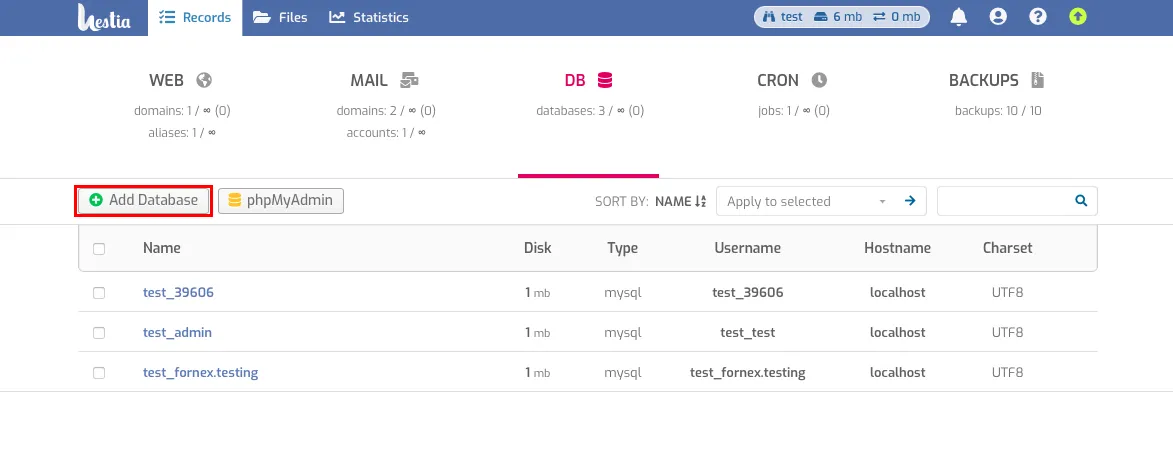
To create a Database on the server, go to DB and click Add DB.
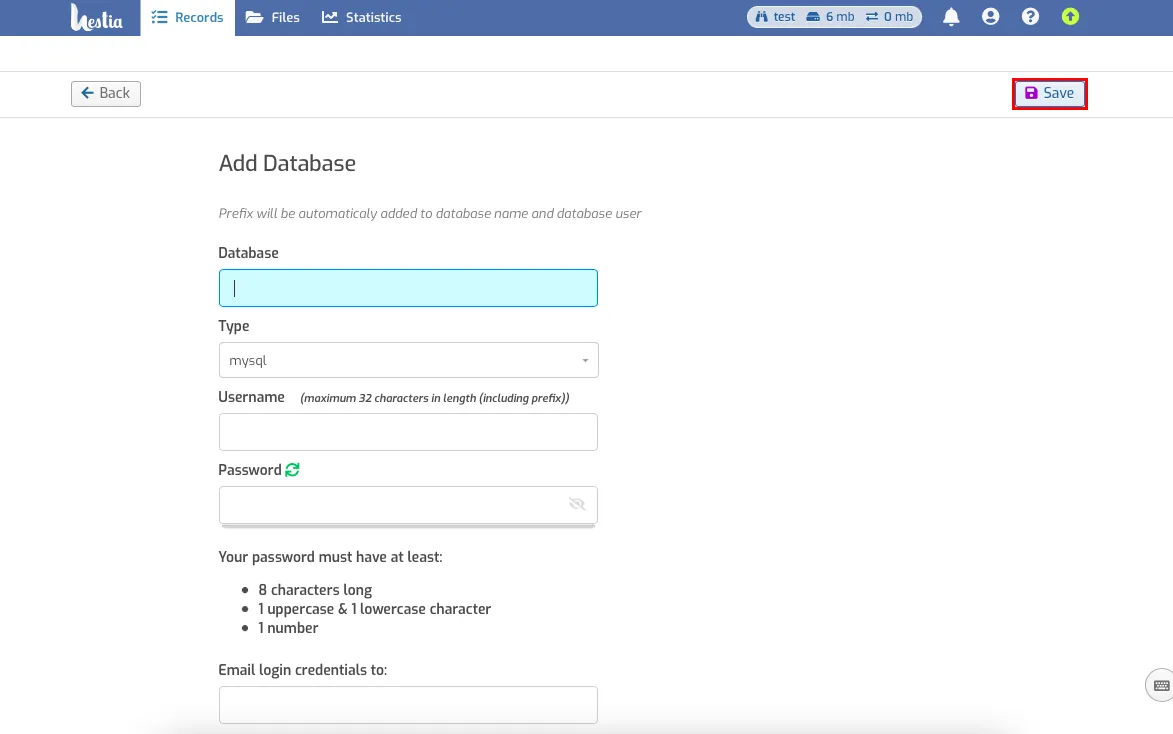
Fill in the fields of the add database form-indicate the database name, database username, and password.
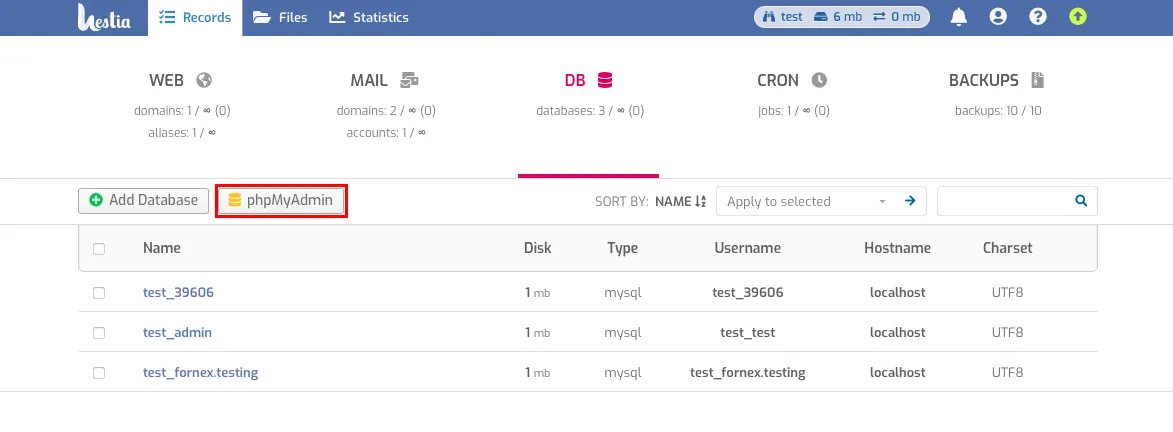
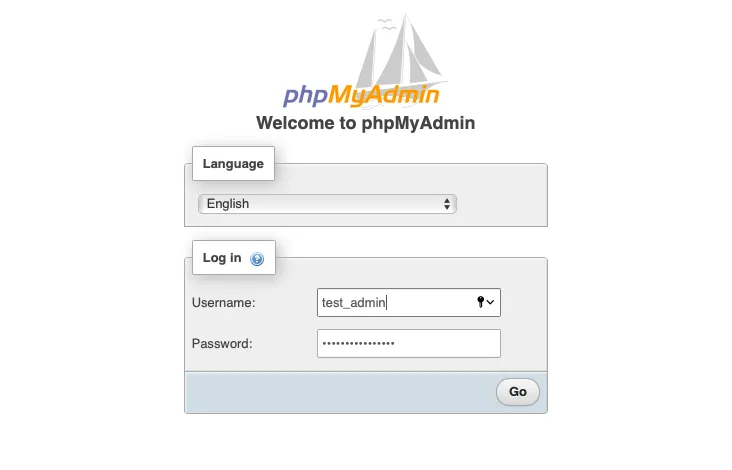
Proceed to manage the database PhpMyAdmin by logging in with the data you got when you created the database.
Choose the name of the database you want to load your existing database into and go to the Import tab and select a database file like bd.sql or an archived file with the extensions: bd.sql.gzip, or bd.sql.bzip2, or bd.sql.zip on your computer.
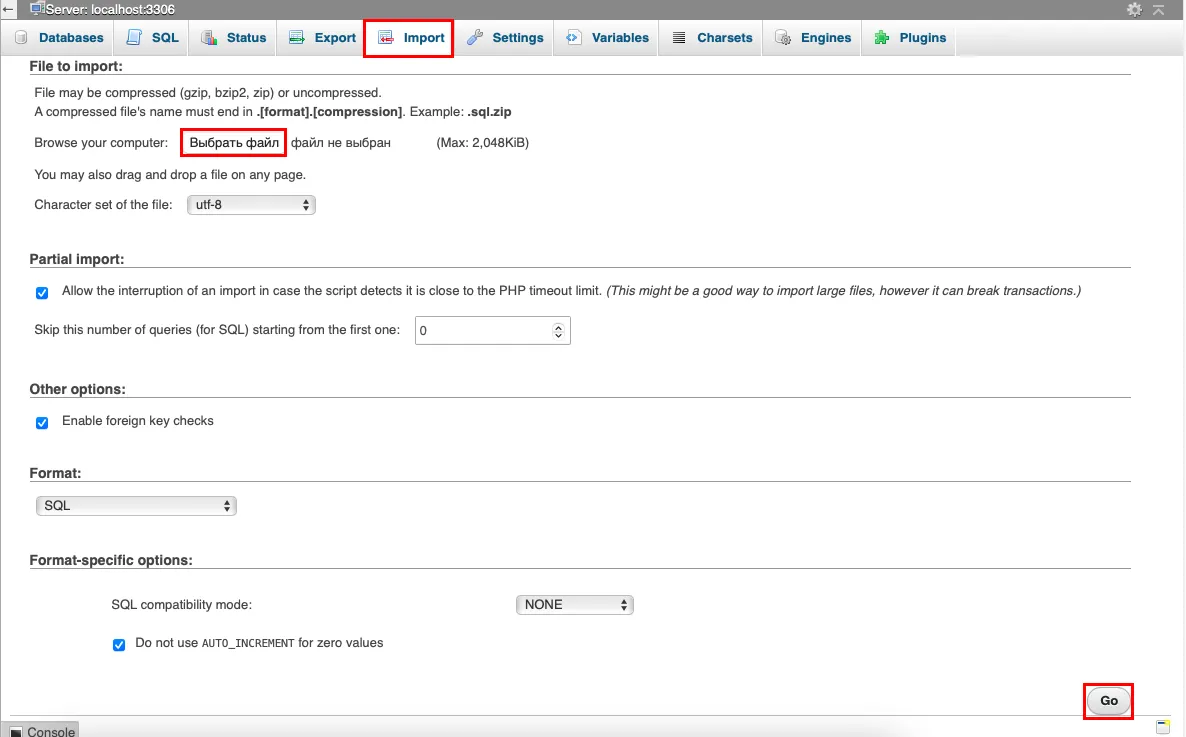
Pressing the Forward button.
By default, the PhpMyAdmin settings have a limit of 2,048 KiB for downloading the database file.
There are two ways to bypass it:
-
archive the database file with the help of archivers that add the above extensions (gzip, bzip2, zip).
-
edit php.ini file through the console and specify the values:
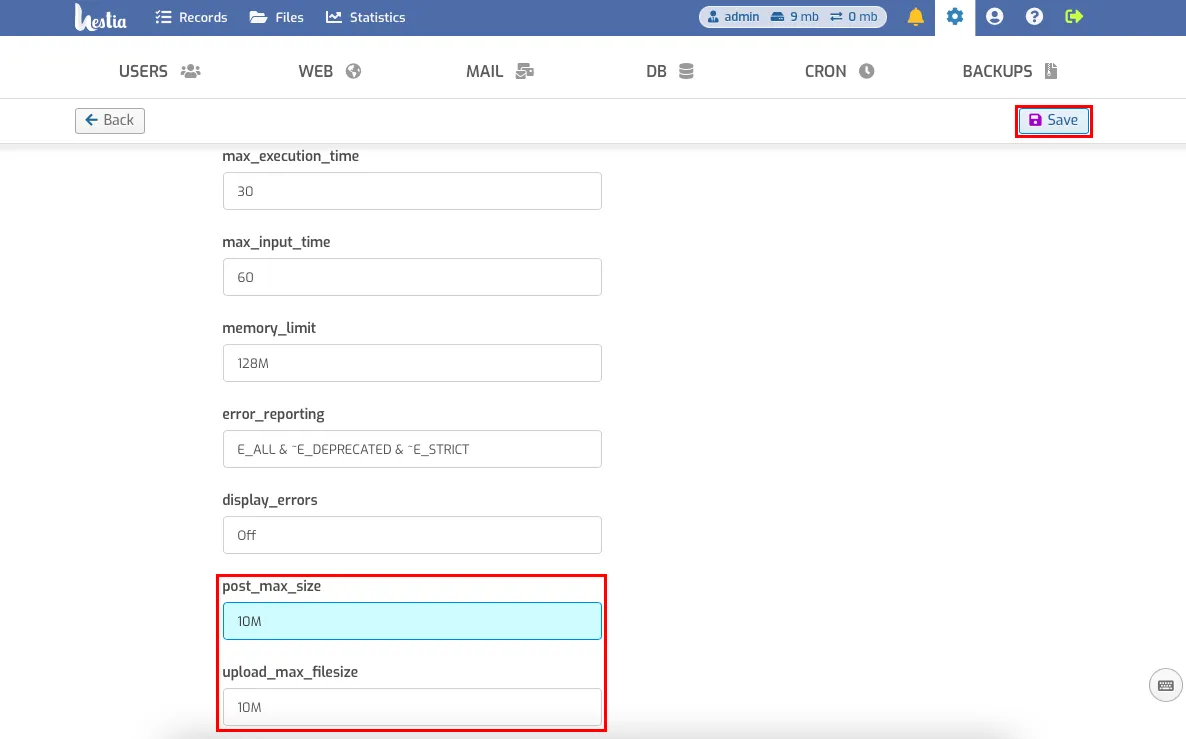
- post_max_size = 8M to the necessary, let's say 10M.
- upload_max_filesize = 2M also, to 10M.
To edit php.ini file we will go to the tab Settings, choose the Apache2 web server item and press the Edit button.
![file]/media/article/img/database-hestia-cp-6-en.webp)
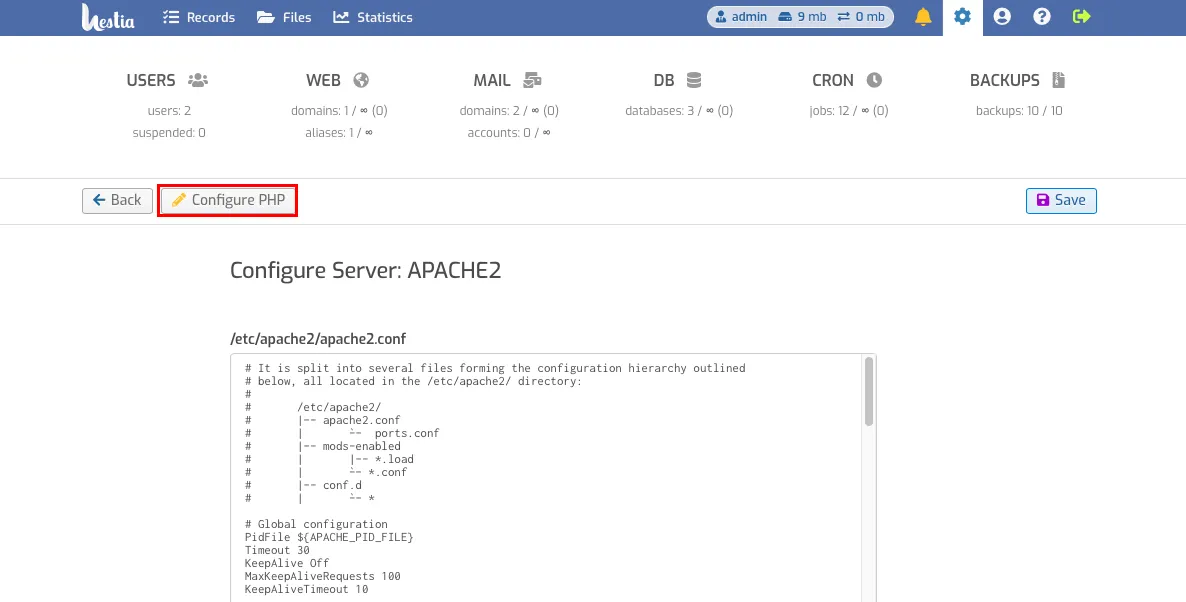
Next, click Customize PHP.
-
post_max_size - Maximum data size in bytes that can be sent by POST.
Should normally be larger than upload_max_filesize and smaller than memory_limit. Byte value labels are used: K (kilo), M (mega), and G (giga). For example, 10M. -
upload_max_filesize - Limits the maximum size of a file uploaded to the server. Specified in megabytes.
Save changes.
Help
If you encounter any difficulties or need assistance, please create a request to our support team through the ticket system, and we will be happy to help you.