Setting up Mimicry VPN in BeAdmin
Step-by-step guide to installing and configuring Mimicry VPN.

Mimicry is a VPN module with the strongest traffic masking the panel has to offer: the connection looks like ordinary web browsing, so it gets through even on networks that filter out obfuscated protocols such as AmneziaWG. The panel deploys the module with a single button and prepares the server side for you — keys, configurations, and client apps are all handed out from the interface. Below: installation, the first user, and connecting a device.
Installing the Mimicry module
The panel sets up the server side on its own — no config files to edit, no SSH session needed.
- In the side menu open VPN → Mimicry.
- Click
Install. To pin a specific port, first openInstallation settings(the gear icon next to the button), enter the number in the Port field, and clickLaunch. - Wait for the installation to finish. The
Logbutton on the module card shows the progress.
By default Mimicry listens on tcp 443 — the port where masking works best. If Nginx, Apache, or another BeAdmin module already holds it, the panel brings the service up on tcp 2083.
Important
The module only runs on the amd64 architecture. On a server with a different one (ARM, for example) the Install button stays inactive and the panel explains why.
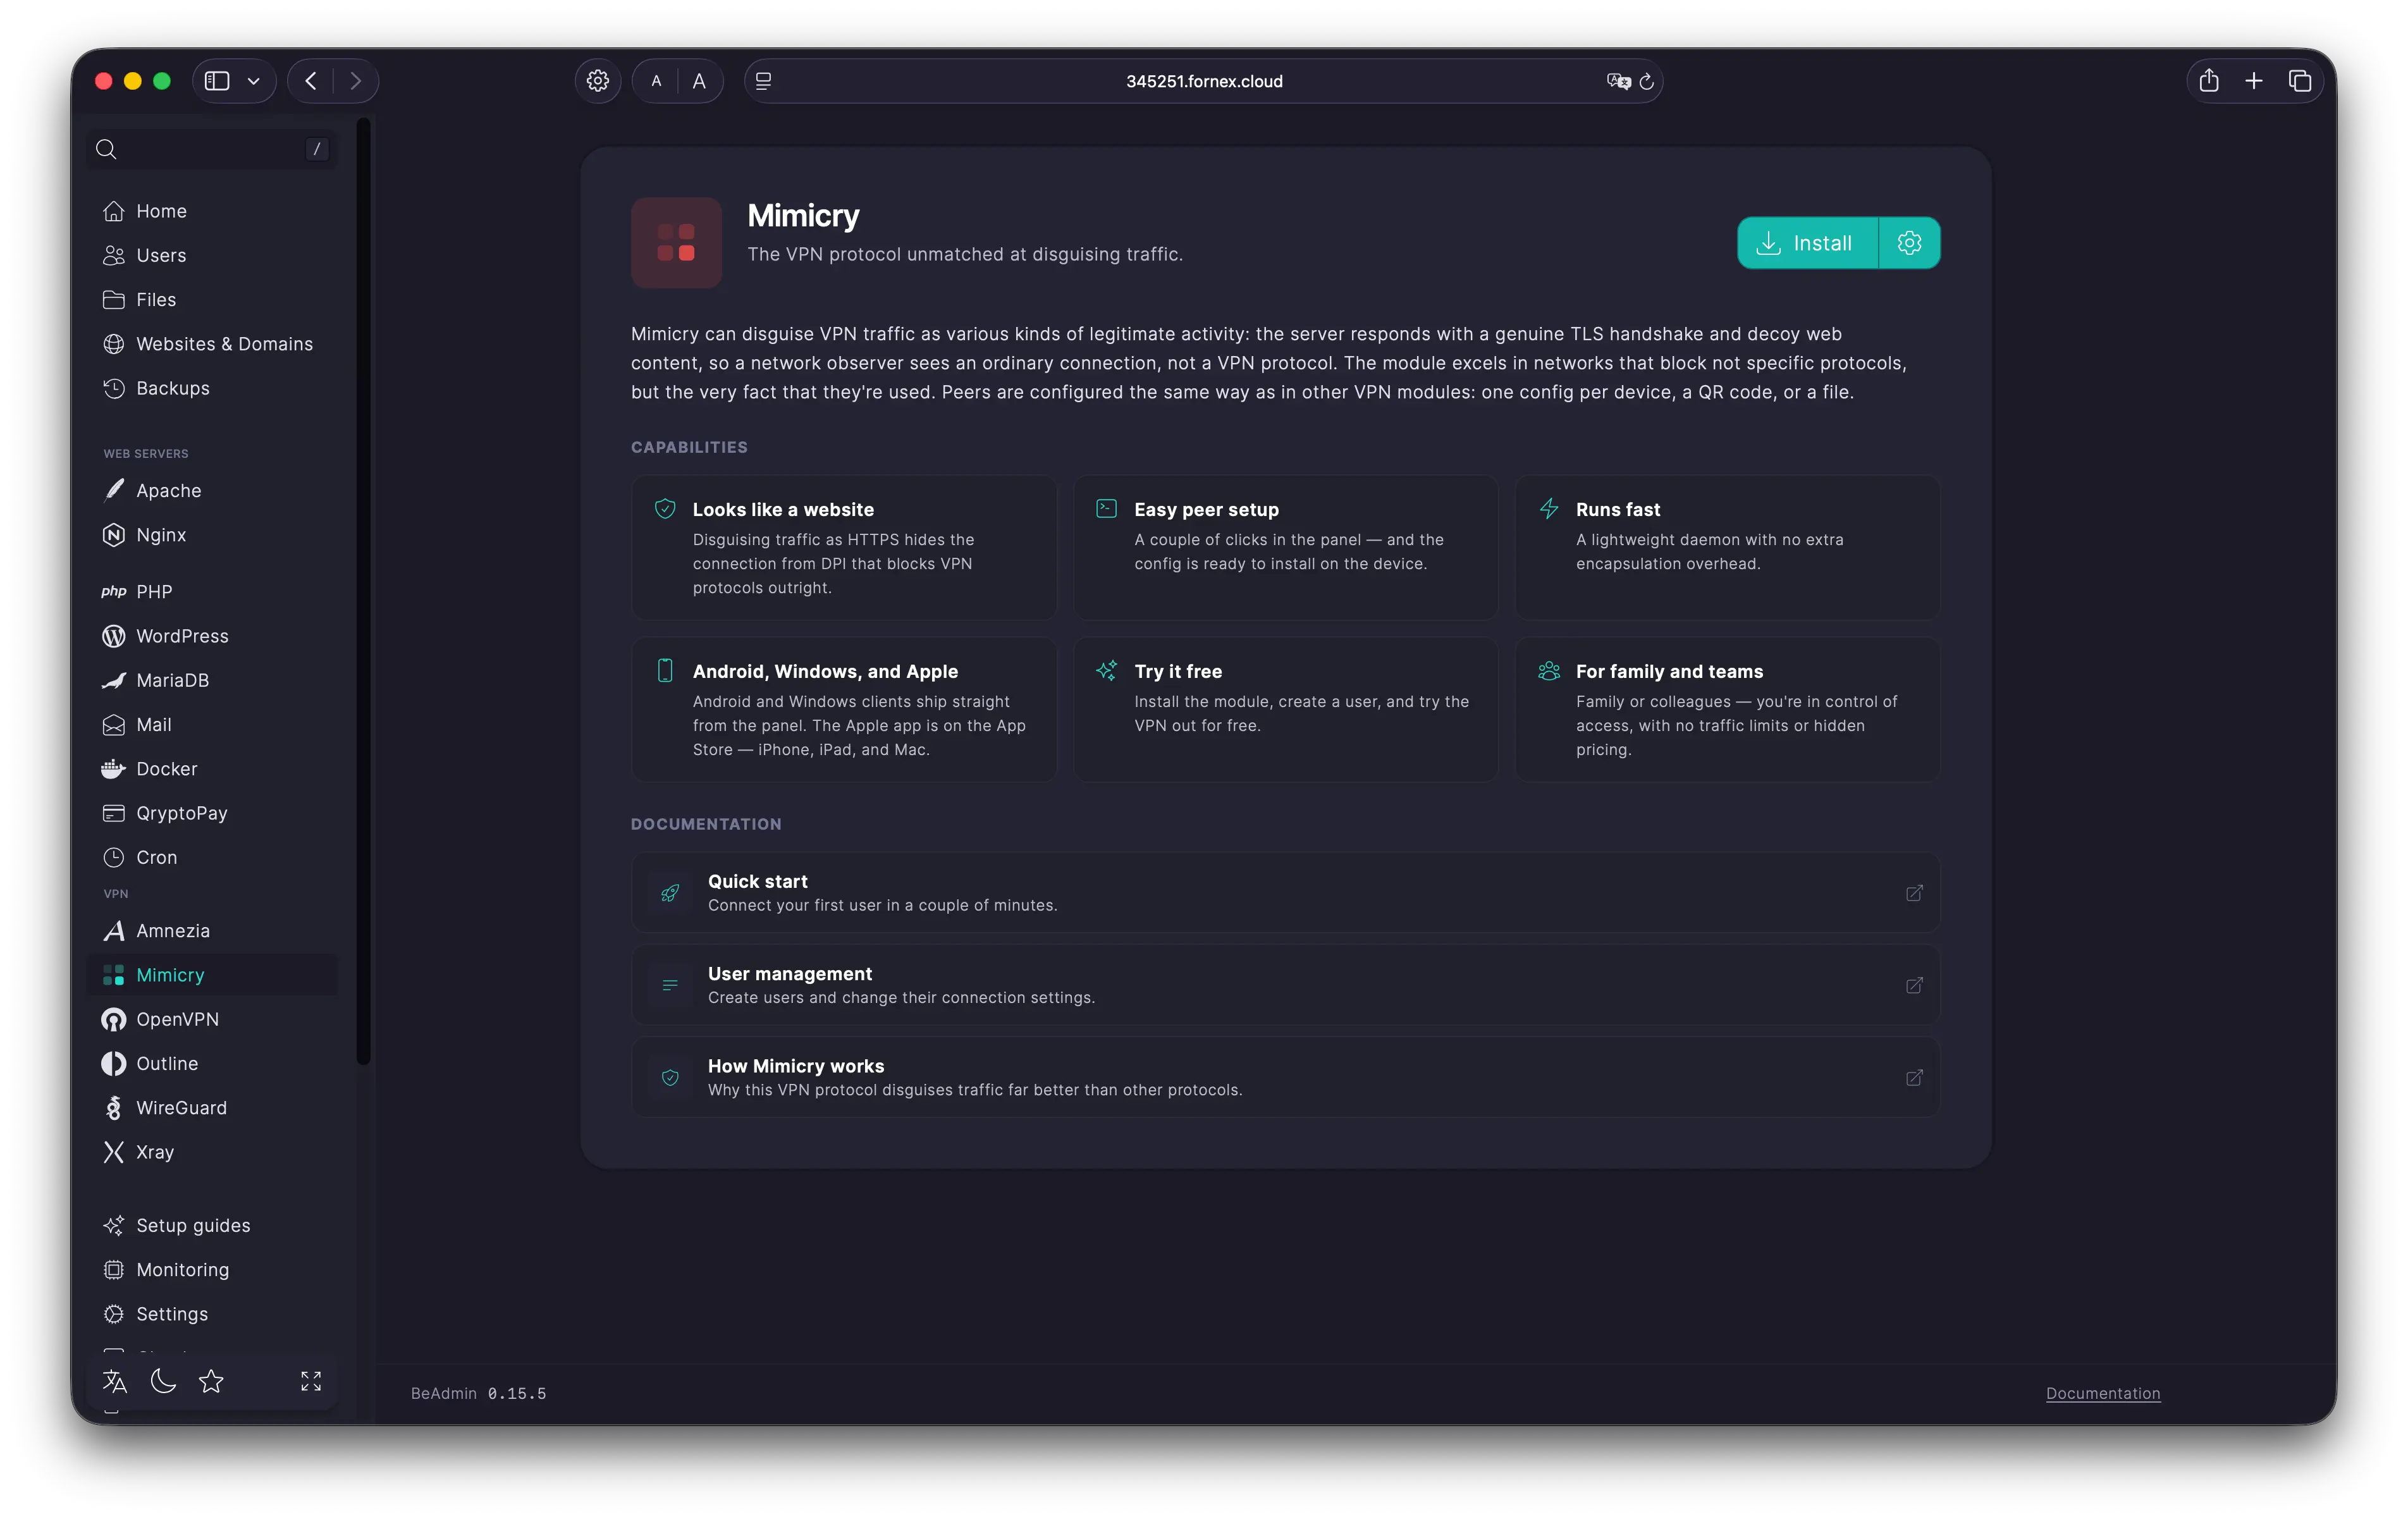 Installing the Mimicry module
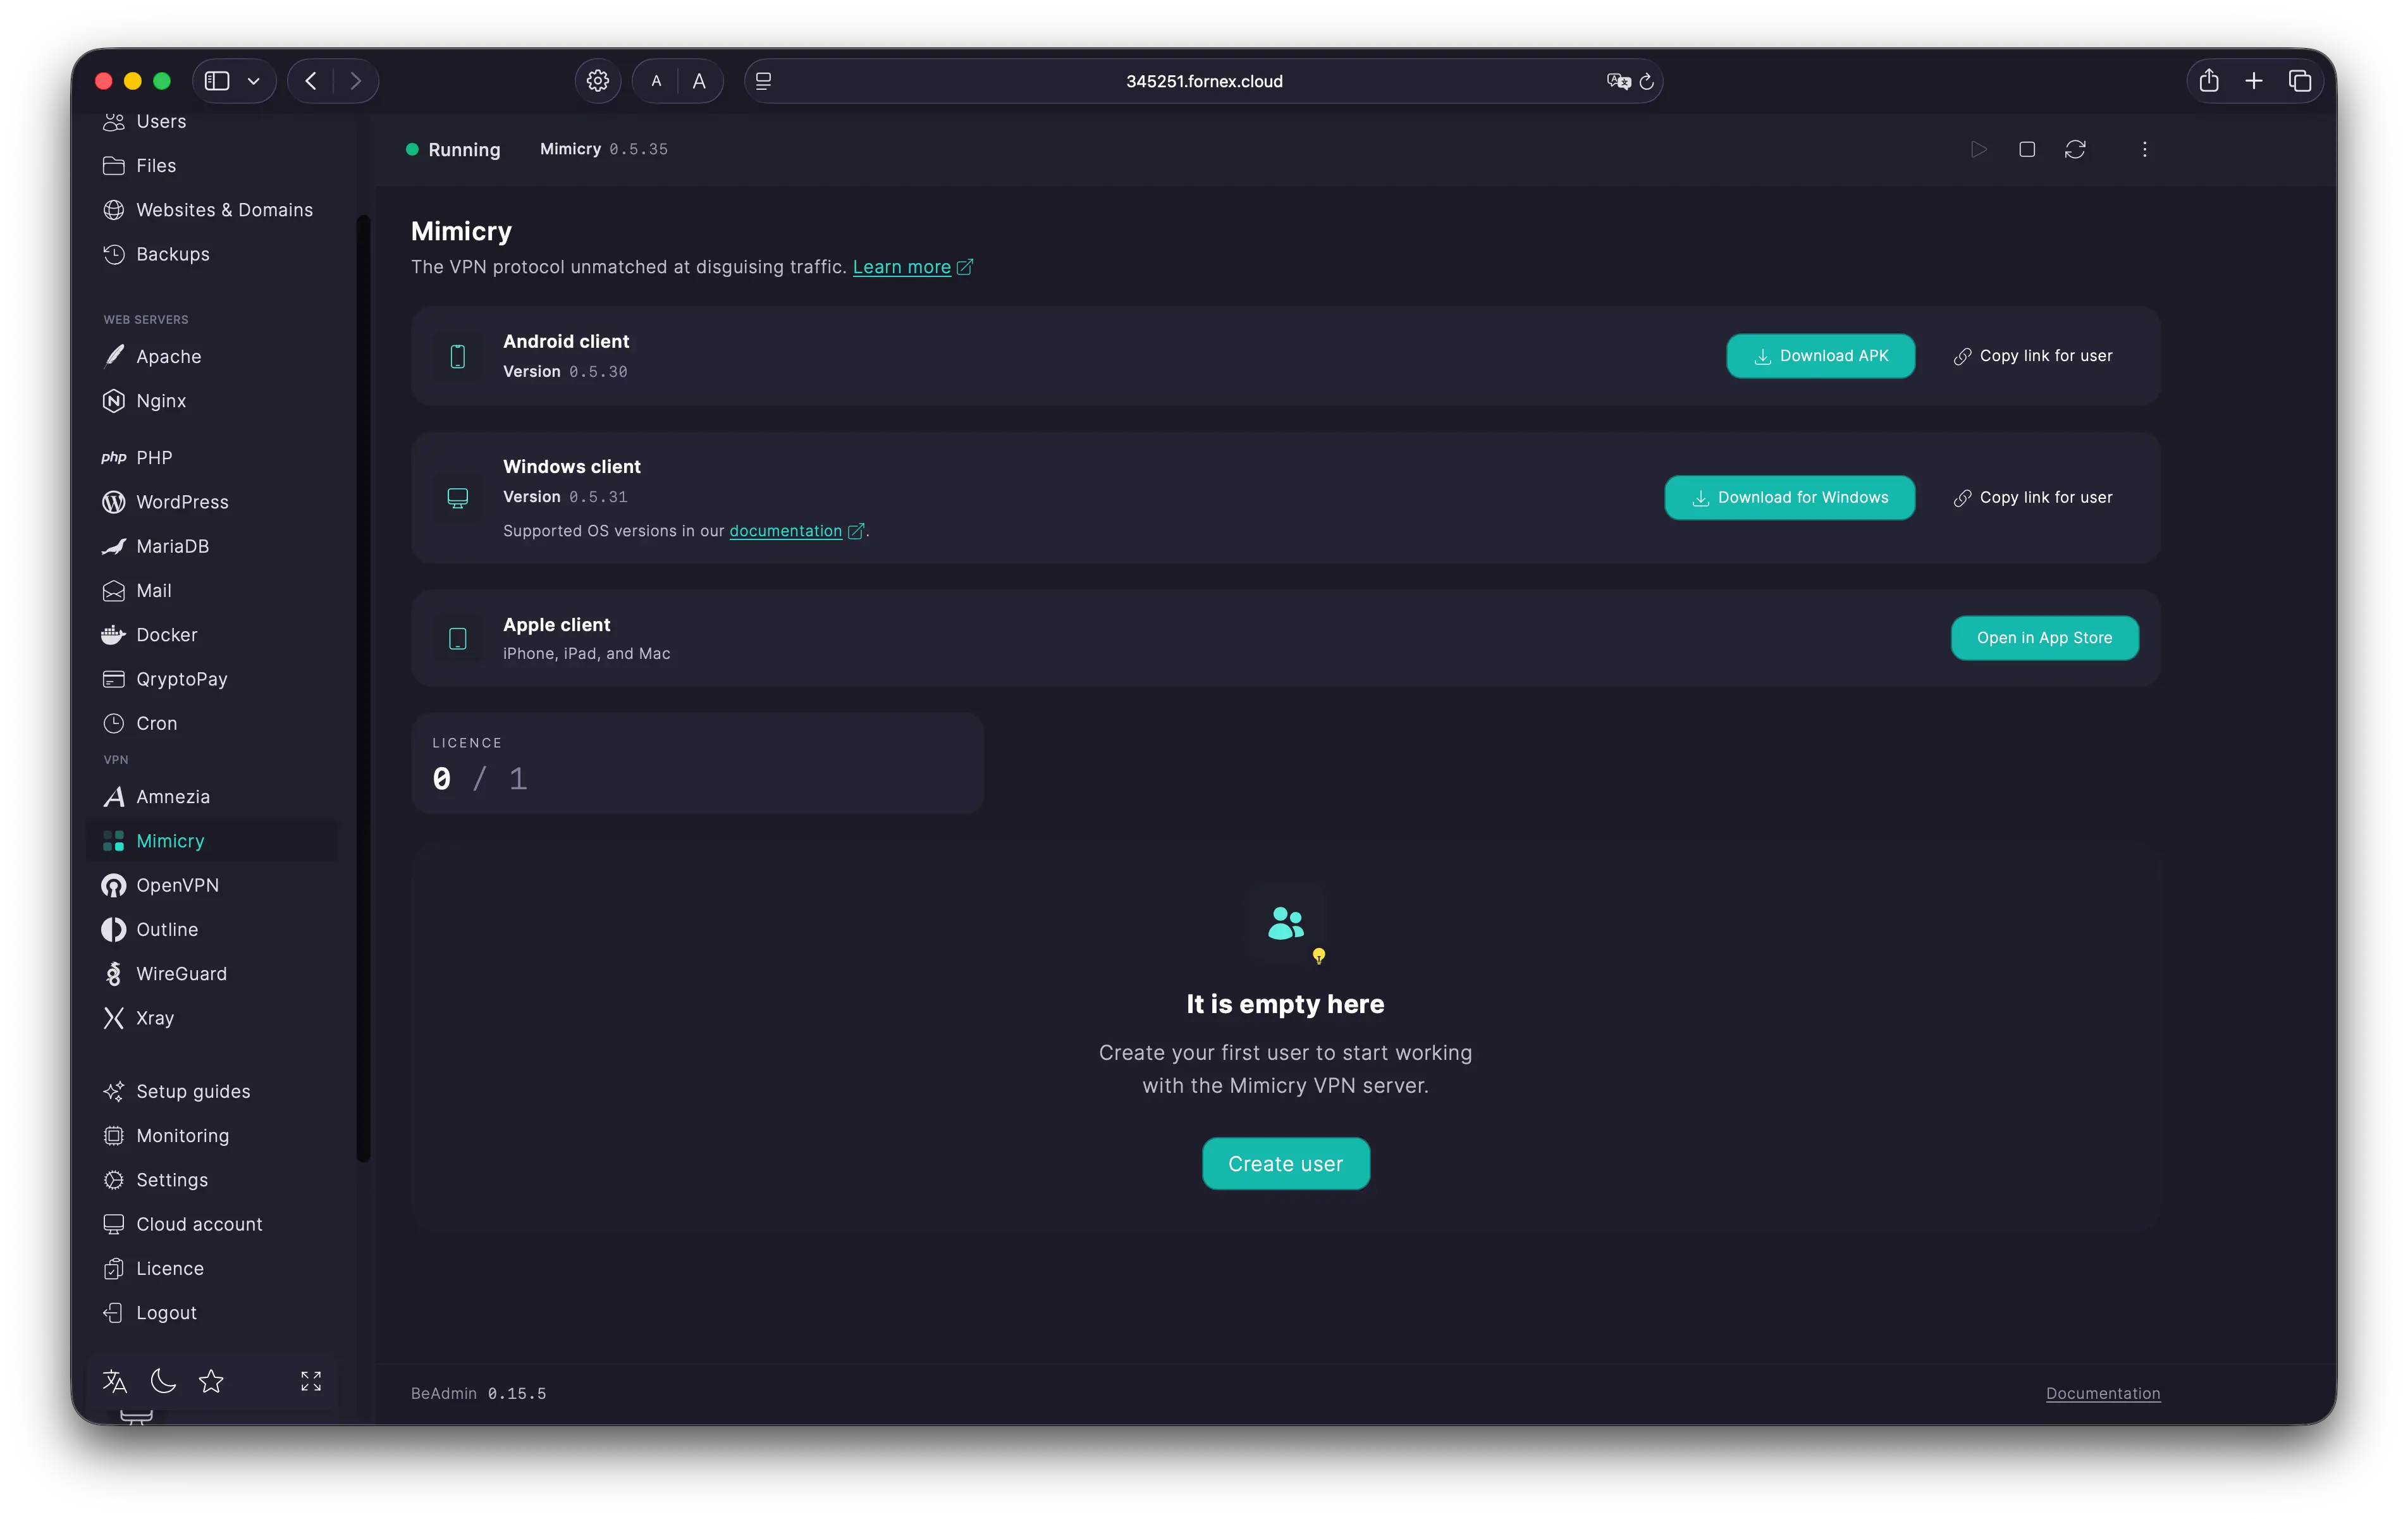
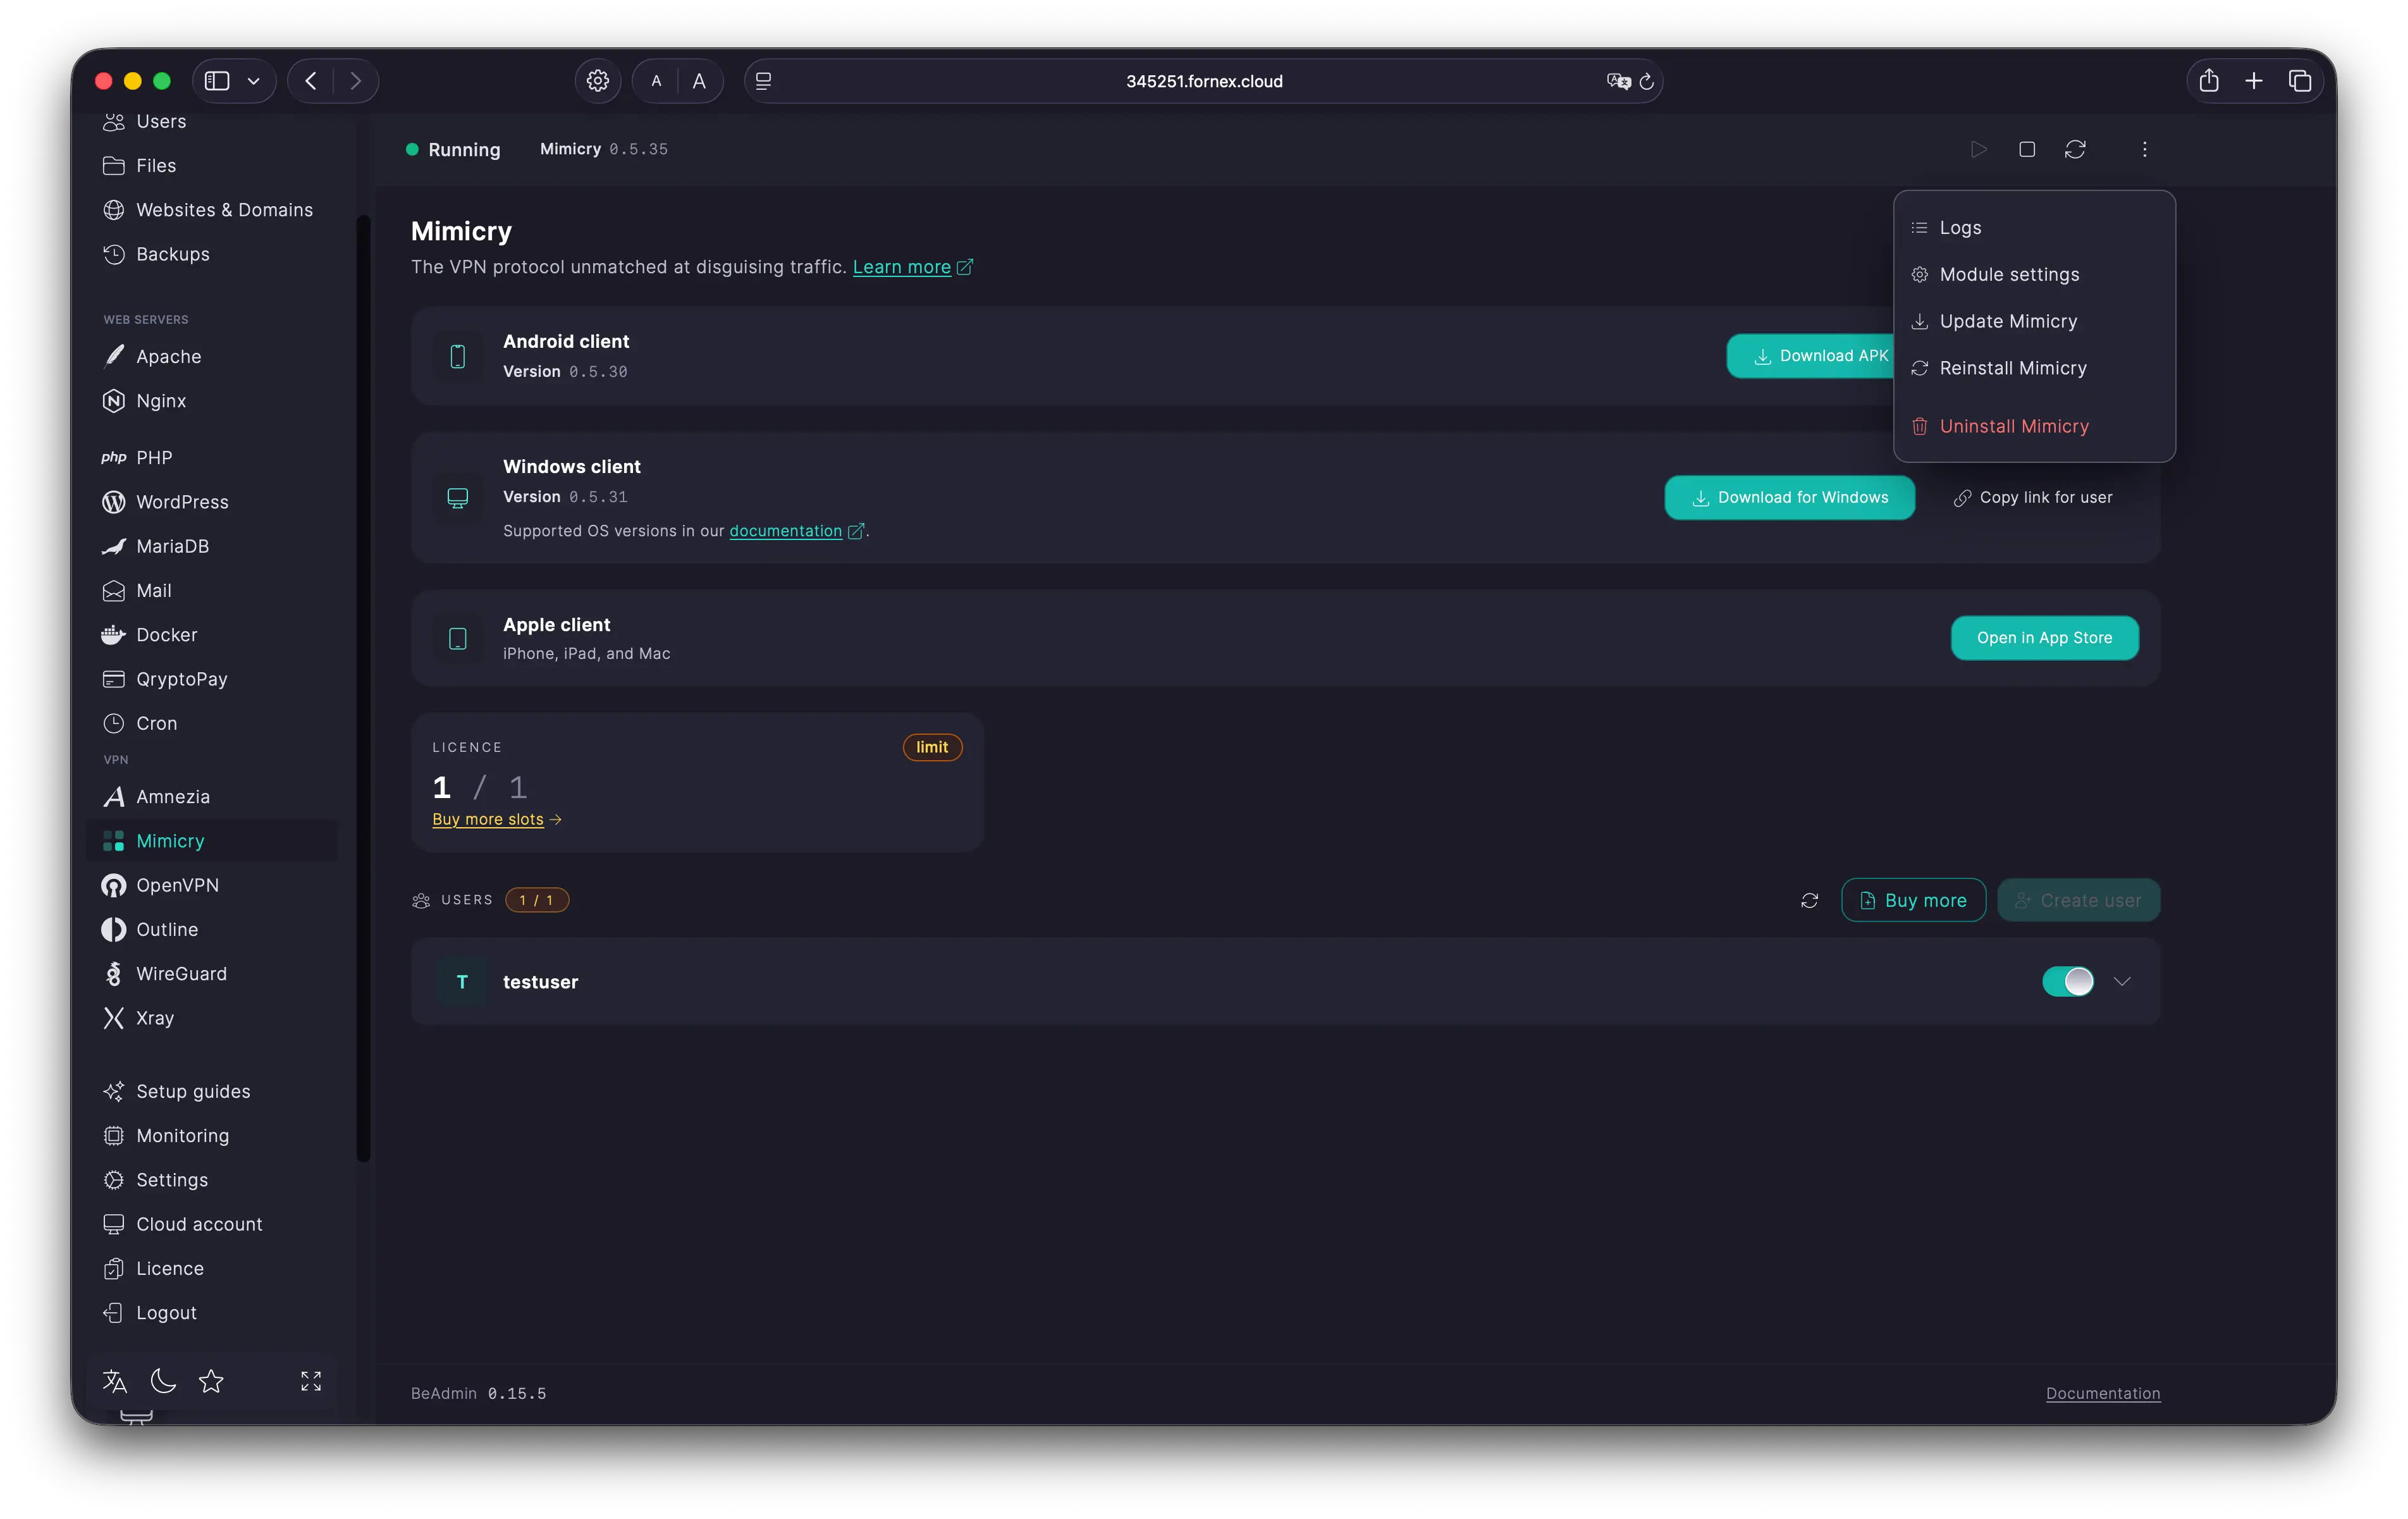
Once the install is done, the Users page opens — the module's main screen. The header holds start, stop, and restart for the service, and the three-dot menu holds logs, settings, updates, reinstall, and uninstall.
By the way, the module needs a server with the BeAdmin panel. If you don't have one yet, a Fornex VPS runs on NVMe with full root access — pick a configuration here.
Creating a user
A Mimicry user is a separate set of keys with its own configuration. Create one user per device: that way you can revoke access for a single device without touching the rest.
- On the Users page click
Create user. - Fill in the fields:
- Username — a short identifier of 2 to 32 characters: Latin letters, digits, and hyphens. Leave it empty and the panel makes up a unique name for you.
- Email — optional. You only need it if you plan to send the configuration by email; the connection itself works without an address.
- Comment — a note of up to 64 characters, for example "Anna's phone" or "work laptop". Keeps the list readable.
- User language — the language of the email with the configuration. Default — English.
- Leave the Enabled toggle in the dialog footer on so the user can connect straight away.
- Click
Create. The user appears in the list, and the server prepares its keys.
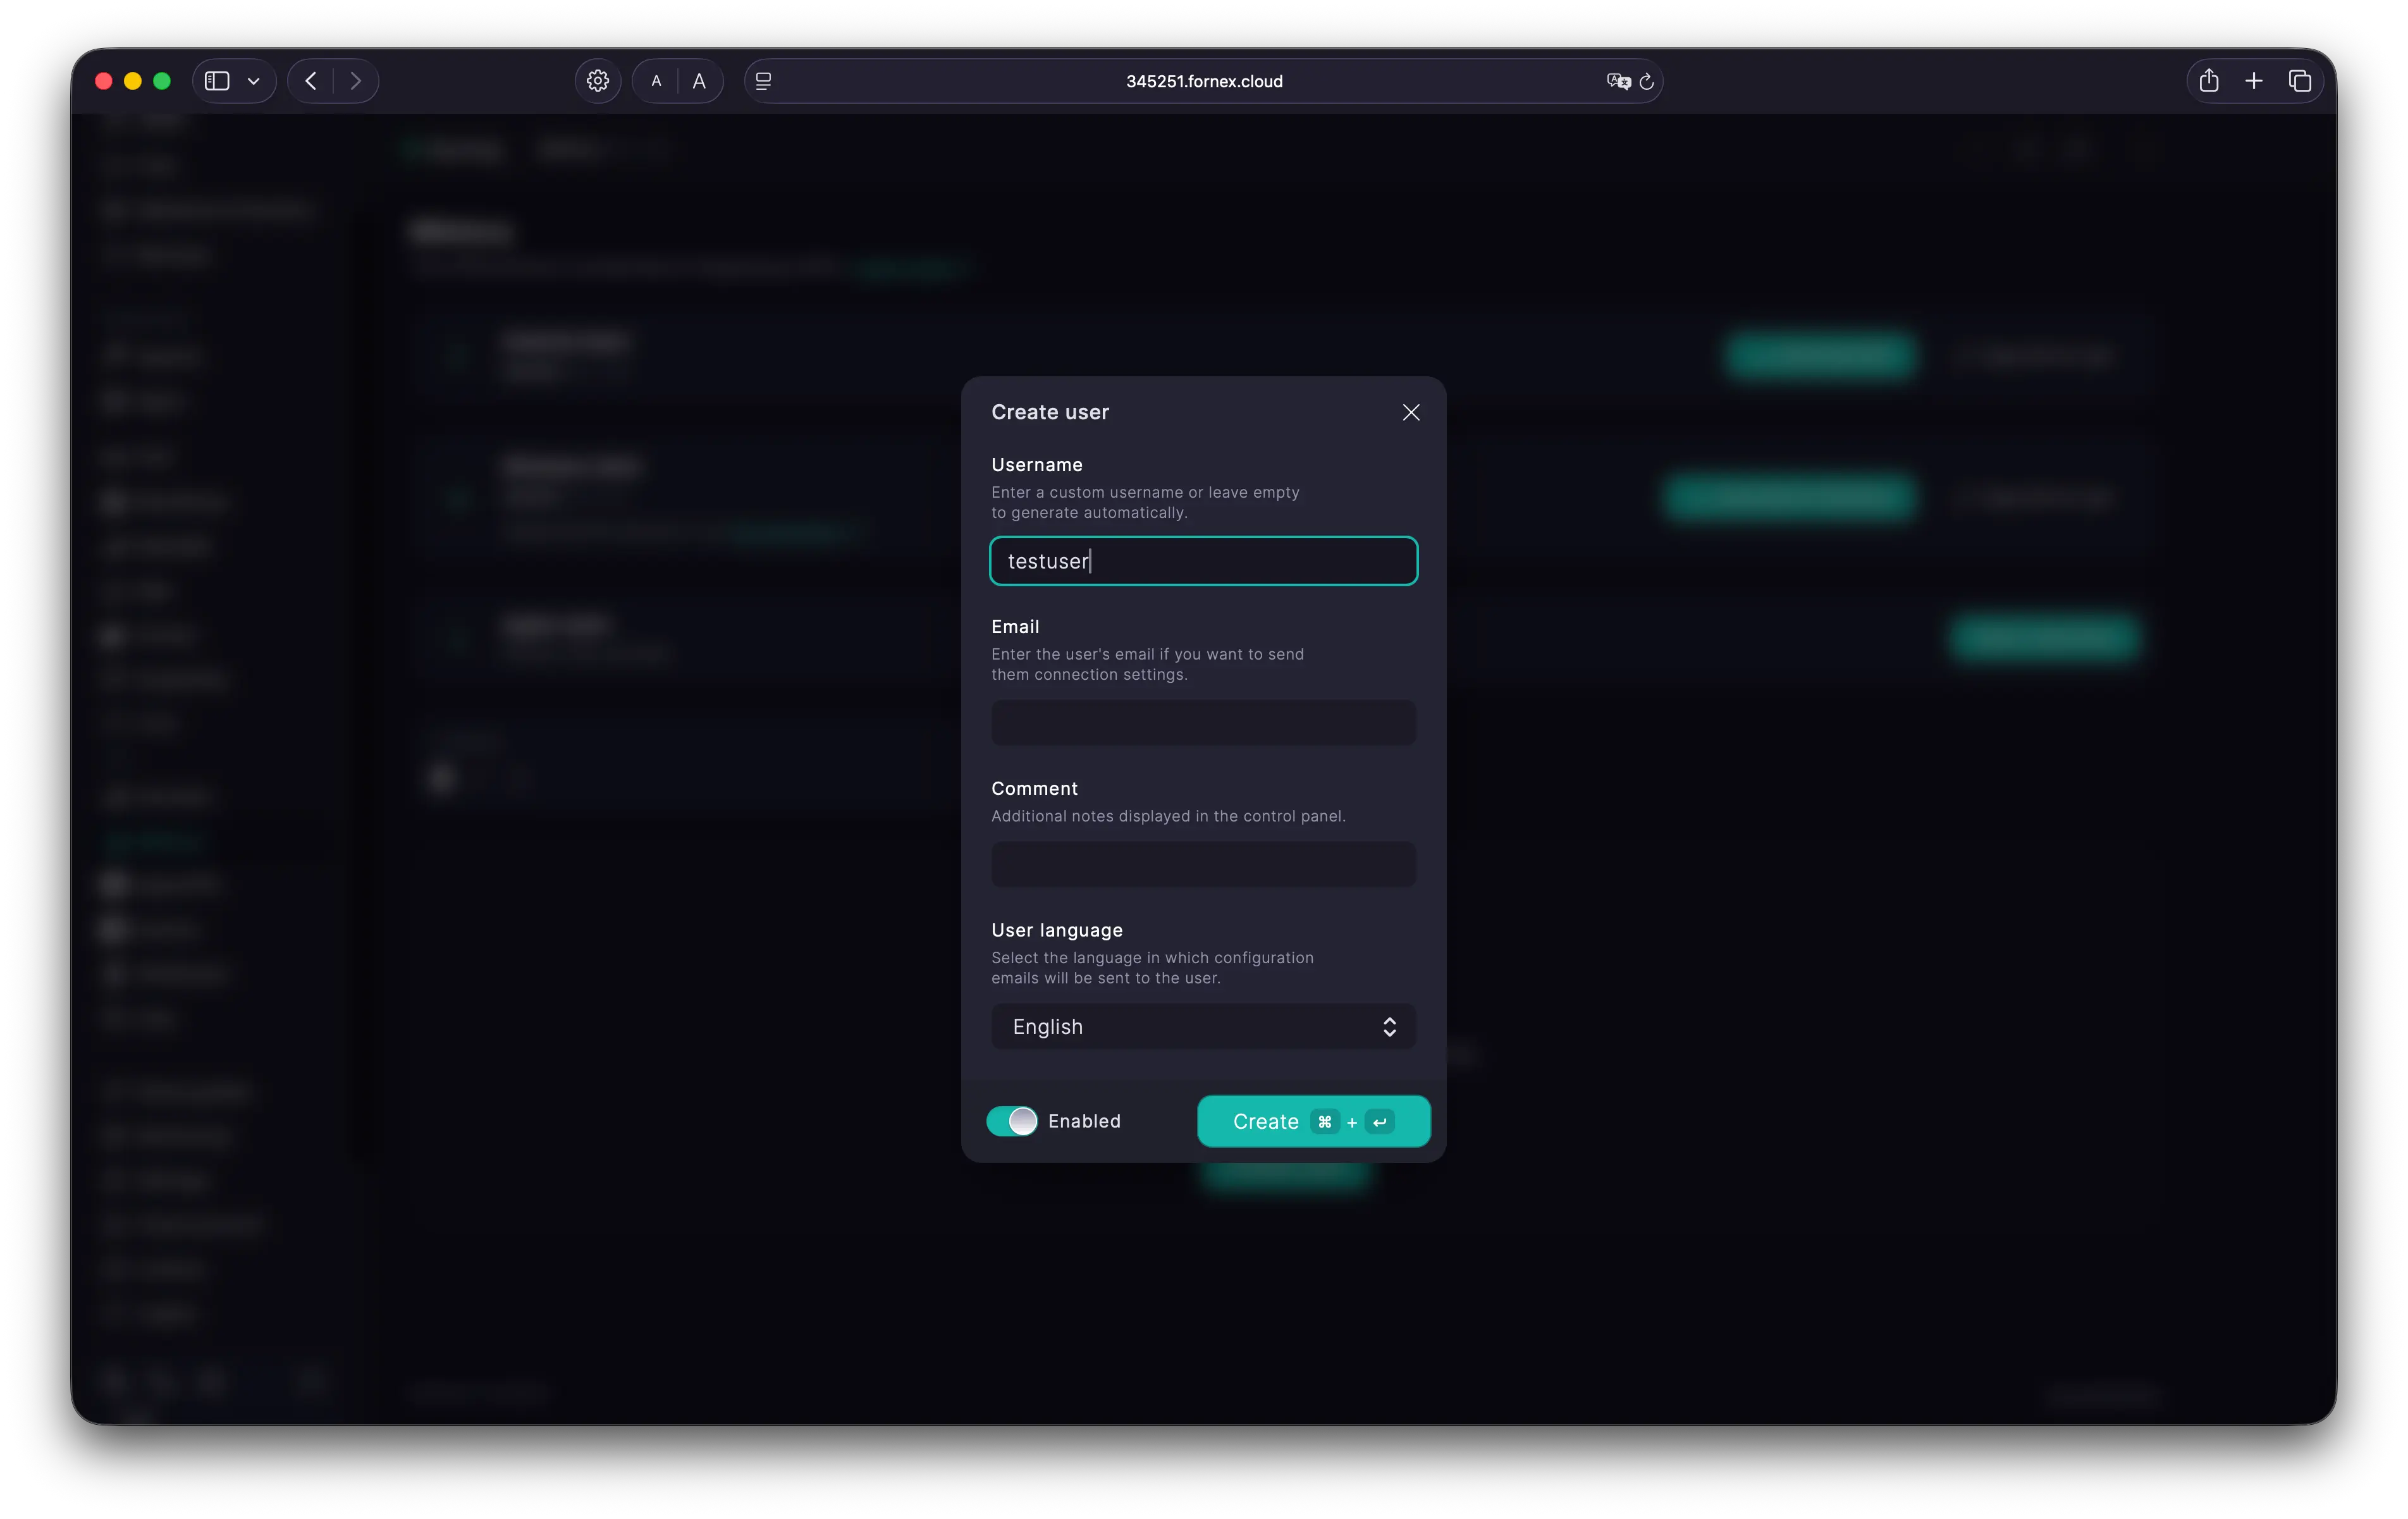 Create a Mimicry user
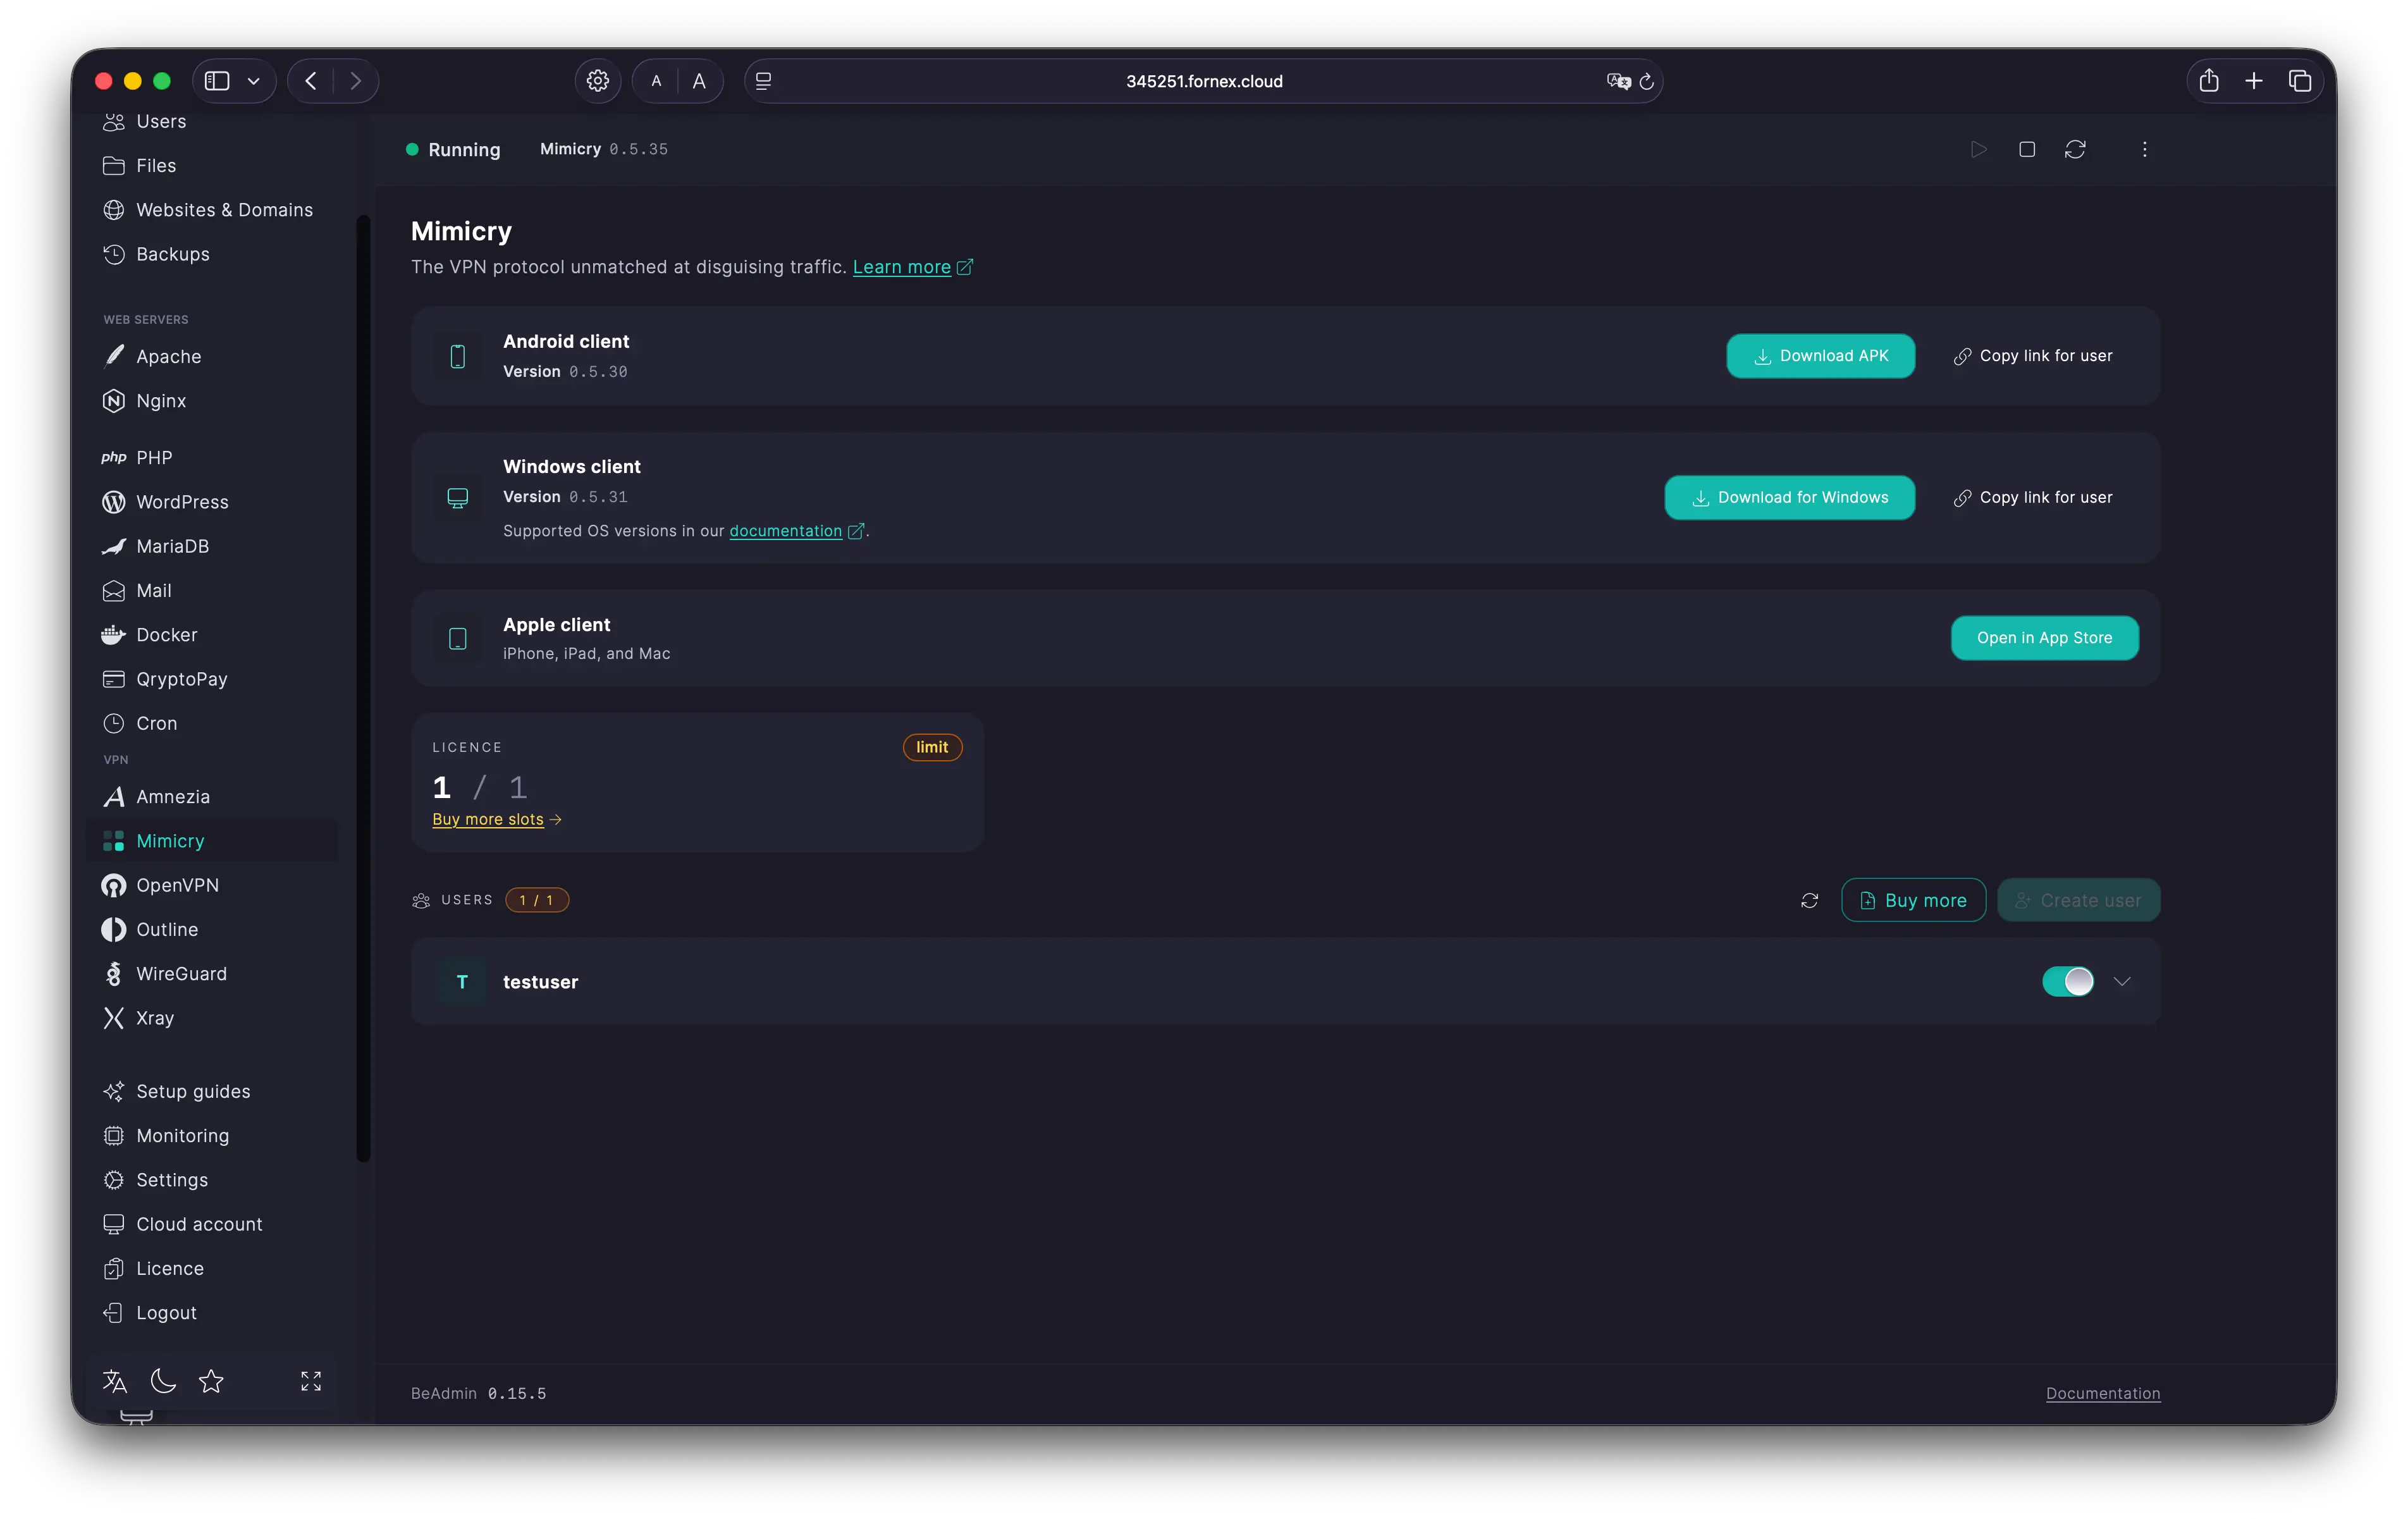 Mimicry users list
Connecting a device
Mimicry uses a single configuration format: one file and one QR code work with every client app — no picking between formats the way Amnezia needs.
Get the app for the platform you need:
- Android — the "Android client" card on the Users page:
Download APK, orCopy link(the link works without a panel account and expires after 24 hours). - Windows — the "Windows client" card:
Download for Windowsfor the.exe, or the same 24-hour link. Requires 64-bit Windows 11, or Windows 10 version 2004 (build 19041) and newer. - Apple — the Mimicry app in the App Store for iPhone, iPad, and Mac.
Then hand the configuration over to the device:
- Click the user's row in the list — it expands and shows a QR code with action buttons.
- Pick whichever way suits you:
- QR code — show the code on screen, or save the image with the
QR codebutton. - Download config — saves the configuration as a file; the name matches the user name.
- Send to email — sends the same file to the user's address, provided SMTP is configured in the panel and the address is filled in.
- QR code — show the code on screen, or save the image with the
- In the Mimicry app pick
Add connection→Scan QR codeand point the camera at the code in the panel. Or open the downloaded configuration file with the app — the connection is added automatically. - Activate the connection.
Important
The Android app isn't distributed through Google Play yet, so on the first install the system asks you to allow installs from this source. Without that permission the APK won't go through.
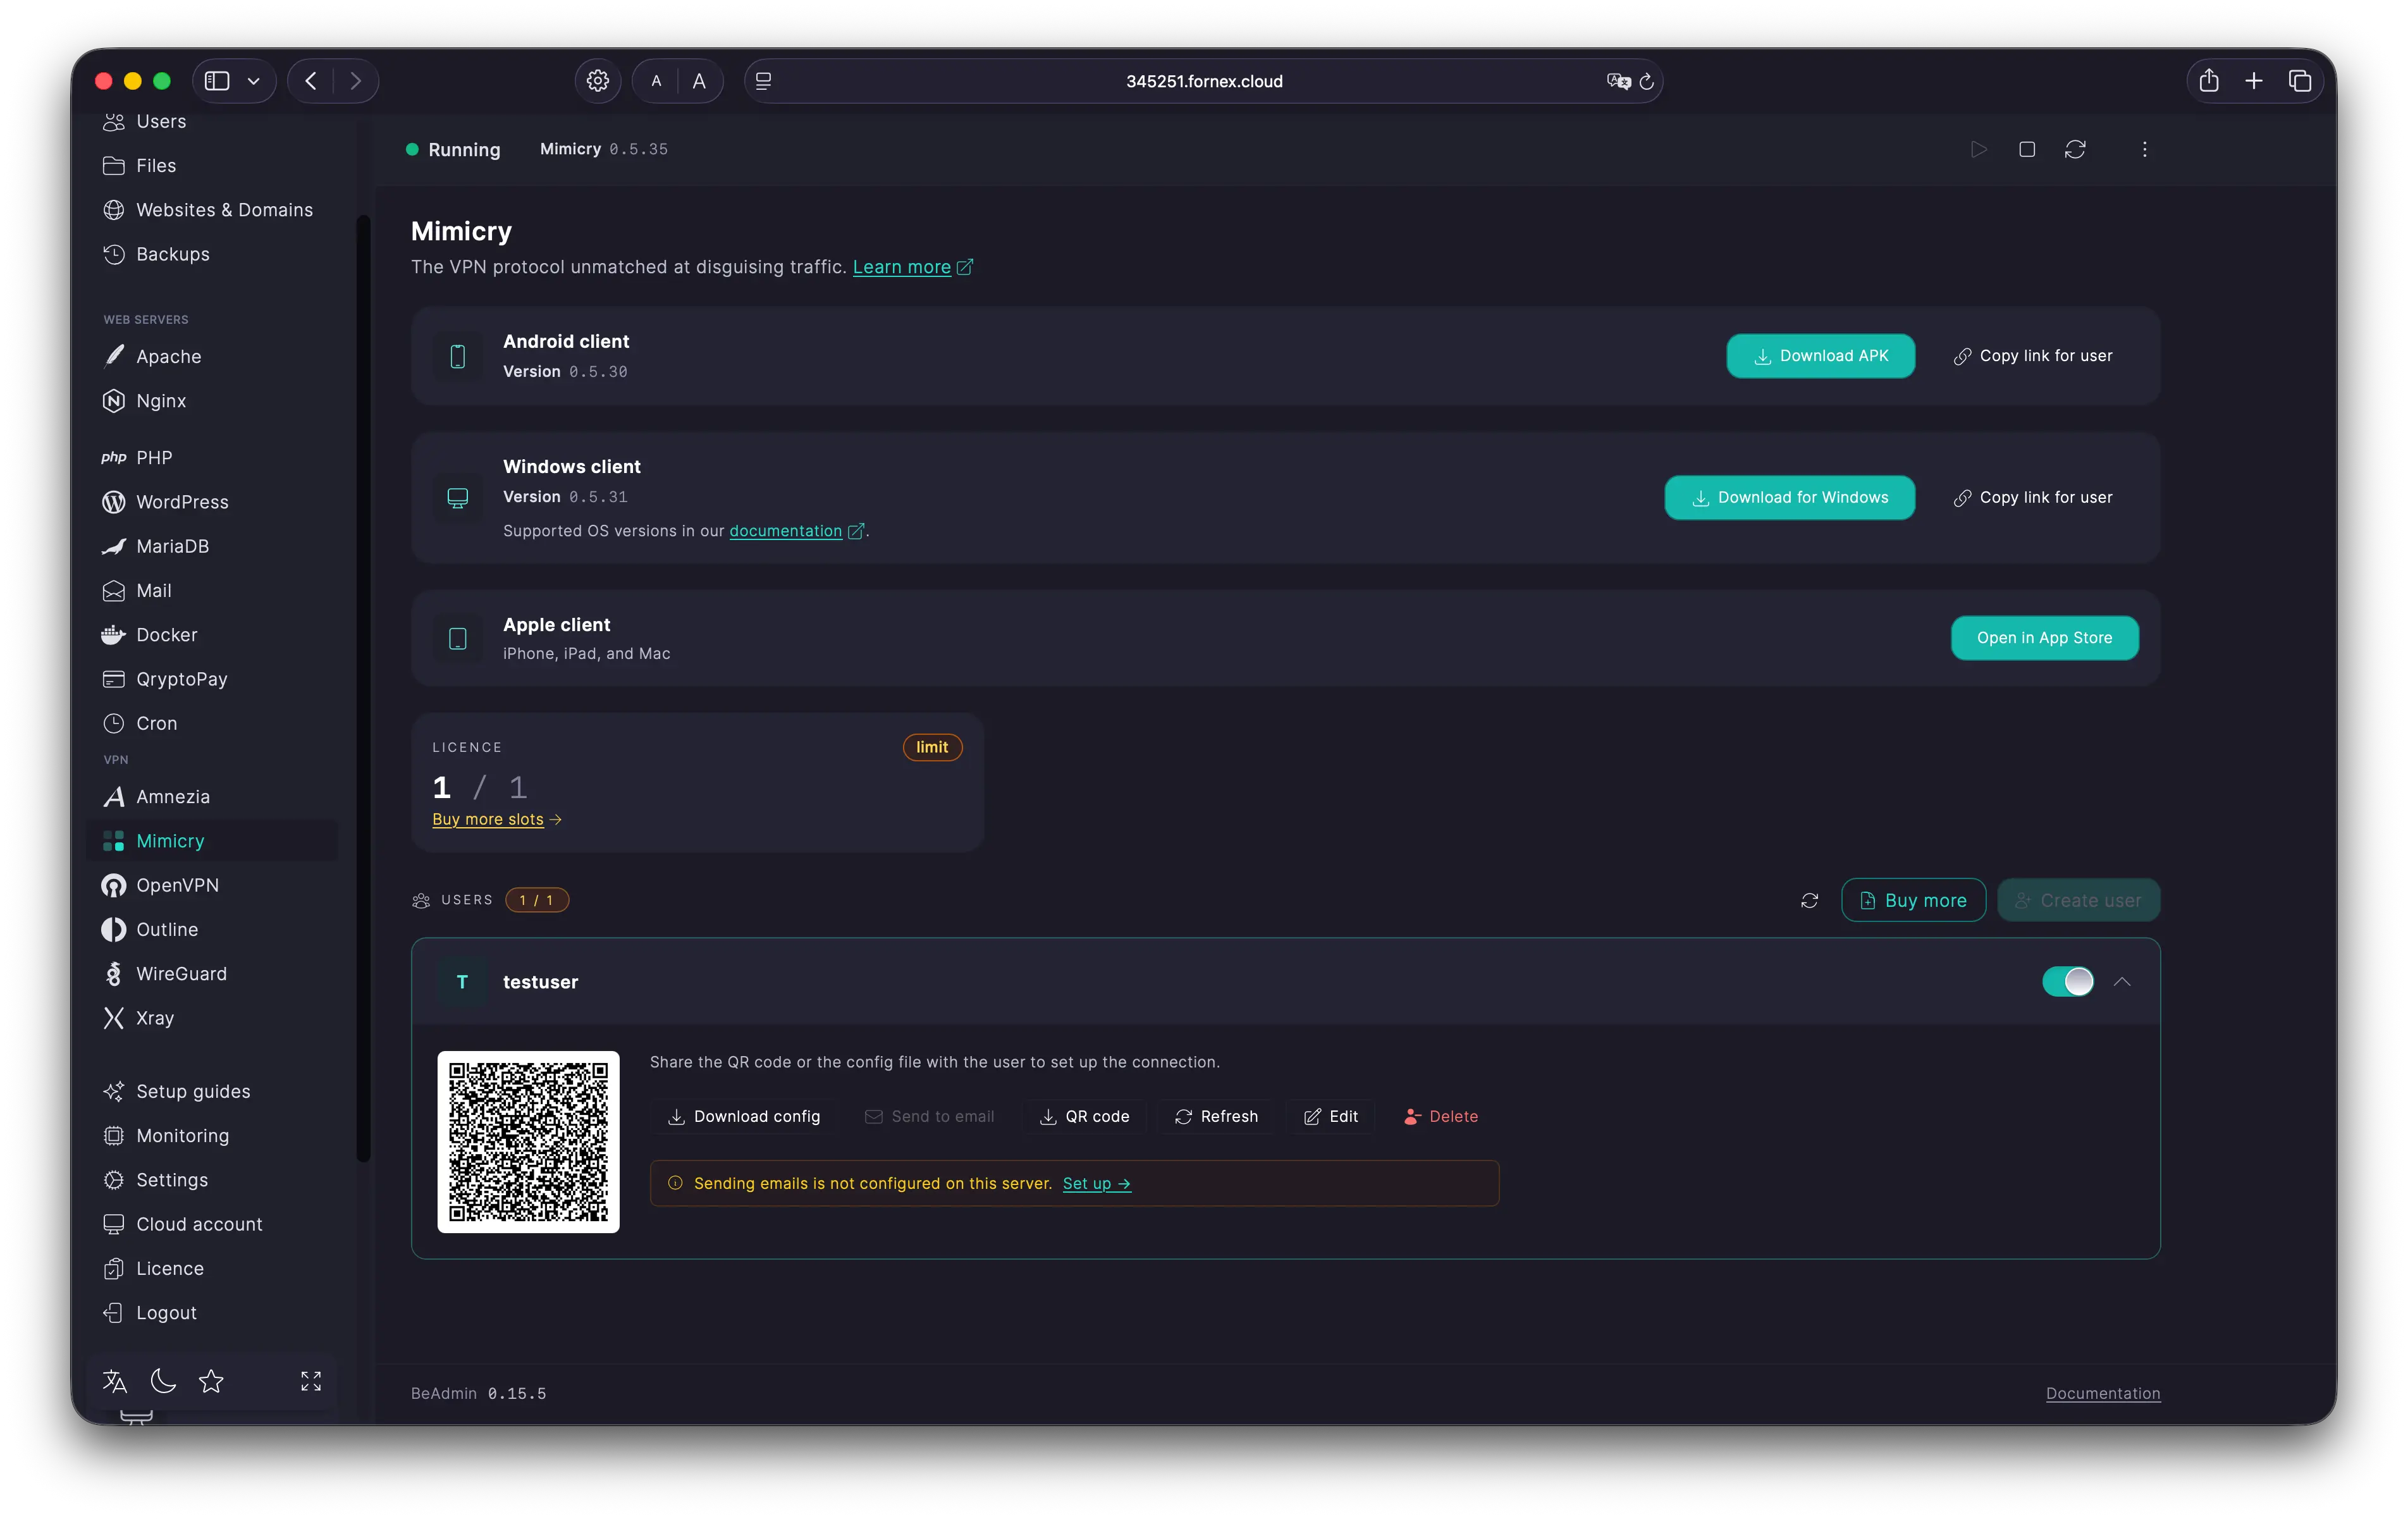 Connecting to the VPN
Tip
Check the result: open myip.com — it should show your server's country.
Split tunnelling by country
Pick a country, and traffic to its sites goes out directly while everything else runs through the server. Set your own country if local services detect and block VPN access: they never see your server's IP, and you don't have to turn the VPN off for local browsing.
Our products and services
Managing users
Above the list the panel shows how many licence slots are left. The free licence covers one user — enough to try the service on a single device. When you need more, the Buy more slots link in the licence tile opens the Licence section with the count already filled in. Licence slots stack with the free one: 5 in the licence gives you 6 users in total.
The more devices route through one server, the sooner bandwidth becomes the bottleneck: for a team or a busy household, take a look at a dedicated server.
The Edit button in the expanded row changes the email address, comment, email language, and the user's state. The username can't be changed after creation. The panel reminds you that new settings only reach the device once the configuration is imported again — until then the app keeps working with the old parameters.
Managing access
The toggle in the user's row enables and disables the account in one tap. A disabled user stays in the list but can't connect with its configuration. The change applies immediately — no service restart required.
Unlike Amnezia, re-enabling does not reissue the keys: the configuration already stored in the app starts working again. No downloading files, no scanning a new QR code.
Warning
Deleting a user is irreversible: the keys are lost for good, active connections drop, and the configuration in the app stops working. Even a user created with the same name gets different keys — the device needs a new configuration. The licence slot is freed up.
Module settings
Open the three-dot menu → Module settings. For now there is one tab, General, with a single parameter — the TCP port in the Connection section.
- In the Port field enter a number from
1to65535. - Click
Saveand confirm the change in the dialog. - The panel stores the new port and restarts the service itself.
Port 443 gives the strongest masking, so it's worth moving away from it only when it clashes with a web server or another BeAdmin module — the panel warns you right under the field. A busy port can still be saved, but the service stays down until the port is free.
Warning
Client configurations have the server address and port baked in, so previous connections stop working after a port change. Hand out fresh configurations — or switch back to the old port, and the files you already issued work again without reissuing keys.
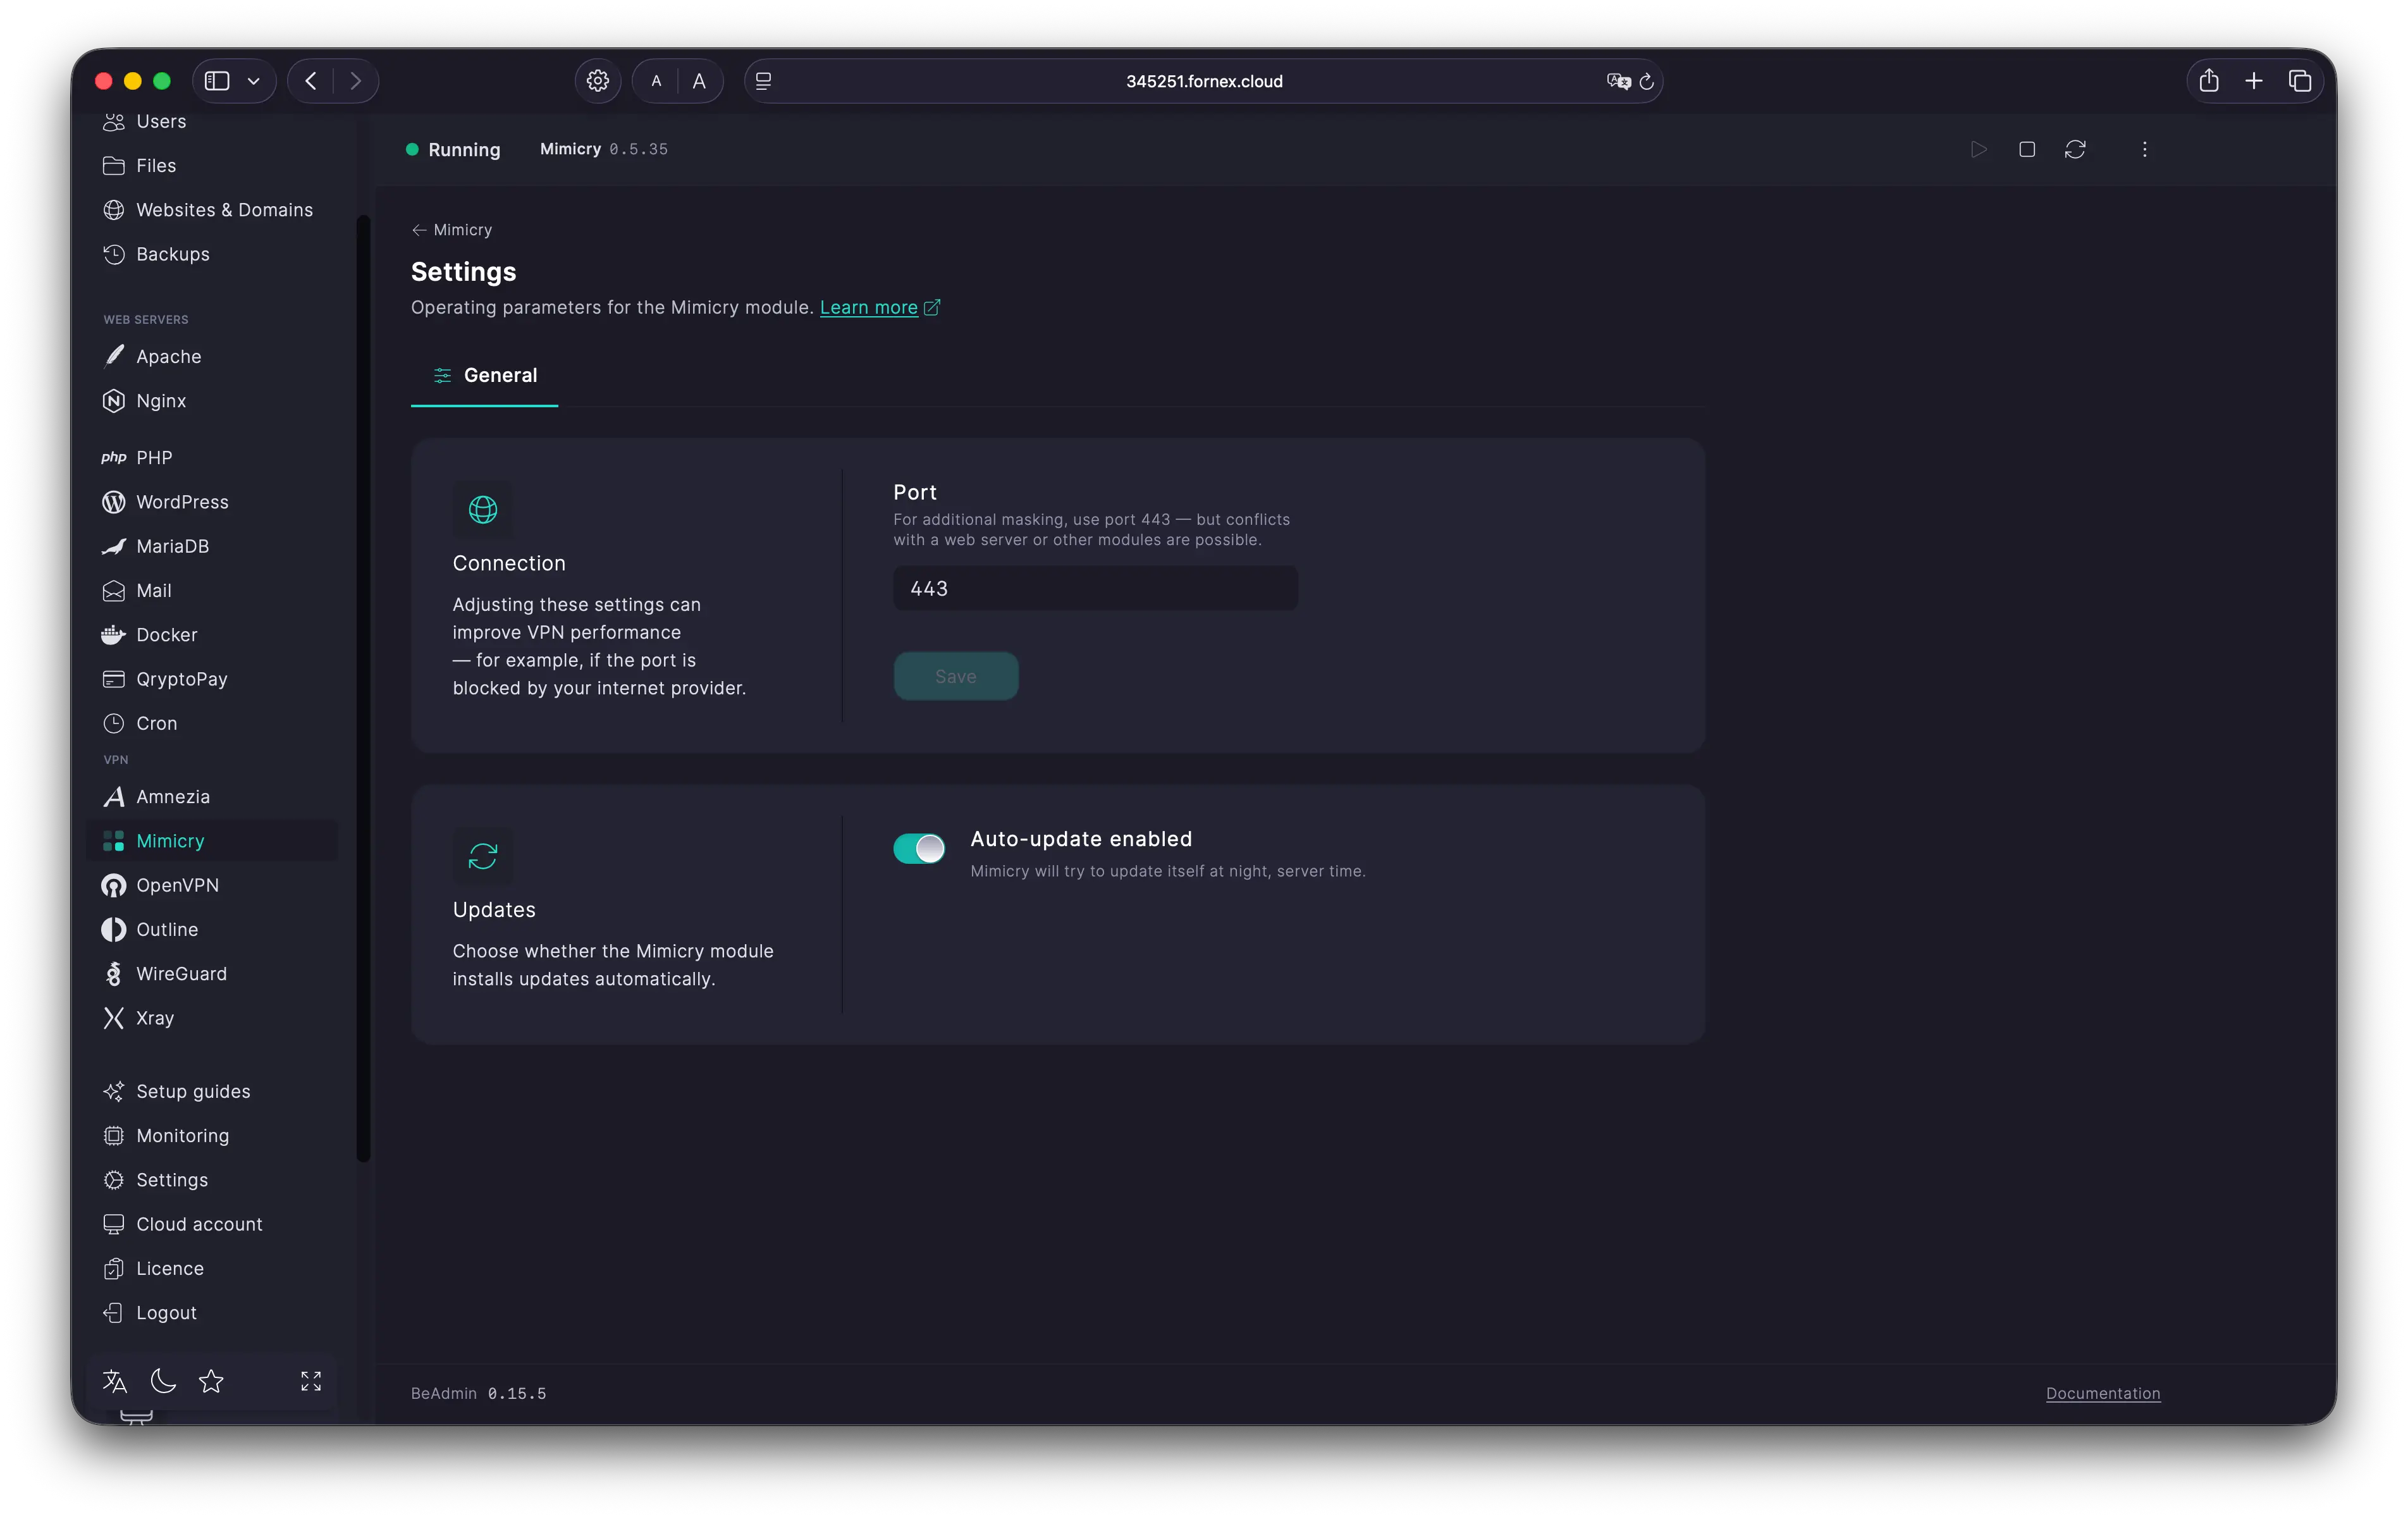 Mimicry settings
Updating and uninstalling the module
Update Mimicry in the actions menu installs the latest version over the current one and restarts the service. The user list and the keys are preserved, so there's nothing to re-import — the same goes for Reinstall Mimicry.
Warning
Uninstalling the module is irreversible, and a reinstall won't bring access back: every install issues new server keys, so all previously shared configurations die along with the old ones. You'd have to create the module and its users from scratch, and every device would need a new configuration. Licence slots are freed on uninstall.
Help
If you have any questions or need assistance, please contact us through the ticket system — we're always here to help!