Configuring WireGuard VPN Client on Mikrotik RouterOS
How to configure MikroTik RouterOS as a WireGuard VPN client
This instruction will describe how to configure Mikrotik RouterOS as a client to connect to the WireGuard VPN server. First of all, you should pay attention to the fact that the option with WireGuard settings in RouterOS has been available since RouterOS 7.0. You can check the current version of your RouterOS through the router's web interface or with the WinBox program.
- You can check the current version of your RouterOS in System - RouterBOARD - Upgrade Firmware.
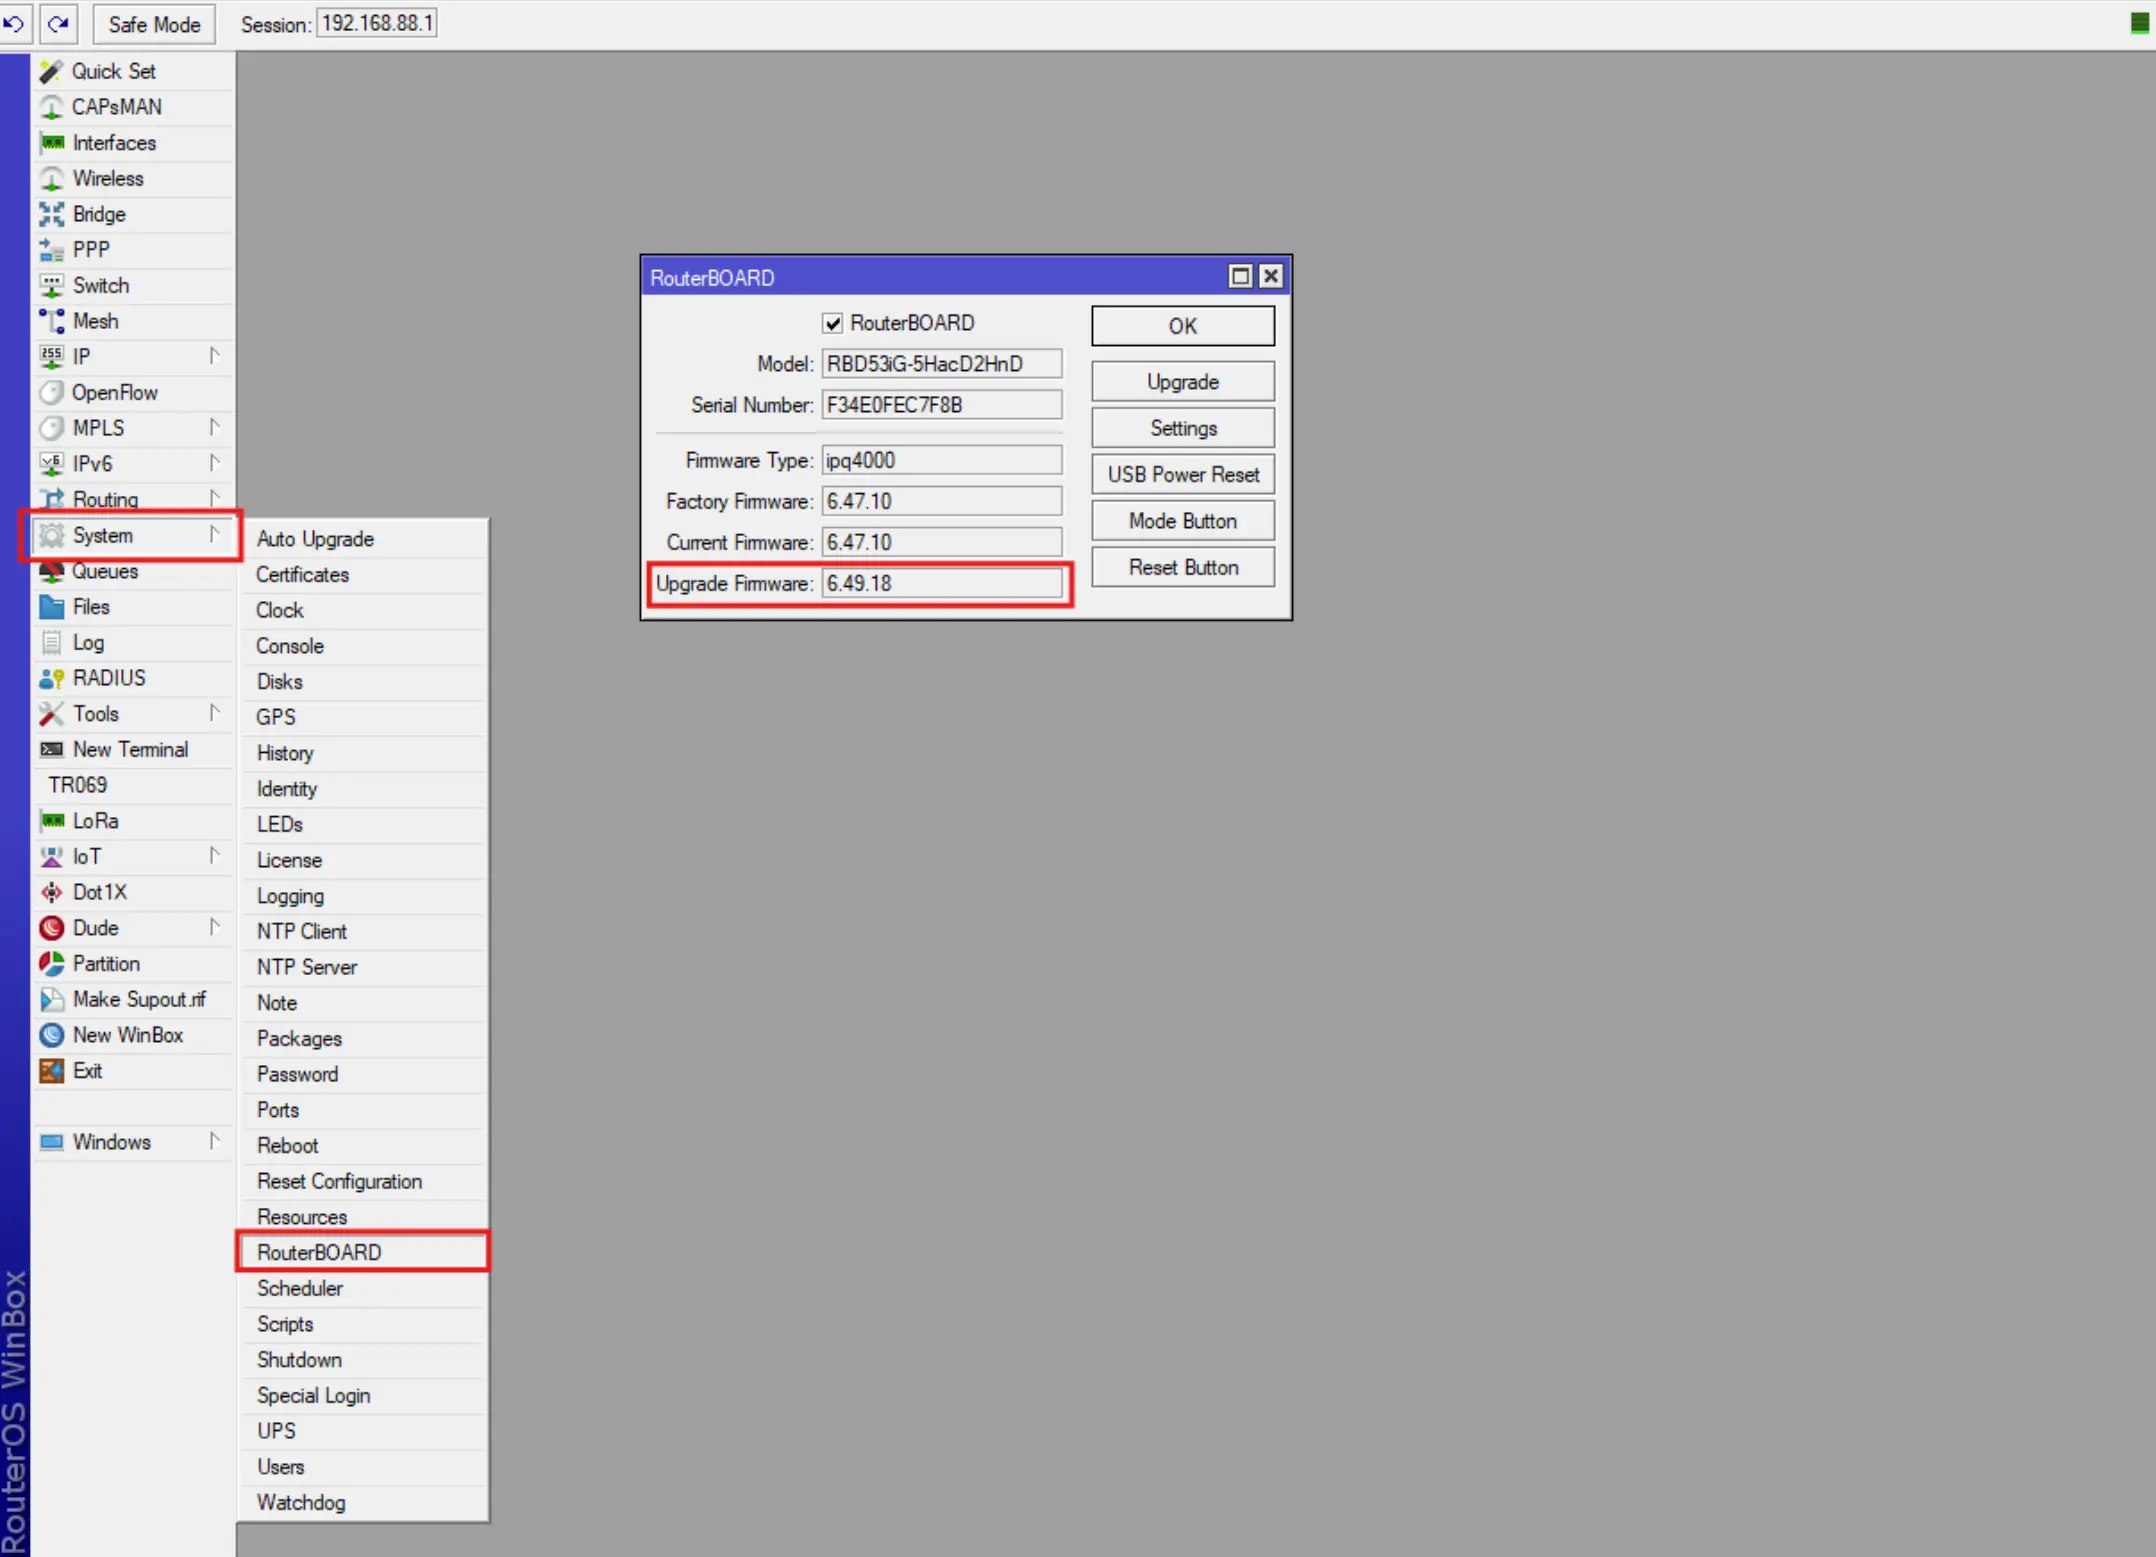
In case the RouteOS version is lower than 7, you need to upgrade the device to the current version.
links:
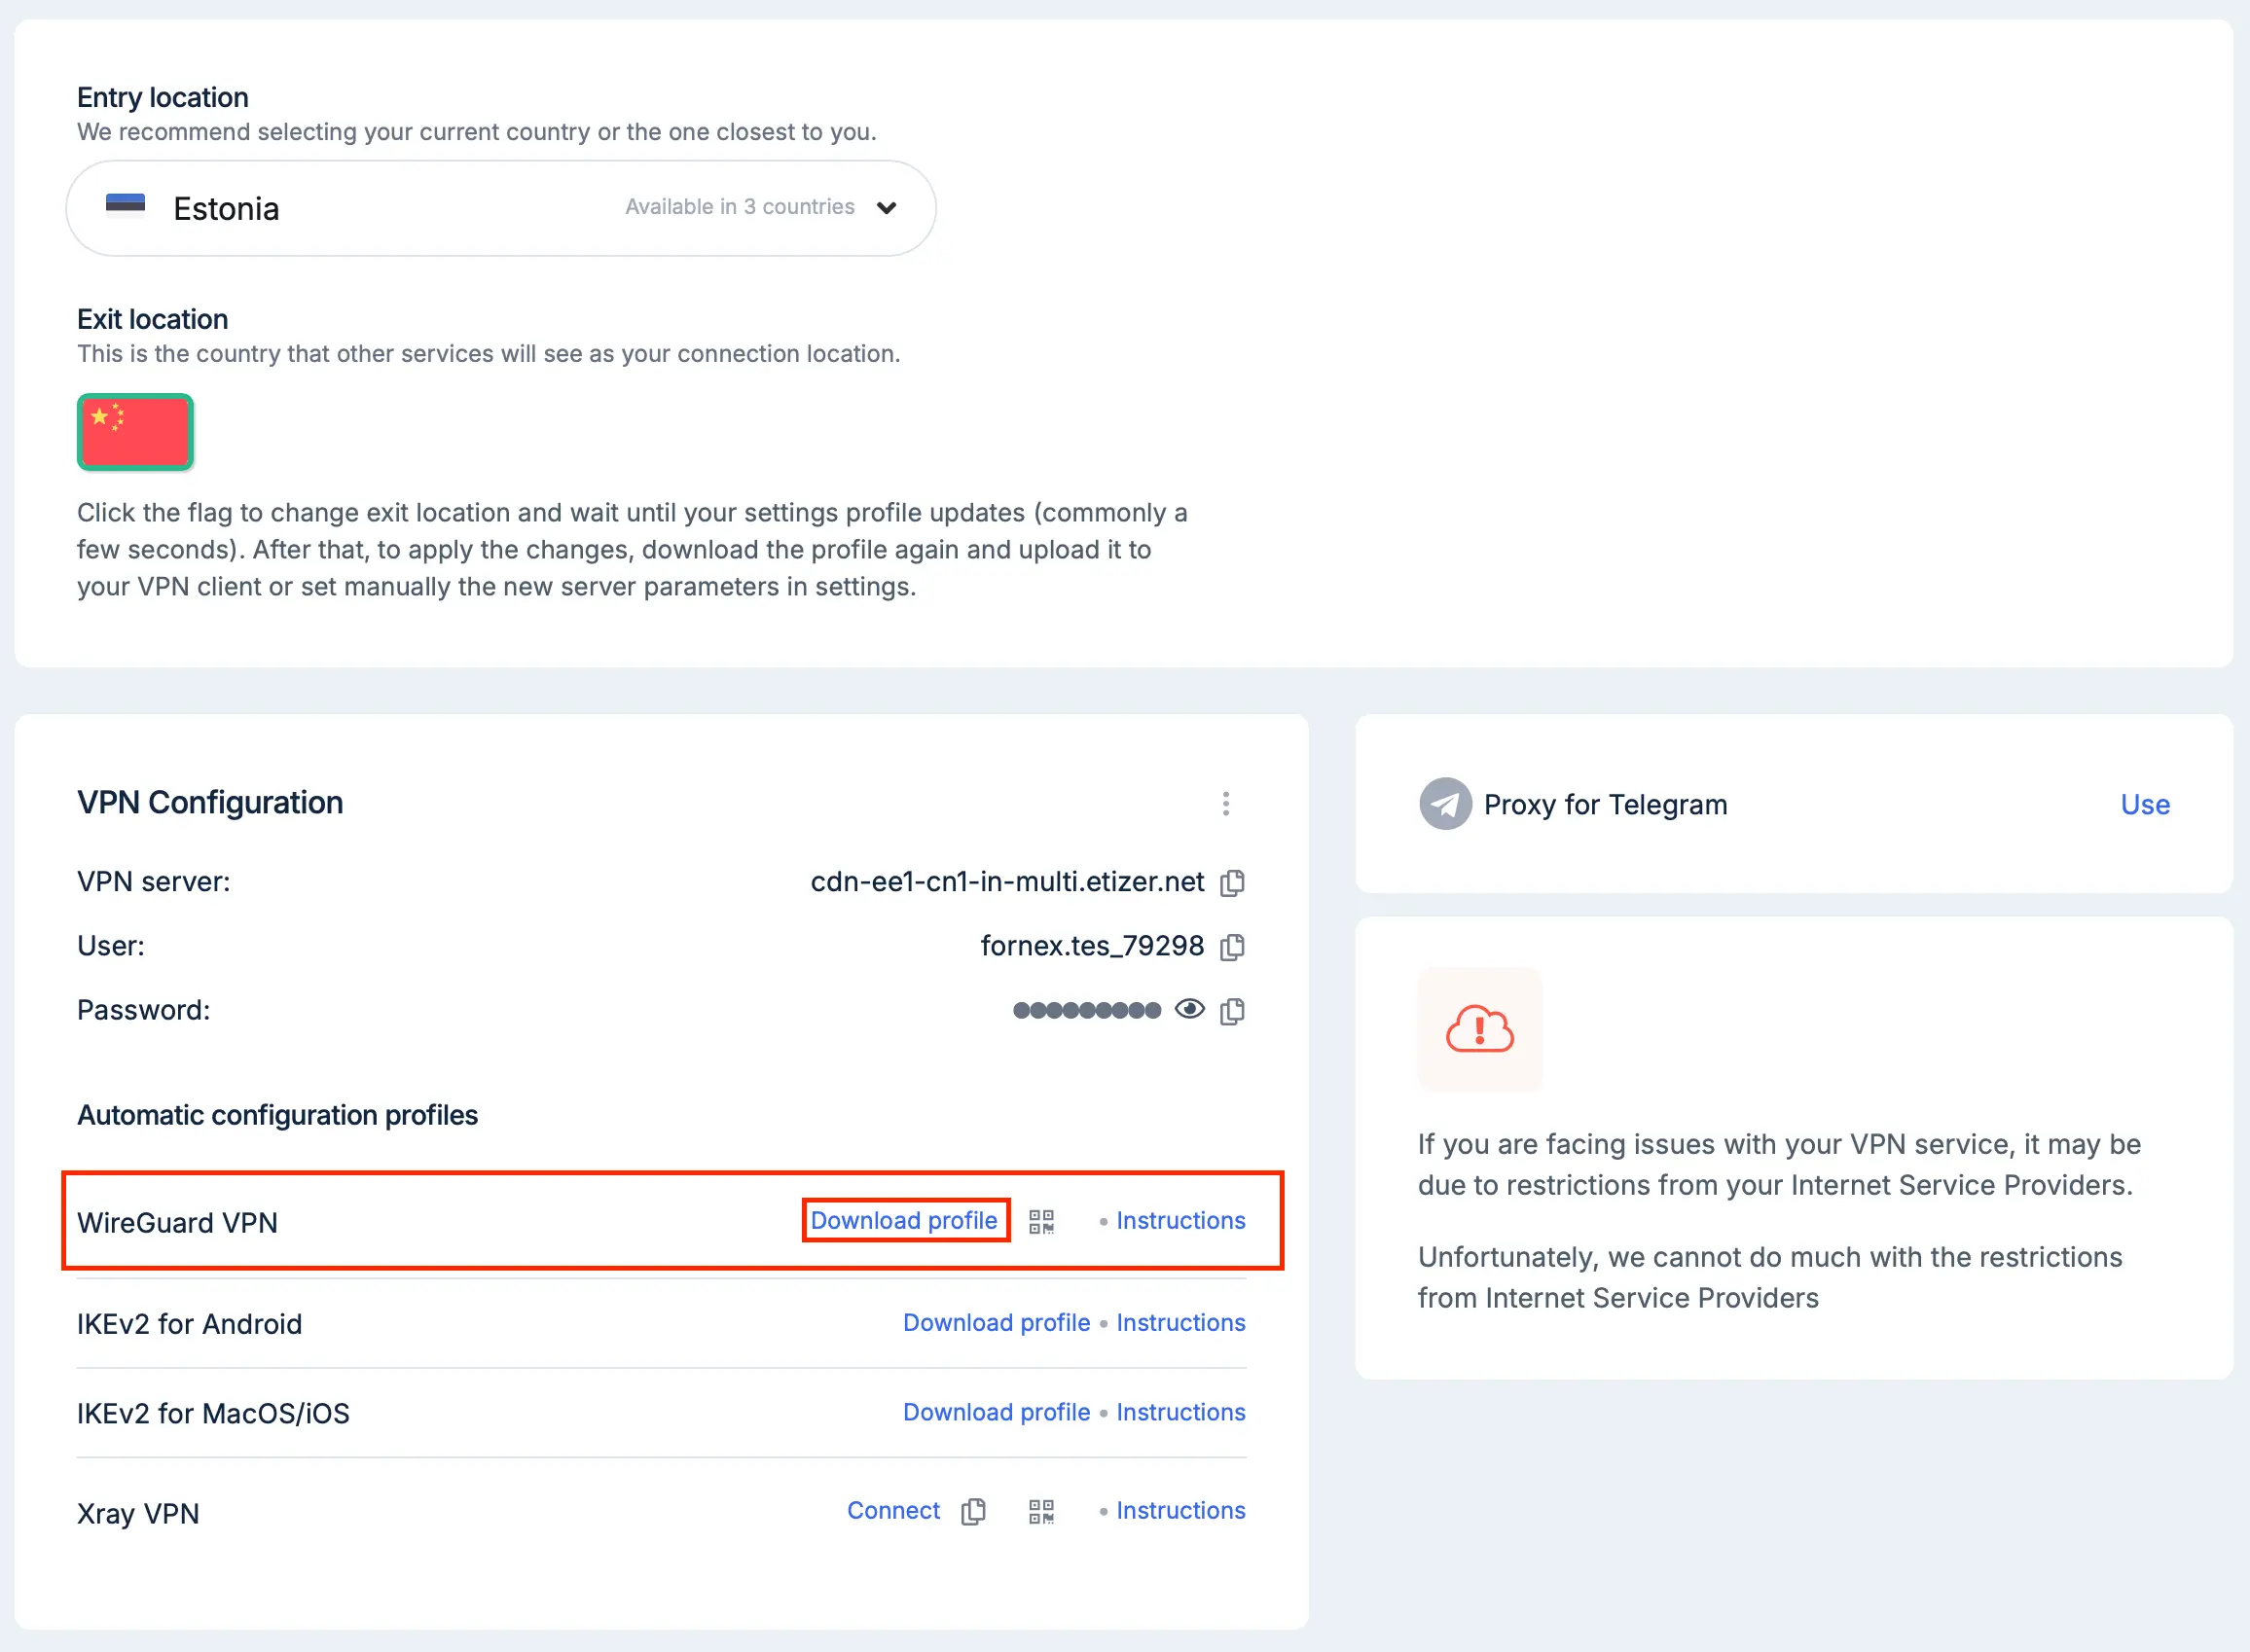
- After checking/upgrading to RouteOS 7, you must perform a WireGuard configuration download. Select the desired VPN order in personal account and download the configuration file.
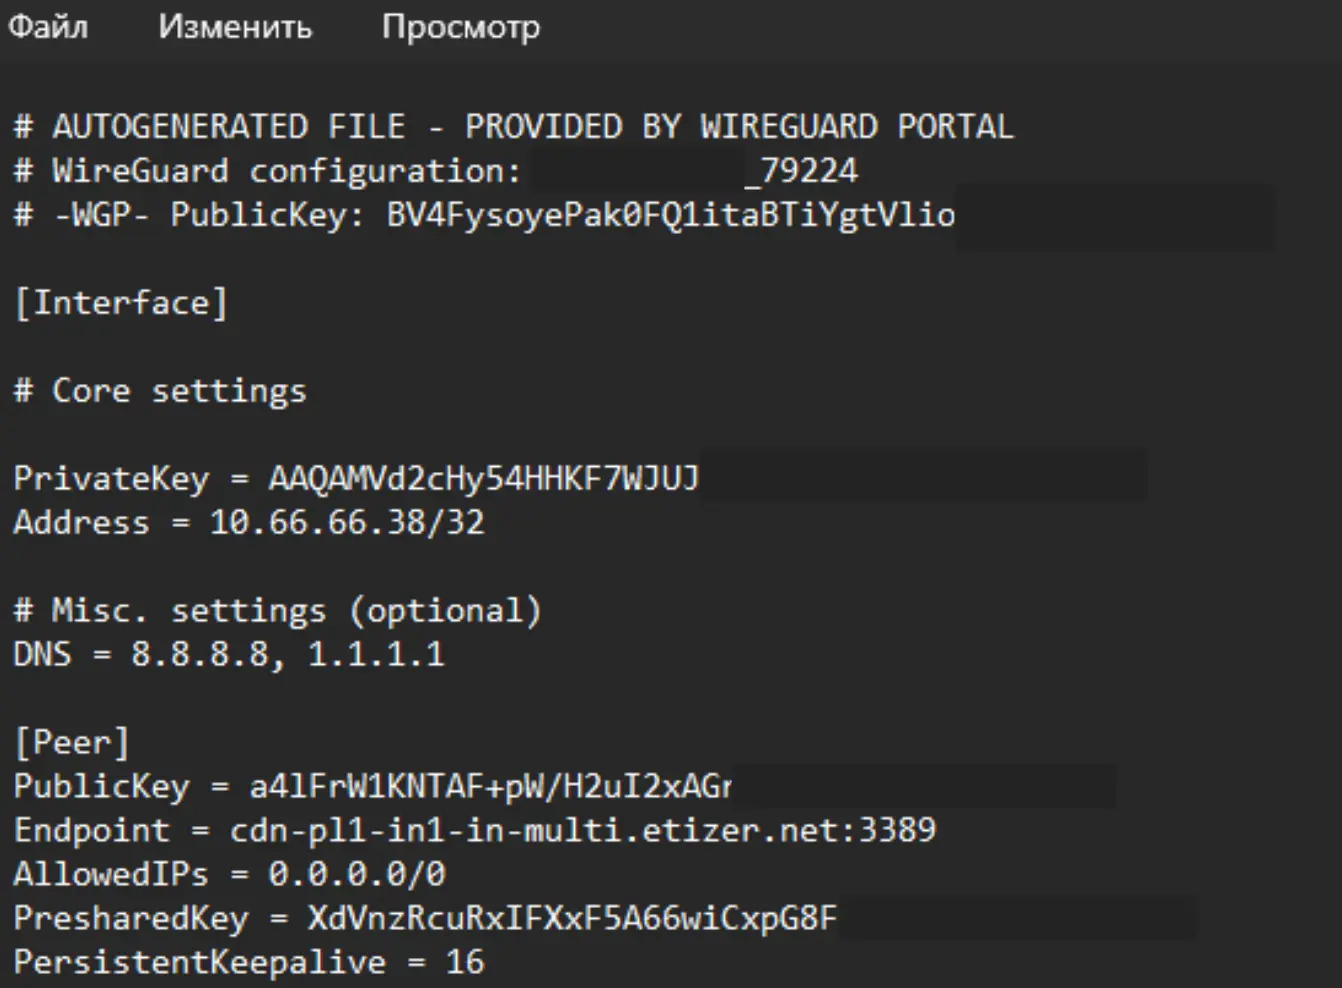
- The uploaded file will have a name like fnx-wg-79298.conf and contain the following:
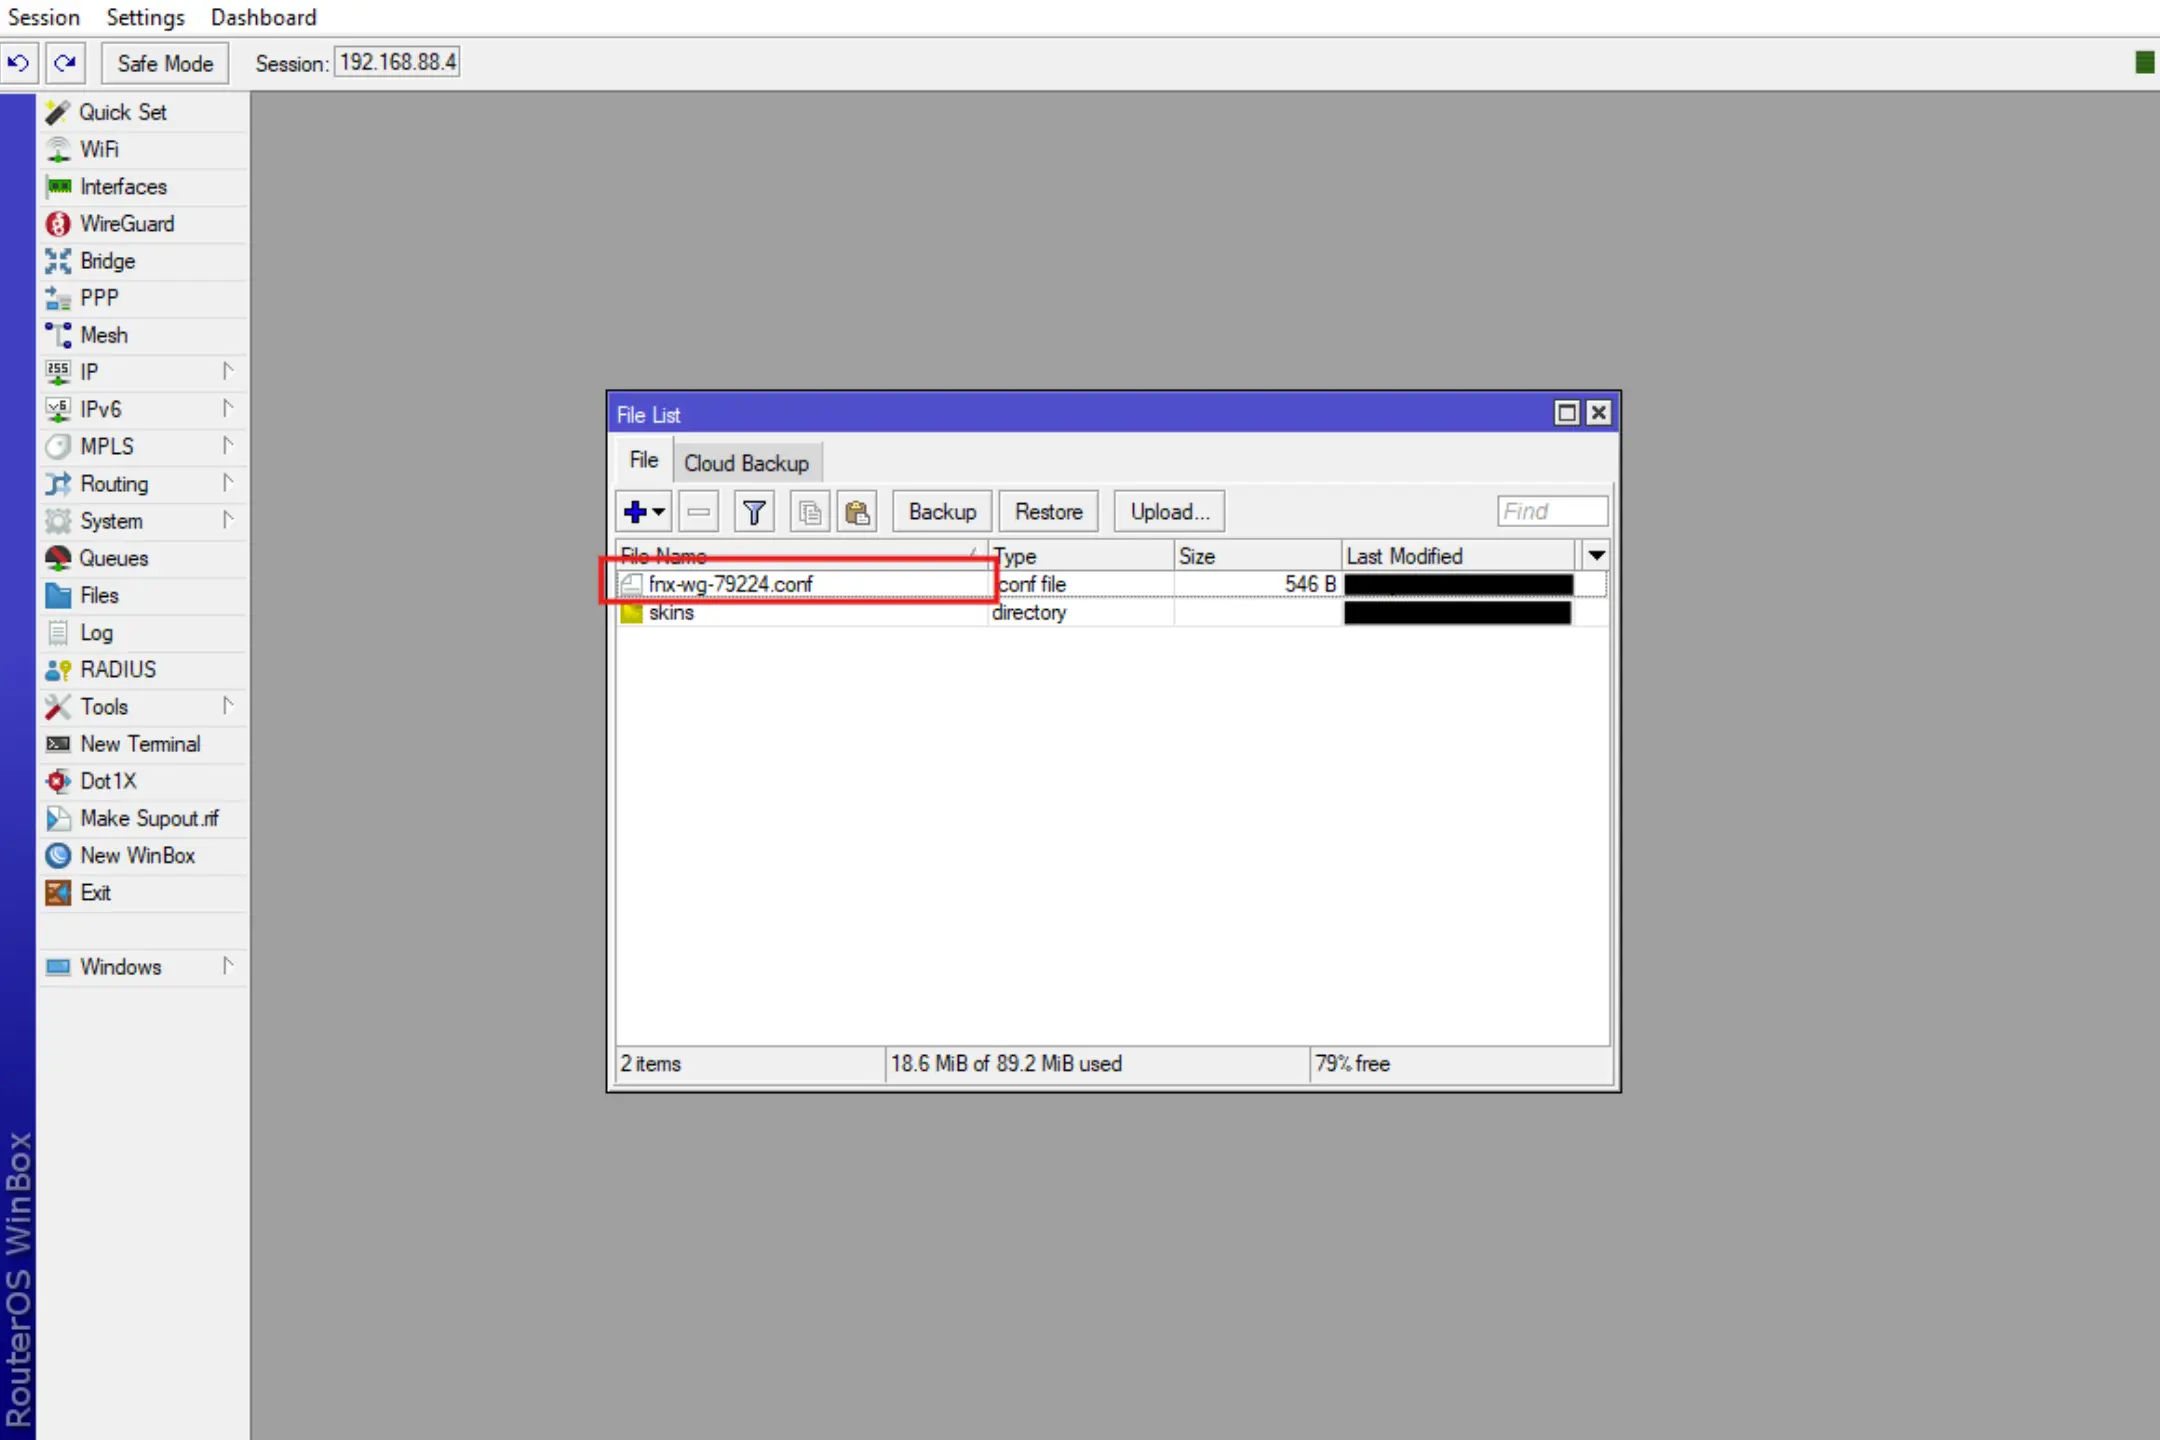
- The next step is to download the configuration file to the device.
By selecting the Files - Upload menu and specifying the required configuration to upload.

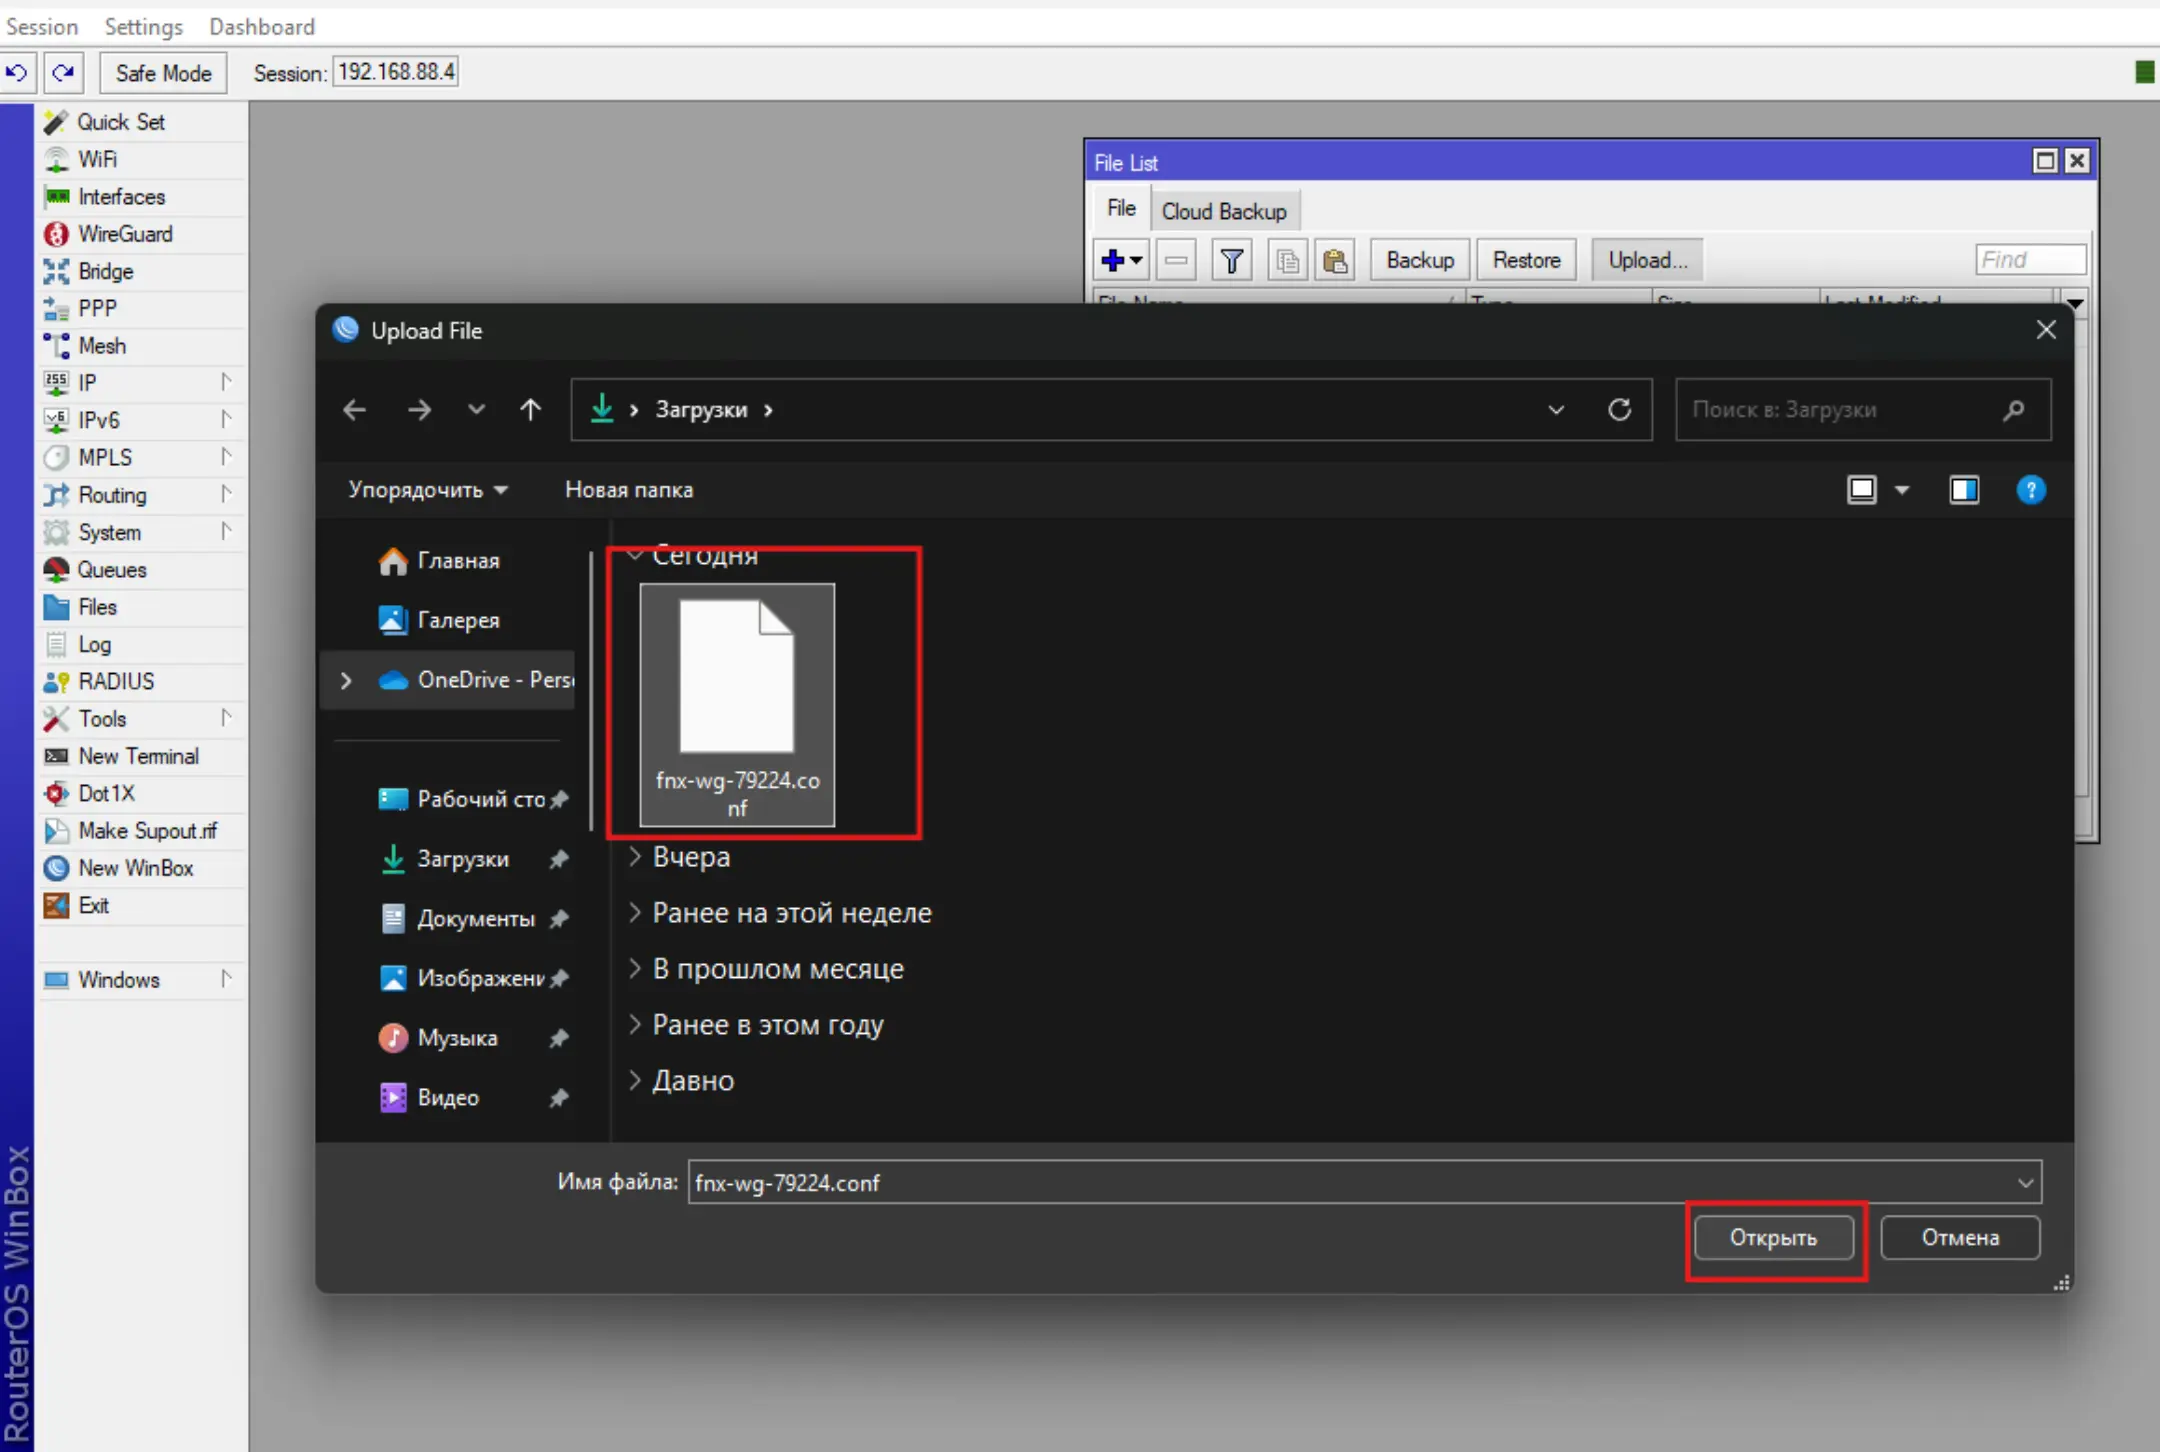
After that the downloaded configuration file will be displayed in the list of files on the device.
Let's move on to importing WireGuard configuration and direct configuration, which is necessary for correct routing of traffic through VPN connection.
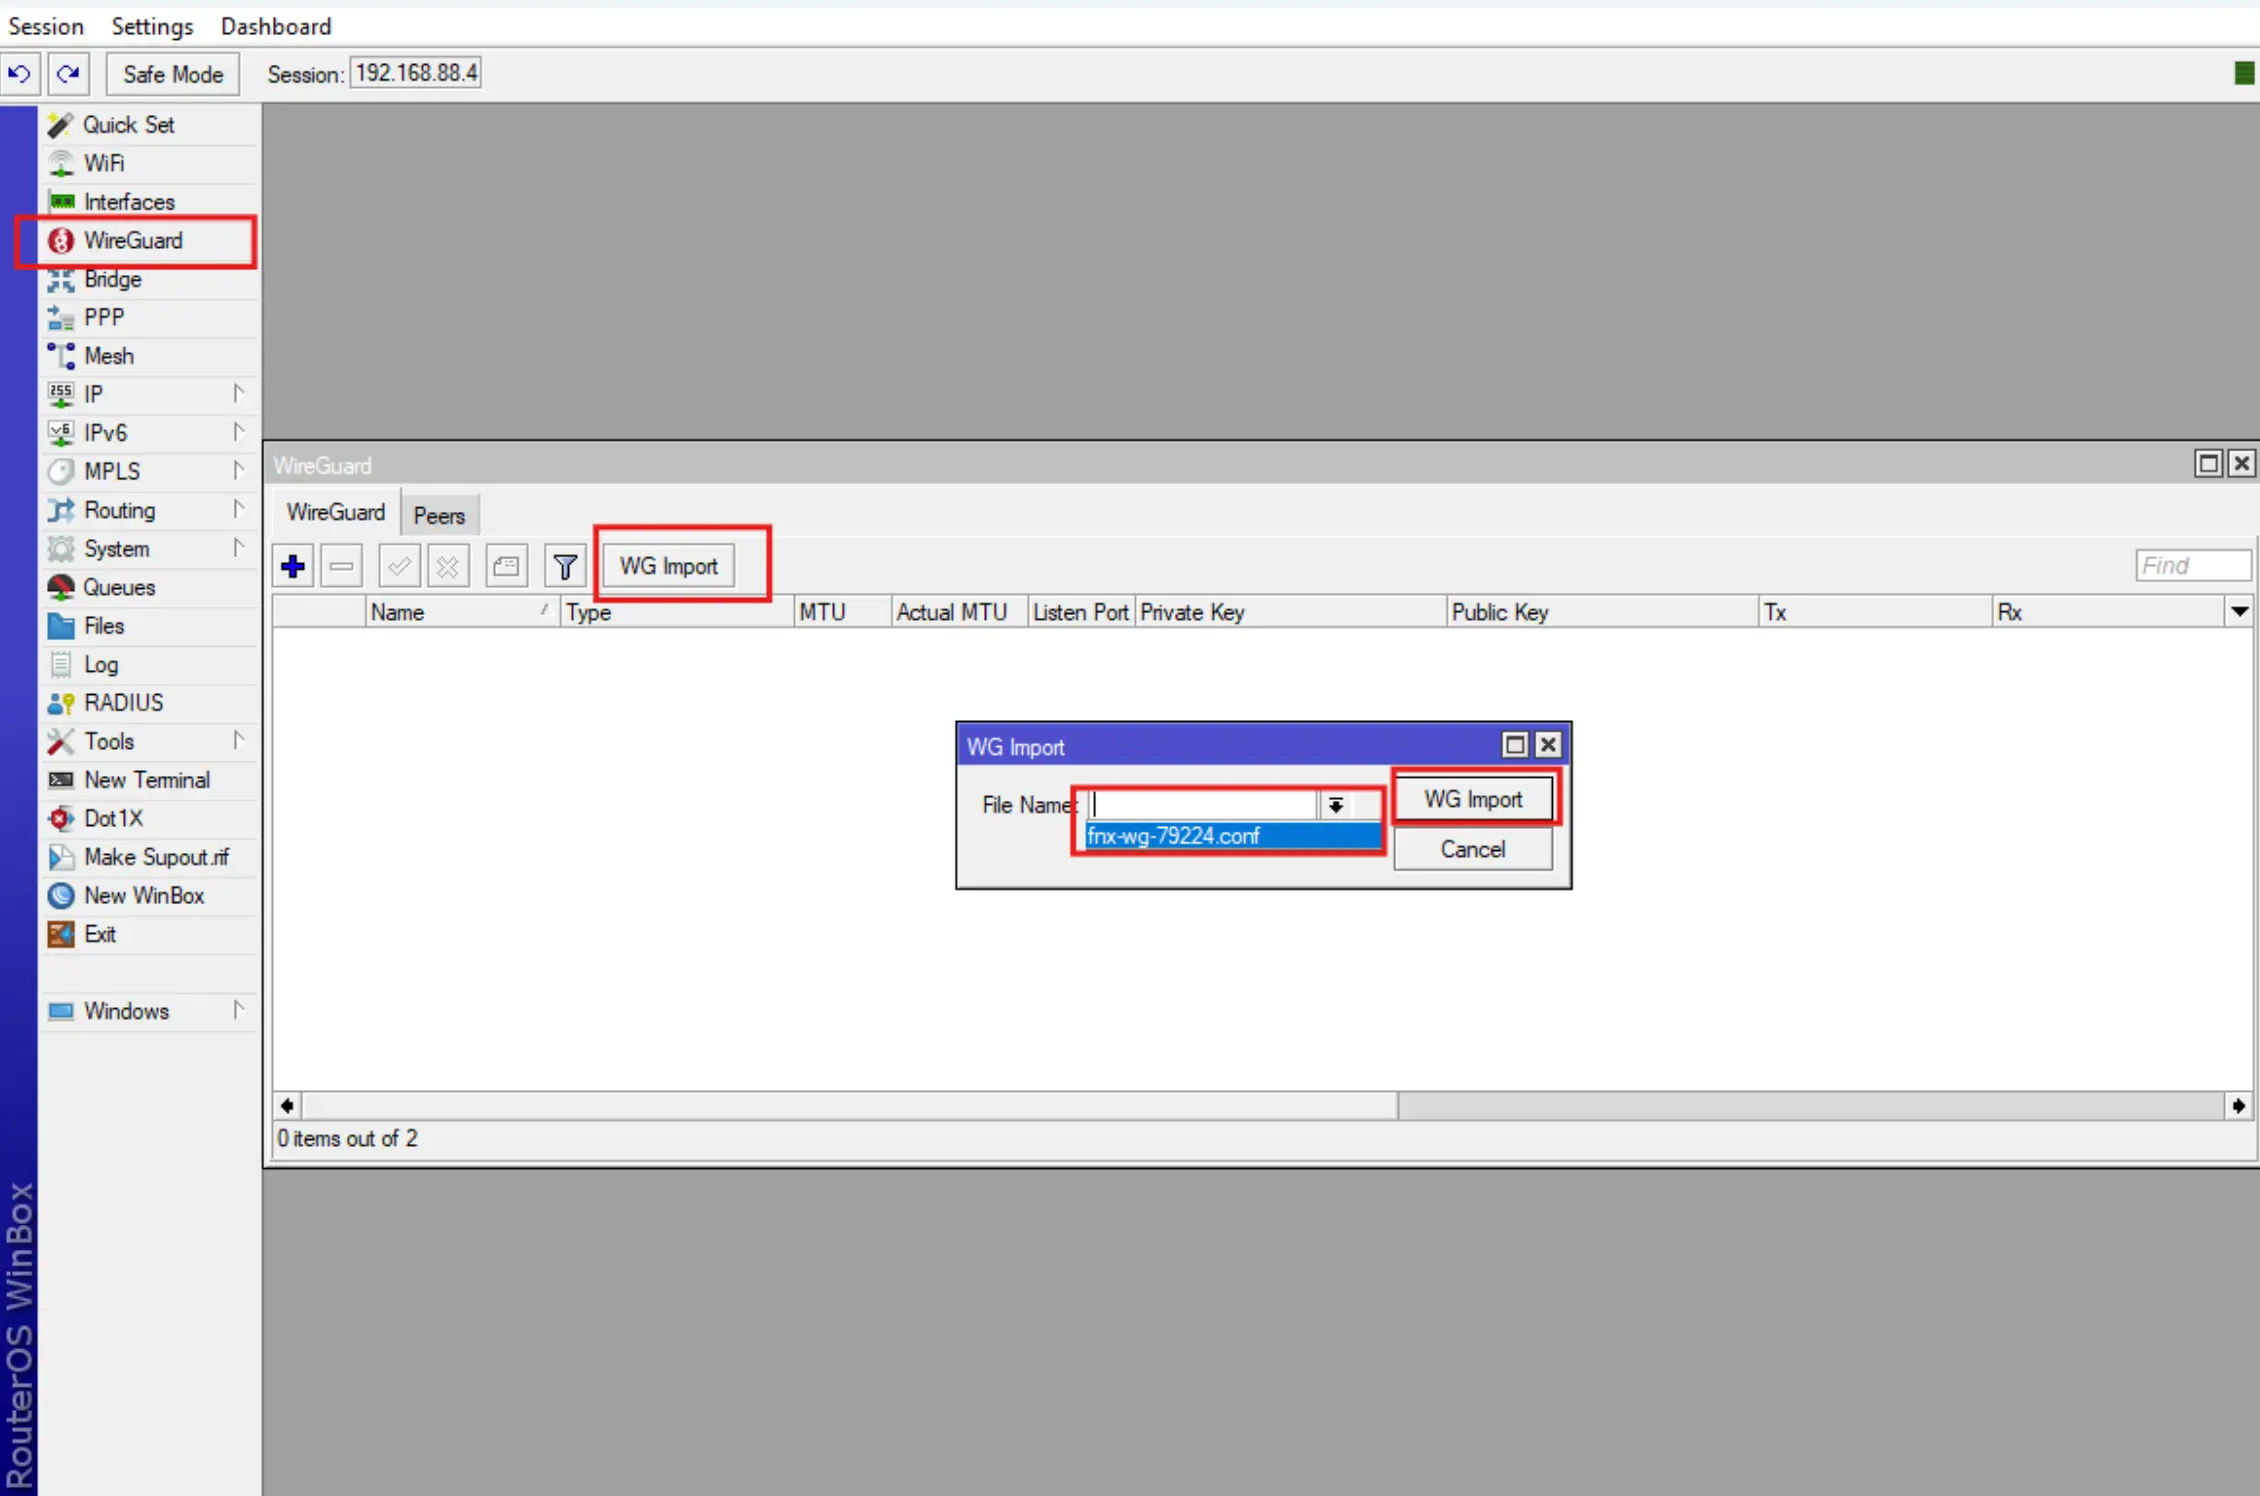
**1. Import WireGuard configuration.
- Go to the WireGuard menu, select WG Import, select our WG configuration in the drop-down list and click the WG Import button.
 .
.
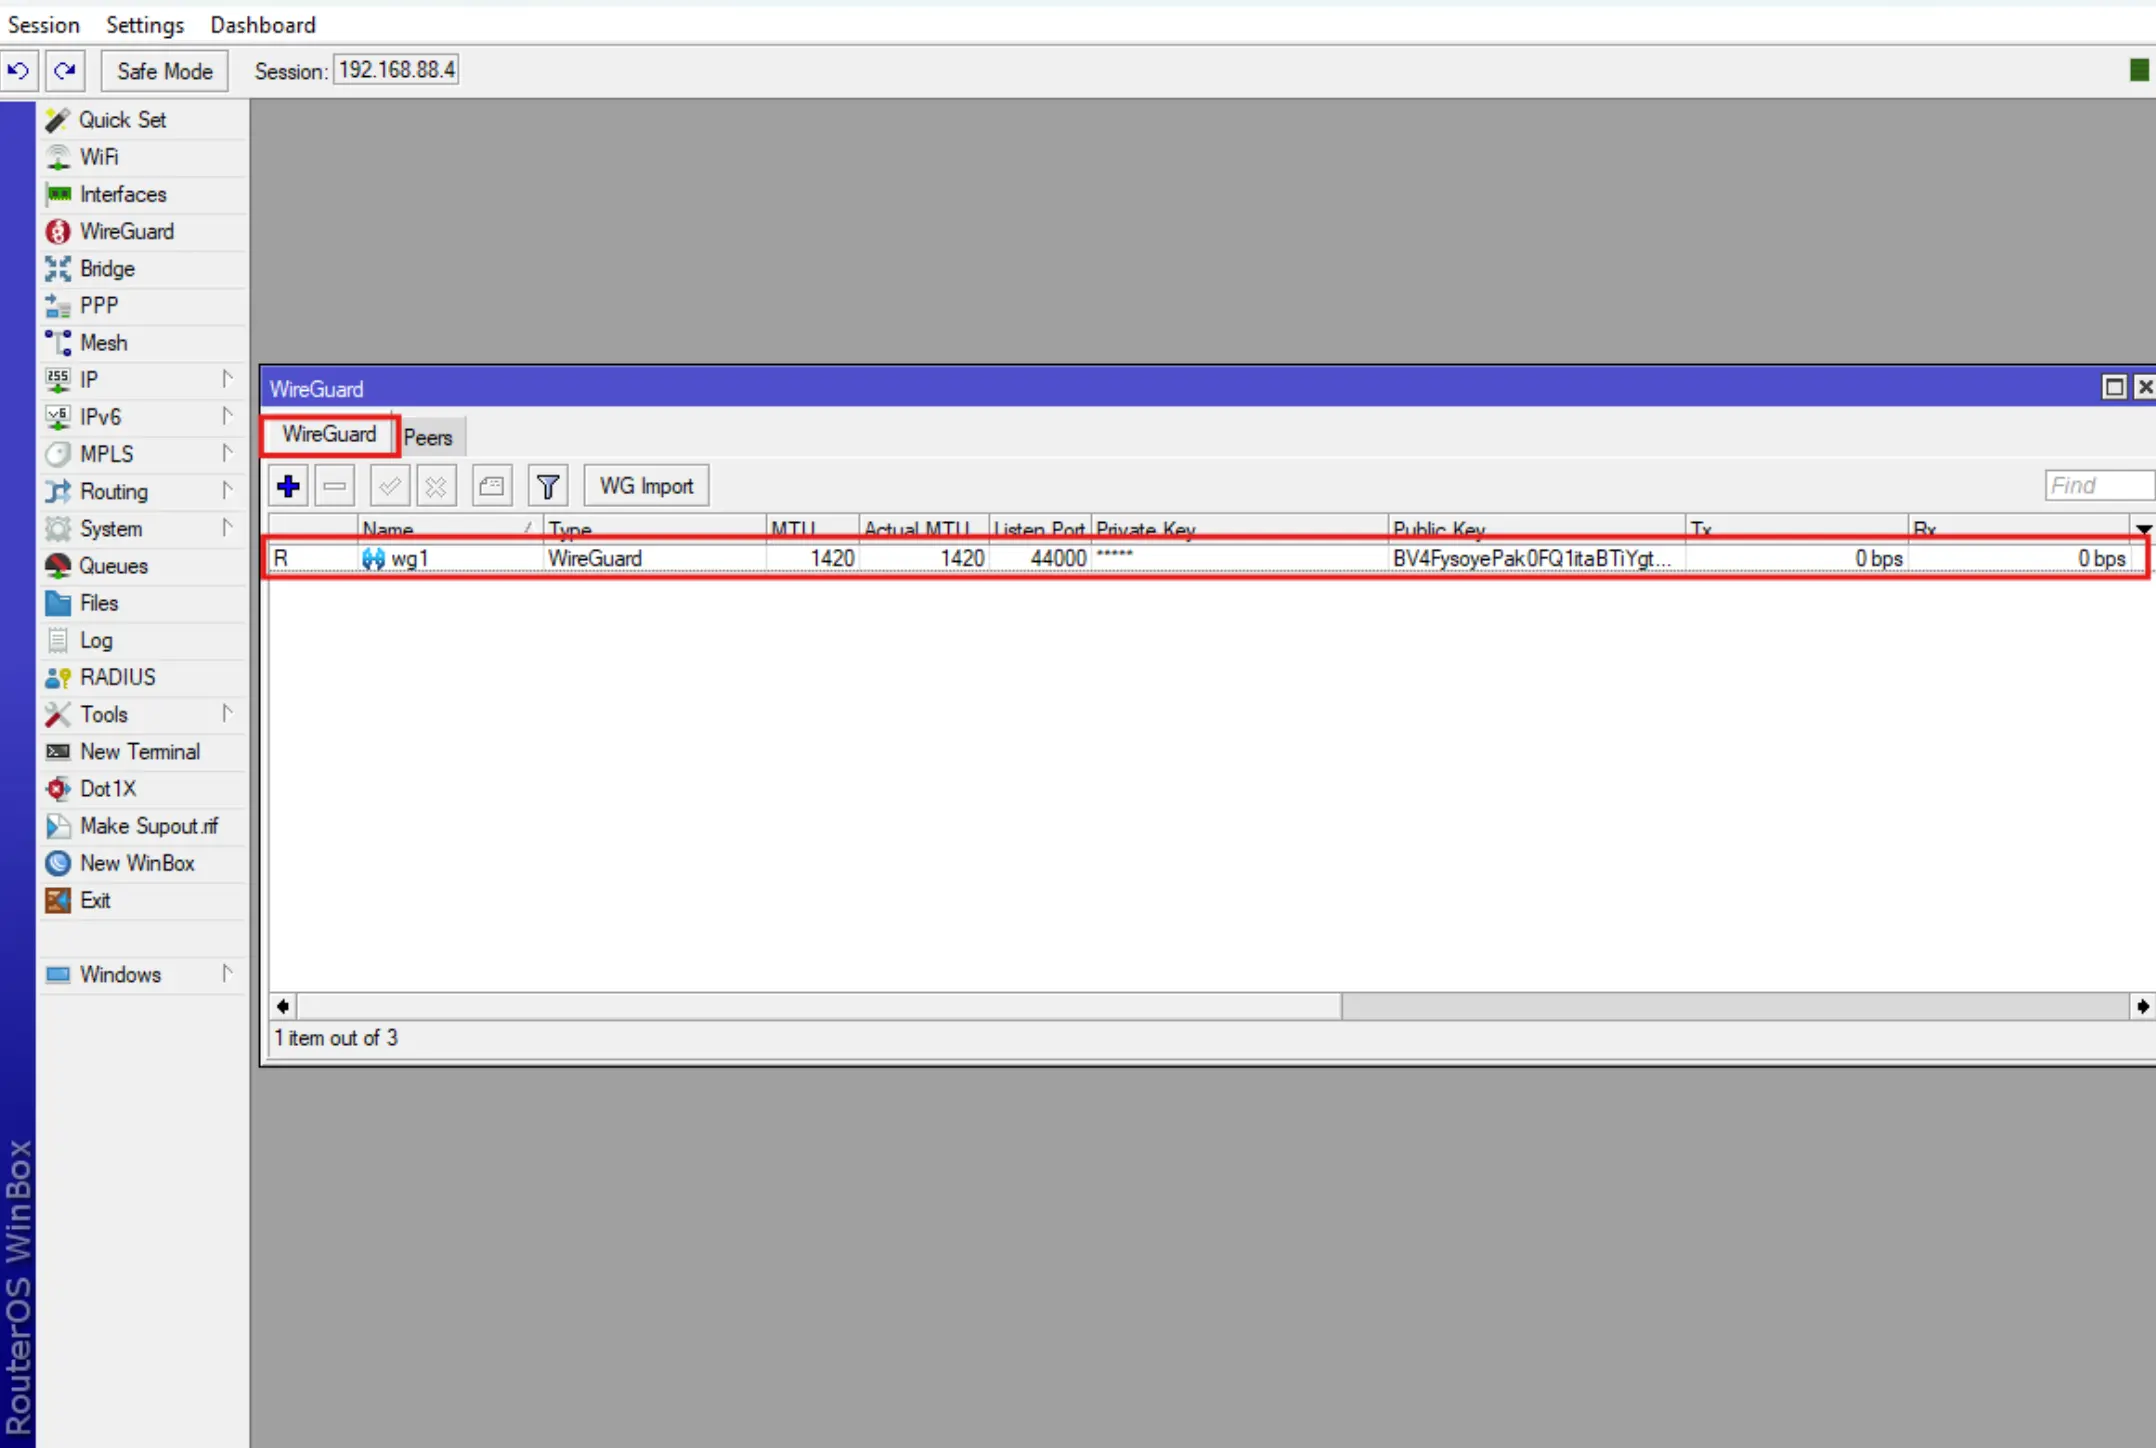
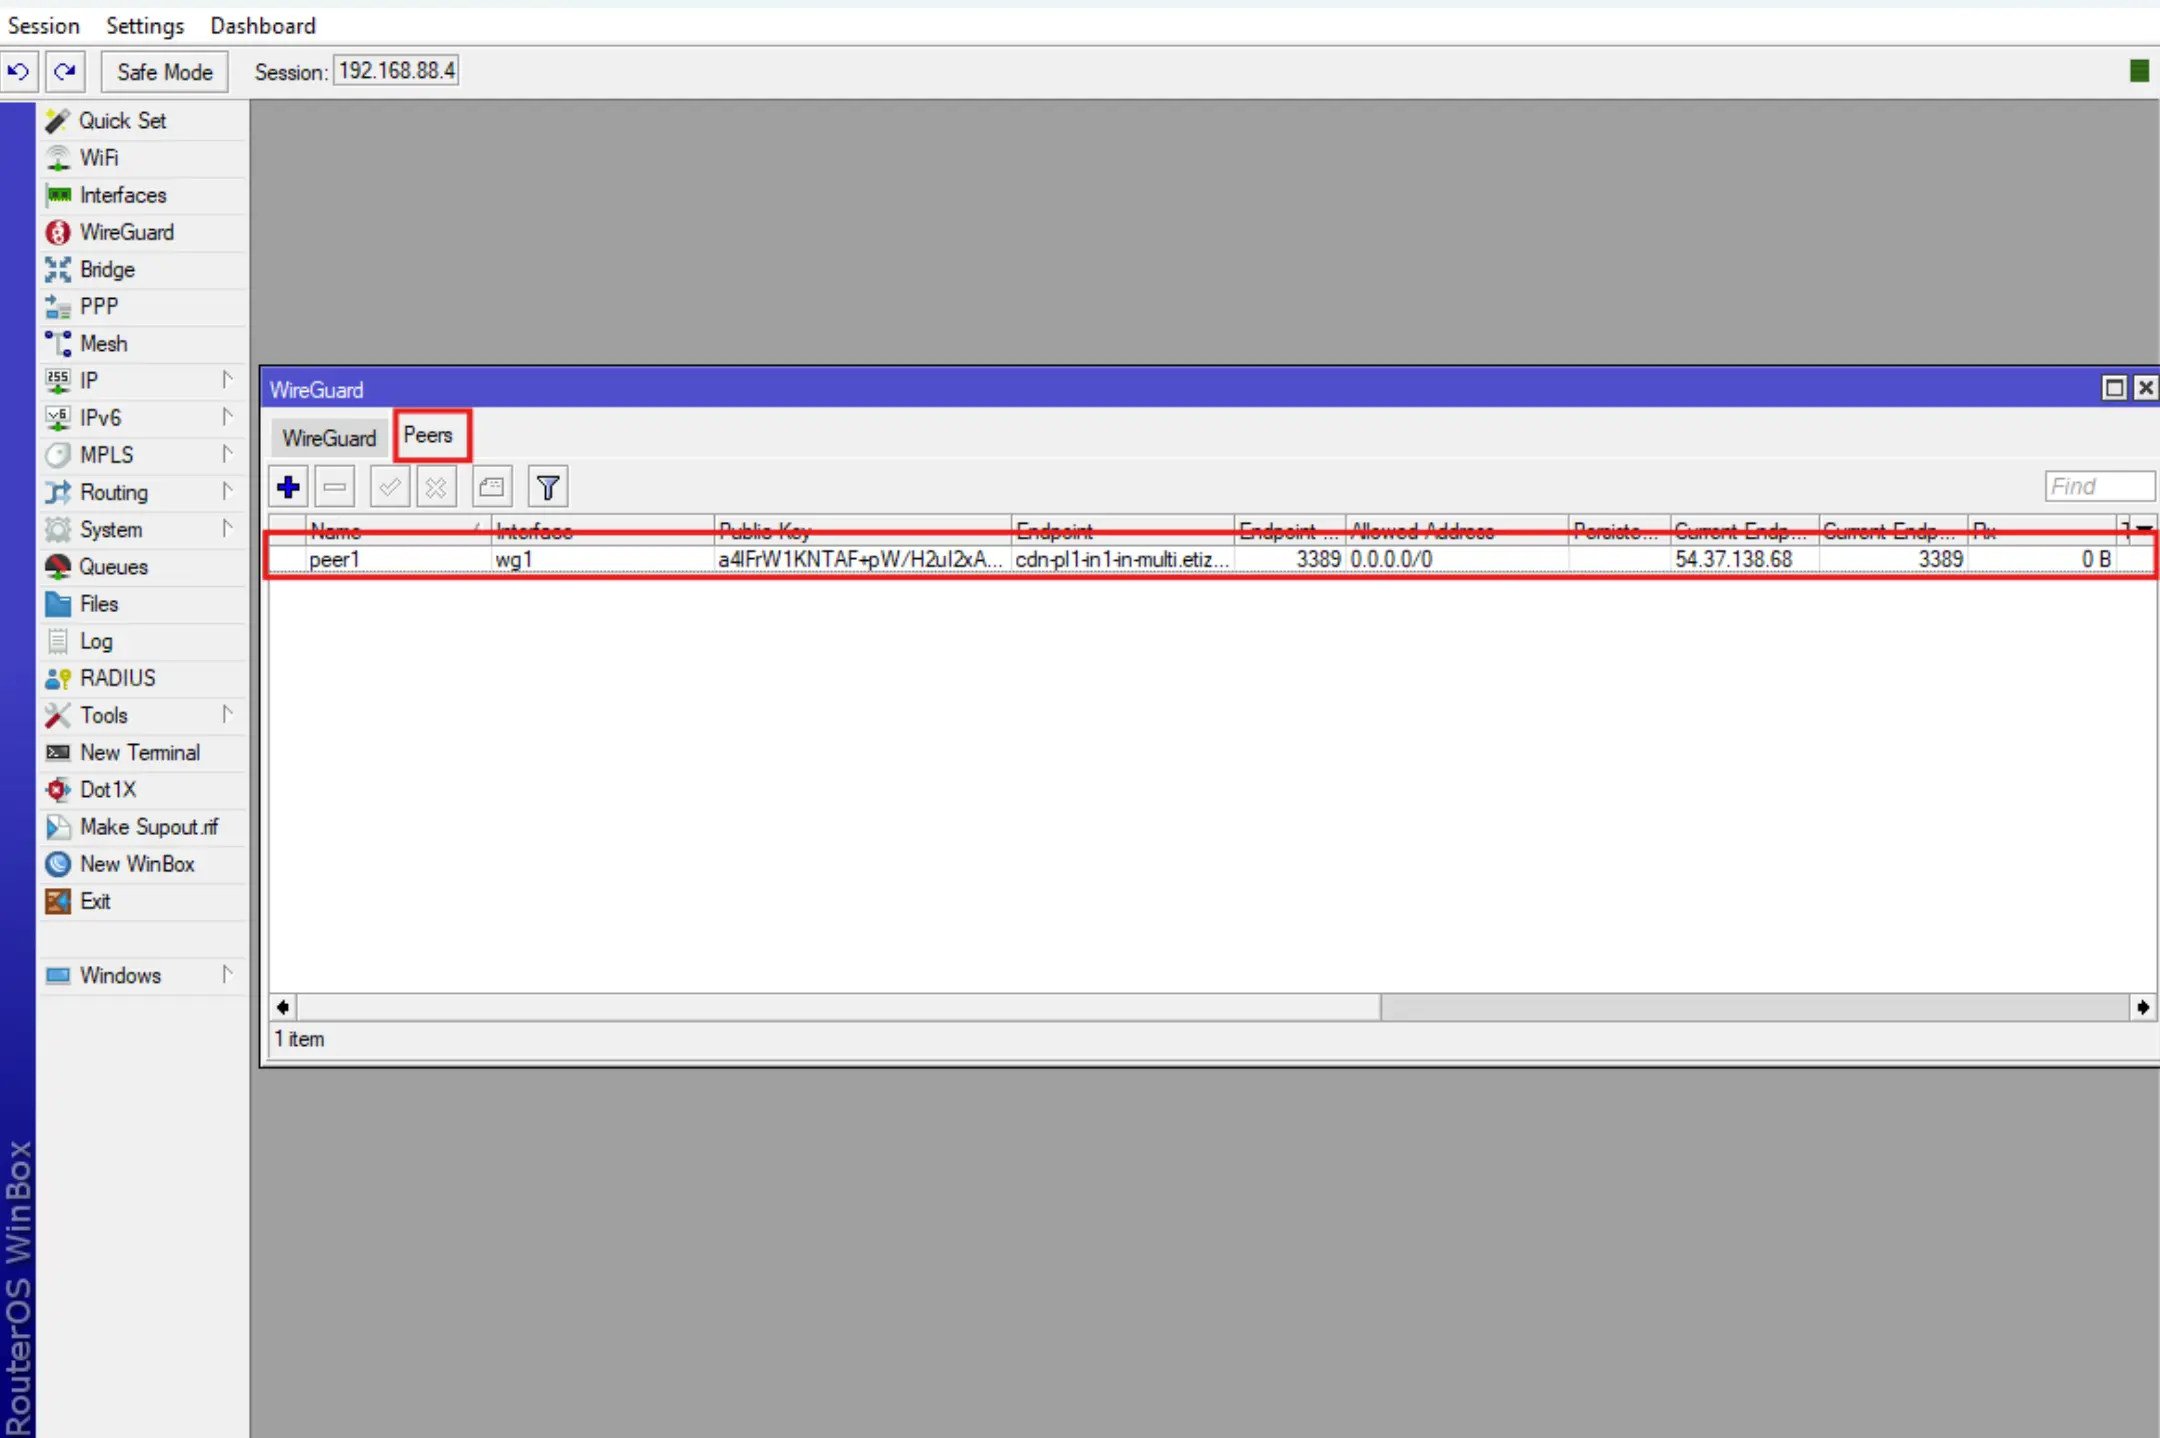
- After successful import of the configuration, WireGuard will appear with Interface and Peer already configured.
 .
.
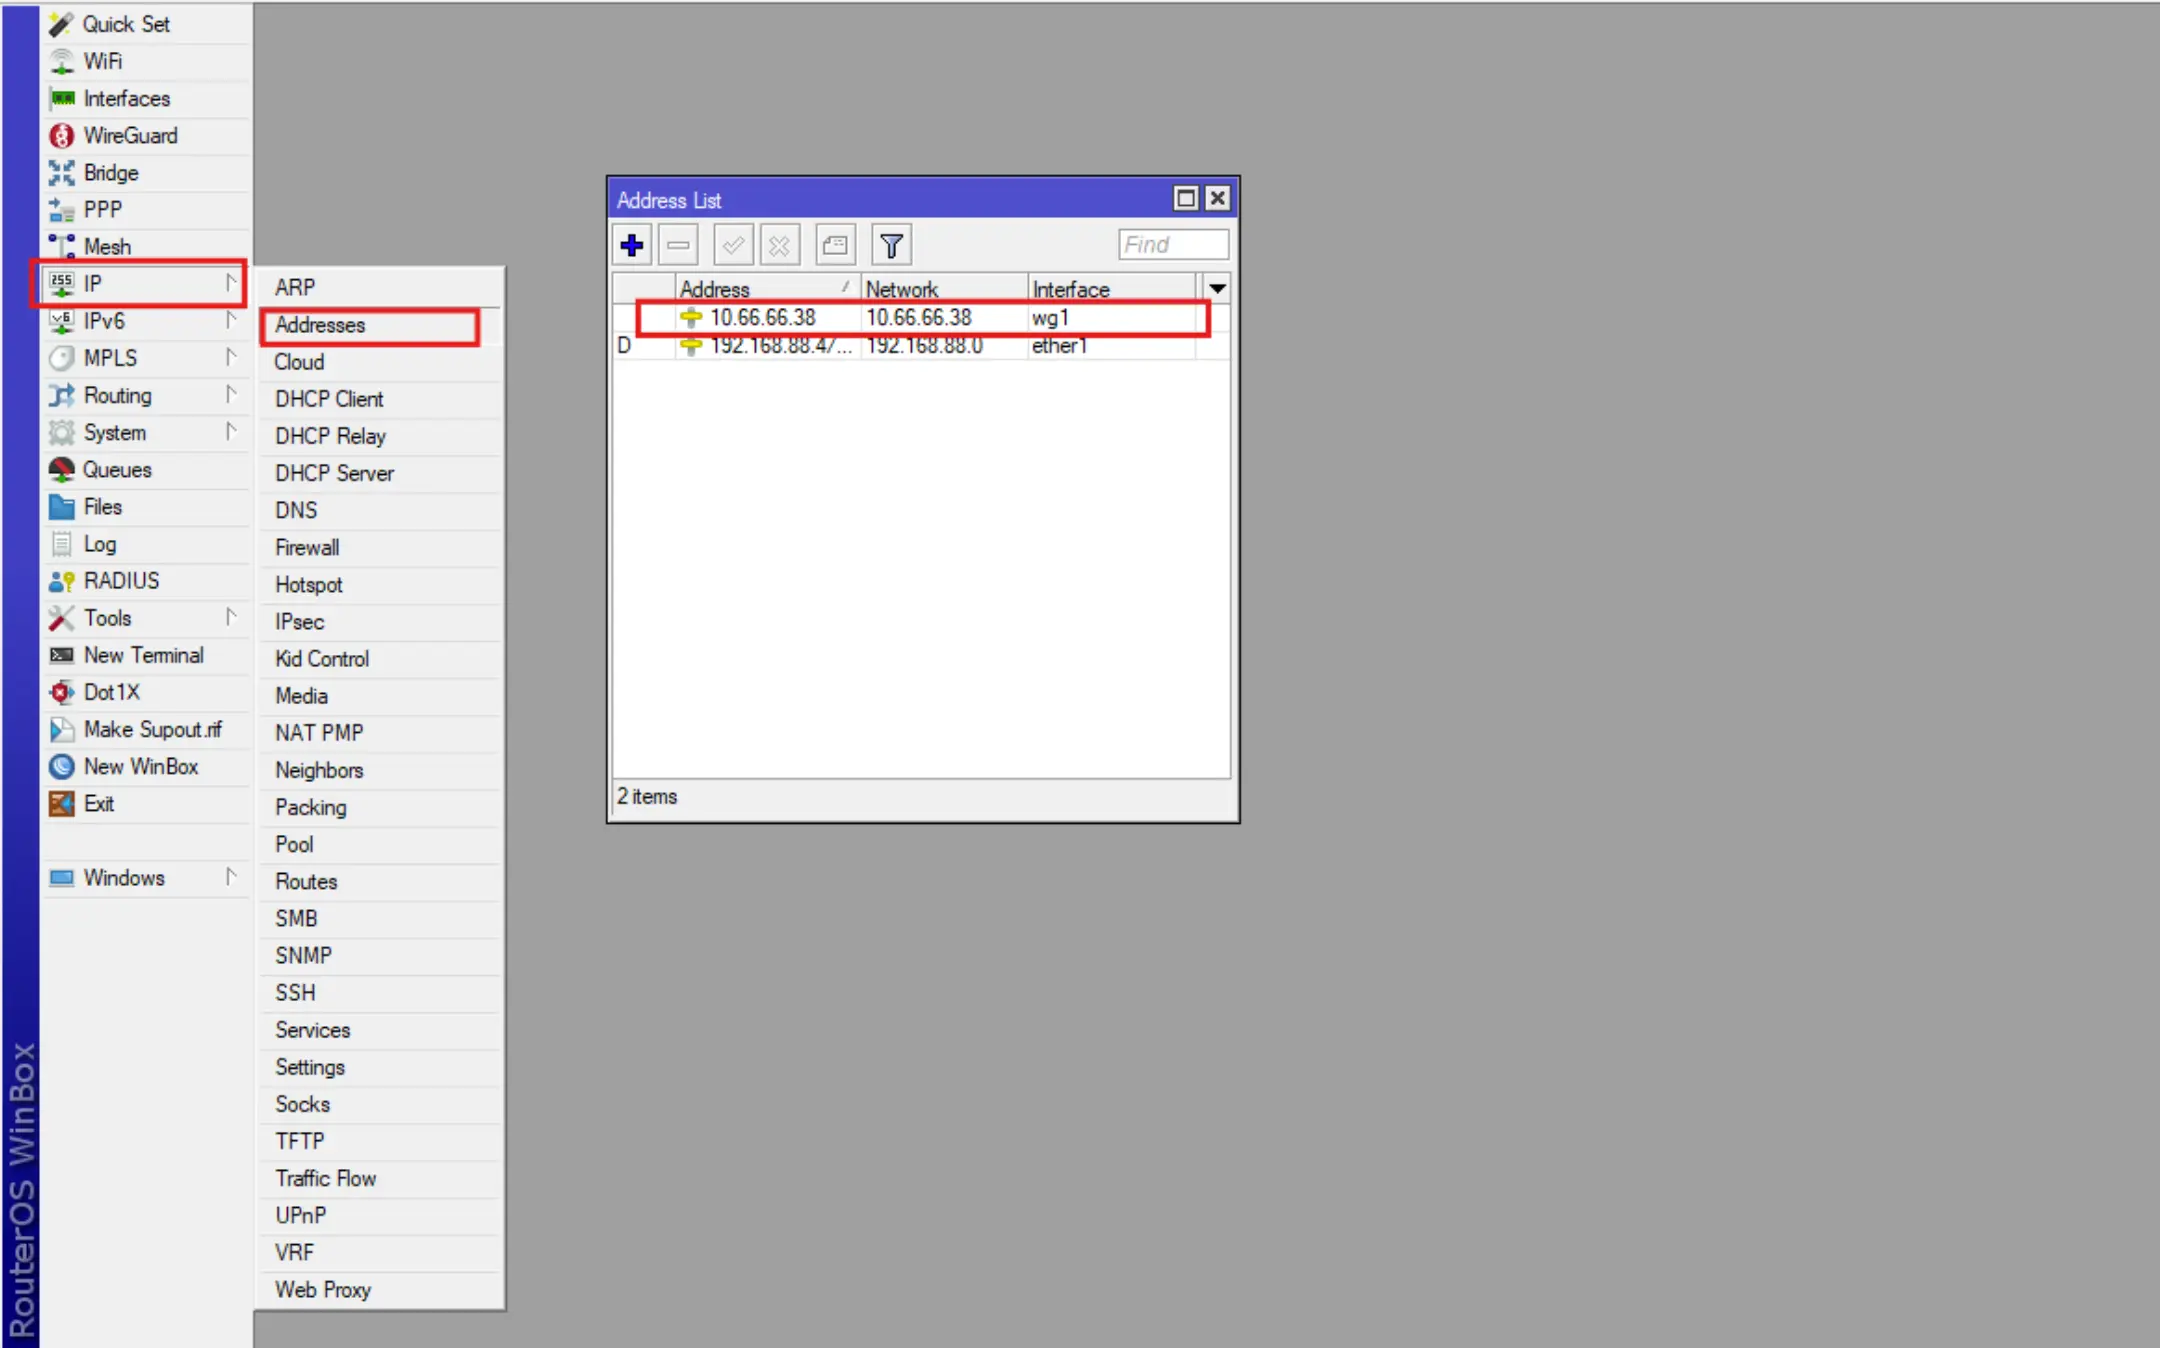
- It will also assign an ip address for the created interface.
2. Creating a routing table for marked packets of VPN traffic Wireguard.
By default RouterOS defines the routing table “main” to add routes to the FIB (Forwarding Information Base, which is used to make decisions about forwarding packets and contains a copy of the necessary routing information).
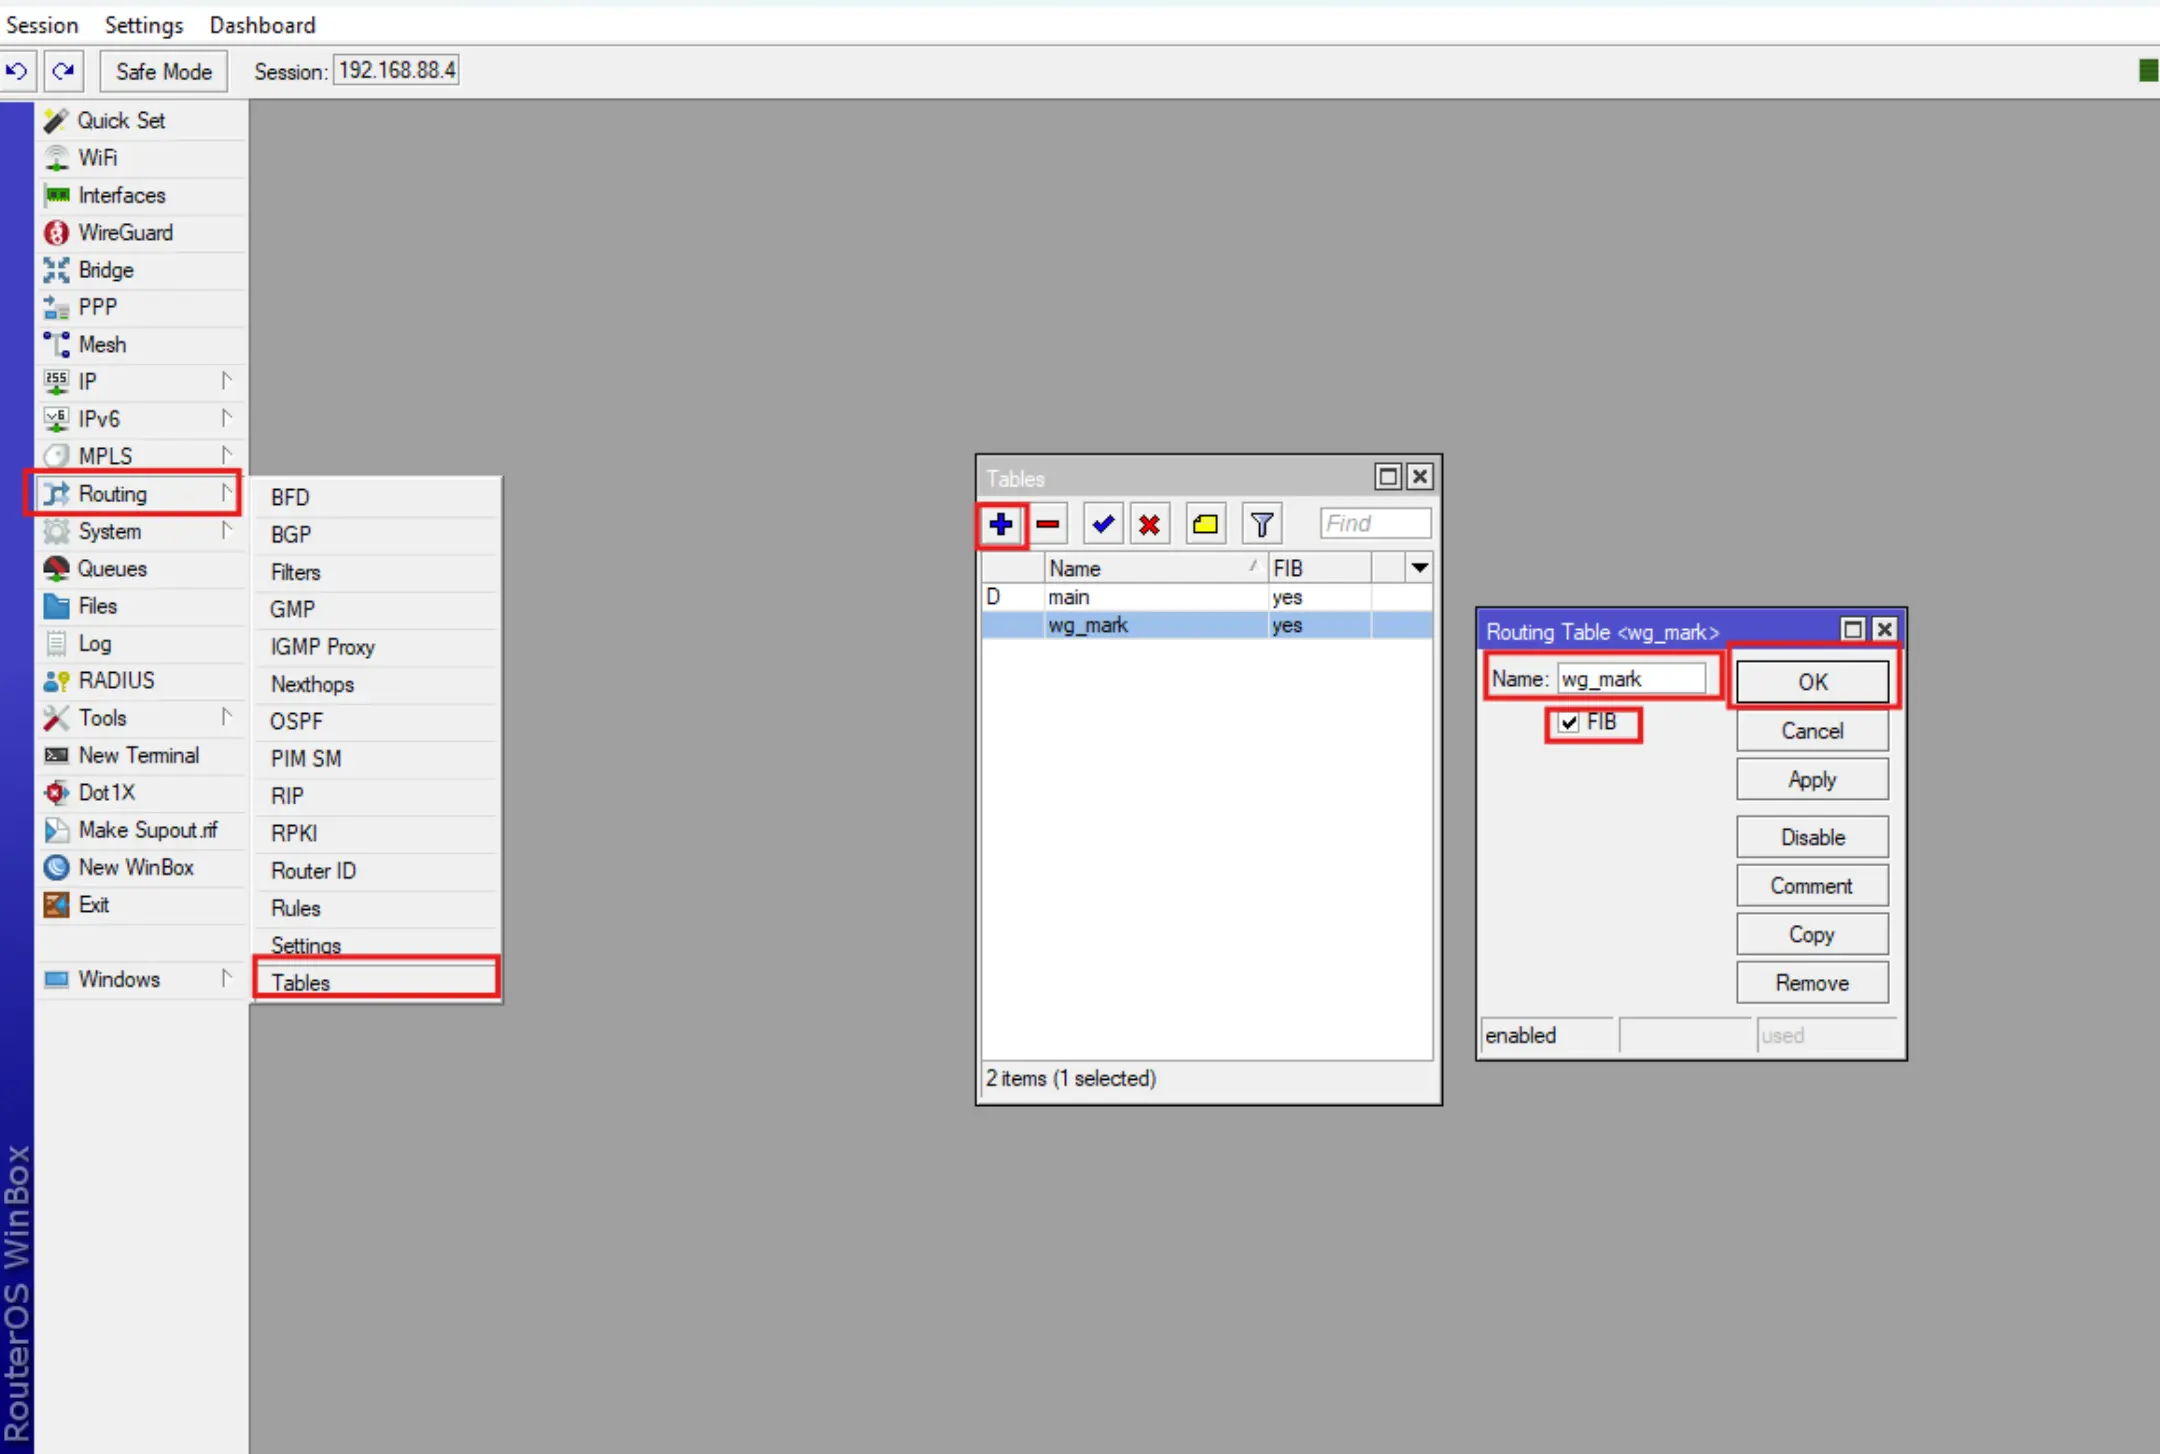
We will need a custom routing table and it should be defined in the Routing-Tables menu to add Wireguard routes to the FIB.
Go to the Routing-Tables menu, press +, then fill the Name field with the value wg_mark and must check the FIB checkbox.
3. Creating address lists and packet markup rules for Wireguard VPN route packets.
For the labeled route of the Wireguard interface you need to create Address Lists that will be used by Wireguard VPN and a route packet markup rule (Mangle), these will be different depending on how you want to tunnel VPN traffic:
- If you want complete tunneling of VPN traffic - follow step 3.1 (all sites will open through the VPN).
- If you need selective tunneling, e.g. to bypass access restrictions to some sites - do item 3.2.
3.1 Full tunneling of VPN Wireguard traffic on Mikrotik.
Now we will prepare a list of addresses using Wireguard. In the case of full tunneling we need to specify the IP of the router's local network so that all devices connected to it will use Wireguard VPN to access sites.
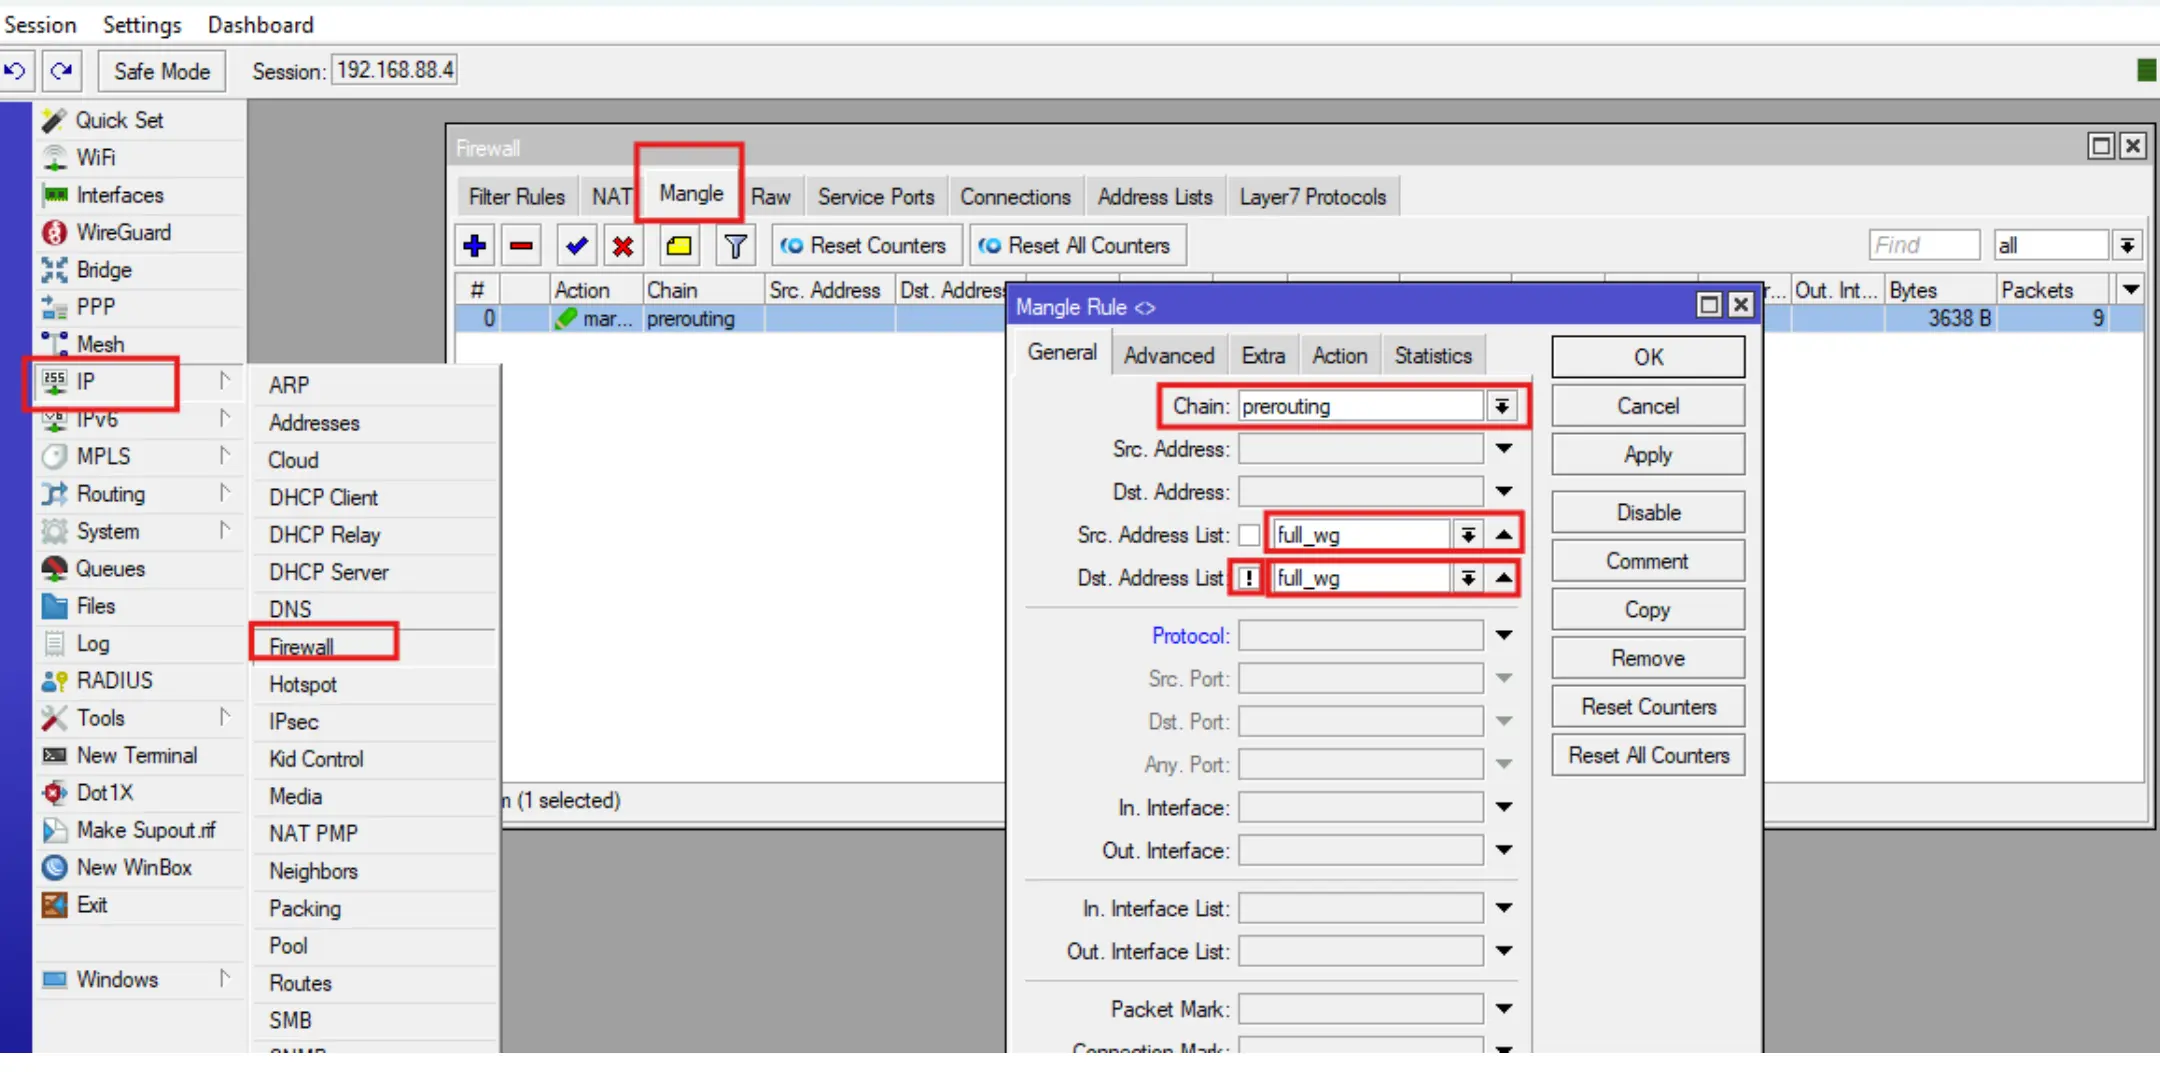
Go to IP-Firewall-Address Lists and press +, then fill in the Name and Address fields. In the Name field specify full_wg, in the Address field fill in the IP address of the router's local network (192.168.88.0/24 by default). Click OK.

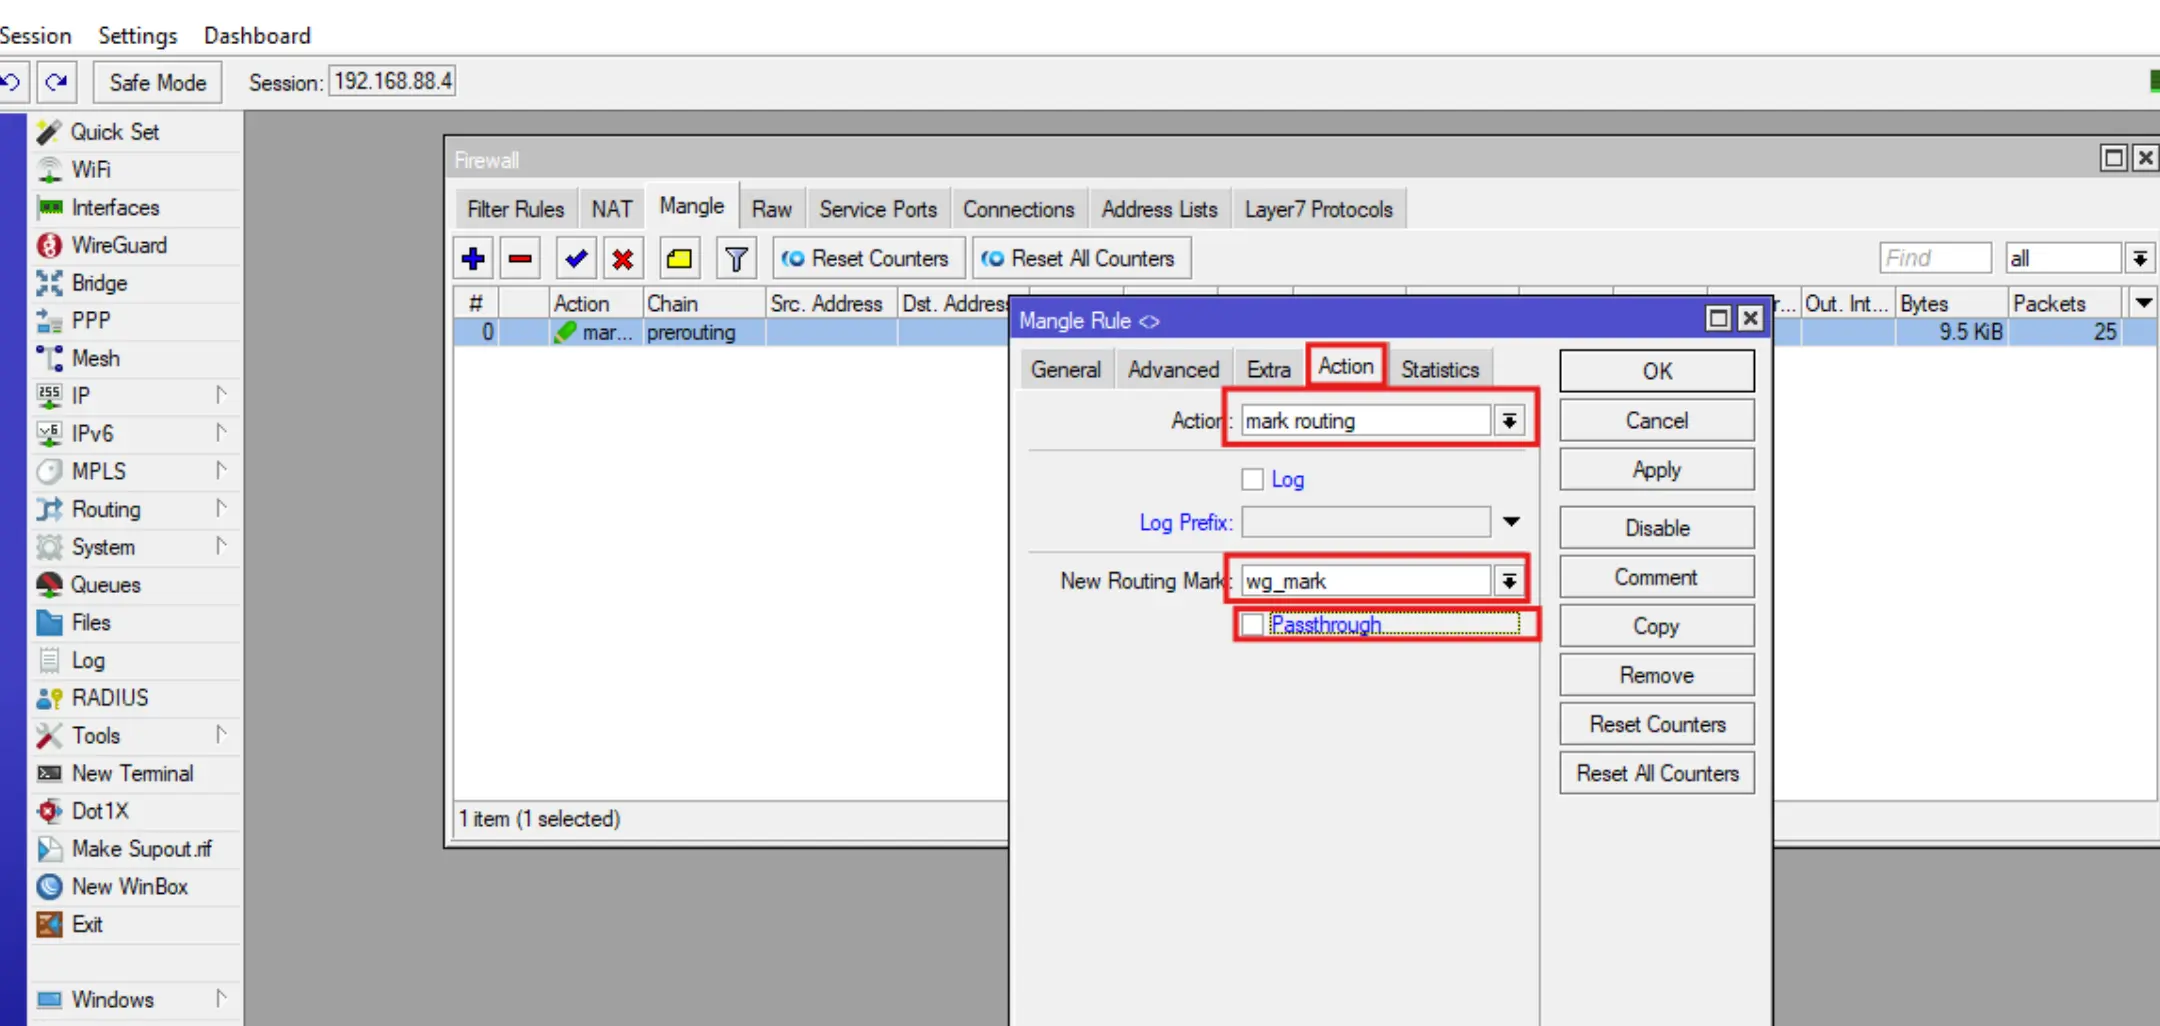
Add a route packet marking rule by going to IP-Firewall-Mangle, click +, then fill in the Chain, Src Address List, Action, New Routing Mark fields and click OK.
3.2 Selective tunneling of VPN Wireguard traffic on Mikrotik.
For selective tunneling, you will need to create new address lists in IP-Firewall-Address Lists similar to step 3.1. The only thing you need to specify in these lists is the site names or IP addresses of the sites you will be accessing via VPN. Mikrotik itself recognizes the addresses of the specified sites and adds (updates after the TTL expires) their IPs to the Address Lists.
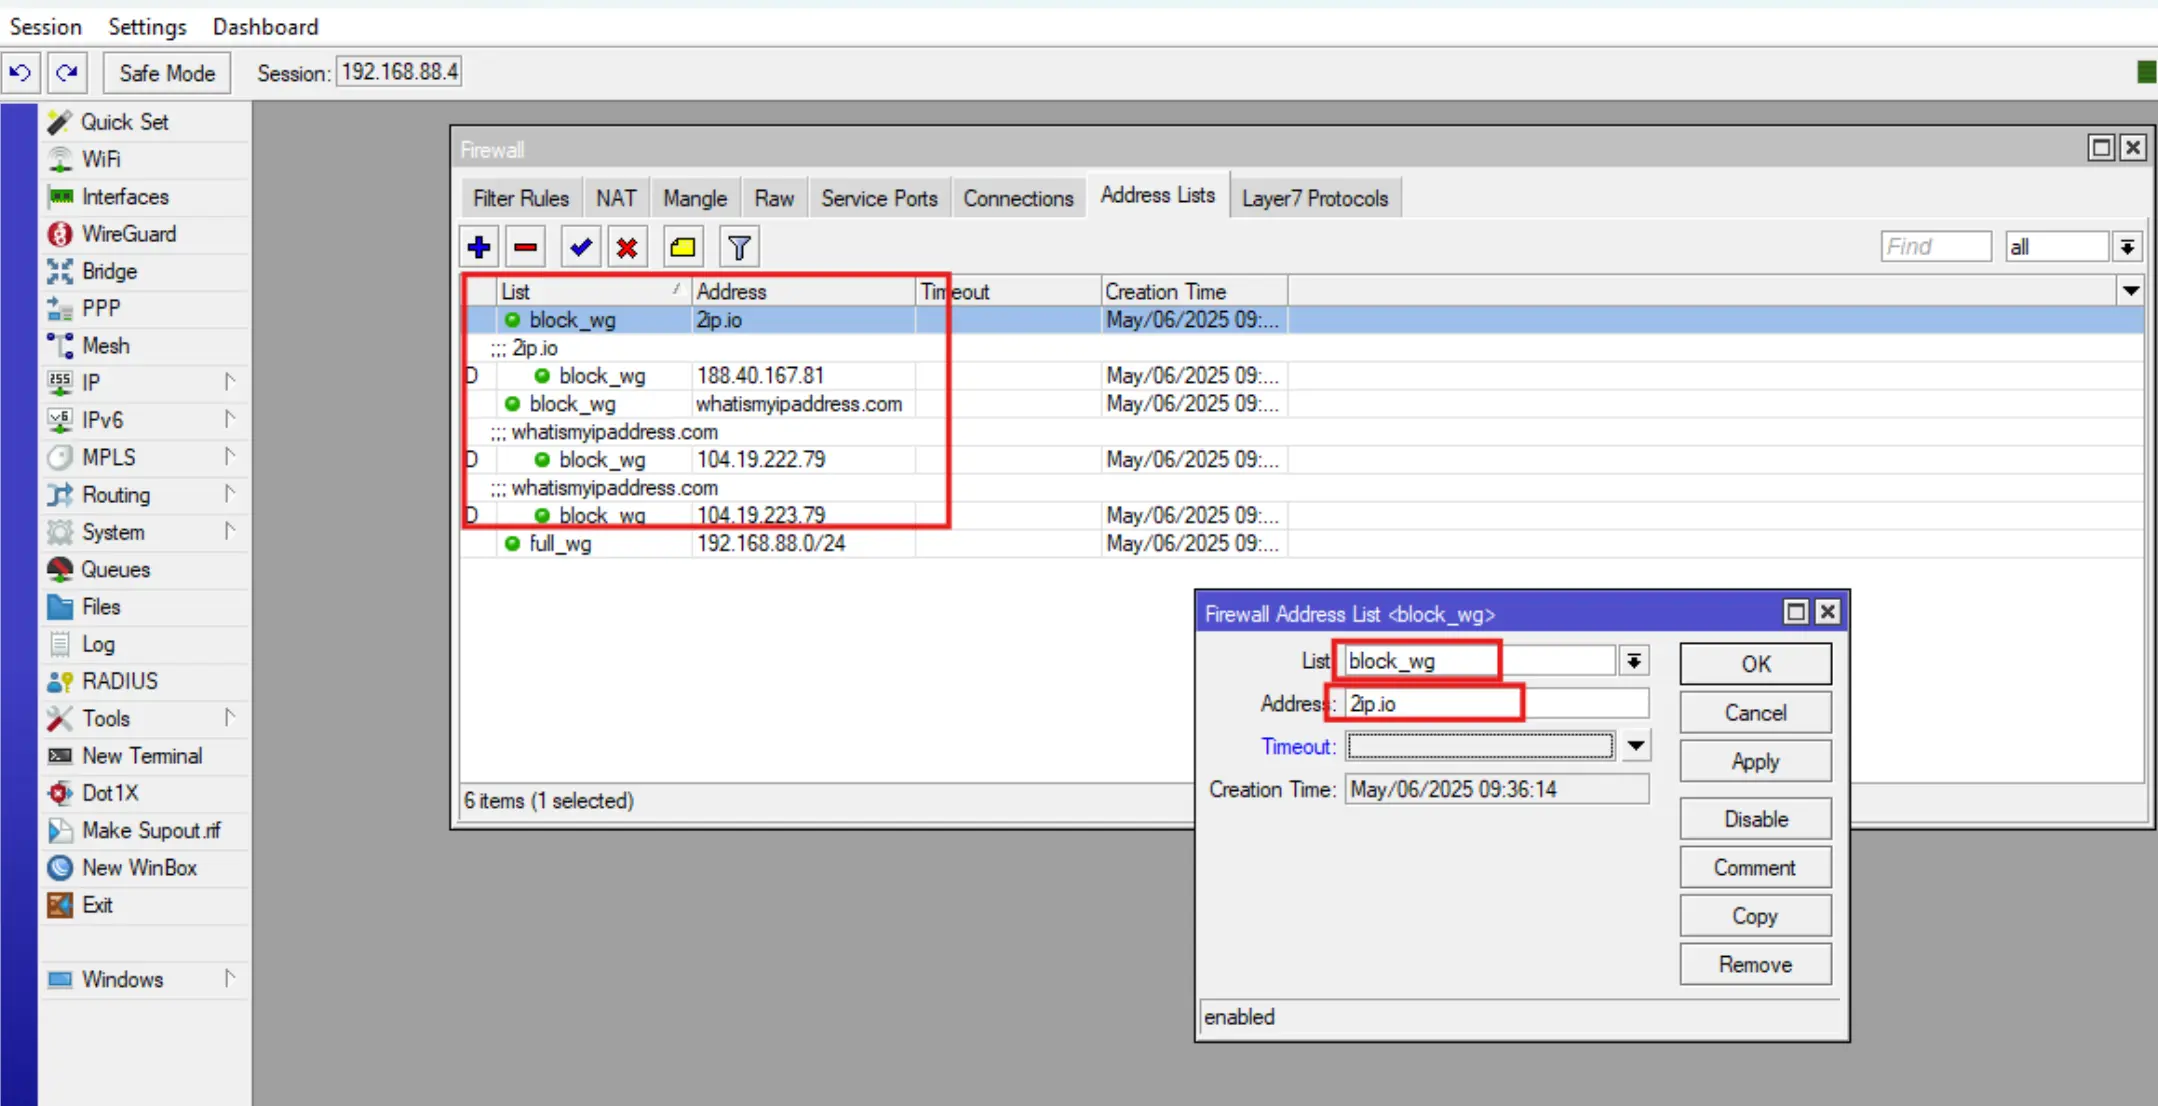
Go to IP-Firewall-Address Lists and press +, then fill in the Name and Address fields. Enter block_wg in the Name field, and fill in the Address field with the name of the site of interest or its IP address. Click OK.
For other sites in the new lists, you will have to specify the same Name as for the first one, but fill Address with a different site name or IP.
Add a route packet marking rule, to do this go to IP-Firewall-Mangle, click +, then fill in the Chain, Dst Address List, Action, New Routing Mark fields and click OK.

 .
.
After following the instructions to the end, check your VPN exactly at https://2ip.io/ and it will show the IP address of your server, because this resource was included in the above-mentioned list. If you open https://whoer.net/ru then whoer will show your real IP.
If the blocked site still won't open, add two address sheets for the same site, one with www. the other without www.
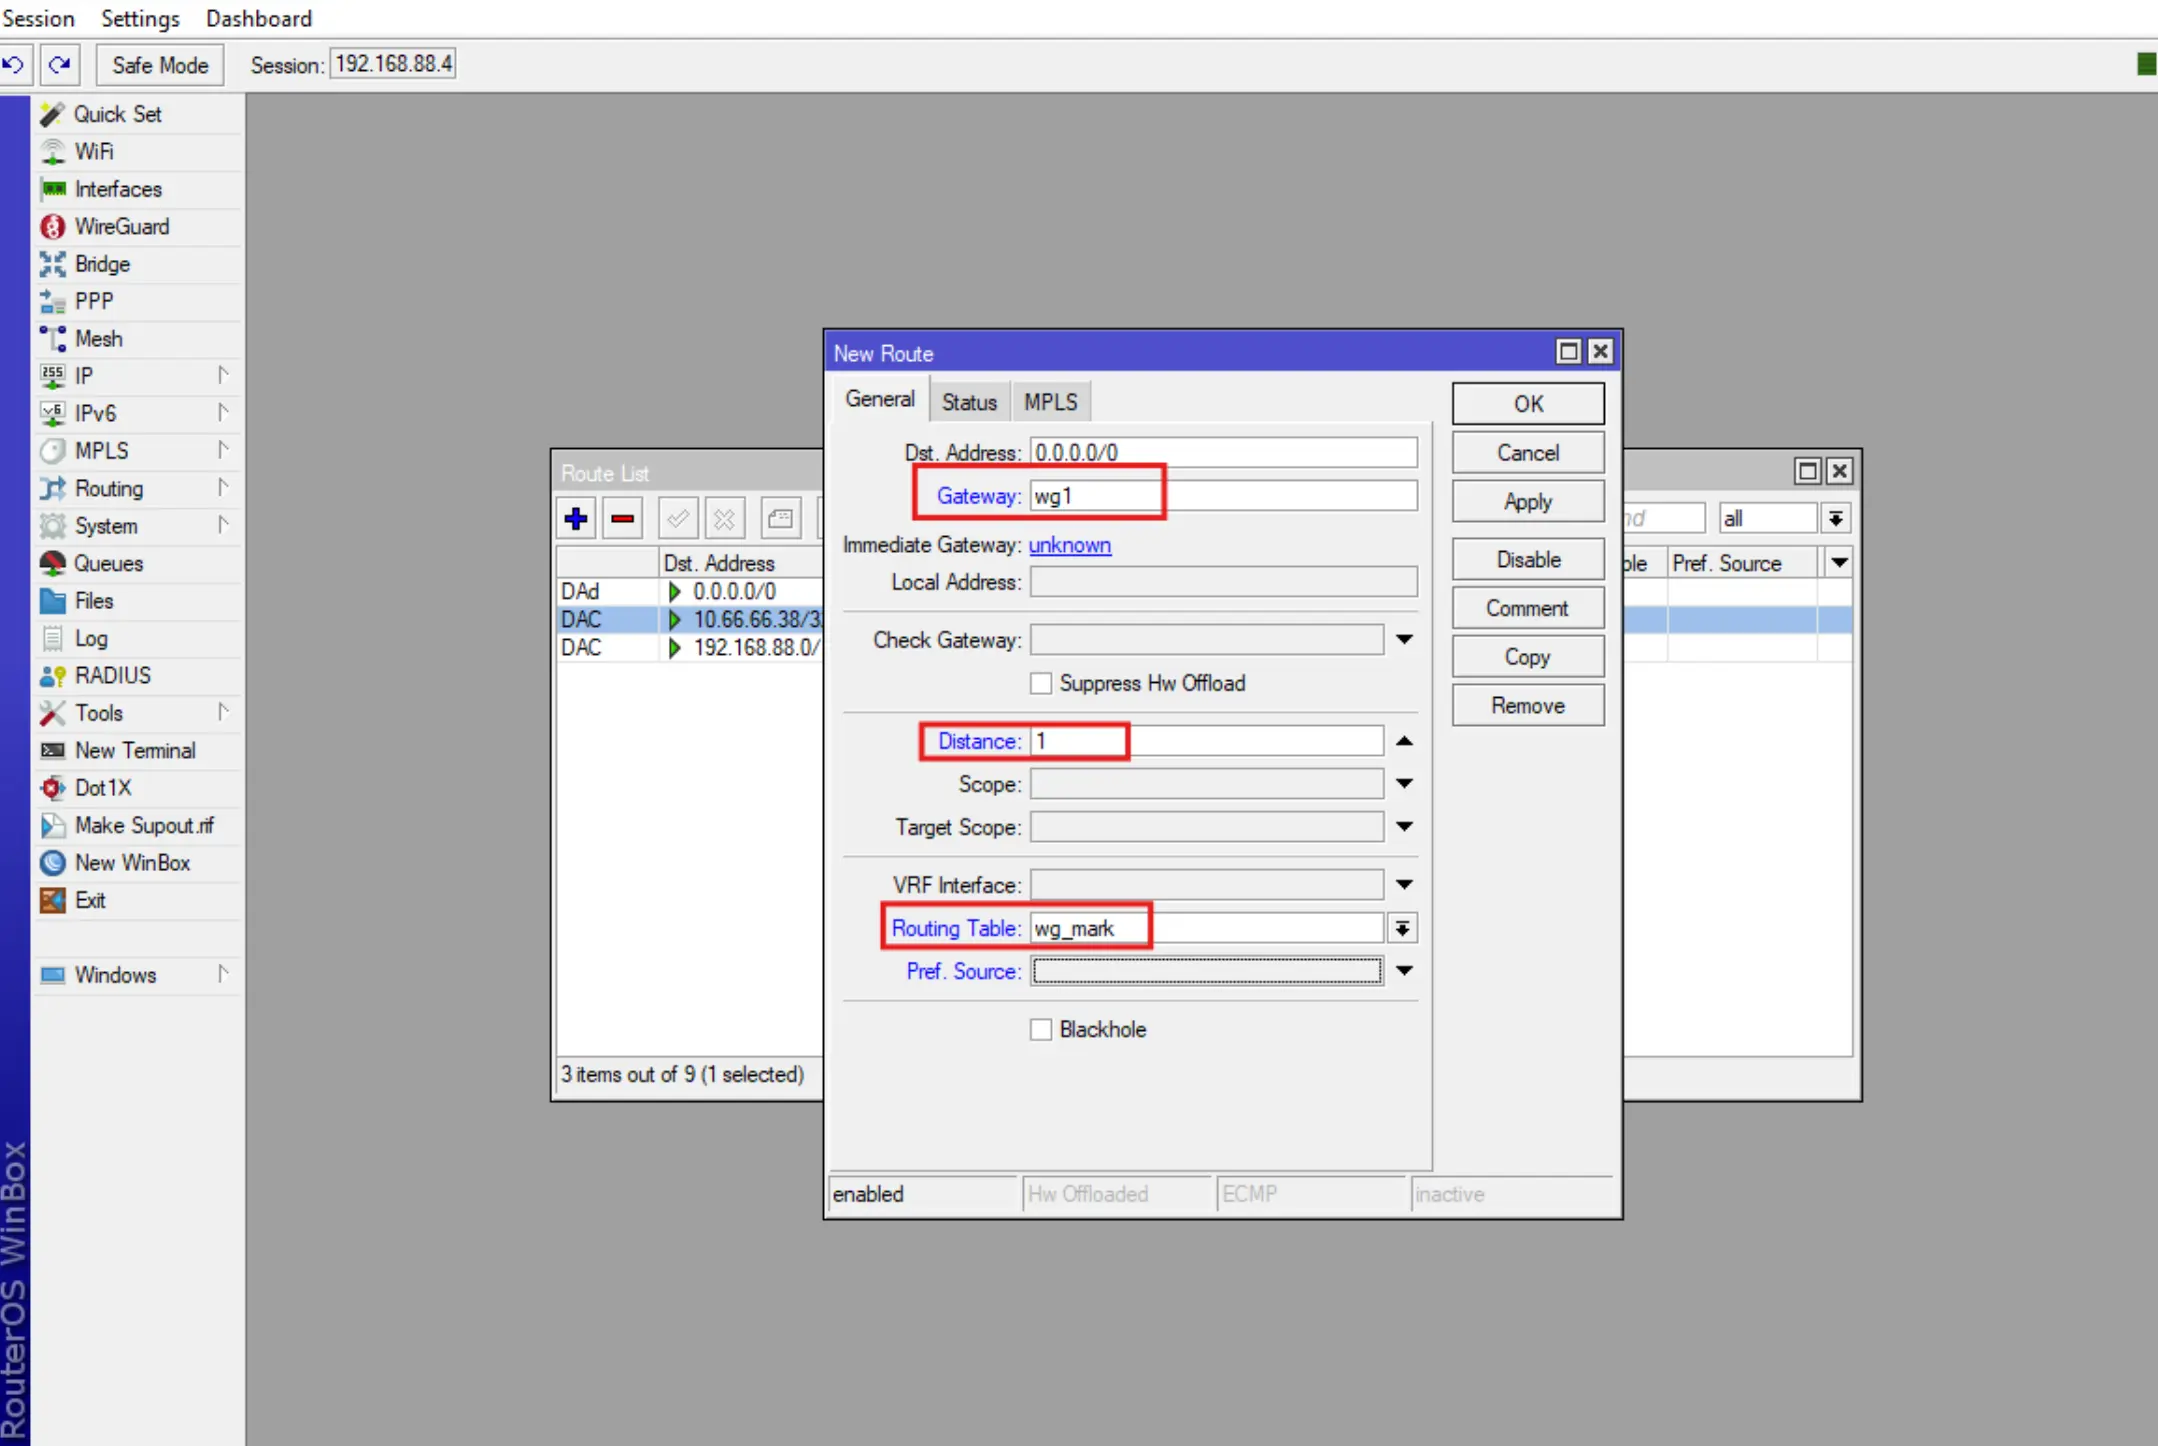
4. Create a routing rule for Wireguard VPN.
Create a new routing rule for the Wireguard interface with the previously created routing table (section 2.3).
To do this, go to IP-Routes, press +, then fill in the fields Gateway, Distance, Routing Table
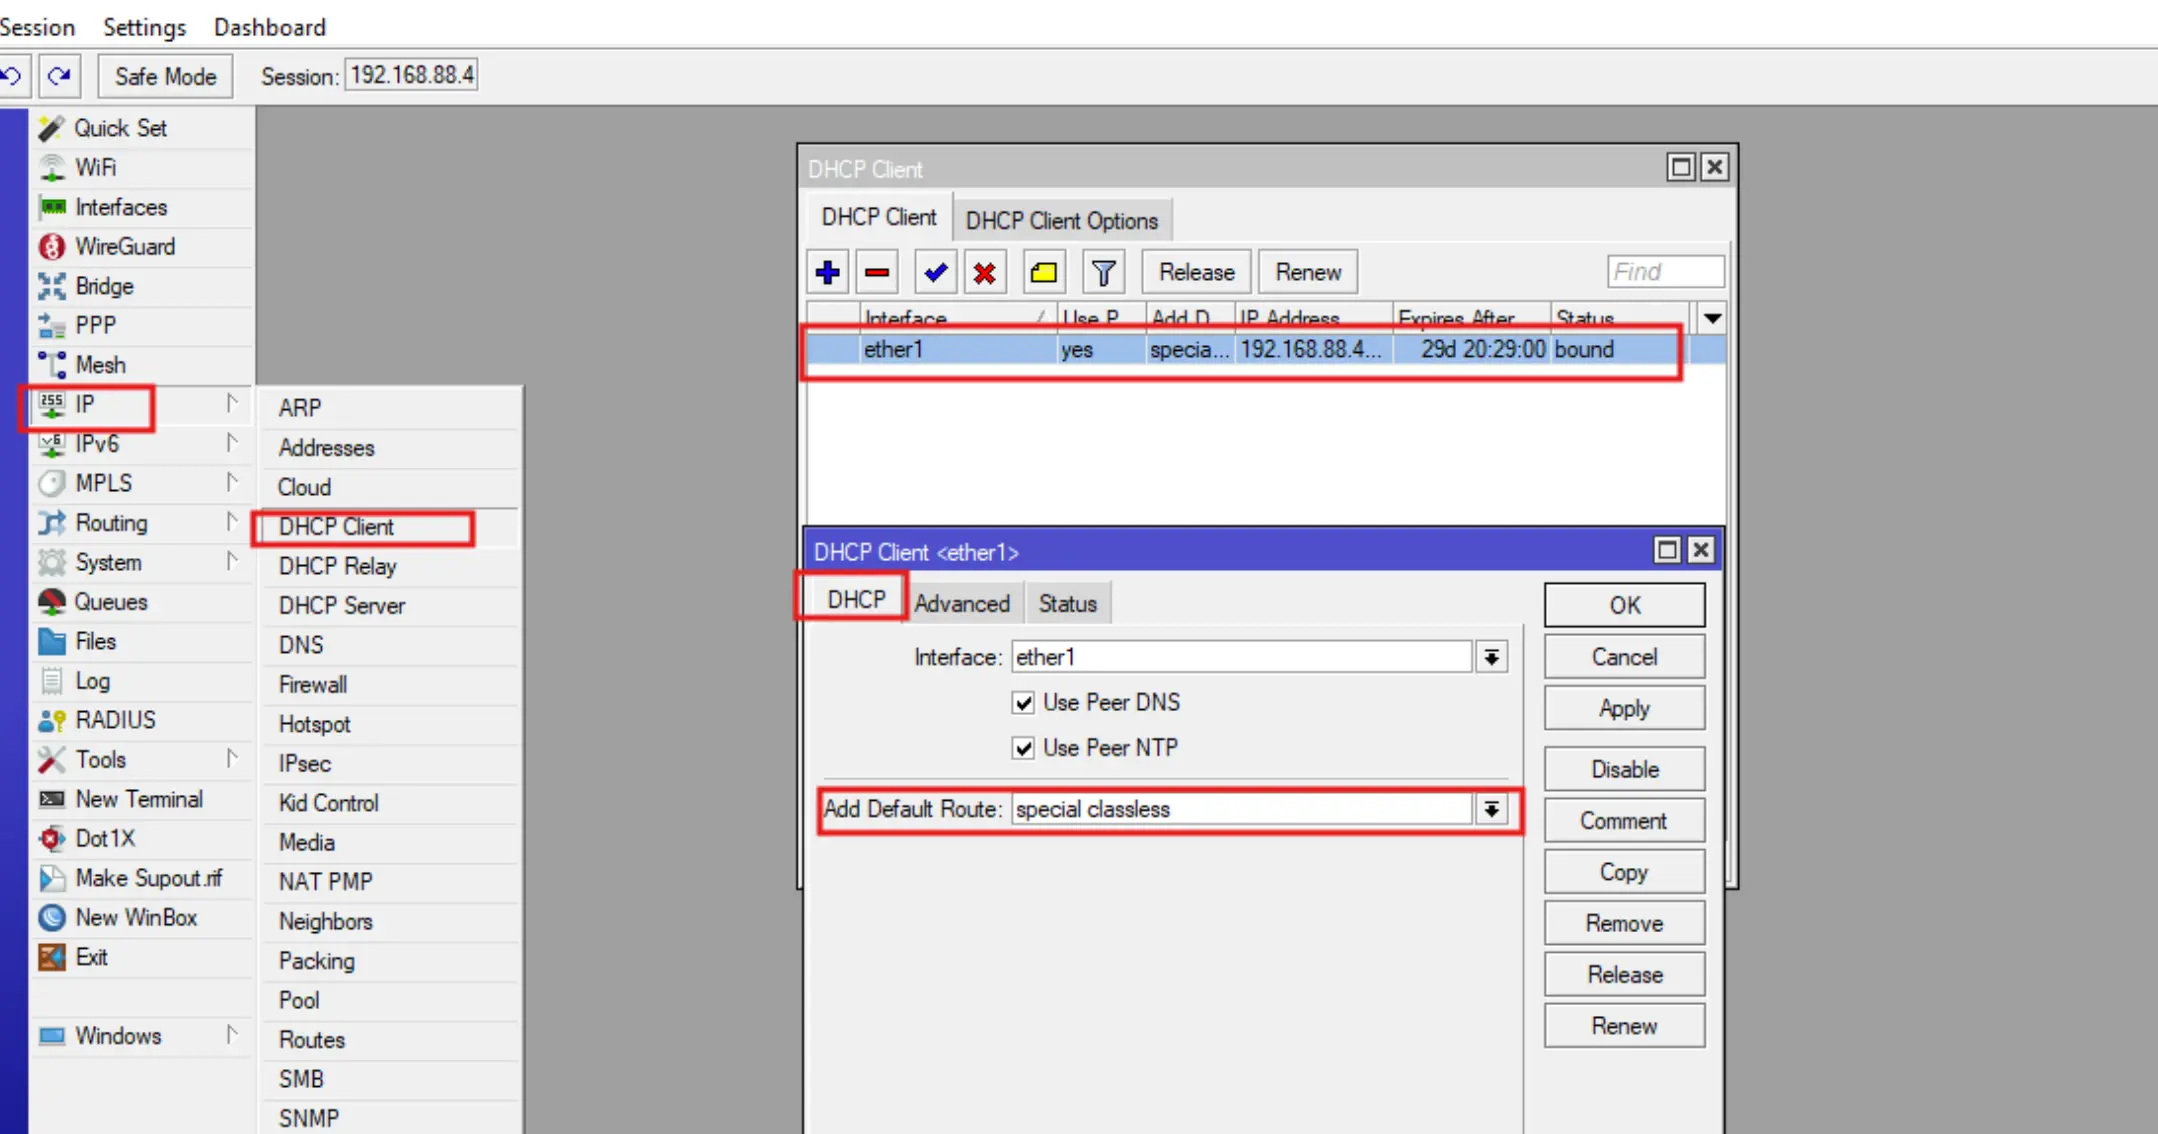
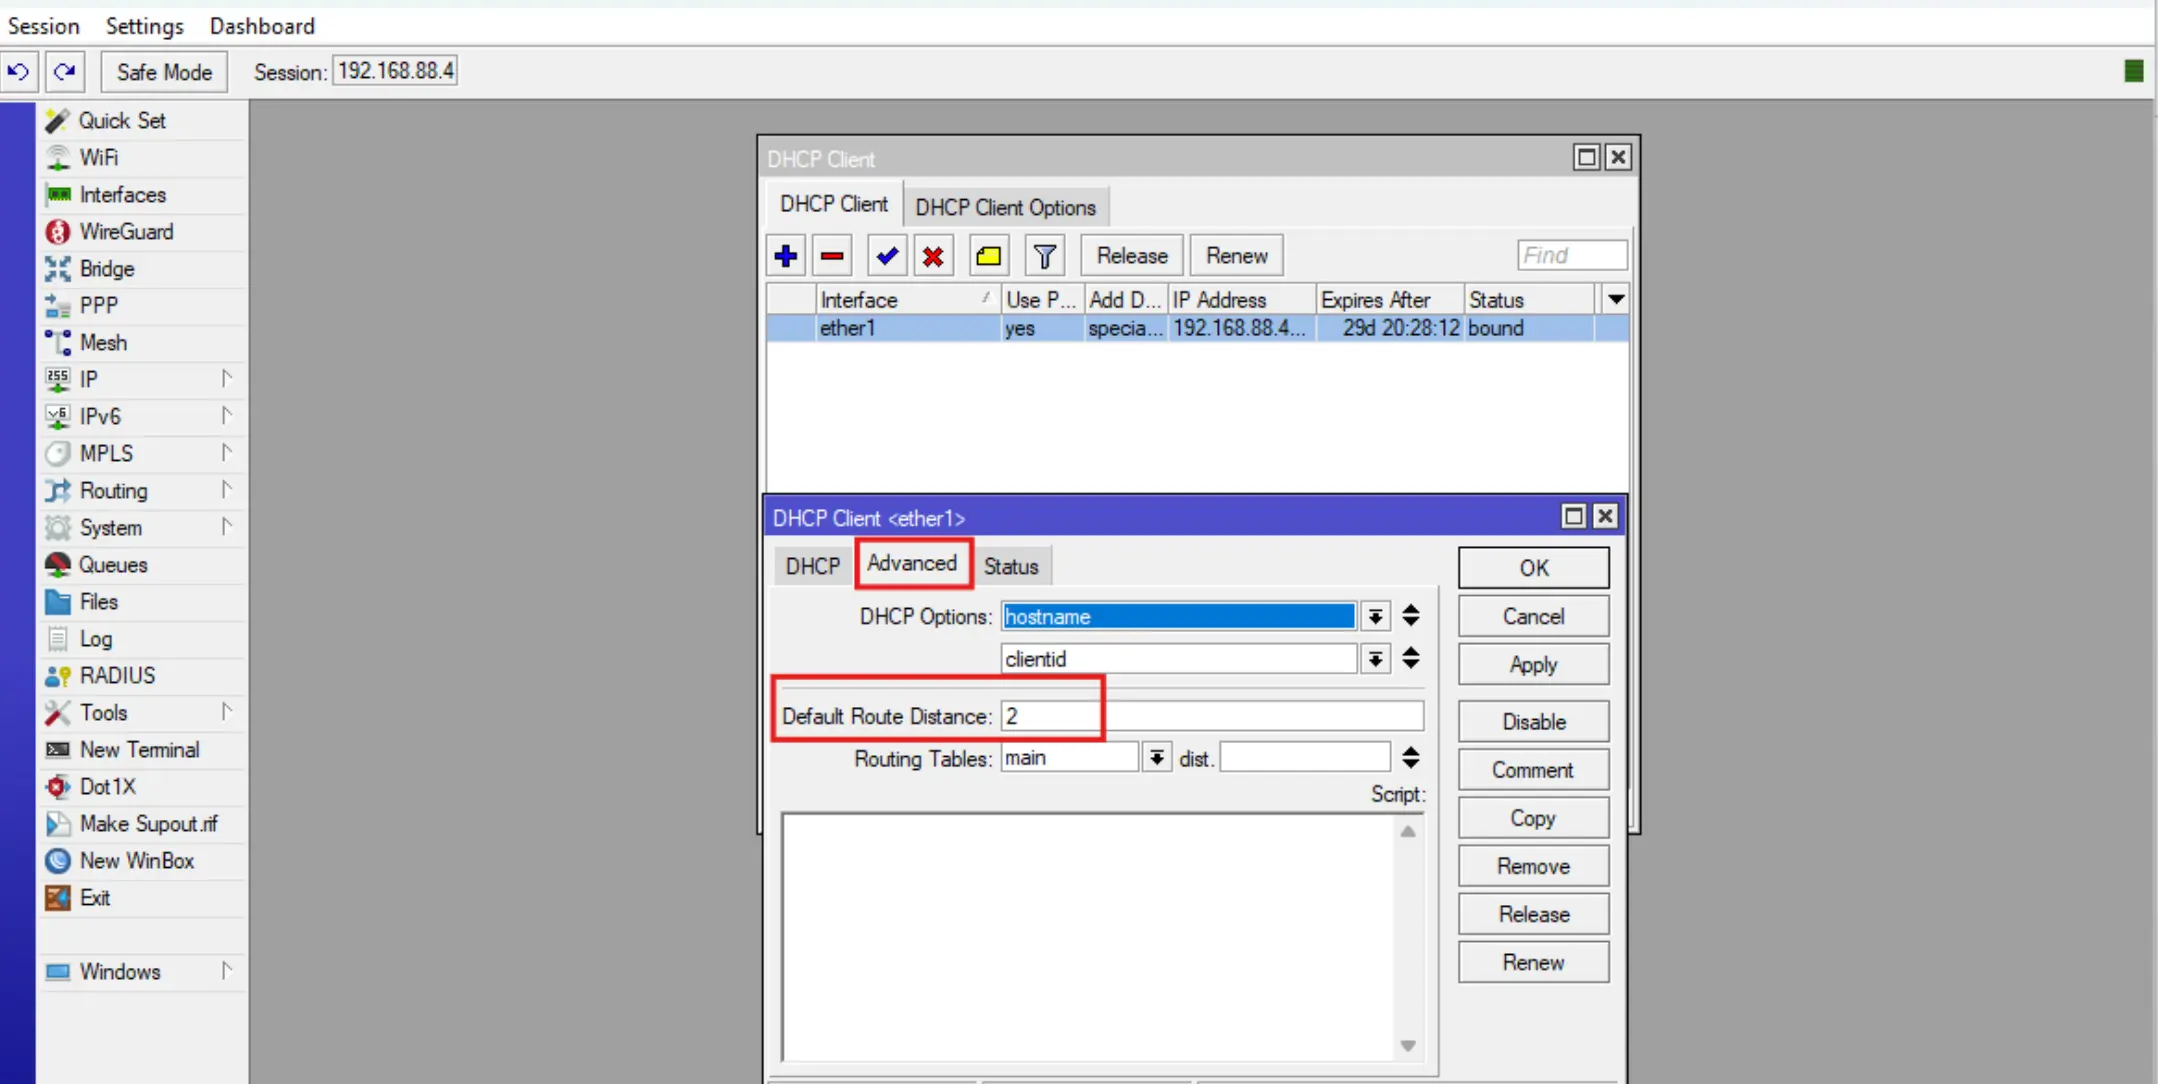
You also need to downgrade the priority of the default DHCP client.
To do this, go to IP-DHCP Client, select an existing DHCP client entry, change the value of the Add Default Route field to Special Classless and specify the value of the Default Route Distance = 2 field in the Advanced tab.
Wireguard VPN connection resolution in Firewall-Nat.
By default Firewall does not assume your Wireguard interface connection and you need to manually write a masquerade rule for it.
To do this, enter IP-Firewall-Nat, click +, then fill in the fields Chain, Out. Interface, Action, click OK.

 .
.
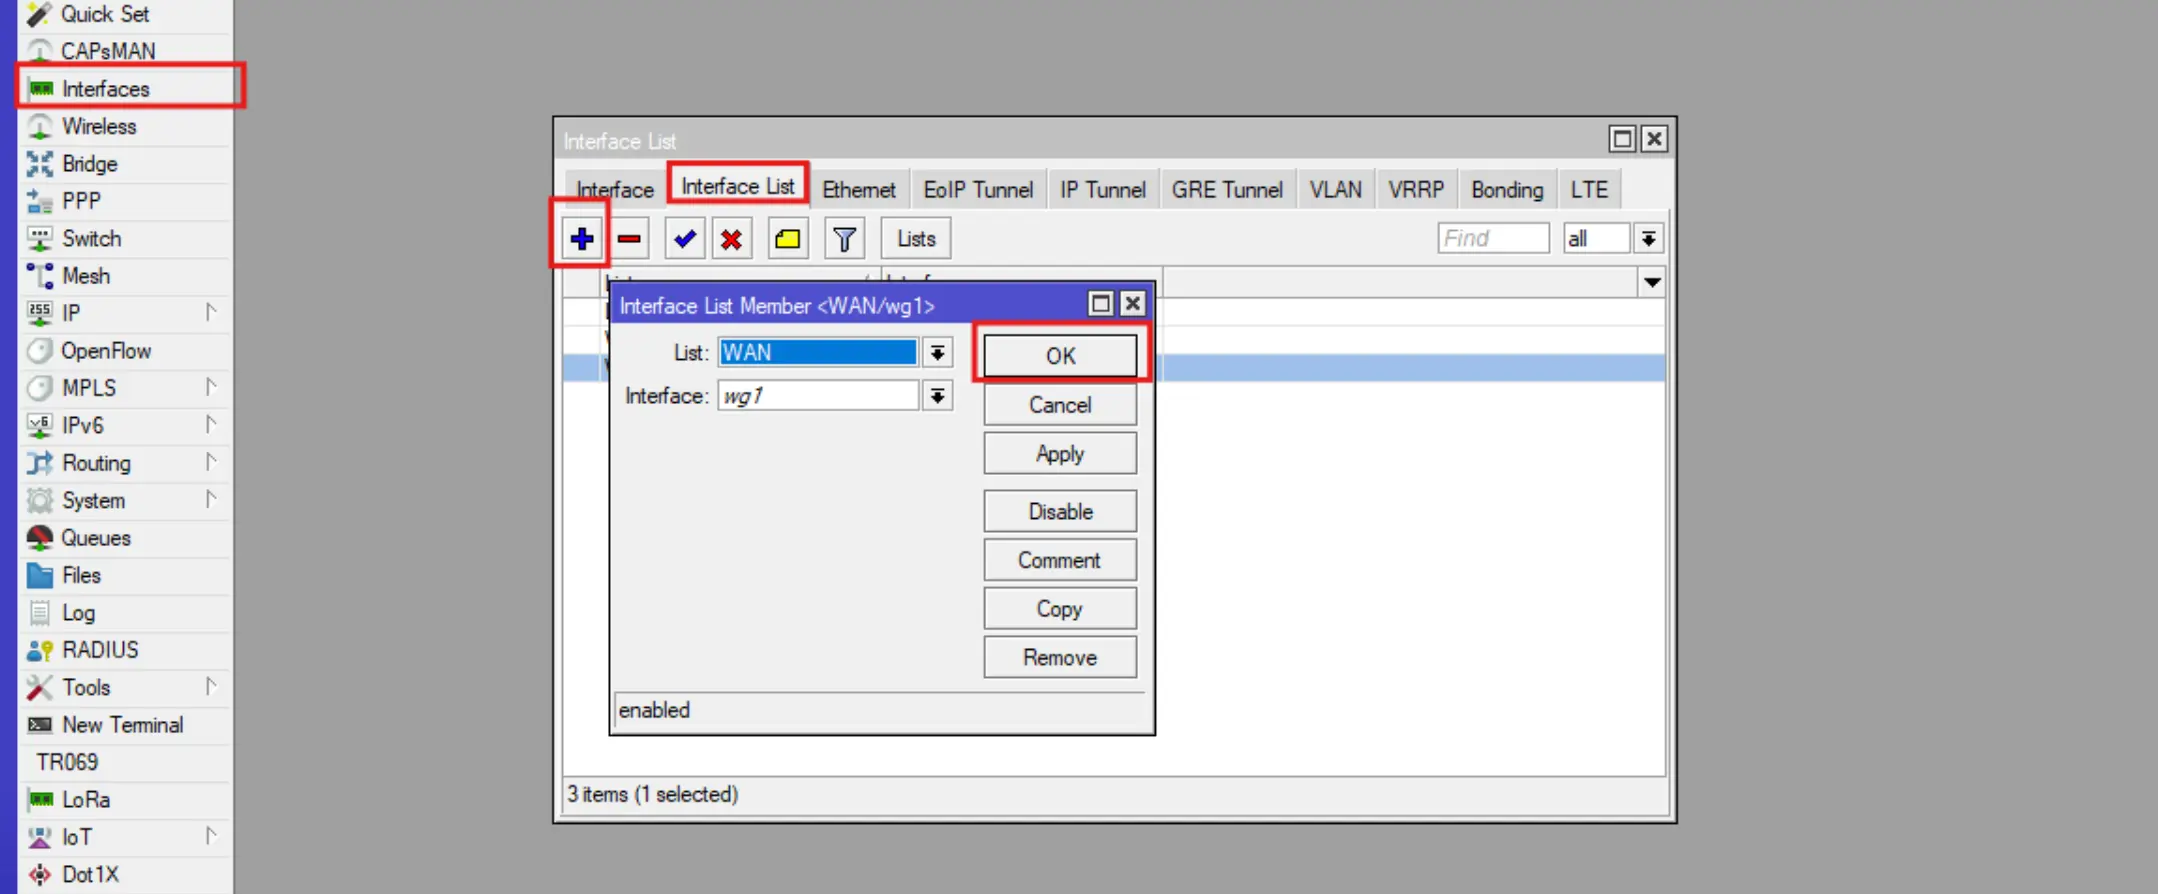
**5. Add WireGuard interface to the WAN list.
Go to Interface - Interface list.
WireGuard configuration on RouterOS is complete. Check your VPN connection https://whoer.net/ru or https://2ip.io/
6. MTU fix for Mikrotik Wireguard (mss clamp to pmtu).
If your Mikrotik with WireGuard installed opens sites slowly or does not open some sites at all, you need to set the correct MTU (How to determine the optimal MTU size?), or you can use the MTU fix.
Info
Use this item only in case of serious problems with loading sites!
Open the Mikrotik console by clicking New Terminal.
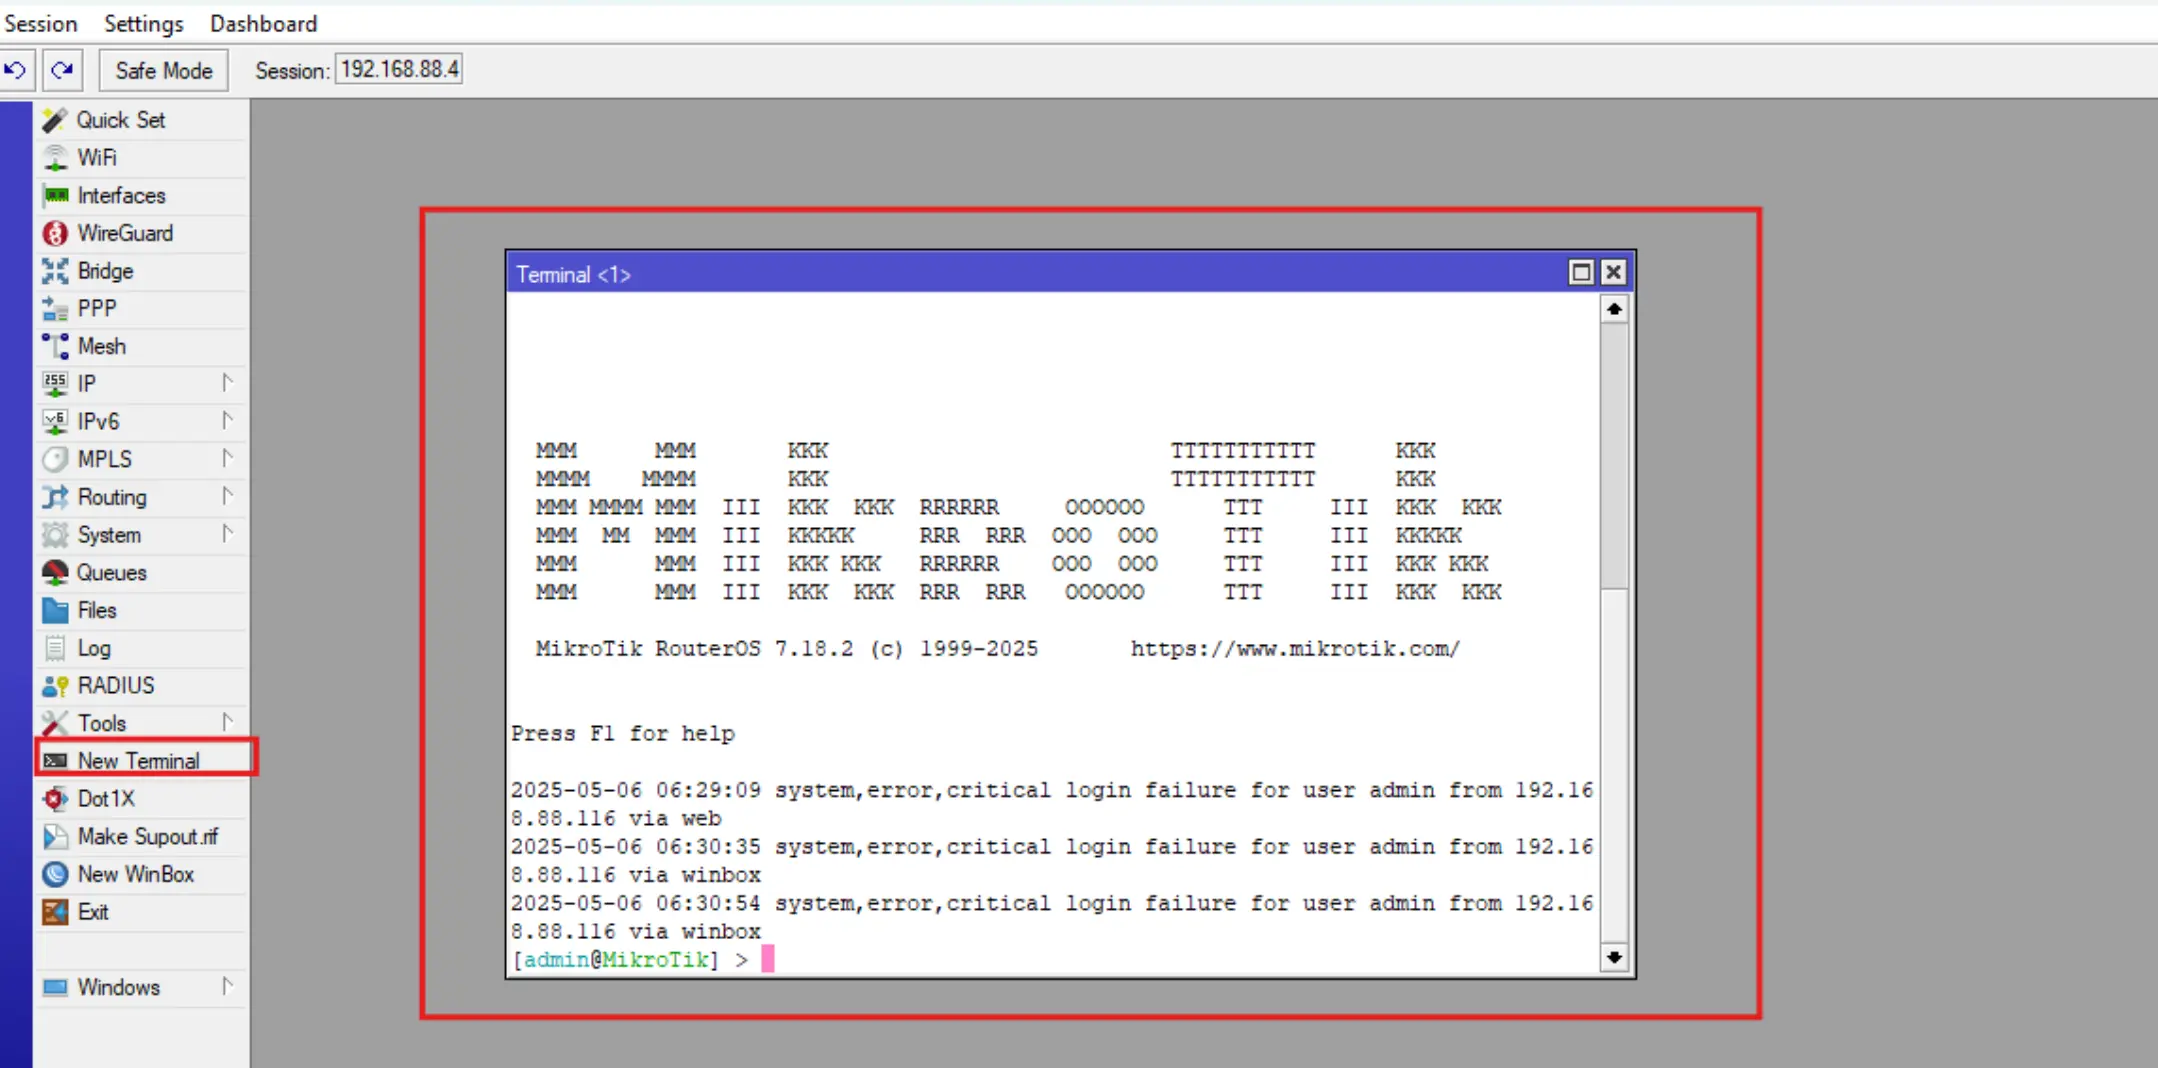
Run the following command:
/ip firewall mangle
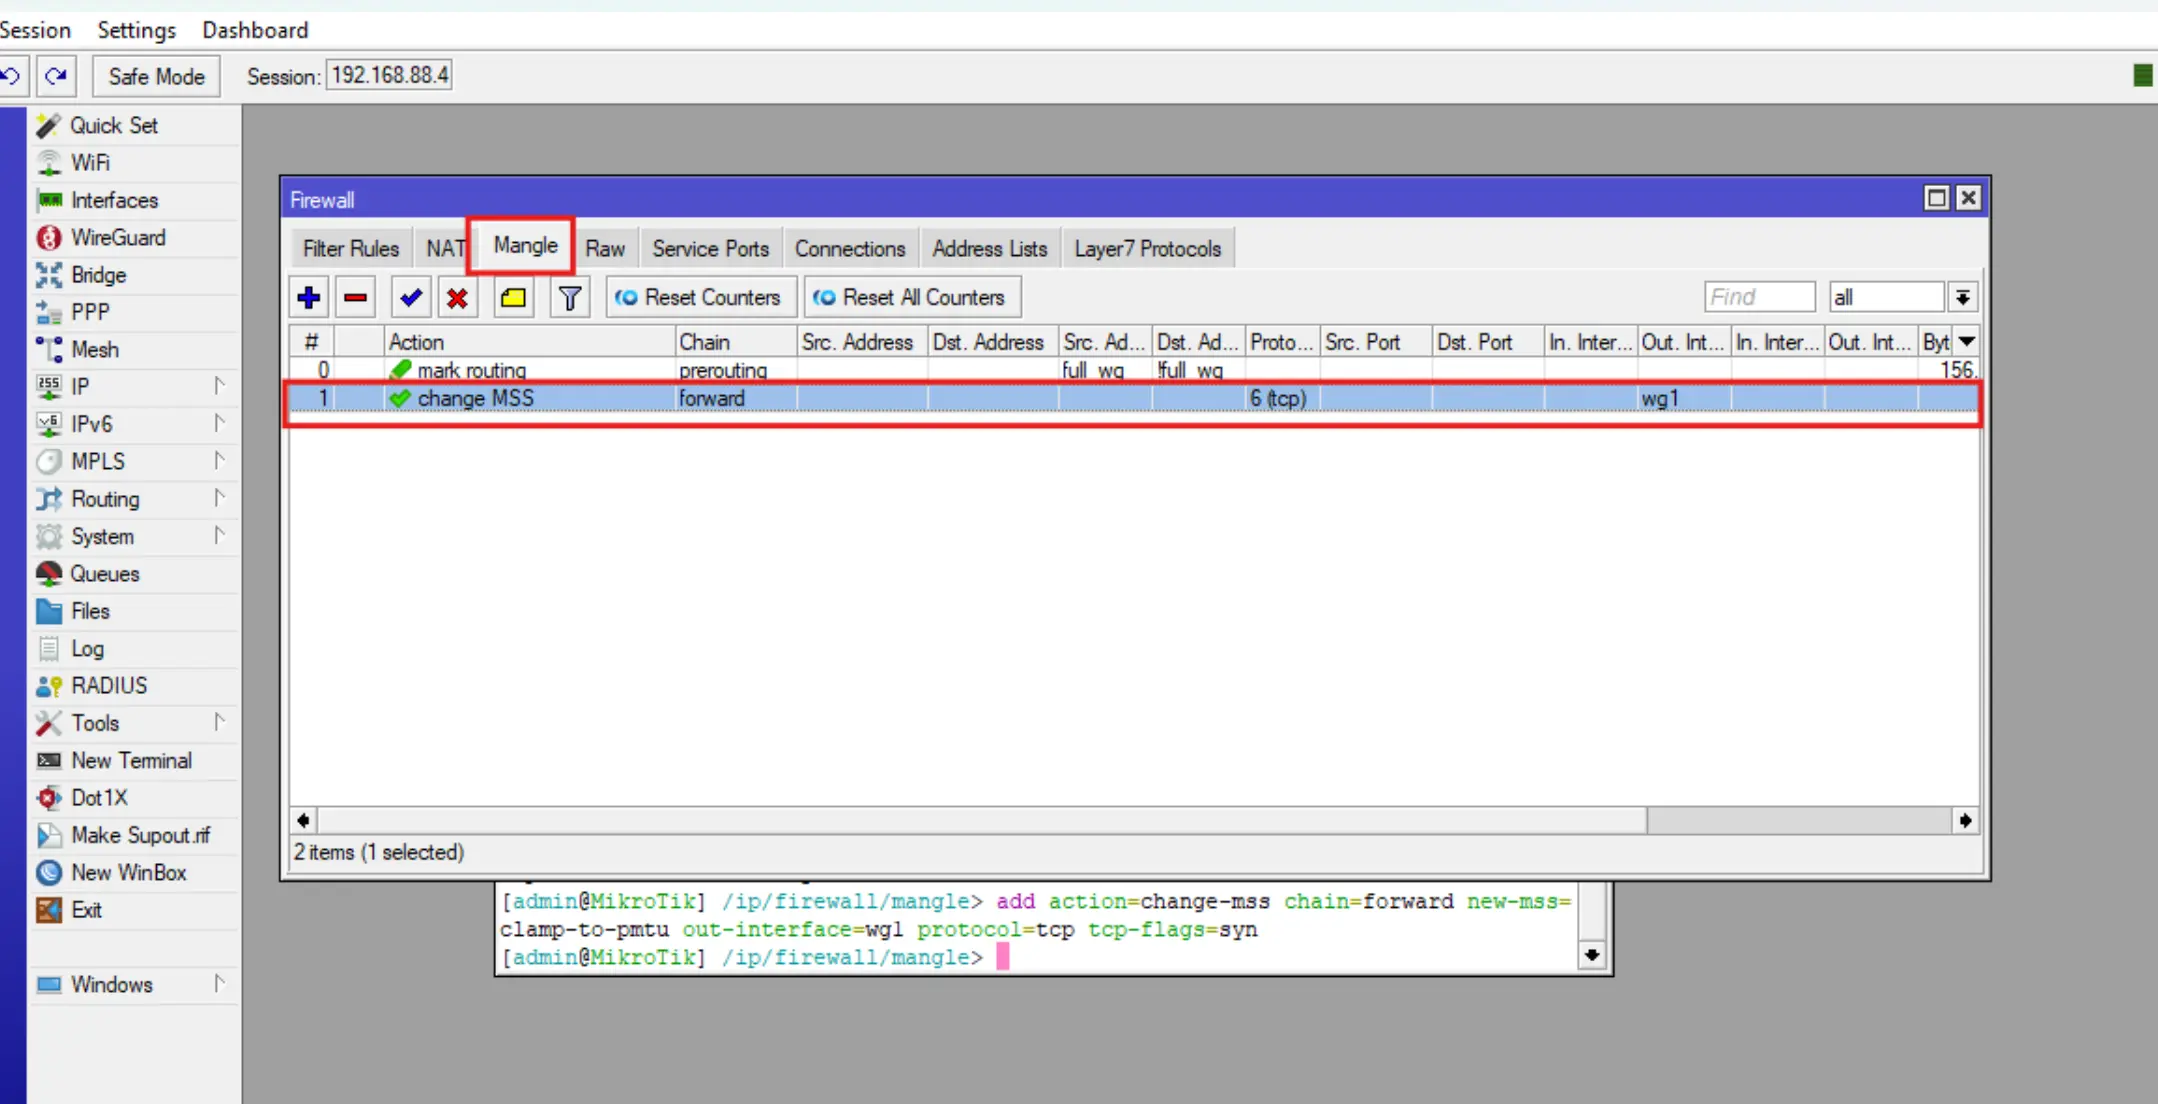
add action=change-mss chain=forward new-mss=clamp-to-pmtu out-interface=wg1 protocol=tcp tcp-flags=syn
Restart the Mikrotik by pressing the Reboot button then press the Yes button. Or use the /system reboot command in the terminal.
This will add the following IP-Firewall-Mangle rule, which fixes the issue of slow and unstable WireGuard on Mikrotik.
Info
If you have any configuration difficulties or have additional questions, you can always contact our support team via ticket system.