Getting Started with Virtual Server and ISPmanager5
This guide will help you do the initial setup in the panel for your sites
After receiving an email with the data to log in to the control panel ISPmanager5, log in to the panel and make the initial setup in a few steps
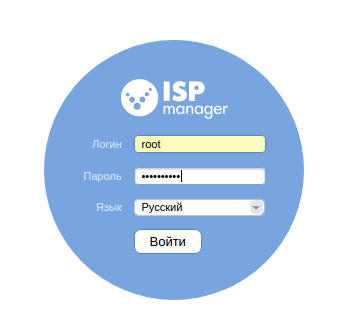
Use "root " as your username, your password is your server password. Here you can also choose the interface language that suits you.
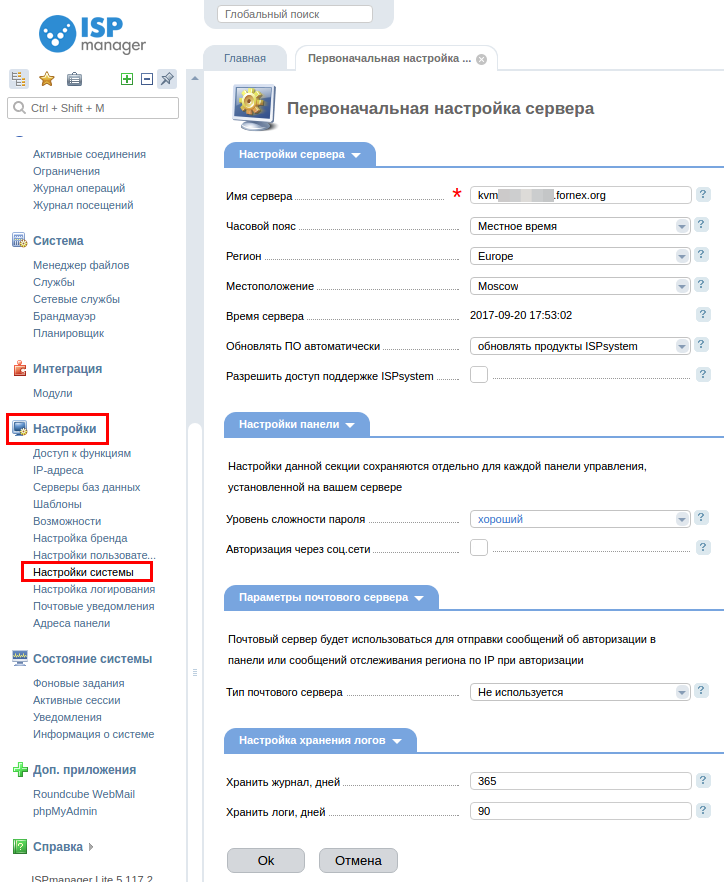
After opening the ISPmanager control panel. Perform the initial configuration of the server and click OK
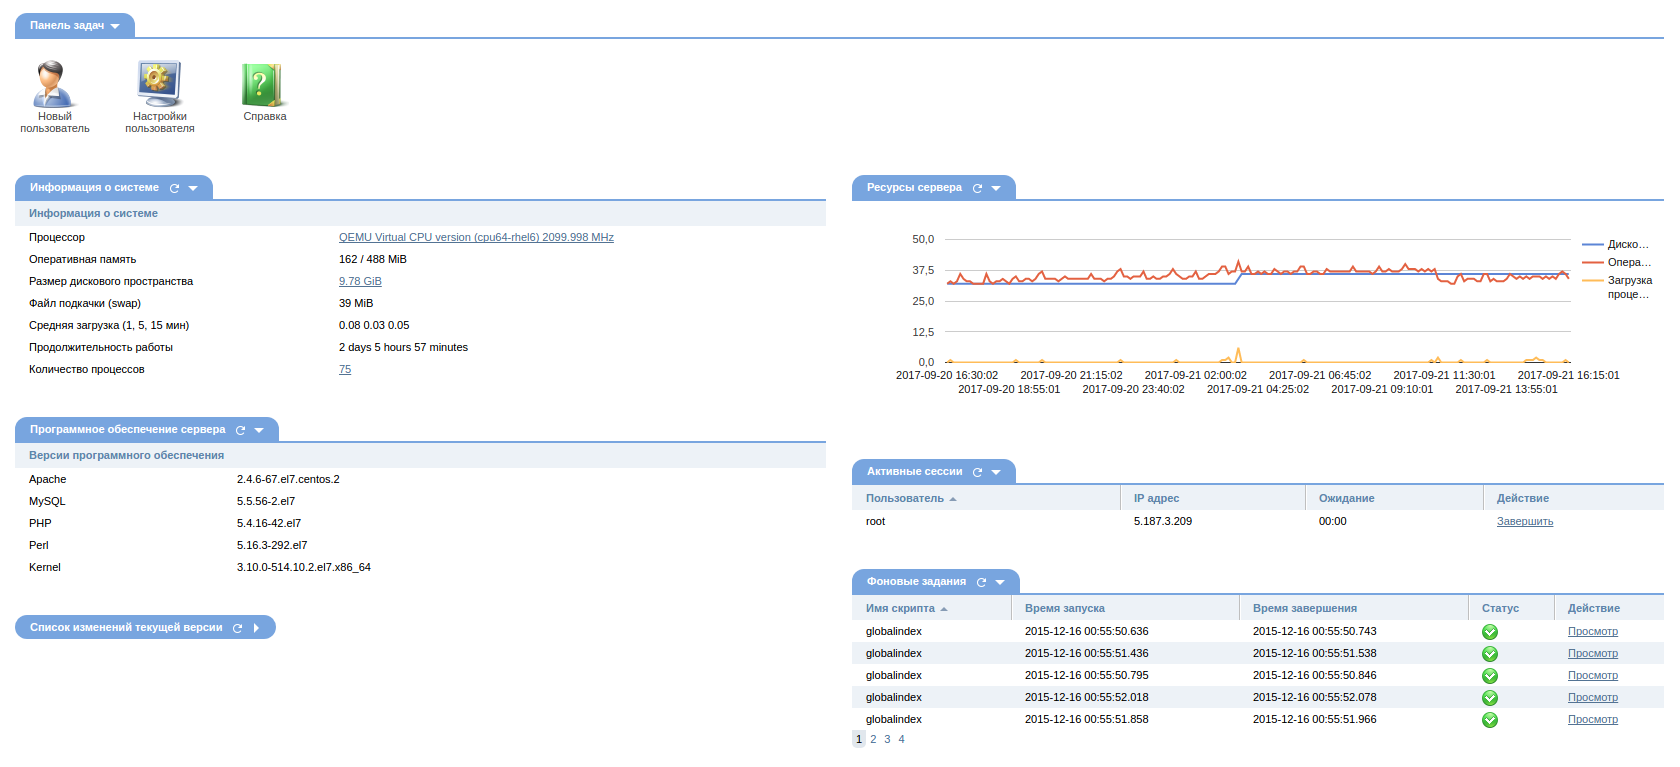
After the setup is done, you can see a summary of the system, from where you can look at the server load, software status, and other parameters
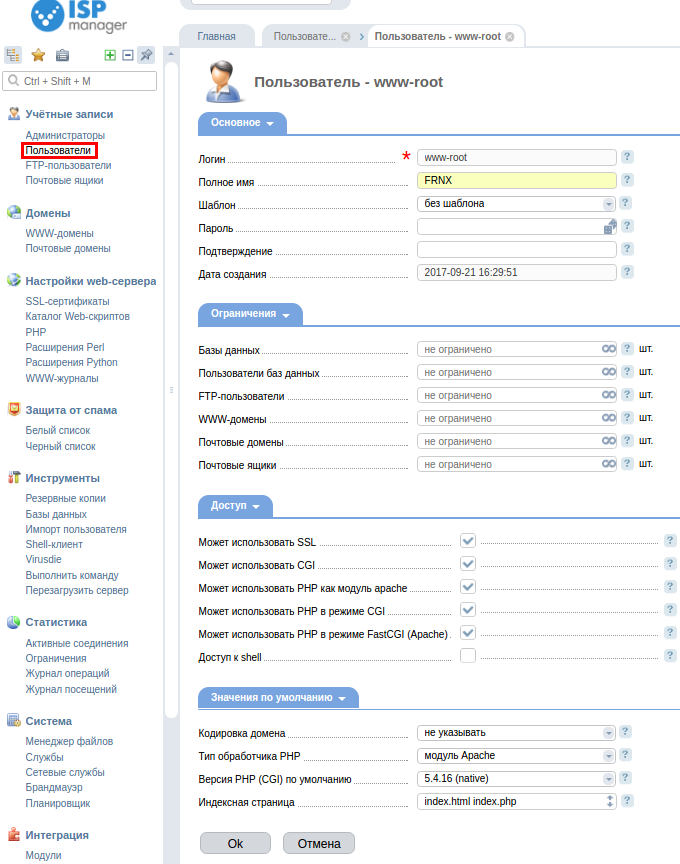
Create a new user under which to host the site and select the features that will be available to it:
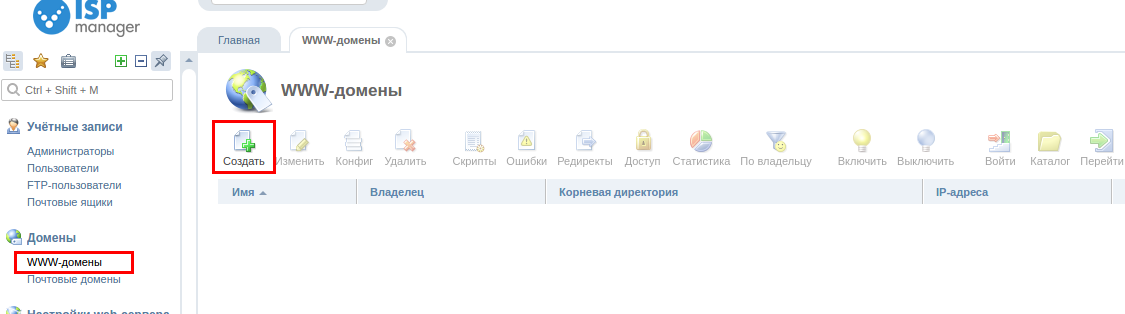
Now you need to set up the domain of your site. Go to the WWW domains tab and select Create:
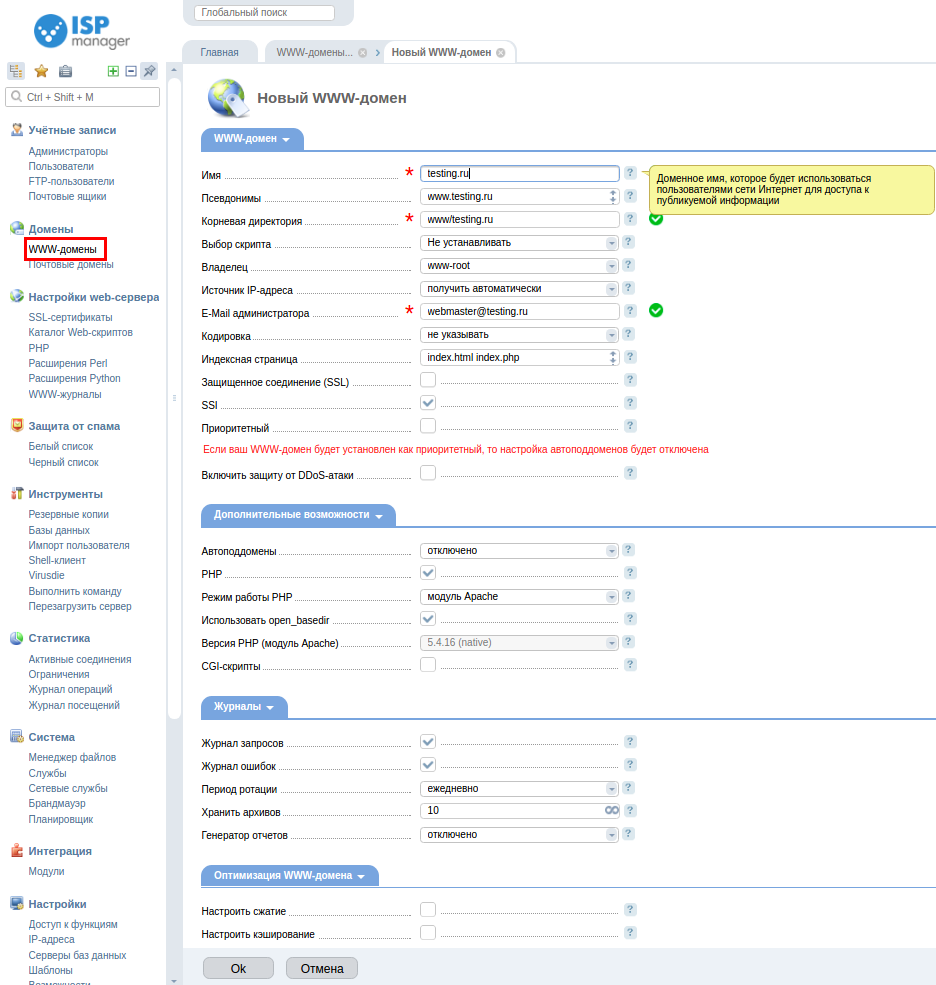
Specify all necessary parameters and click Ok to attach the domain: From the mandatory fields you need to specify the name of the domain, you can also make it a priority using a checkbox.
Create a mail domain if we are going to use the mail on the server.
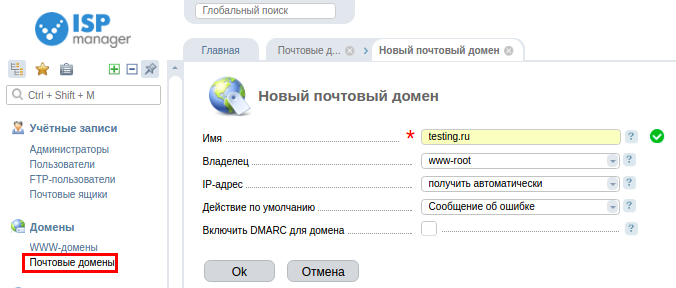
The email domain setup, can be found here.
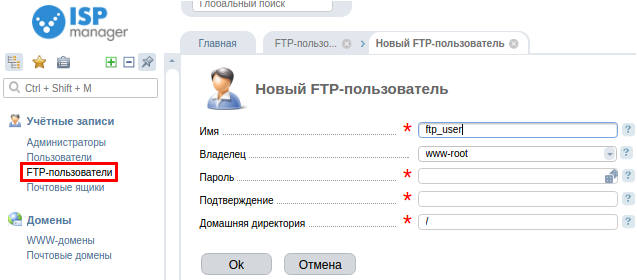
To upload your CMS files to the site space, you can use FTP access To do this, let's create a FTP user.
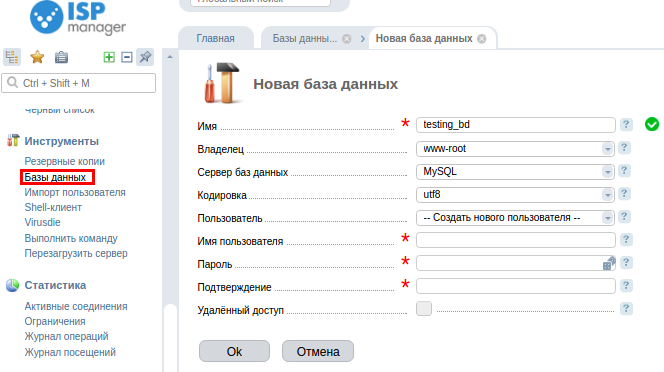
Now create a database, in the window that appears, specify the database name, the database user name, and the password for the database user. Leave the rest of the parameters as they are.
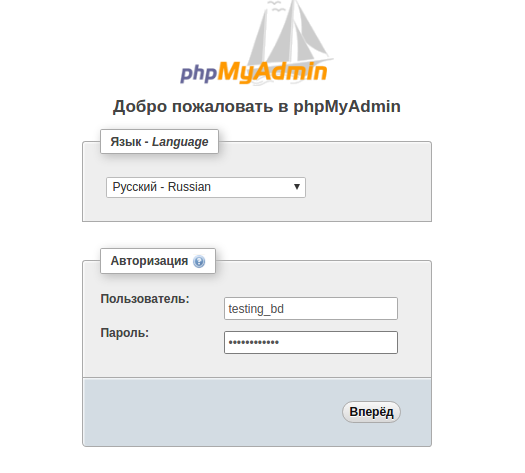
Performing a database import. To do this, go to phpMyAdmin and enter the username and password of the previously added database:
This completes the initial setup After the health check you need to add your site to our DNS panel, see how to do this here - DNS Settings
This guide for the updated ISPmanager5 design starting from version 5.261.0 is available here.
If you have any additional questions, you can always contact our support team via Ticket System.