Getting Started with Virtual Server and ISPmanager4
This guide will help you do the initial setup in the panel for your sites
Initial configuration of ISPmanager on VPS*
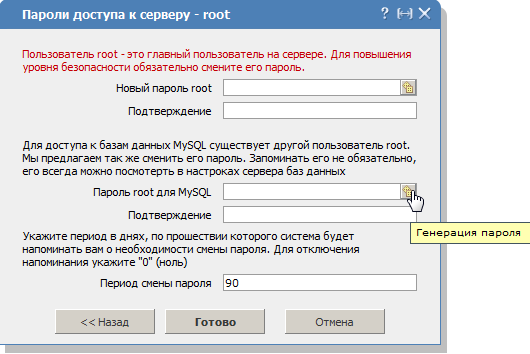
After you receive an email with the data to log in to ISPmanager, you will need to log in to the control panel and make the initial setup in a few steps (you may just click Next).
You may change your root password for SSH/ISPmanager access, and you will need to generate a password for the MySQL root user:
Add user (site owner) for FTP access
Next, in the Users menu, click on the icon and create a new user:
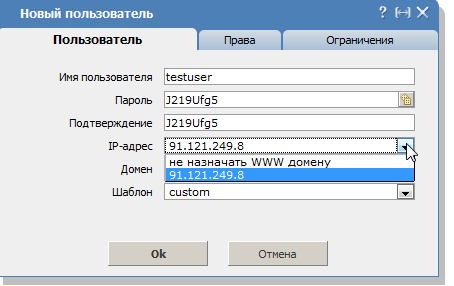
Consideration: leave the Domains field blank, and in the IP list select the IP address given to your server.
Attention: write down the password for this user, it is under this password and this username you will be able to log in via FTP.
After that go to the Rights tab without closing this window and check PHP as an Apache module:
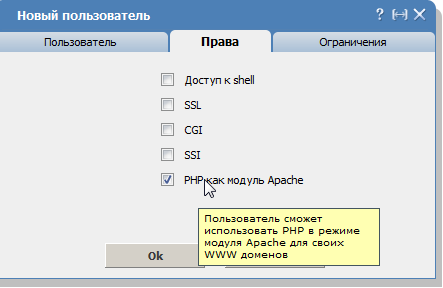
Click OK and you will see the created user in the panel.
Create Site
Then go to WWW domains and click to create the site. For example test.com:
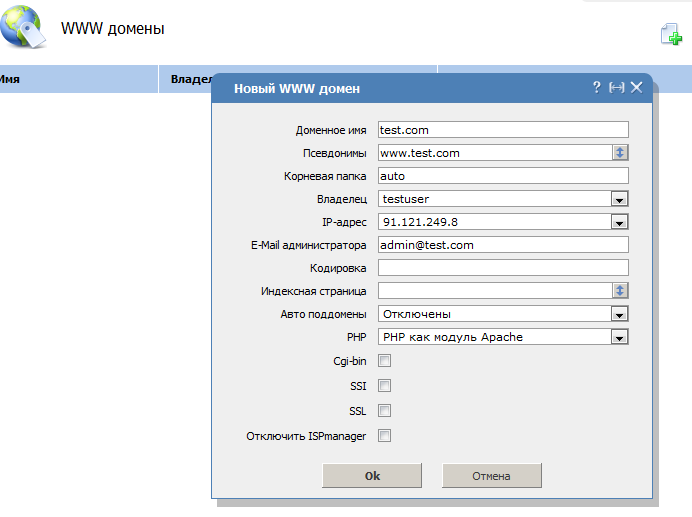
Choose PHP as the Apache module, fill in the site name test.com and enter the administrator's email admin@test.com (or your email for your site)
Note:* if you do not add admin@test.com mailbox (or your email for your site) to mail addresses - then mail is not sent from the site. Requirement of ISPmanager panel.
Note:* if you see the error Internal Server Error after you click OK - click to close the window (cross right above), then press F5, log in to WWW domains, click edit site and fill in blank fields in site settings according to the picture above. This bug is encountered in the ISPmanager, we can not affect it.
Generating a mailbox
Next, go to Mail Domains and check if our site is here, if it is only localhost - then add a new mail domain and click OK:

Next, add the mail user of our choice (the one we entered in the site settings in the mailboxes). Go to the menu Mailboxes and add the user:
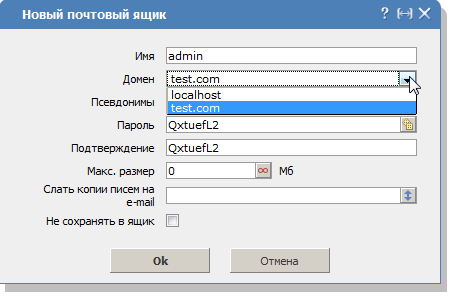
Enter the name we chose: admin, then choose our domain test.com in the list and generate a password. If you need a forwarding, fill in the appropriate fields.
Create databases
Go to Tools → Databases menu and create a database
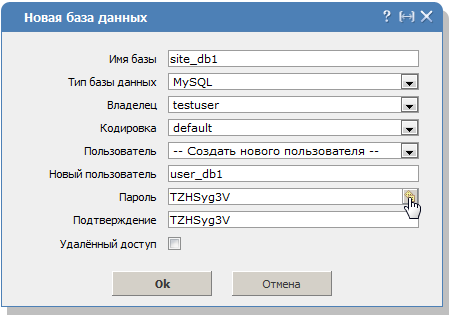
You choose the name of the database (in our case site_db1), choose the encoding for your database (if you don't know leave Default) and enter the user name (in our case user_db1) and password to access the database. Then click OK.
It is under this user you will be able to enter phpMyAdmin - Menu Advanced Applications → phpMyAdmin
This completes the initial setup and you can copy the data to your VPS and download the database. After checking the functionality you need to add your site to our DNS panel, how to do this see here - DNS settings