Switching to HTTPS in WordPress
Description of translating the site to HTTPS in CMS WordPress
To enable HTTPS for the admin panel, you need to put the following line in wp-config.php, which is stored in the root folder of your WordPress build:
define('FORCE_SSL_ADMIN', true);
You can test if HTTPS works by going to https://mysite.com/wp-admin/
Next, migrate the frontend to HTTPS. It will be difficult to migrate everything to HTTPS at once, so it's better to do it one by one and start with one page.
There is a plugin that allows you to do this - Easy HTTPS Redirection (SSL), with it you can enable a forced login to the admin via https, configure https only for certain pages / records, or for specific addresses by regular expressions, delete all non-https content from the page, change the outgoing links from http to https versions of sites, and so on.
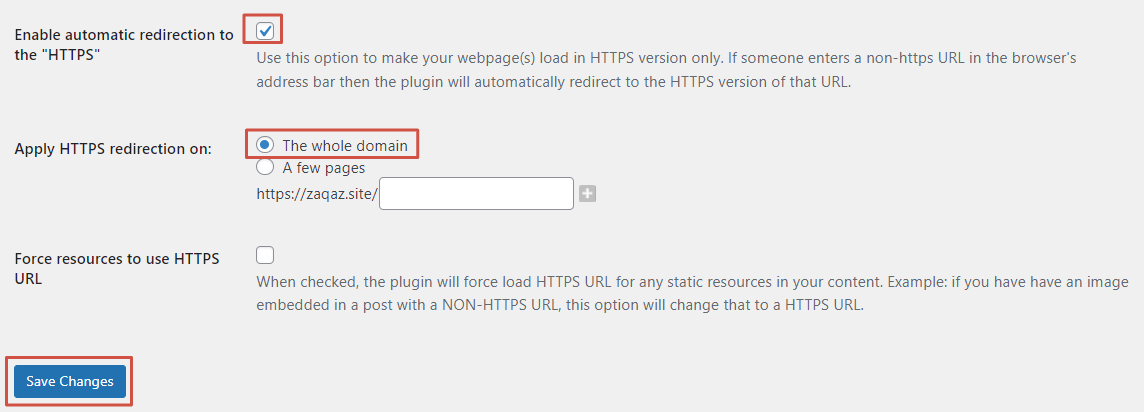
Next, you need to get rid of the Mixed Content notifications
To see this information, open debug mode in the browser by right-clicking → view code and select the tab "Console " in the list on the right.


Next, we get a list of our errors listed as Mixed Content.

Individually fix all of the specified problems.
Correct HTTPS links in the site database
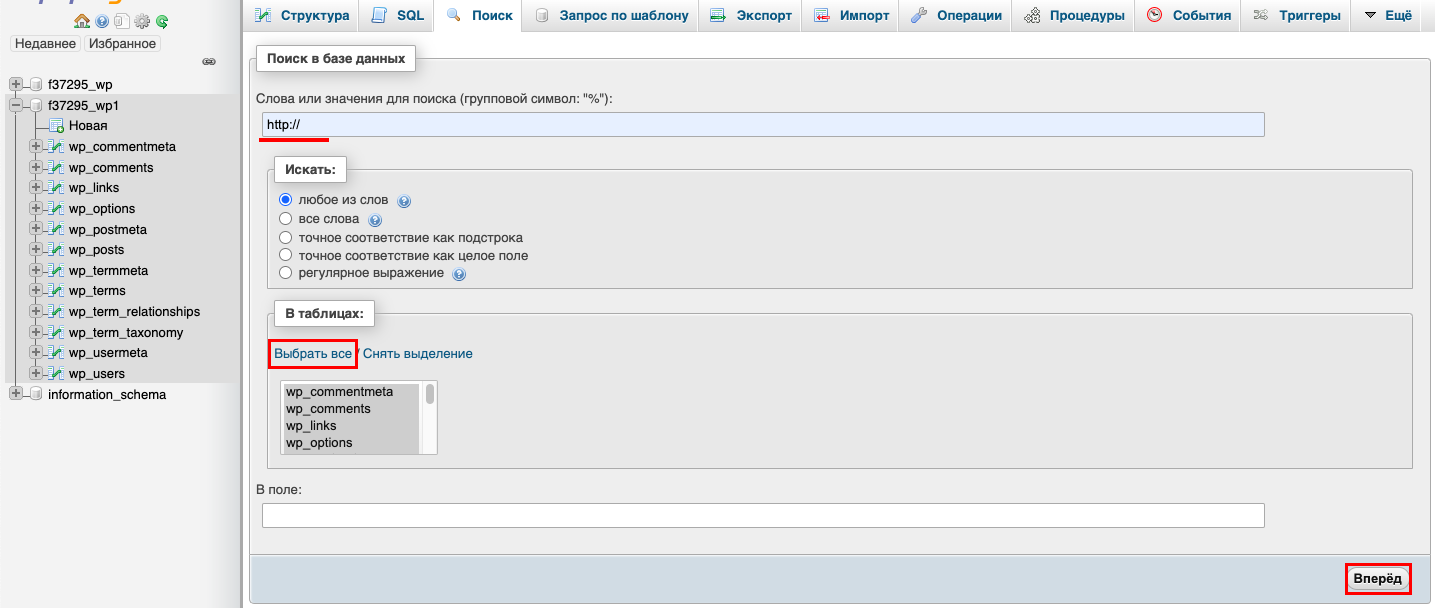
First, connect to the database of the site using PhpMyAdmin. After selecting the necessary database, go to "Search " With the help of this section we will find all mentions in the database about the protocol **https:// **.
After the search, the result will be a list with the number of matches in each table
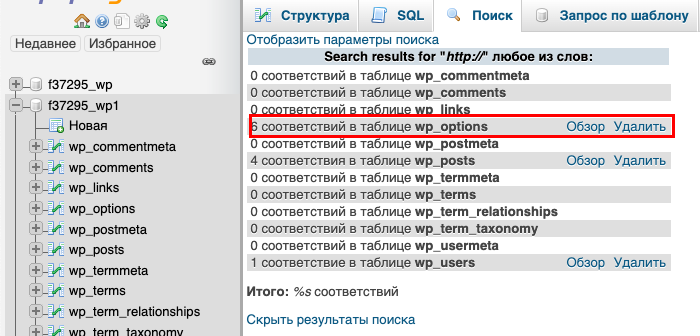
To fix this, go to the right database table and under "Search " select "Find and Replace ".

After searching, you will be prompted to replace certain values. Accept with the "Replace " button.
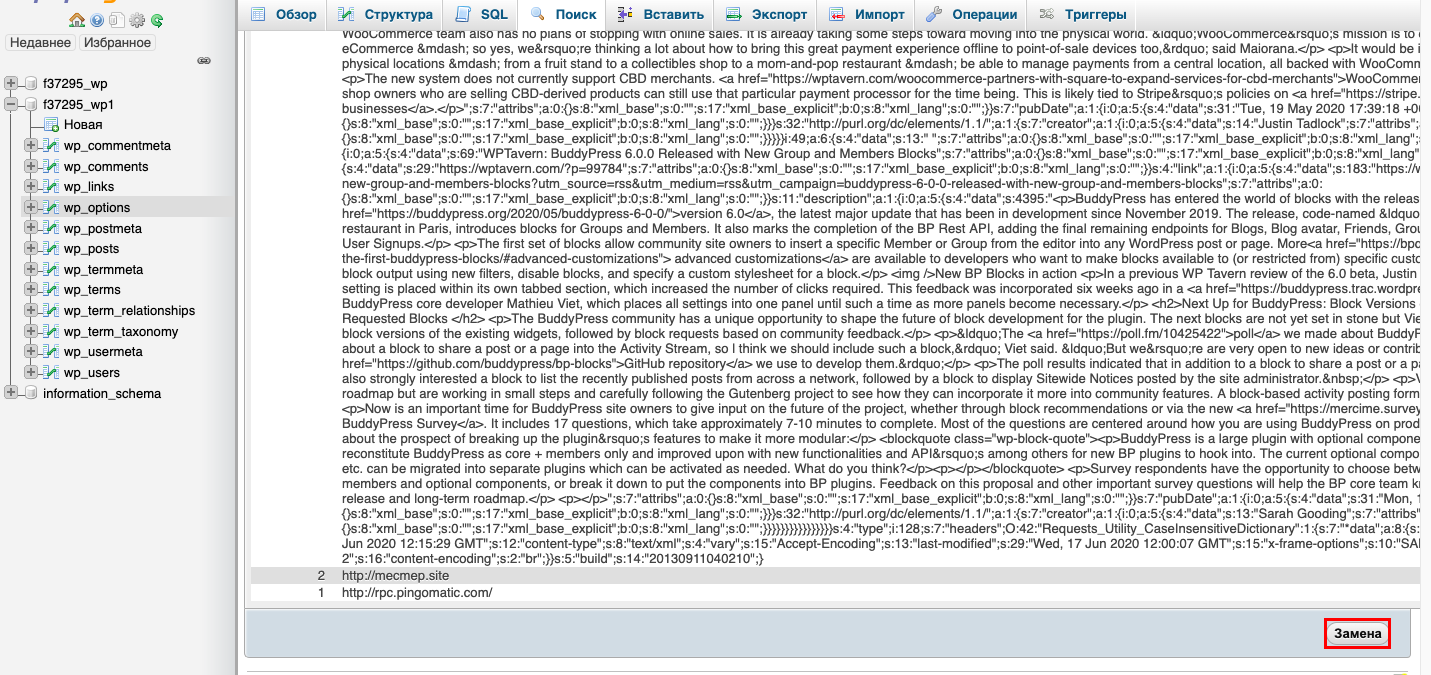
You have to do this with every table and column that has https:// You can check with a normal search to see if there are still such entries in the database
!!! We recommend creating a backup copy of the database before doing this work. For this you can use the manuals:
- Creating a MySQL database backup on Virtual Hosting;
- Export MySQL database via PhpMyAdmin on VPS;
- Import MySQL database via PhpMyAdmin on VPS server.
Modifying site files
Upload the site using FTP to your local computer. You can use the guides to do this:
It is necessary to use special text editors (Notepad++) which have a search of matches in files
After unloading the site go to the main folder of the site, you need to start the search from the directory wp-content/themes.
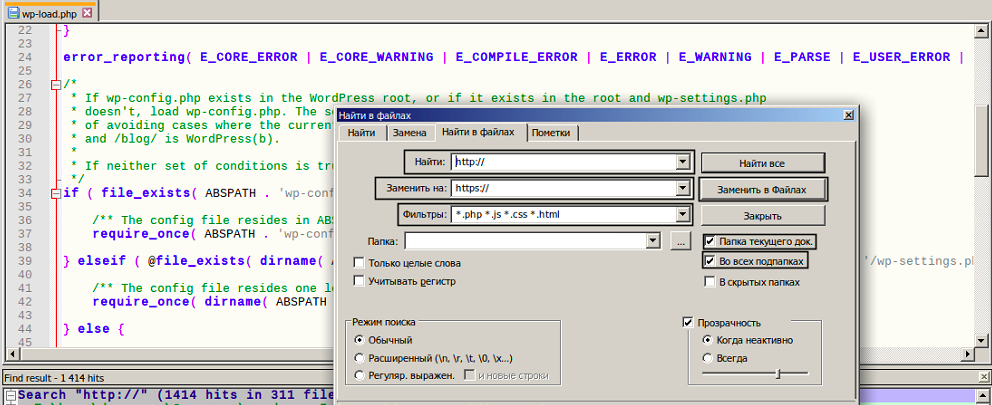
Open any of the files via Notepad++ and go to Search - Find in files.

A window will pop up where you need to enter your replacement data. Note the filters (they don't let you replace other files) "current document folder" helps you find the path quickly. It's best to only do replacements in the theme folder.
Once the project files are fixed, you can upload the site back to the server.
Start HTTPS everywhere on the site
This is done in .htaccess at the root of the WordPress build:
# Force HTTPS
RewriteEngine On
RewriteCond %{HTTPS} off
RewriteRule (.*) https://%{HTTP_HOST}%{REQUEST_URI} [R=301,L]
Once this code is placed in the file, you can disable the plugin and remove the code from wp-config.php.
You'll also need to change the URL settings in the general settings, making them https://. This way, all the links in WordPress will be properly formed:
