Setting up Outline VPN on OpenWRT
Connecting Router to VPN Server via Outline Protocol.
Outline is a modern VPN protocol based on Shadowsocks that provides high connection speeds and reliable data protection. Configuring Outline directly on an OpenWRT router allows you to secure all traffic of your home or office network through a VPN without configuring each device individually. In this guide, we will walk step by step through connecting an OpenWRT 24.10 router to an Outline VPN server.
Connecting to the router and preparing the system
Connect to the router via SSH:
ssh root@192.168.0.1
Note
Replace the IP address with your router’s address. By default, it may be 192.168.1.1, 192.168.0.1, or another address depending on your configuration.
Downloading the installation script
Download the Outline installation script:
cd /tmp
wget https://raw.githubusercontent.com/1andrevich/outline-install-wrt/main/install_outline.sh -O install_outline.sh
chmod +x install_outline.sh
Installing dependencies
Update the package list and install the required components:
opkg update
opkg install kmod-tun ip-full
Note
The kmod-tun package creates a virtual TUN network interface for the VPN tunnel, and ip-full provides advanced routing management tools.
Obtaining the access key
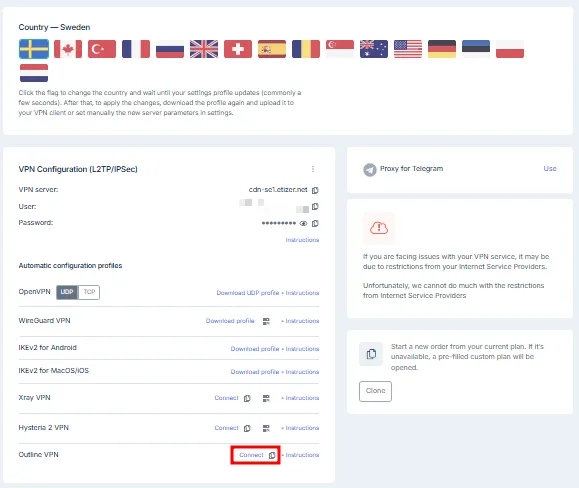
Copy the connection key from your personal account.
Note
You will need the server name (for example, vpn-nl1.example.com) and the full access key.
The key has the following format:
`ss://Base64EncodedString@server-address:port/?outline=1`

Example:
`ss://Y2hhY2hhMjAtaWV0Zi1wb2x5MTMwNTpNeVNlY3VyZVBhc3N3b3Jk@vpn-nl1.example.com:8443/?outline=1`
Running the installation script
Run the previously downloaded script:
./install_outline.sh
Enter the server and key when prompted in the command line:
Enter Outline Server IP: vpn-nl1.example.com
Enter Outline (Shadowsocks) Config: ss://Y2hhY2hhMjAtaWV0Zi1wb2x5MTMwNTpNeVNlY3VyZVBhc3N3b3Jk@vpn-nl1.example.com:8443/?outline=1
Use Outline as default gateway? [y/n]: y
Note
Answer y (yes) to the question about using Outline as the default gateway if you want to route all traffic through the VPN.
Configuring static routes
After the installation is complete, you need to add static routes to ensure proper VPN operation.
First, determine the IP address of your Outline server:
nslookup vpn-nl1.example.com
The command will return an IP address, for example 185.45.67.89. Use this address in the following commands.
Run the command below, replacing 192.168.0.1 with the IP address of your main gateway and 185.45.67.89 with the VPN server IP:
ip r add 185.45.67.89 via 192.168.0.1 dev br-lan
Note
This command adds a route to the VPN server itself via the main gateway. This is critical: without this route, the router will attempt to reach the VPN server through the VPN tunnel itself, creating a routing loop and making the connection impossible.
Checking the connection
To verify that the VPN is working, run the following command on the router:
curl ifconfig.me
The command should return the IP address of your VPN server, for example:
185.45.67.89
You can also connect to the router from any device on your network and check the IP address on https://2ip.io or run:
curl ifconfig.me
The IP address should match the IP address of your VPN server.
Preserving settings after reboot
To ensure that routing settings are not lost after a router reboot, you need to add them to the network configuration file.
Option 1: Using UCI commands (recommended)
uci add network route
uci set network.@route[-1].interface='lan'
uci set network.@route[-1].target='185.45.67.89/32'
uci set network.@route[-1].gateway='192.168.0.1'

uci commit network
/etc/init.d/network reload
Note
Replace 192.168.0.1 with your gateway IP address and 185.45.67.89 with your VPN server IP address.
Option 2: Editing the configuration file manually
Open the network configuration file:
vi /etc/config/network
Add the following lines to the end of the file:
config route
        option interface 'lan'
        option target '185.45.67.89/32'
        option gateway '192.168.0.1'

config route
        option interface 'tunnel'
        option target '0.0.0.0/0'
        option gateway '172.16.10.2'
Save the changes and close the file.
Note
In the vi editor, press Esc, then type :wq and press Enter.
Restart network services:
/etc/init.d/network restart
Verification after reboot
Reboot the router to verify that the settings persist:
reboot
After the system boots, check the routes and connection:
ip r show
curl ifconfig.me
Setup is complete. All traffic from devices connected to your router will now pass through the secure Outline VPN tunnel. All routes are configured automatically and will be restored after a router reboot.
Help
If you have any questions or need assistance, please contact us through the ticket system — we're always here to help!