Managing a Dedicated Server with IPMIView on Windows
Step-by-step connection guide and KVM features for full remote control
IPMIView is a management tool for dedicated servers. It includes a KVM Console feature, which allows you to control the keyboard, video, and mouse over IP, providing full remote access to the server — including BIOS-level management.
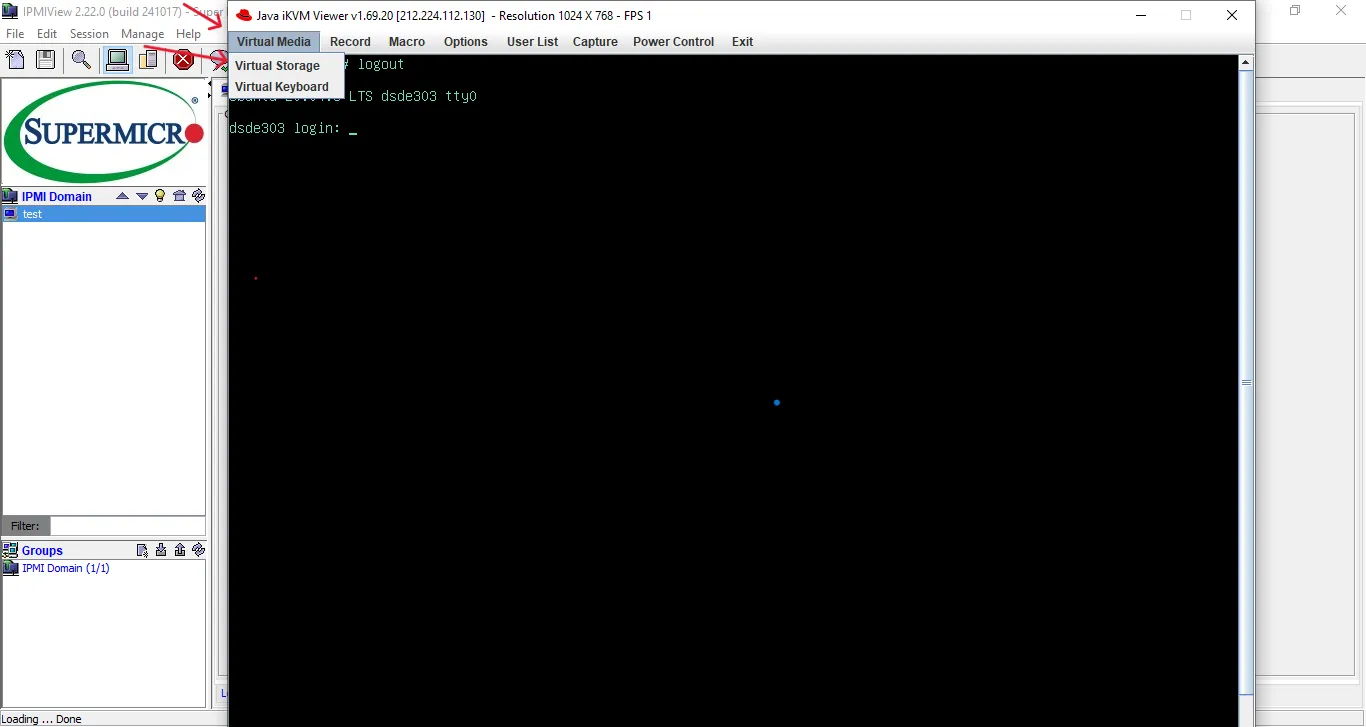
The KVM Console is especially useful when SSH access is unavailable, as it lets you access the boot menu and troubleshoot network configuration issues. It also supports Virtual Media, allowing you to mount ISO images and install an operating system remotely.
You can download IPMIView from the official Supermicro website after entering your details.
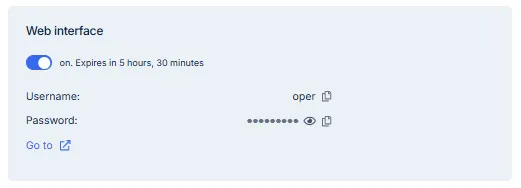
In your account, go to the iKVM/IPMI section, activate the web interface, and click Go to.

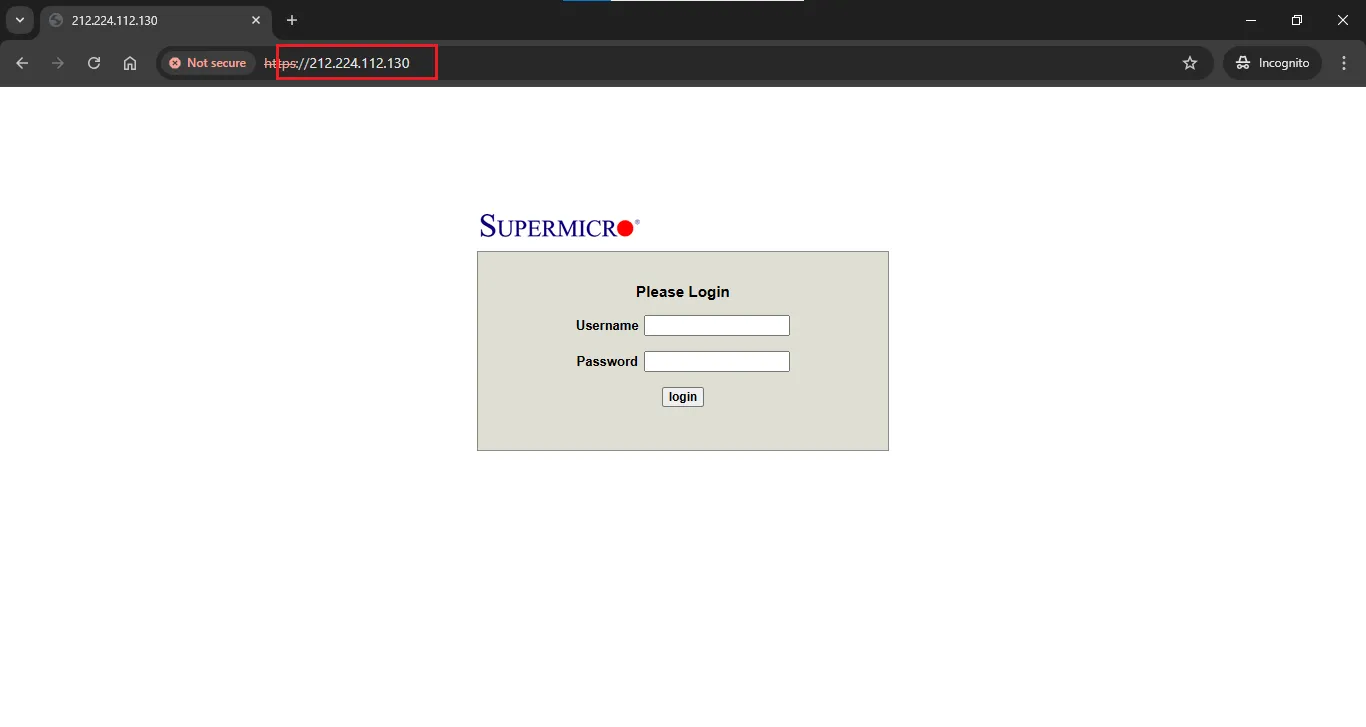
In the window that opens, copy the IP address from the address bar. This IP will be required for the connection.
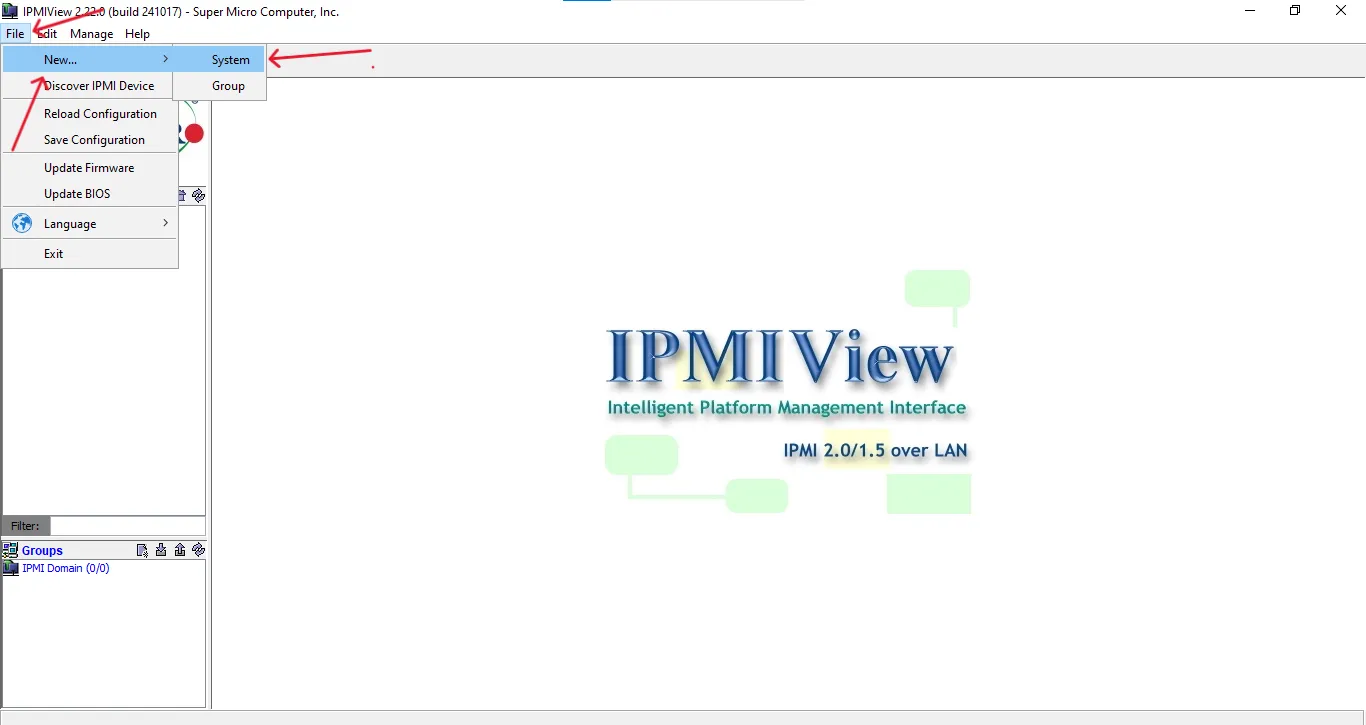
After installing and launching the software, go to File → New → System to add your server.
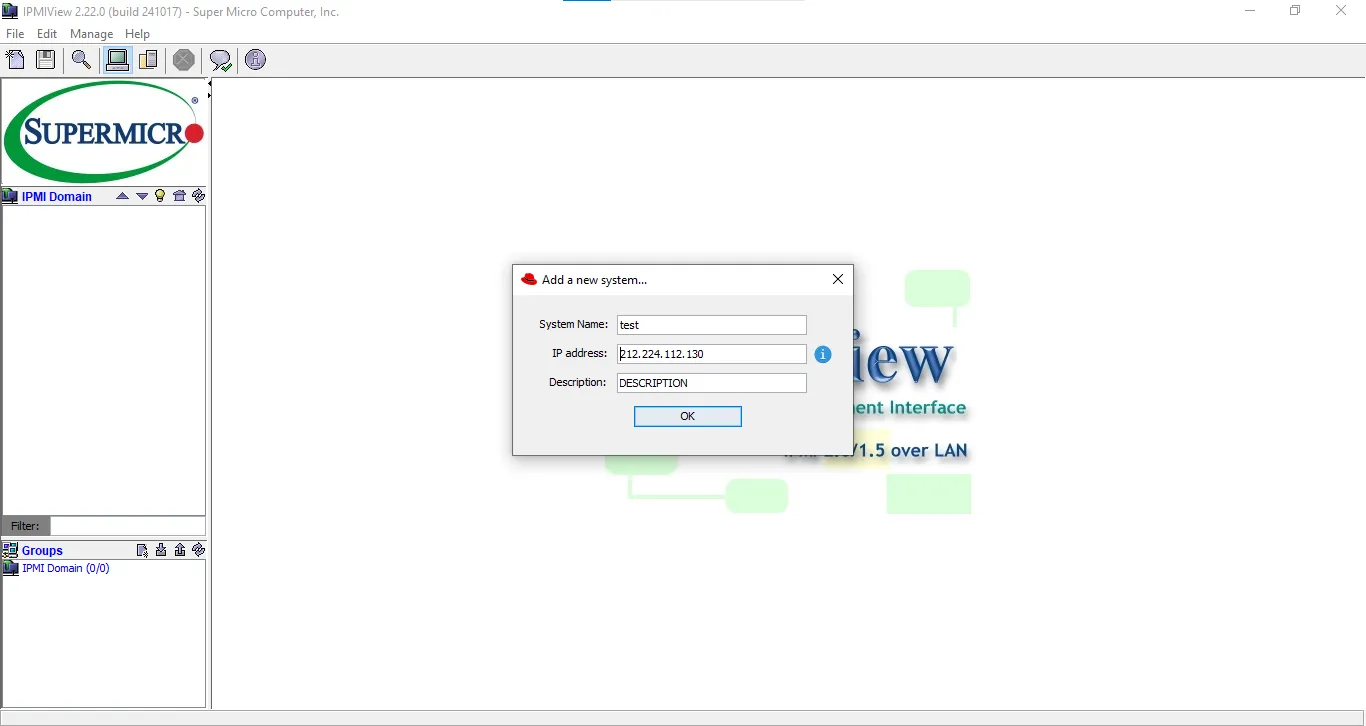
Enter the server name in the System Name field and paste the previously copied IPMI address into the IP Address field.
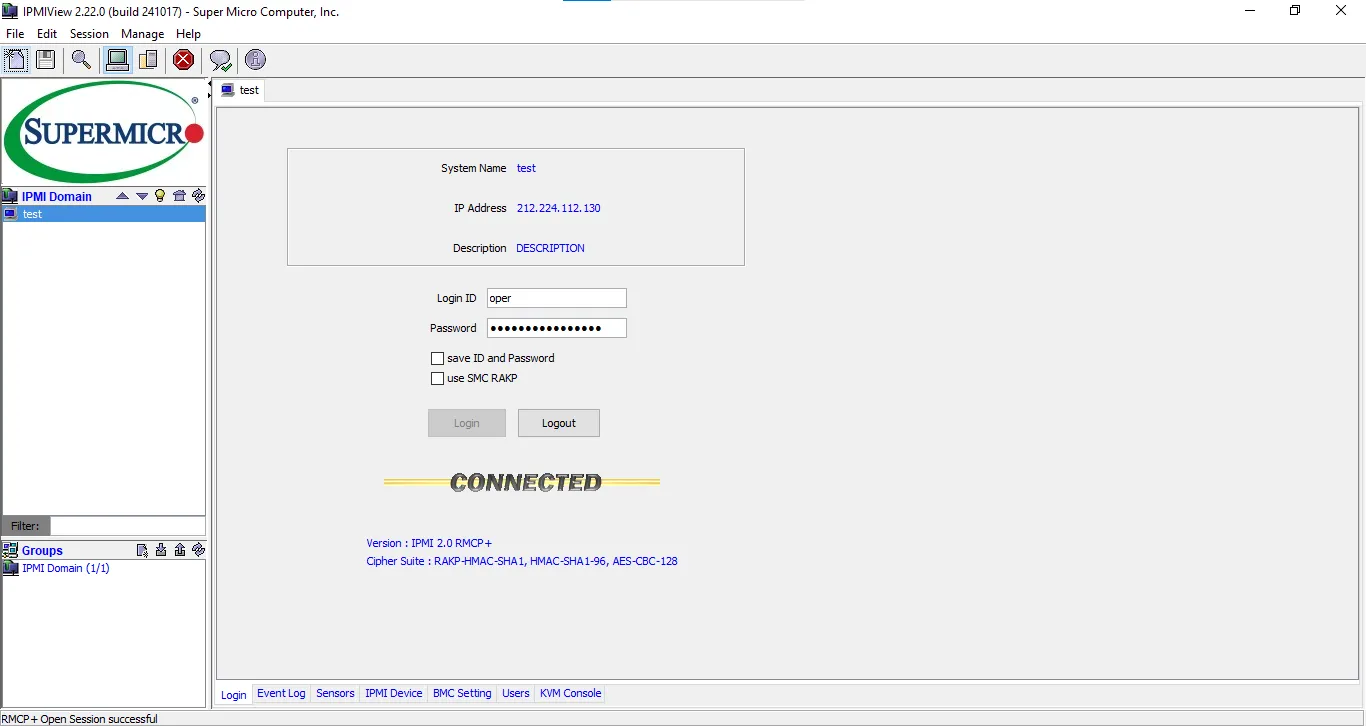
In the list on the left, double-click the added server to open the login window. Enter the credentials from your order details and click Login. Once connected, the status will show Connected, and additional management tabs will appear at the bottom of the window.
To start remote server management, go to the KVM Console section and click Launch KVM Console.
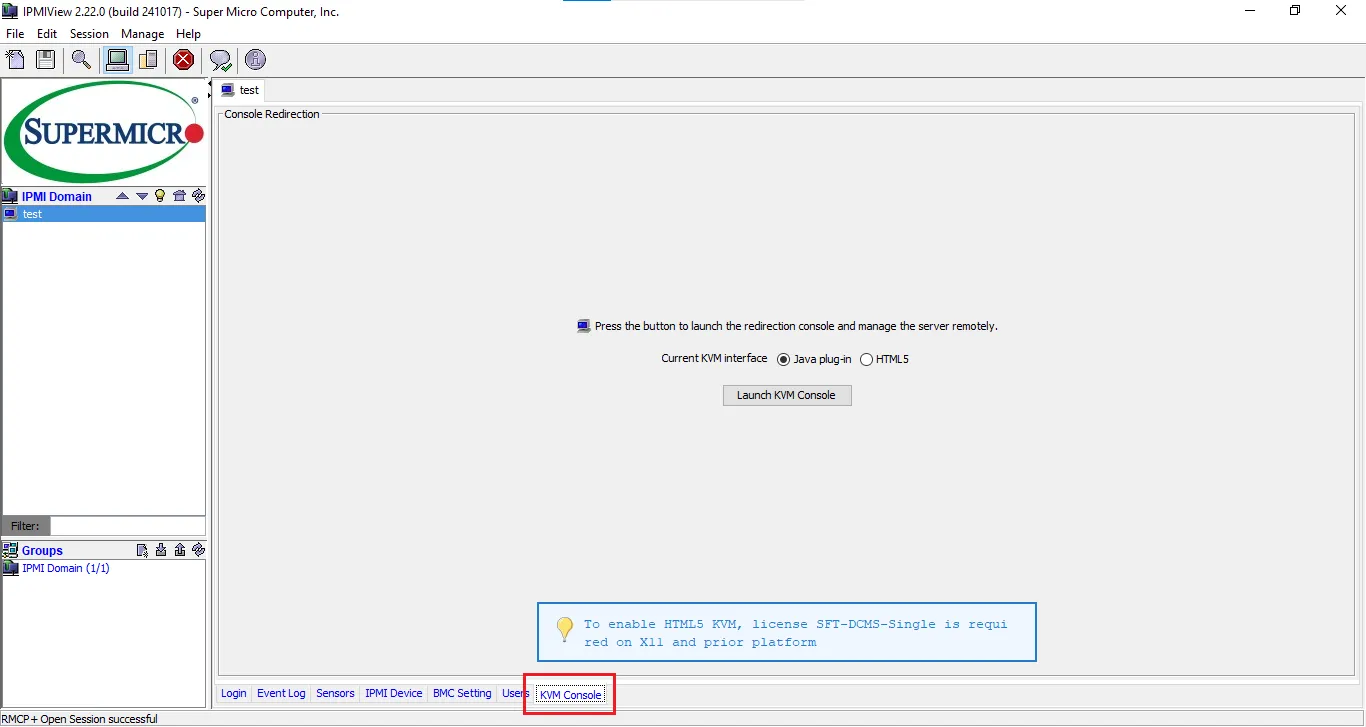
Once the console launches, you can manage the server remotely, including BIOS configuration and operating system installation or reinstallation.
Mounting a Disk Image
Warning
Administrative privileges are required to use the virtual media mounting feature (Windows: run as administrator).
To mount a disk image (including a bootable ISO), open the Virtual Storage Manager from the Virtual Media menu:
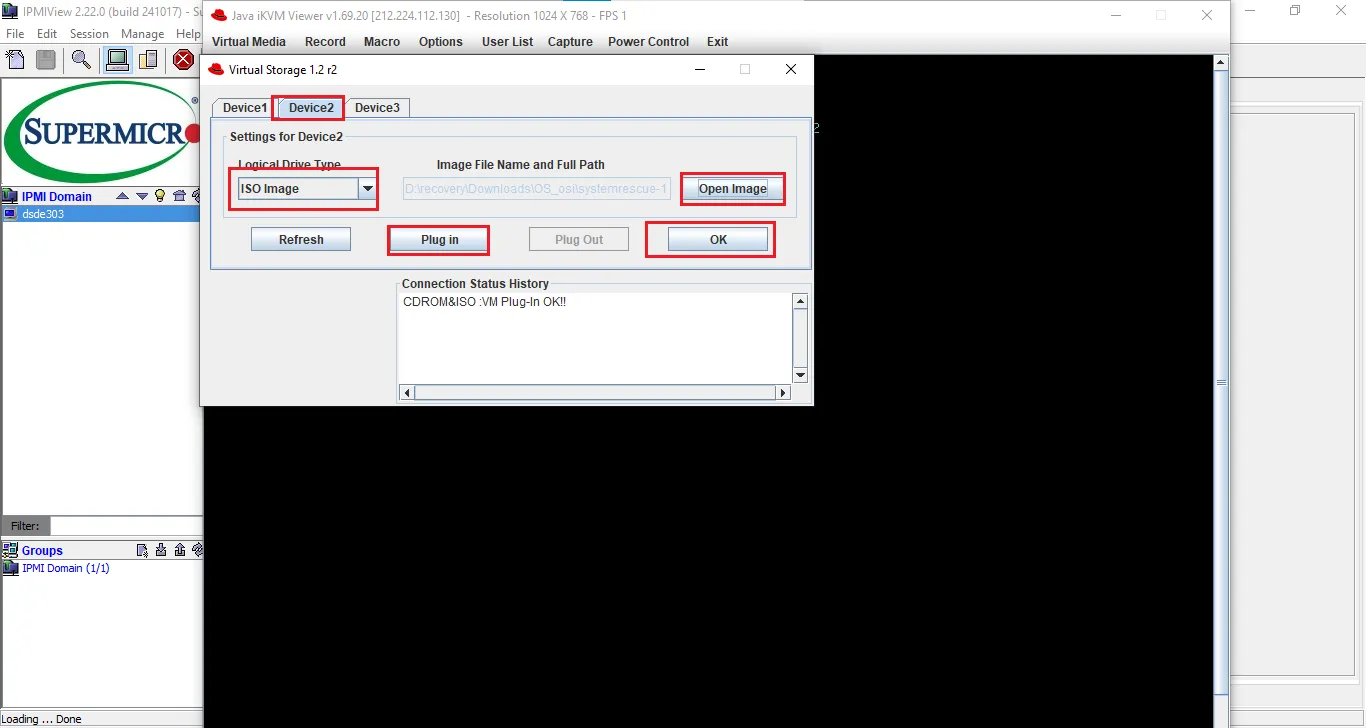
In the opened window:
- Go to the Device 2 tab.
- Select the type of image to mount: ISO File.
- Choose the file from your local drive.
- Click Plug in to mount it to the server.
- Close the Virtual Storage Manager by clicking OK.
After mounting the image, restart the server and select the connected device as the boot option in BIOS. Press F11 during startup to access the boot menu or Del to modify BIOS settings.
Note
Some key combinations (e.g., Ctrl+Alt+Del) may be intercepted by your operating system. Use the virtual keyboard or macros to send them to the remote server.
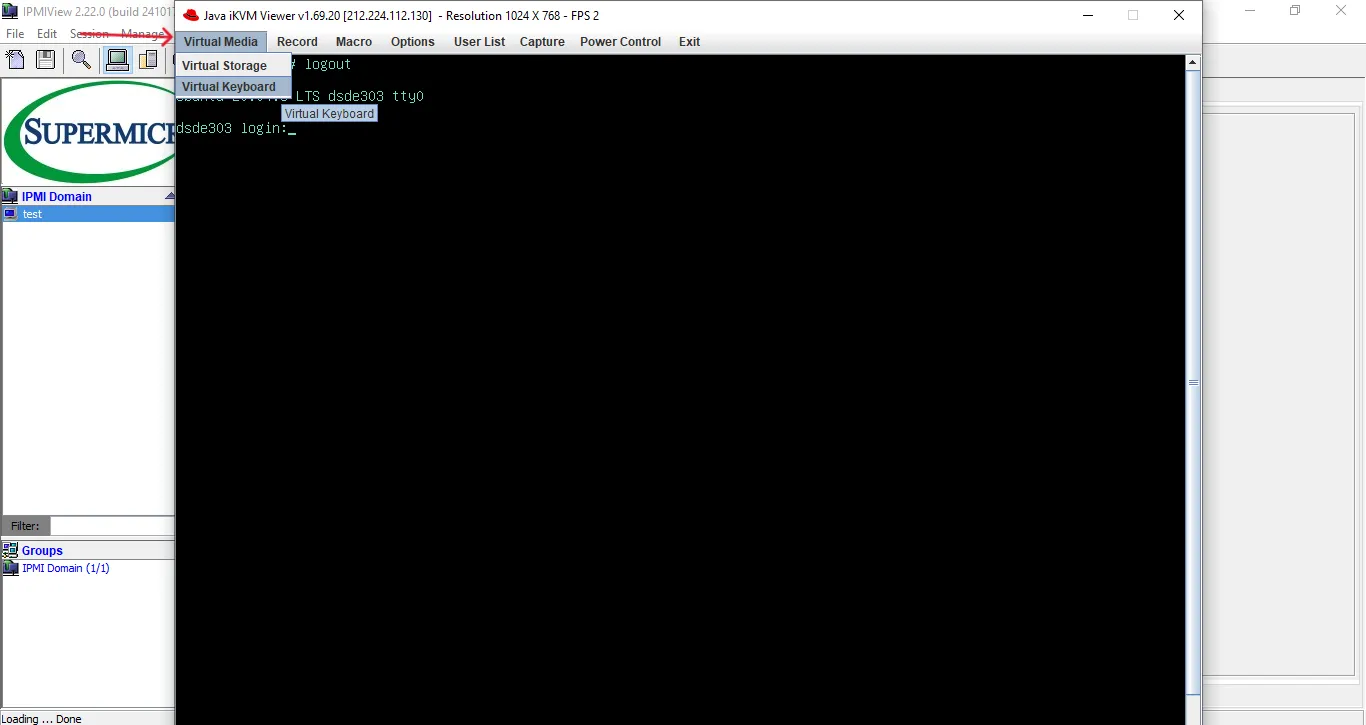
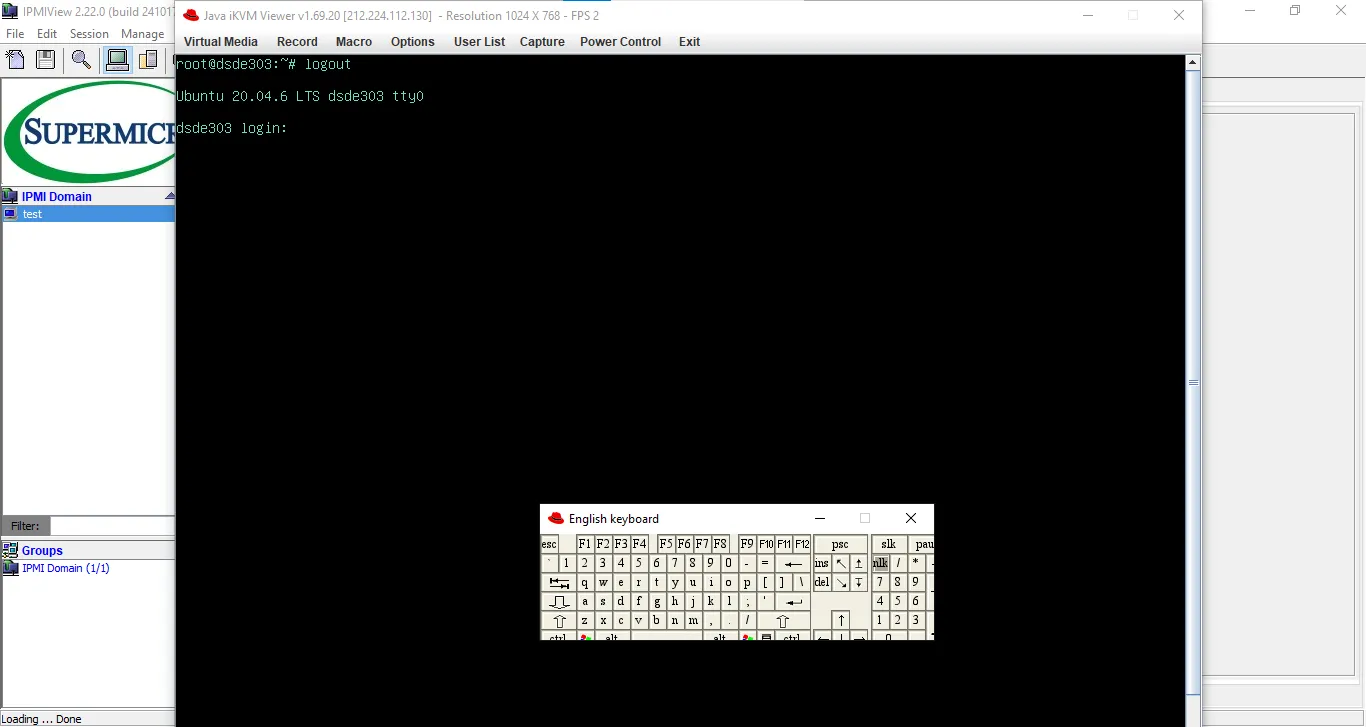
Virtual Keyboard
Certain key combinations cannot be entered directly because your local OS intercepts them. The management console provides Macros:
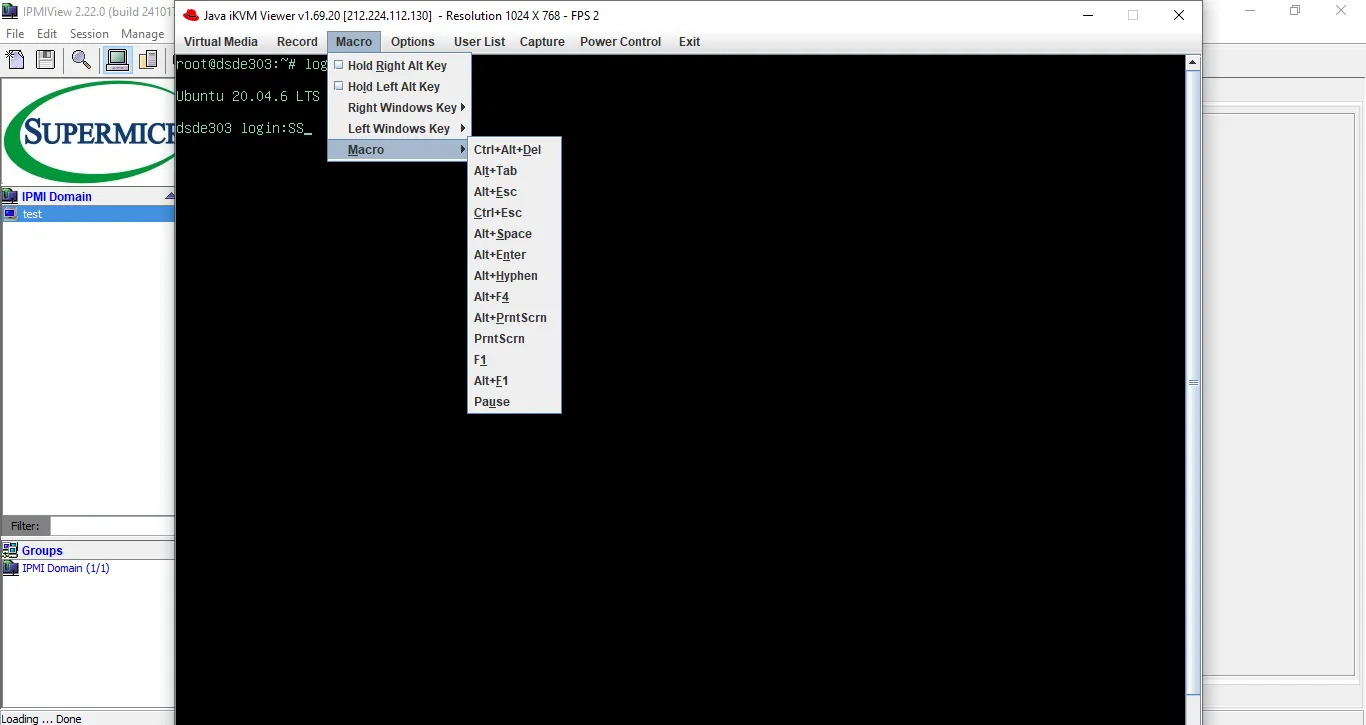
To use them, select the desired menu item, and the key combination will be sent to the server as if typed on a directly connected keyboard.
If the built-in macros are insufficient, you can enable the virtual keyboard:
Help
If you encounter any difficulties or have further questions, you can contact our support team via the ticket system.