Installing CMS WordPress in BrainyCP
Step-by-step guide for automatically installing WordPress CMS using BrainyCP control panel.

BrainyCP control panel allows you to automatically install WordPress CMS on a selected domain using the built-in auto-installer. This allows you to quickly deploy a website without the need to manually configure its components.
Quick start
- To install WordPress, log in to the BrainyCP control panel on your VPS.
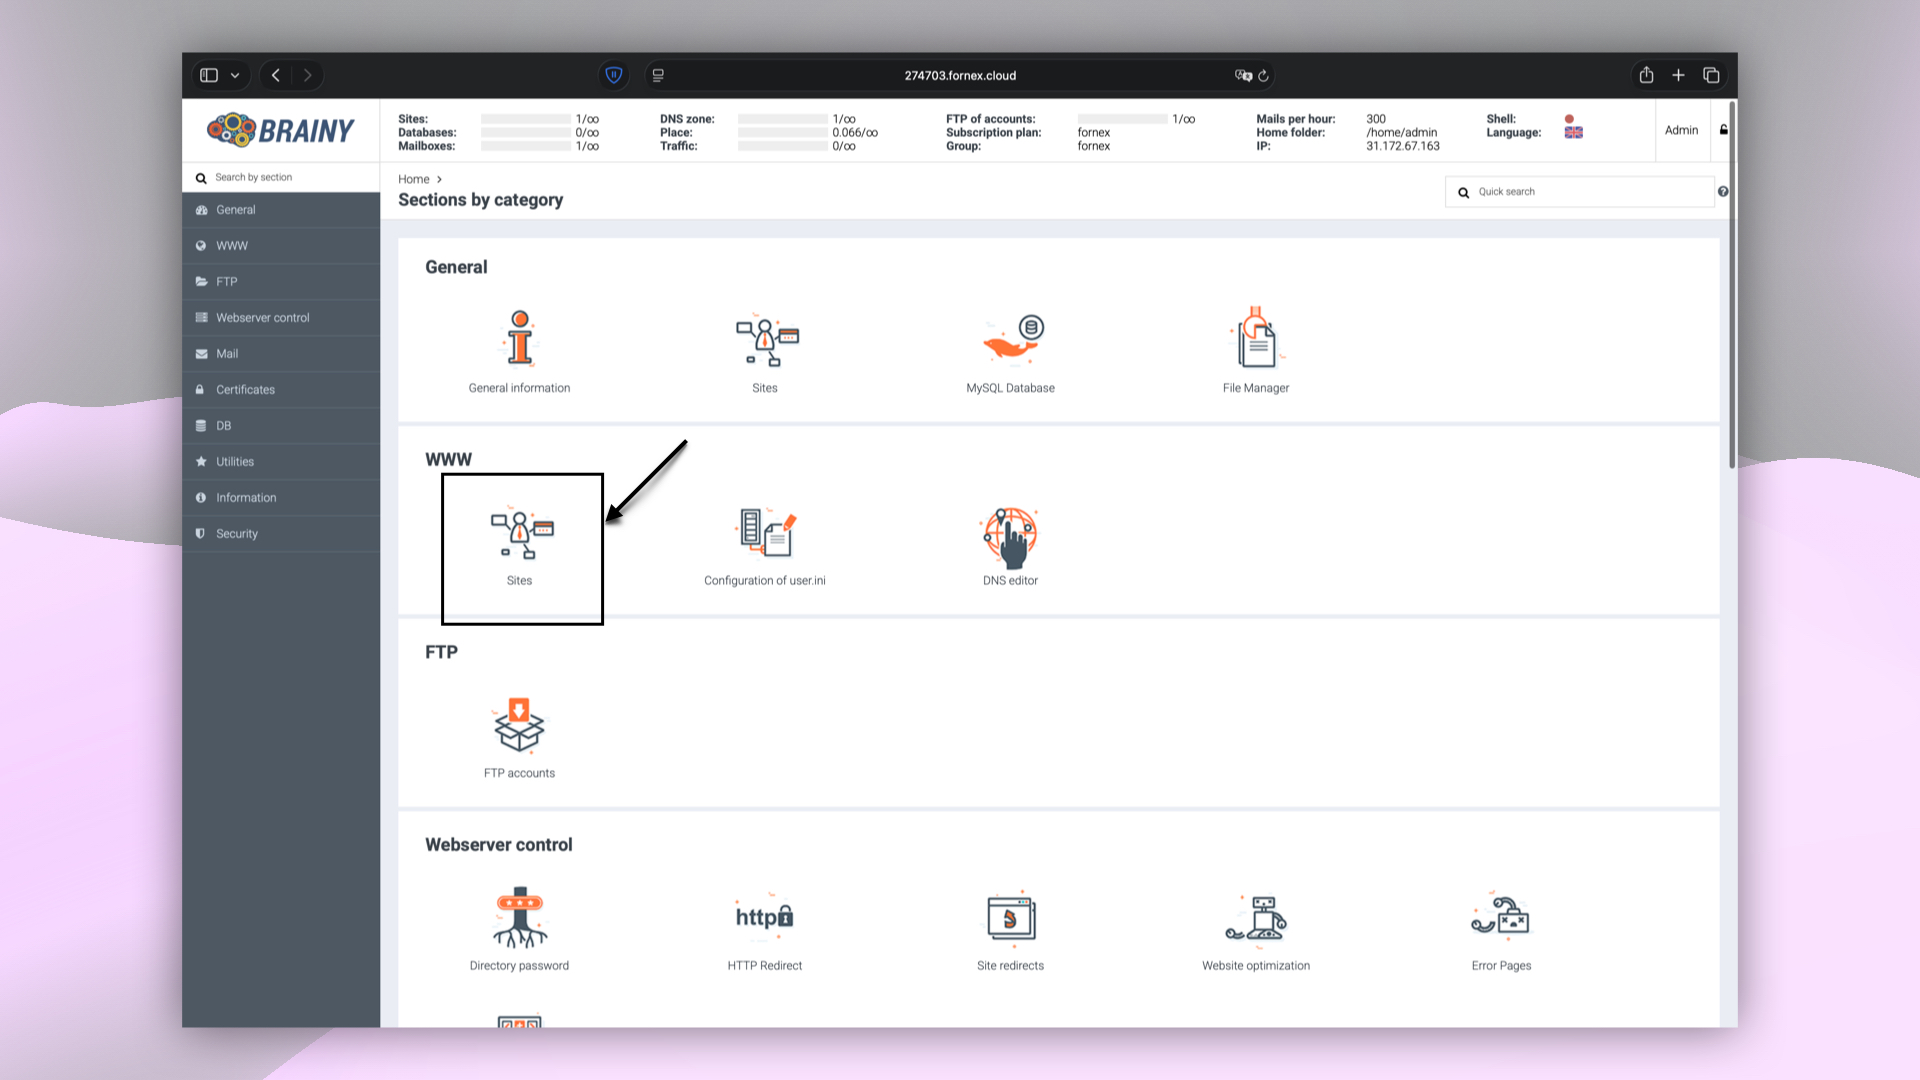
- Go to WWW → Sites.
Don't have a VPS yet?
Fornex offers VPS hosting with full root access, 24/7 support, and DDoS protection. Get a stable server with NVMe disks for fast and reliable operation. Find more details on the Fornex VPS page.
 BrainyCP control panel sections
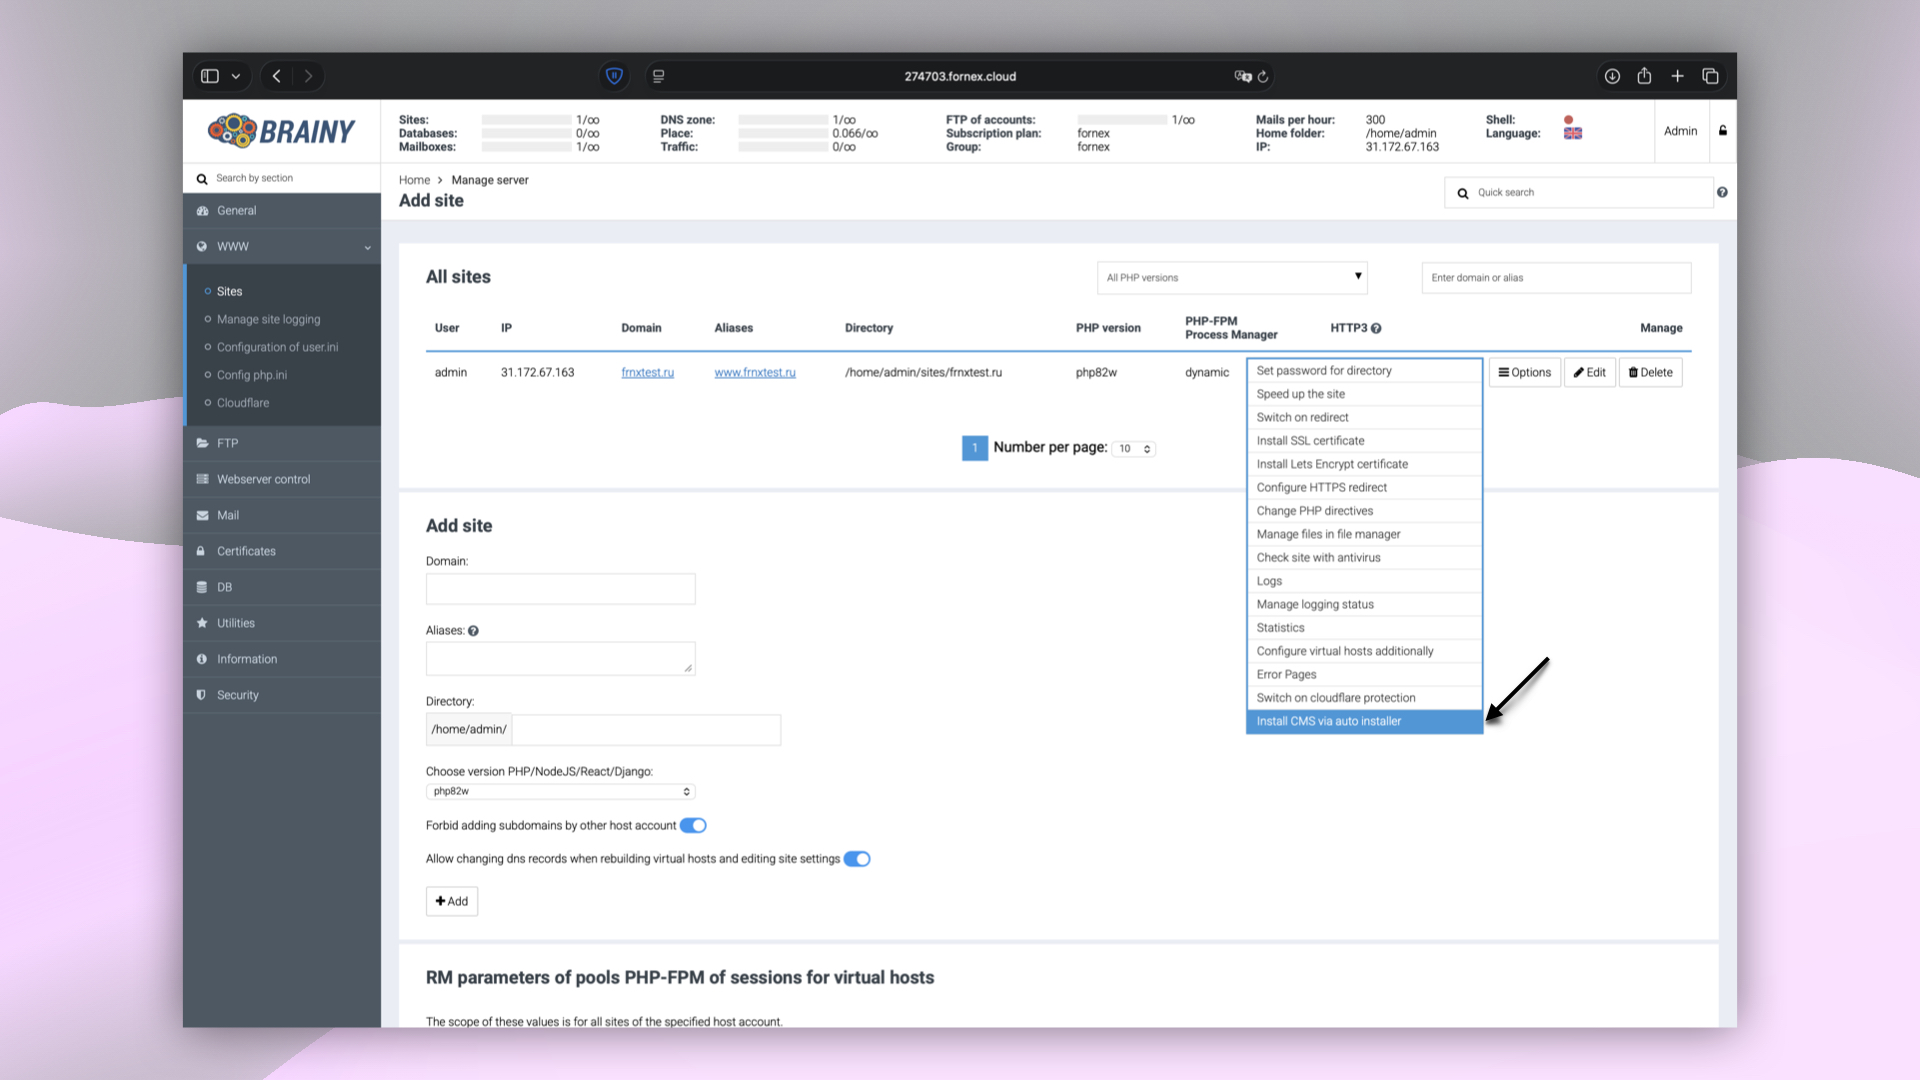
- Select a domain and click on the Options button.
- From the dropdown menu, select Install CMS via auto installer.
 CMS installation options in BrainyCP
Choosing and installing WordPress distribution
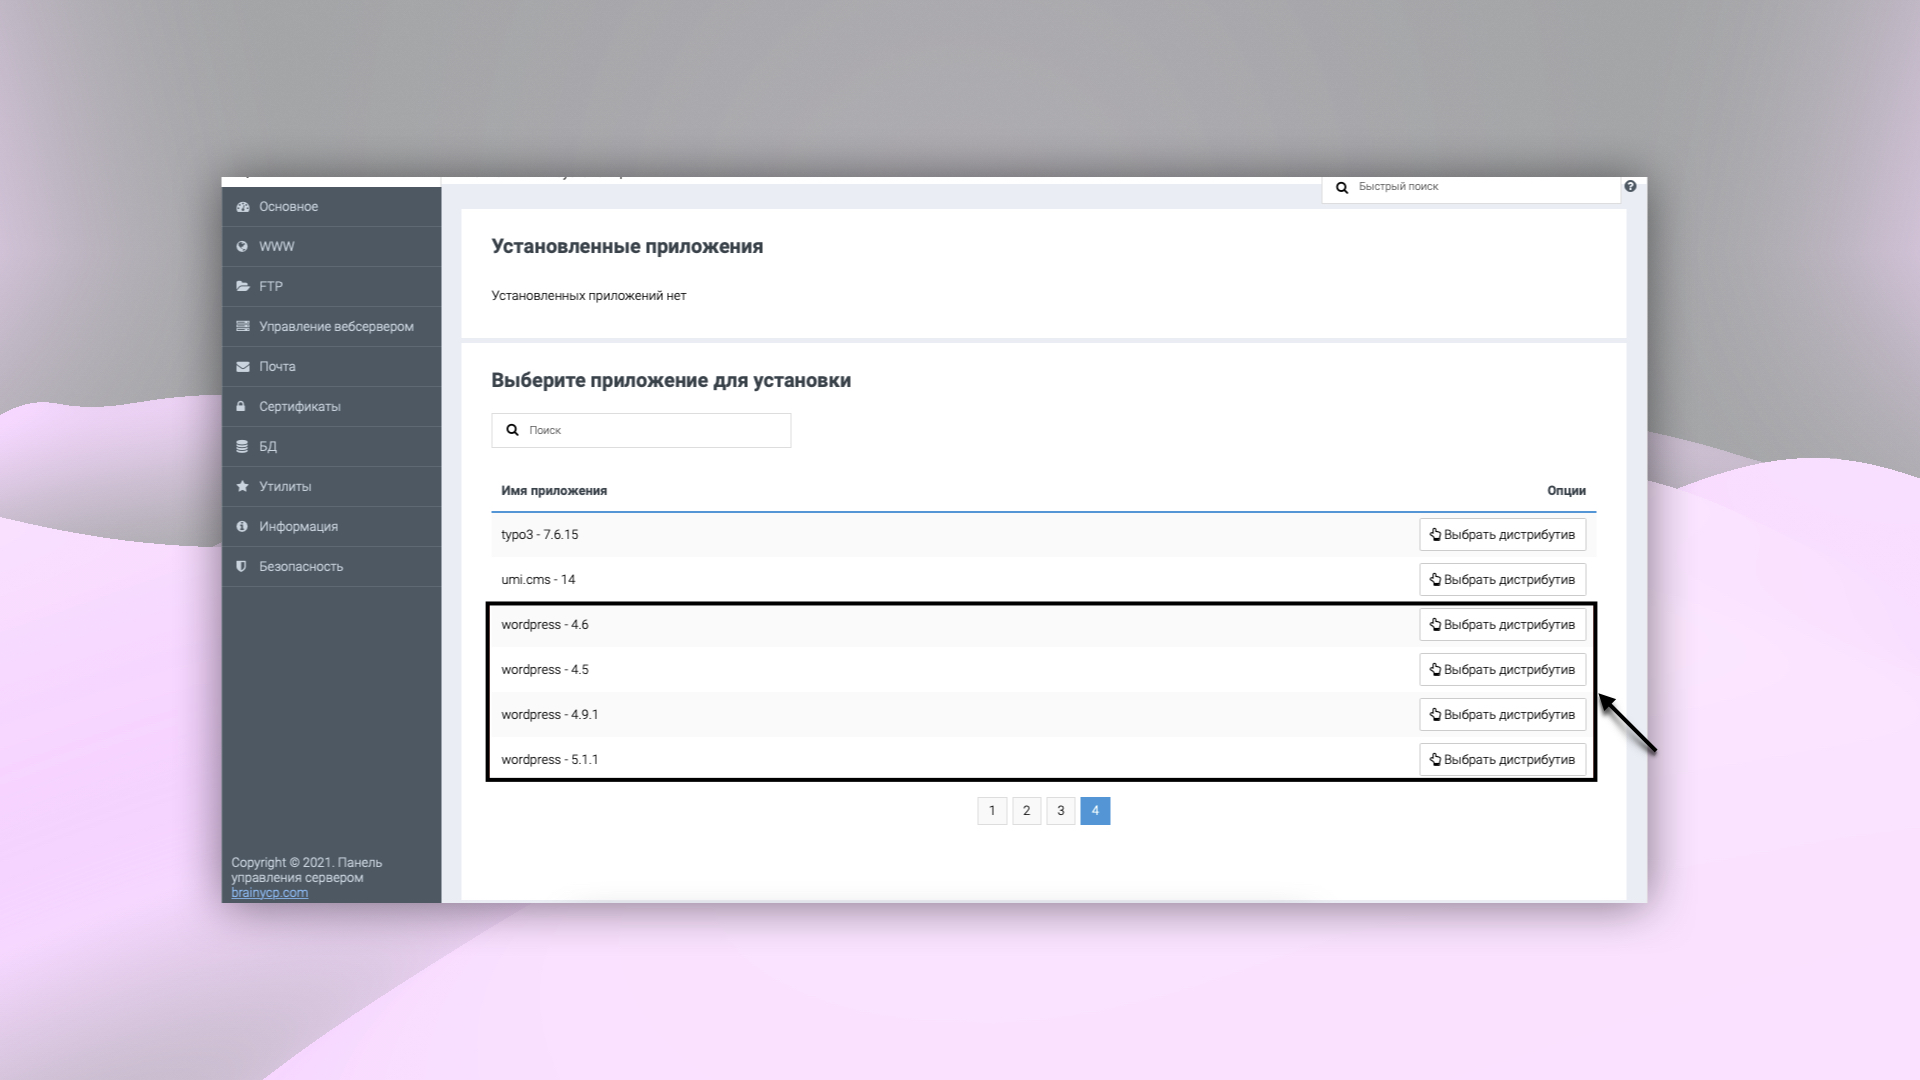
- Select the necessary distribution from the list.
- Click on the Select Distribution button to open the form for entering installation parameters.
 CMS distribution list in BrainyCP
Filling in the installation parameters
- Fill in all the required fields:
- Protocol
- Domain
- Directory
- Site Title
- Description
- Login
- Password
- Name
- Click on the Install button to start the installation process.
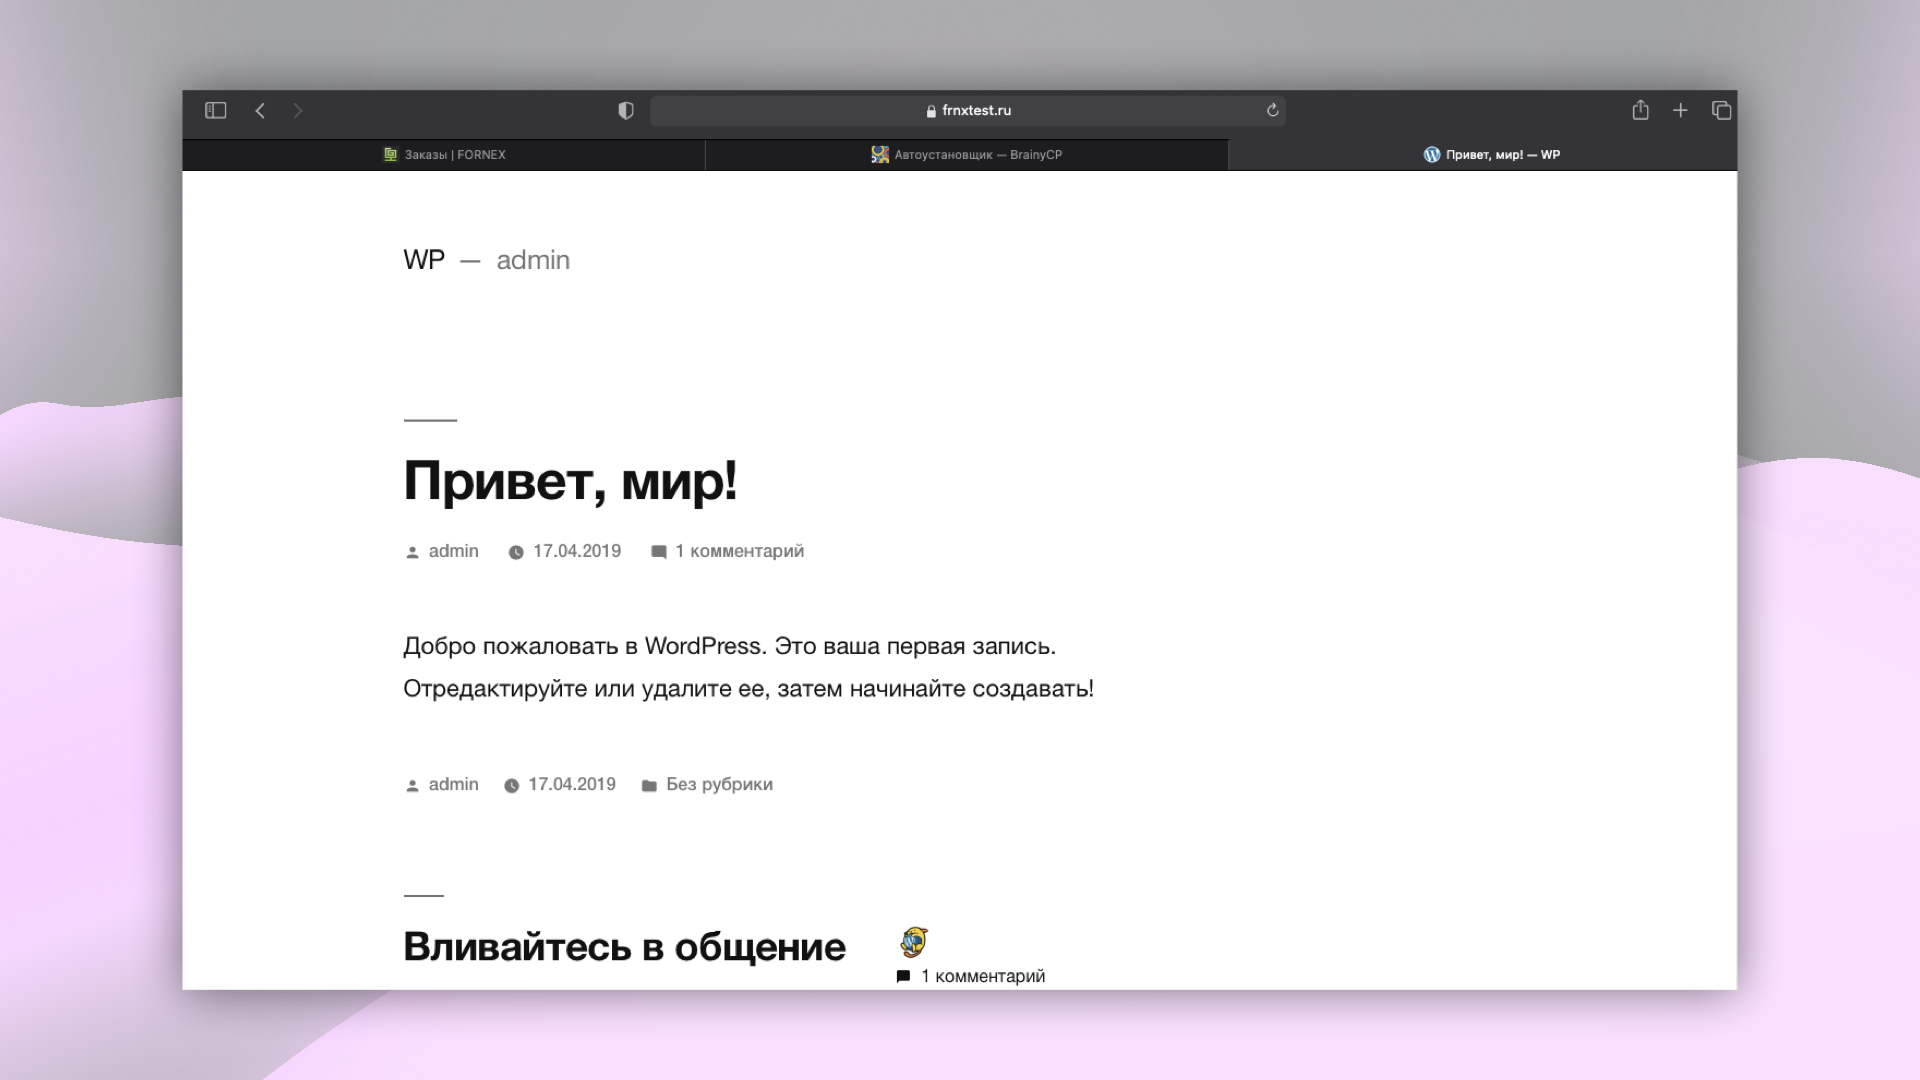
 Successful WordPress installation
Help
If you have any questions or need assistance, please contact us through the ticket system — we're always here to help!