Launching PHP sites in BeAdmin panel
Step-by-step instructions for launching PHP sites in BeAdmin
Running PHP Websites with BeAdmin
BeAdmin is a modern, flexible, and user-friendly control panel designed to simplify server and website management. Whether it’s hosting websites, managing databases, or configuring services — BeAdmin puts all the tools you need into one clean interface.
To launch a website, you can use one of the ready-to-go deployment scenarios.
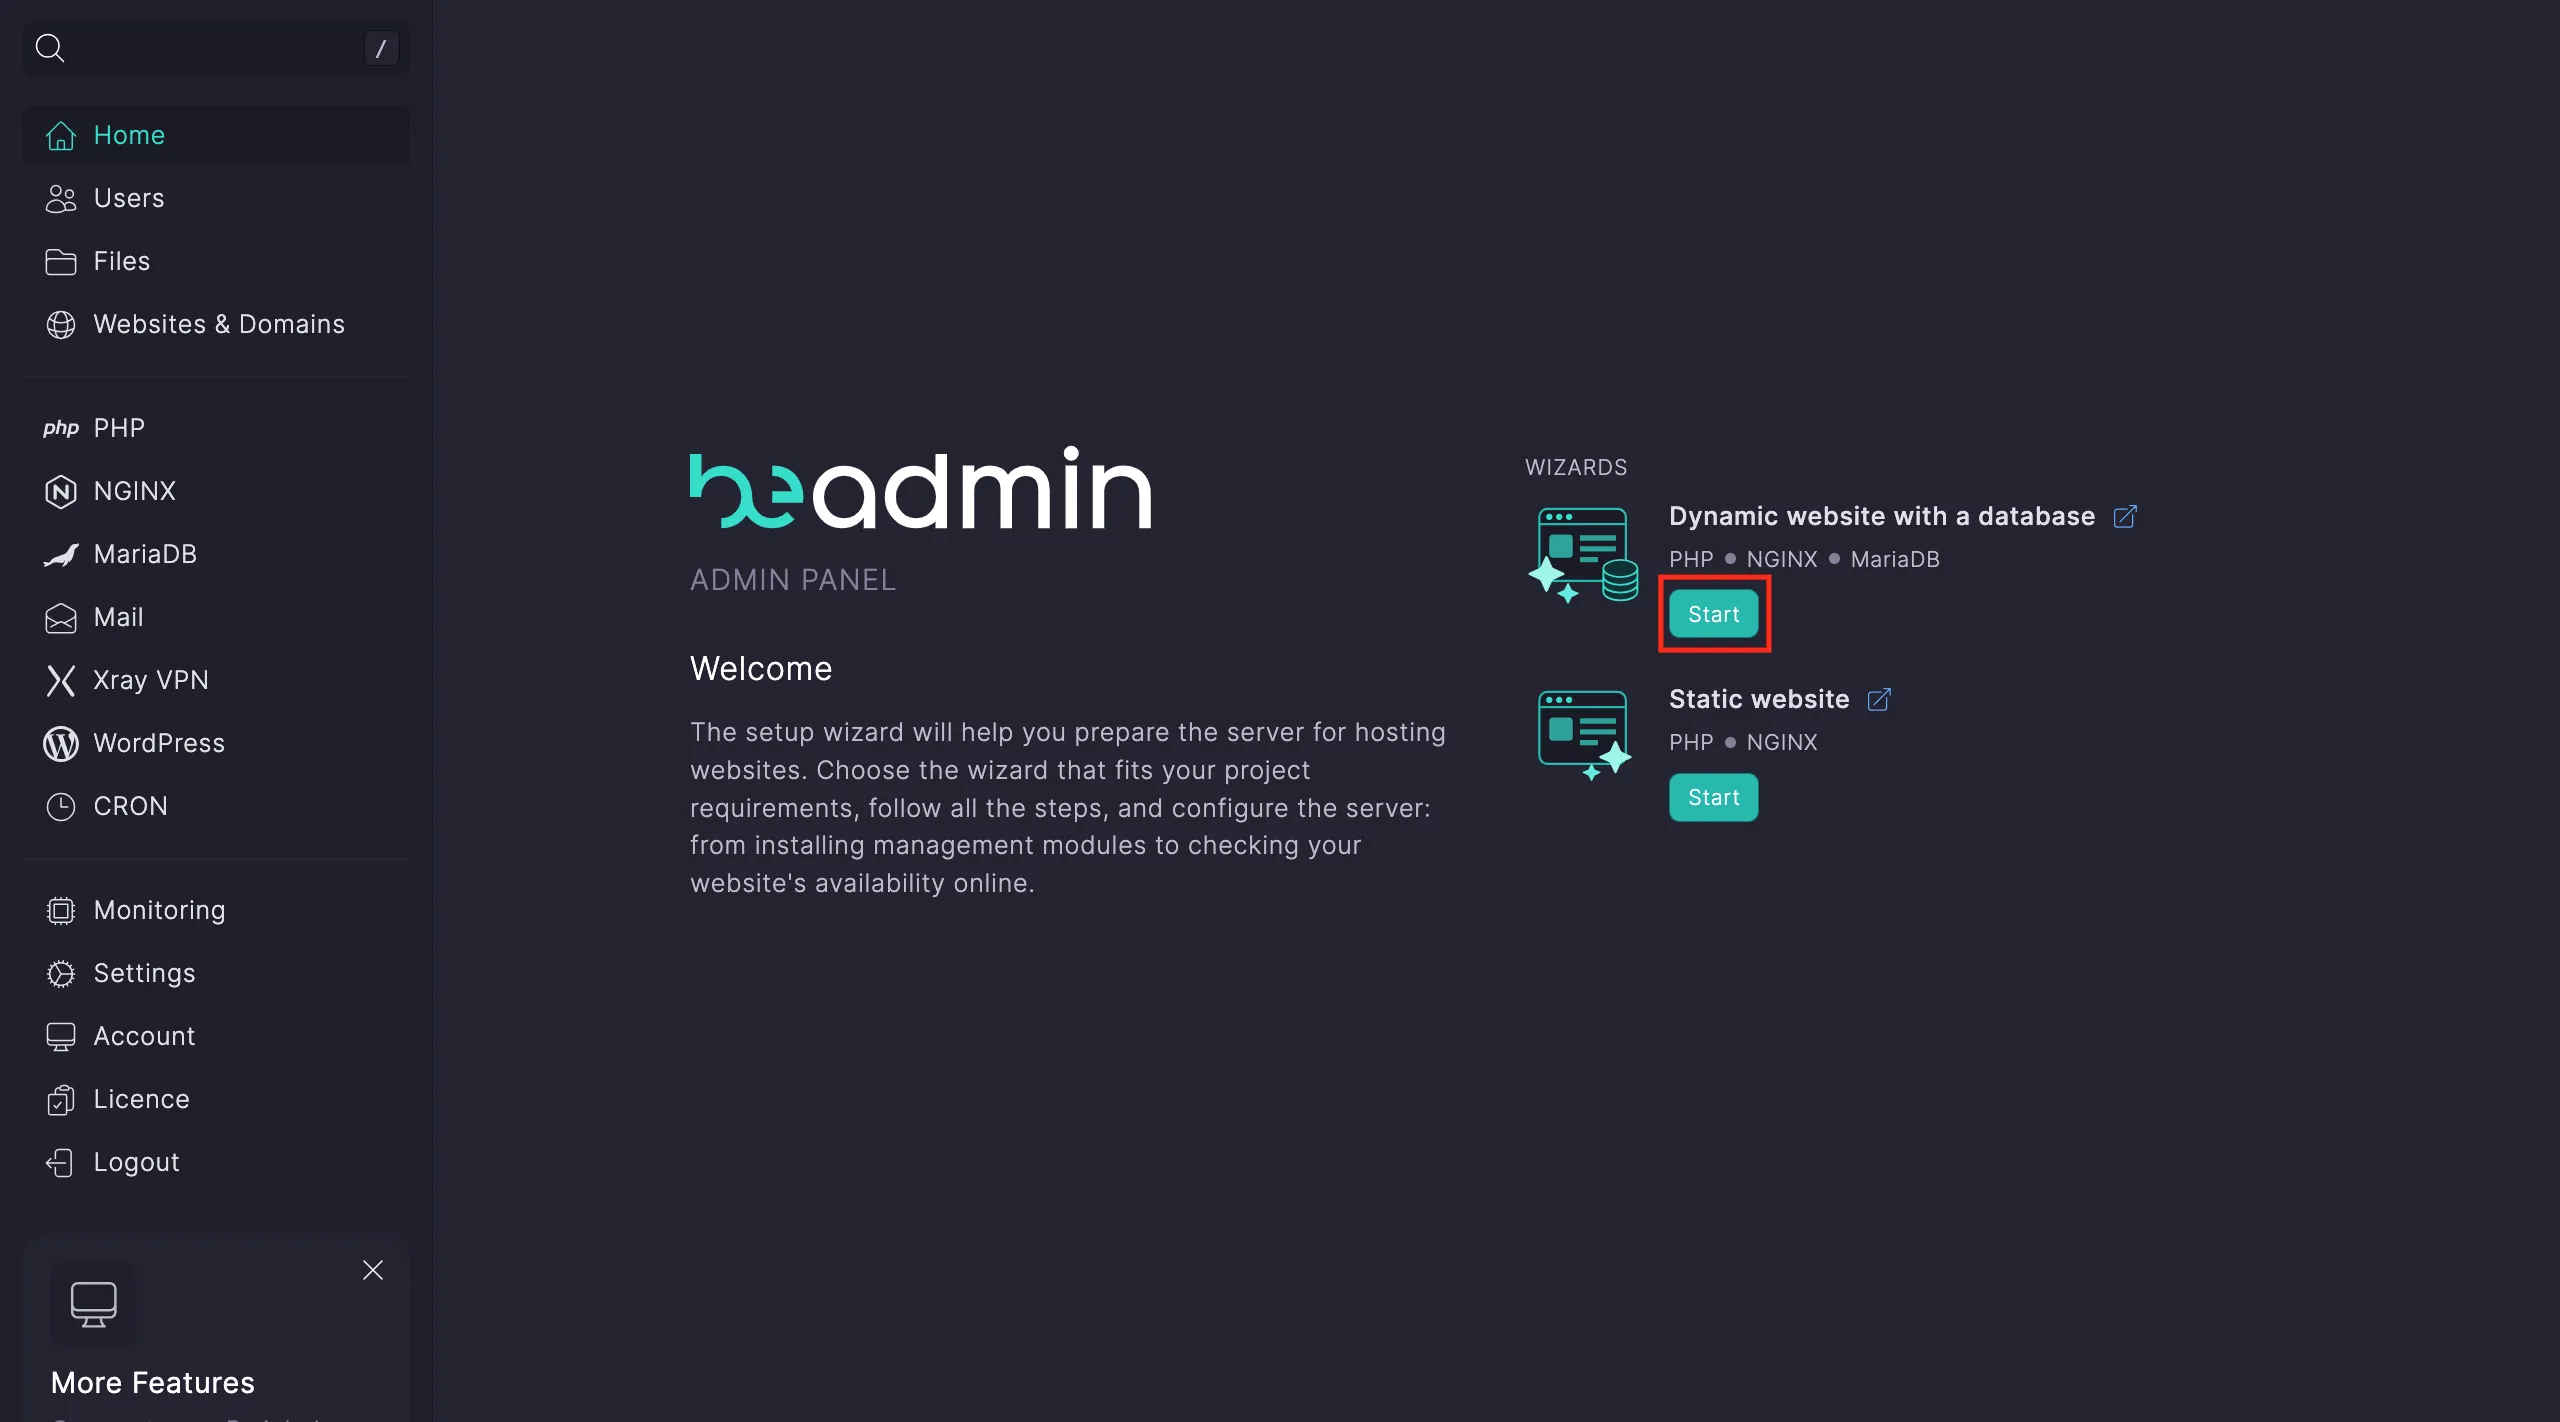
Dynamic site with a database
Go to the panel’s main page and pick the Dynamic site with a database scenario. Click Start.
Start the installation of the modules from step one of the scenario.
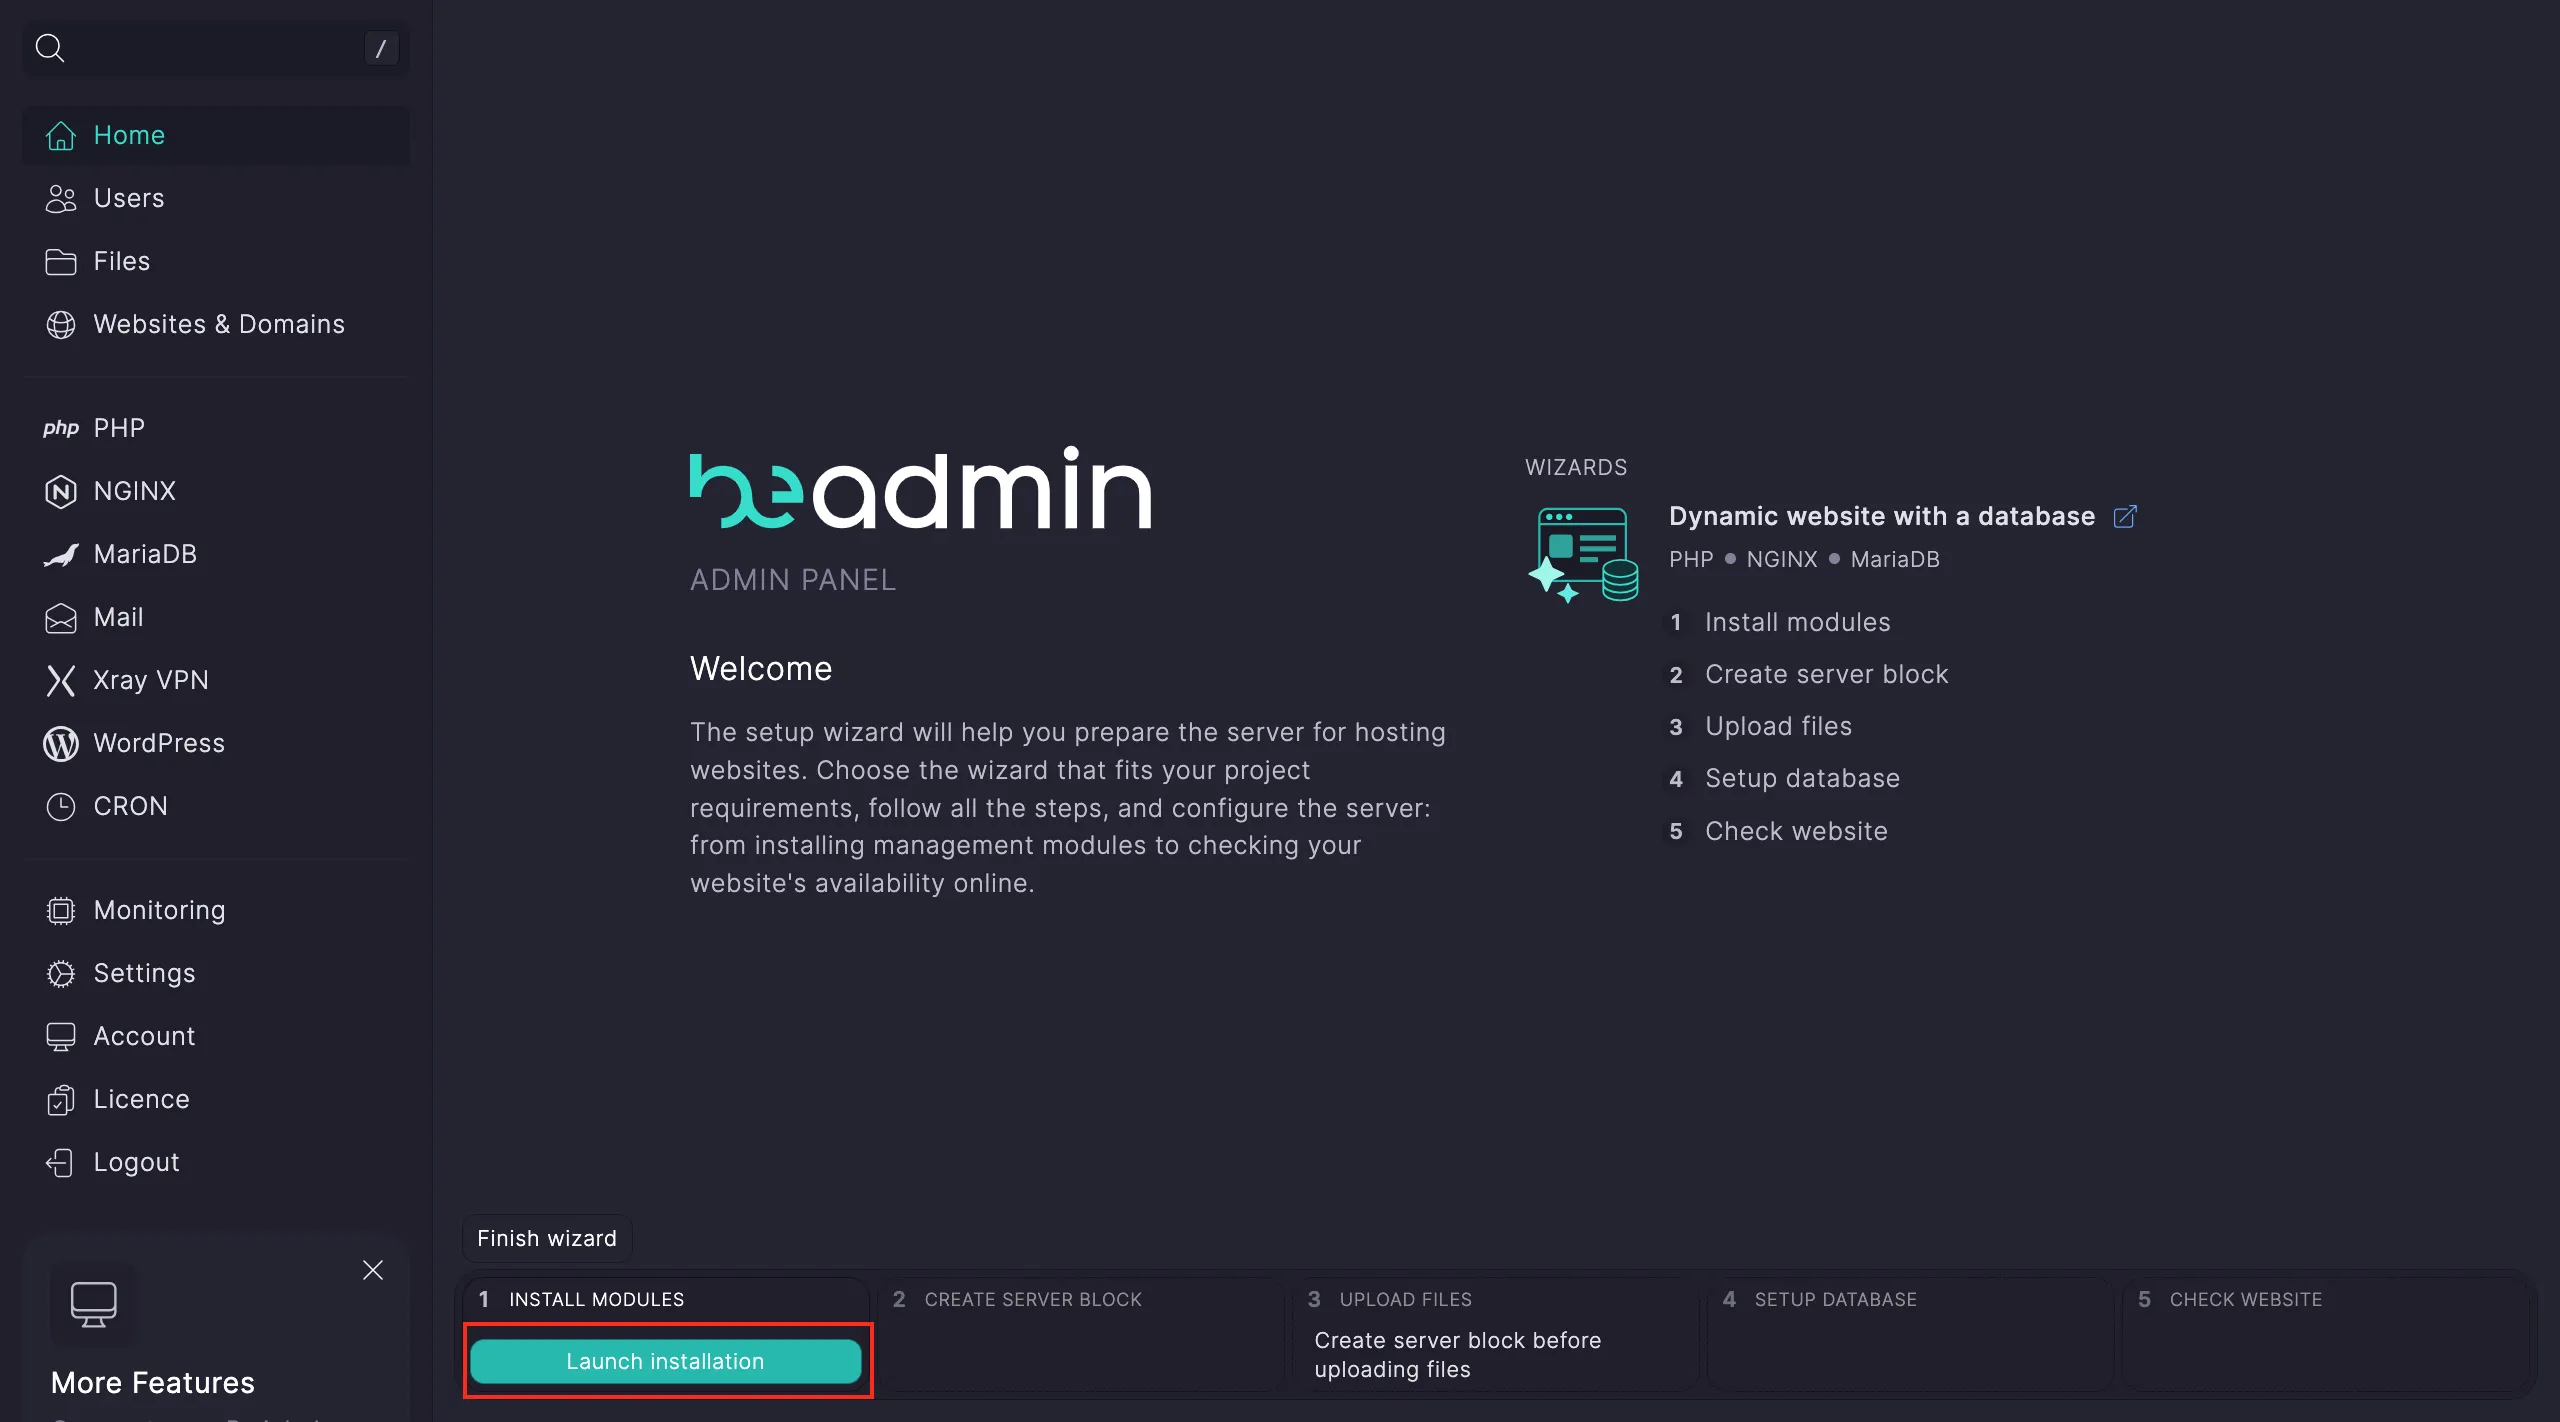
Note
Installing Nginx takes about 15 seconds. After that, you can move on — the rest of the modules will install automatically.
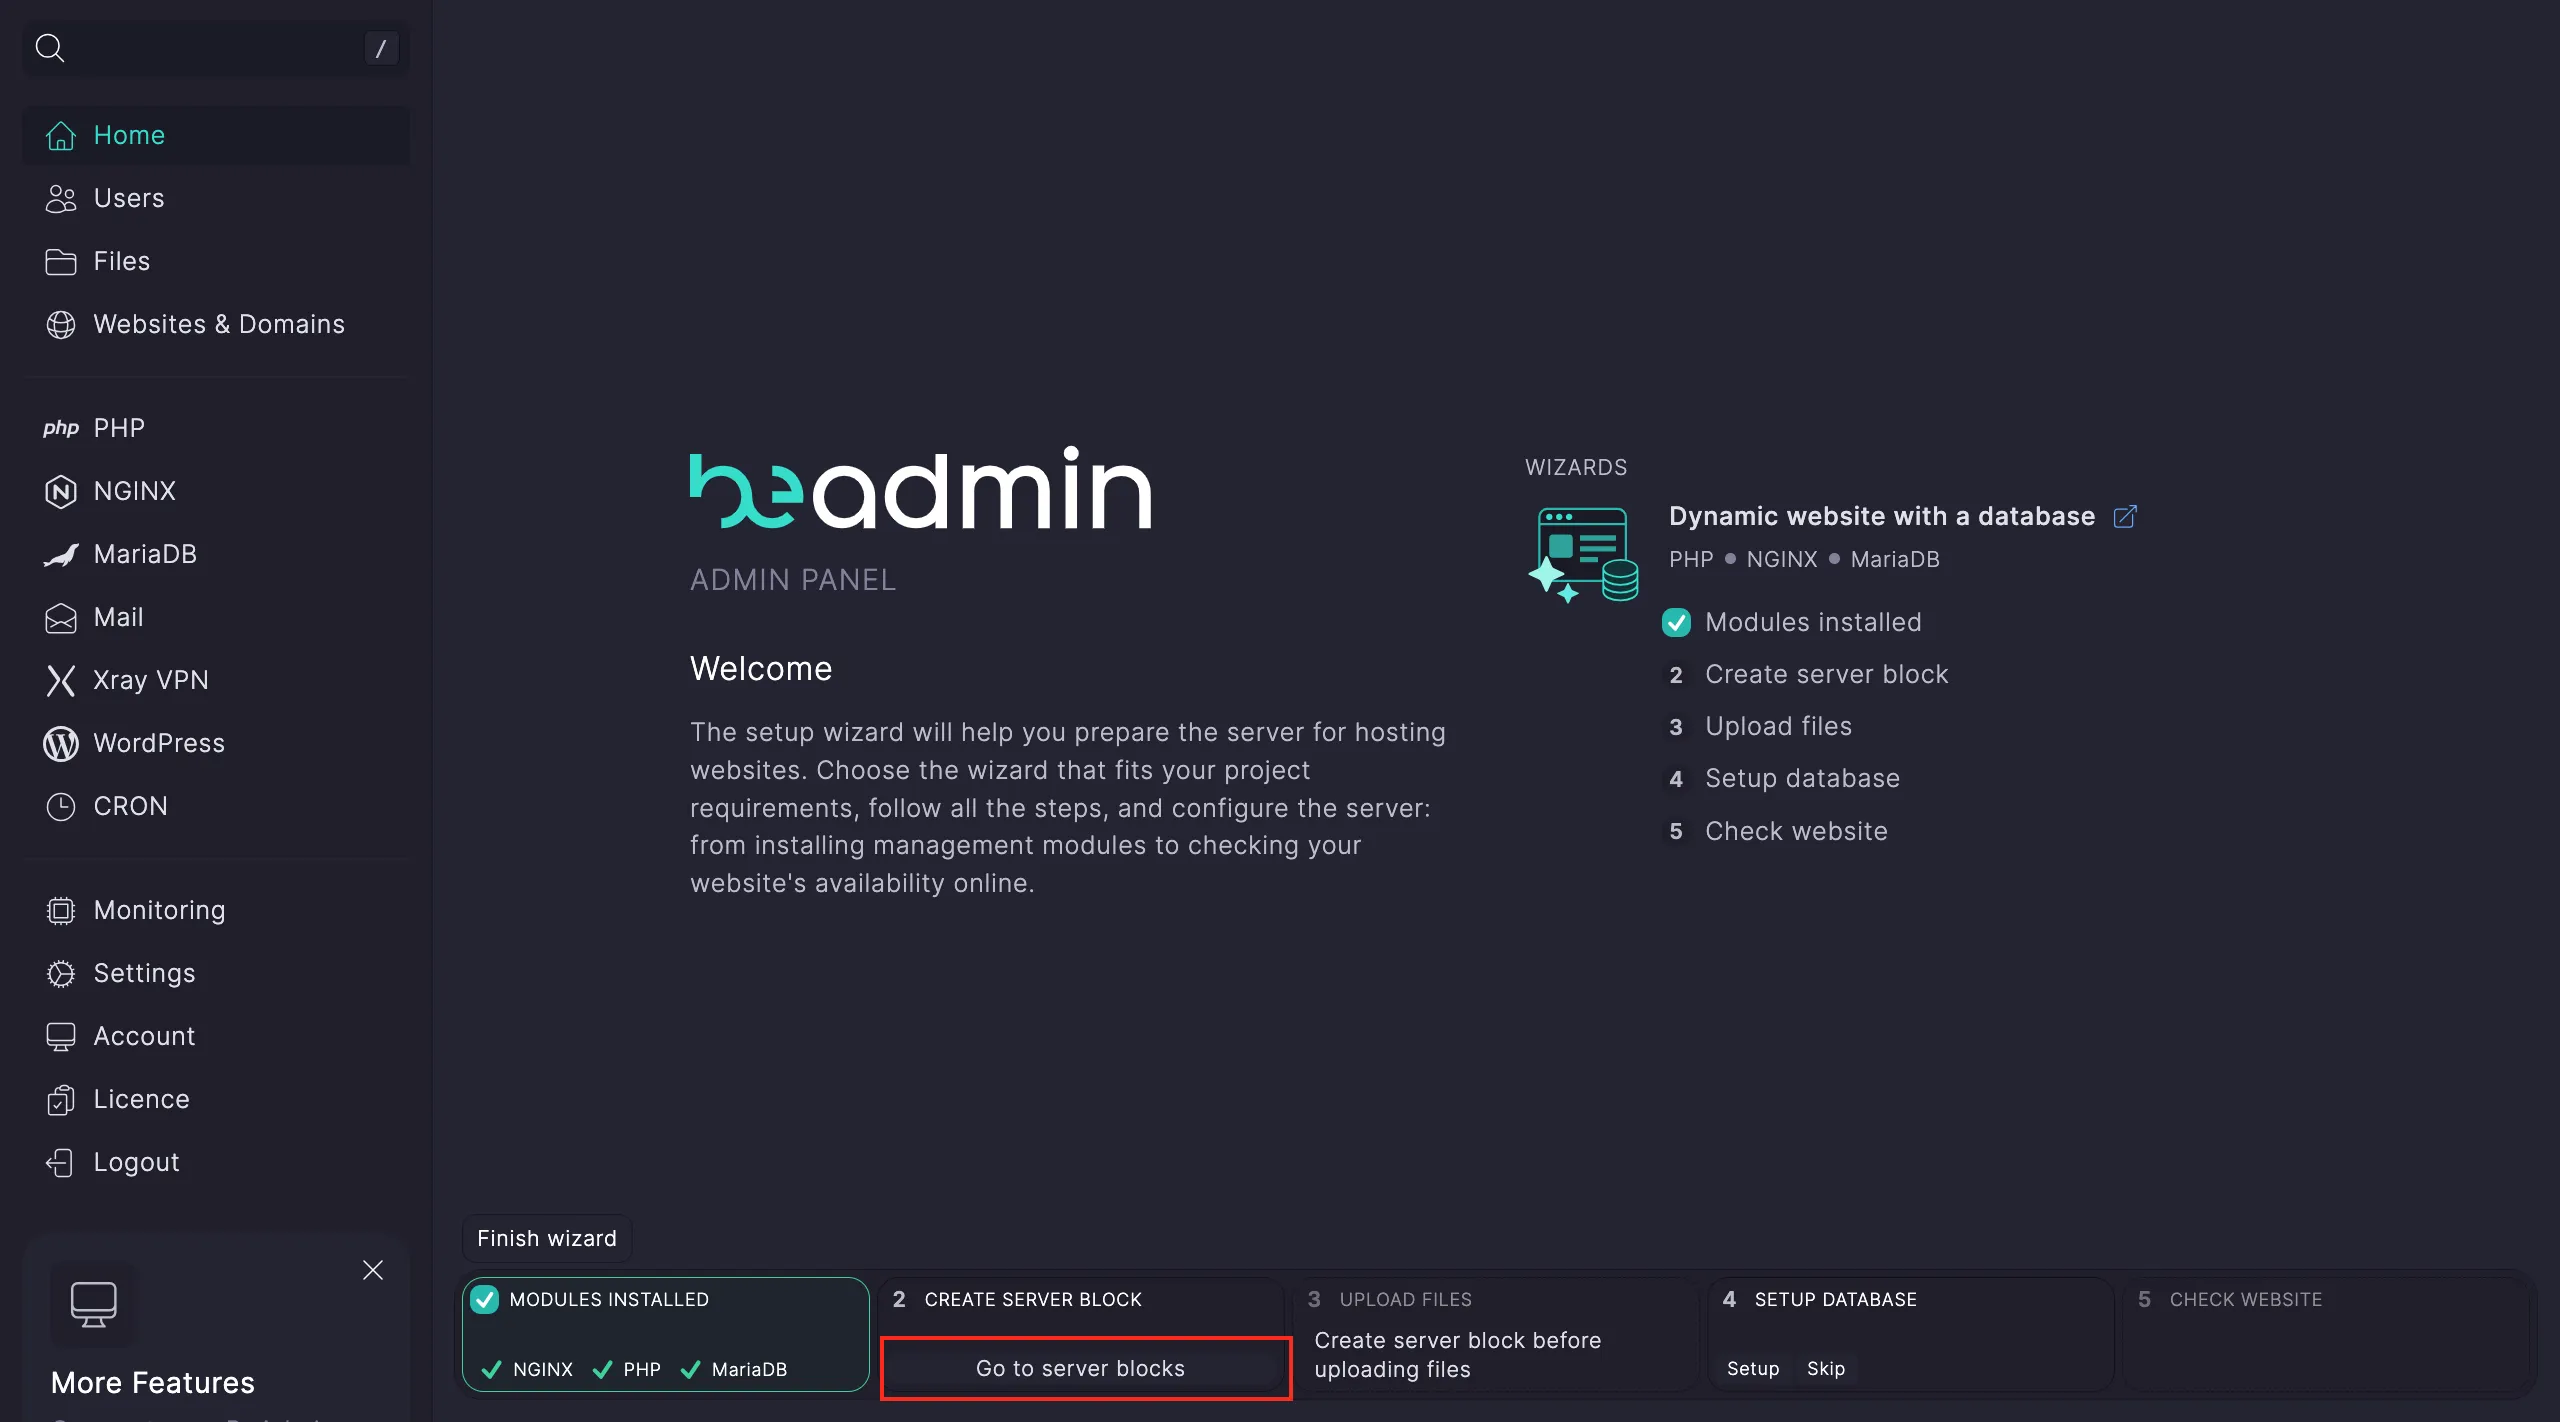
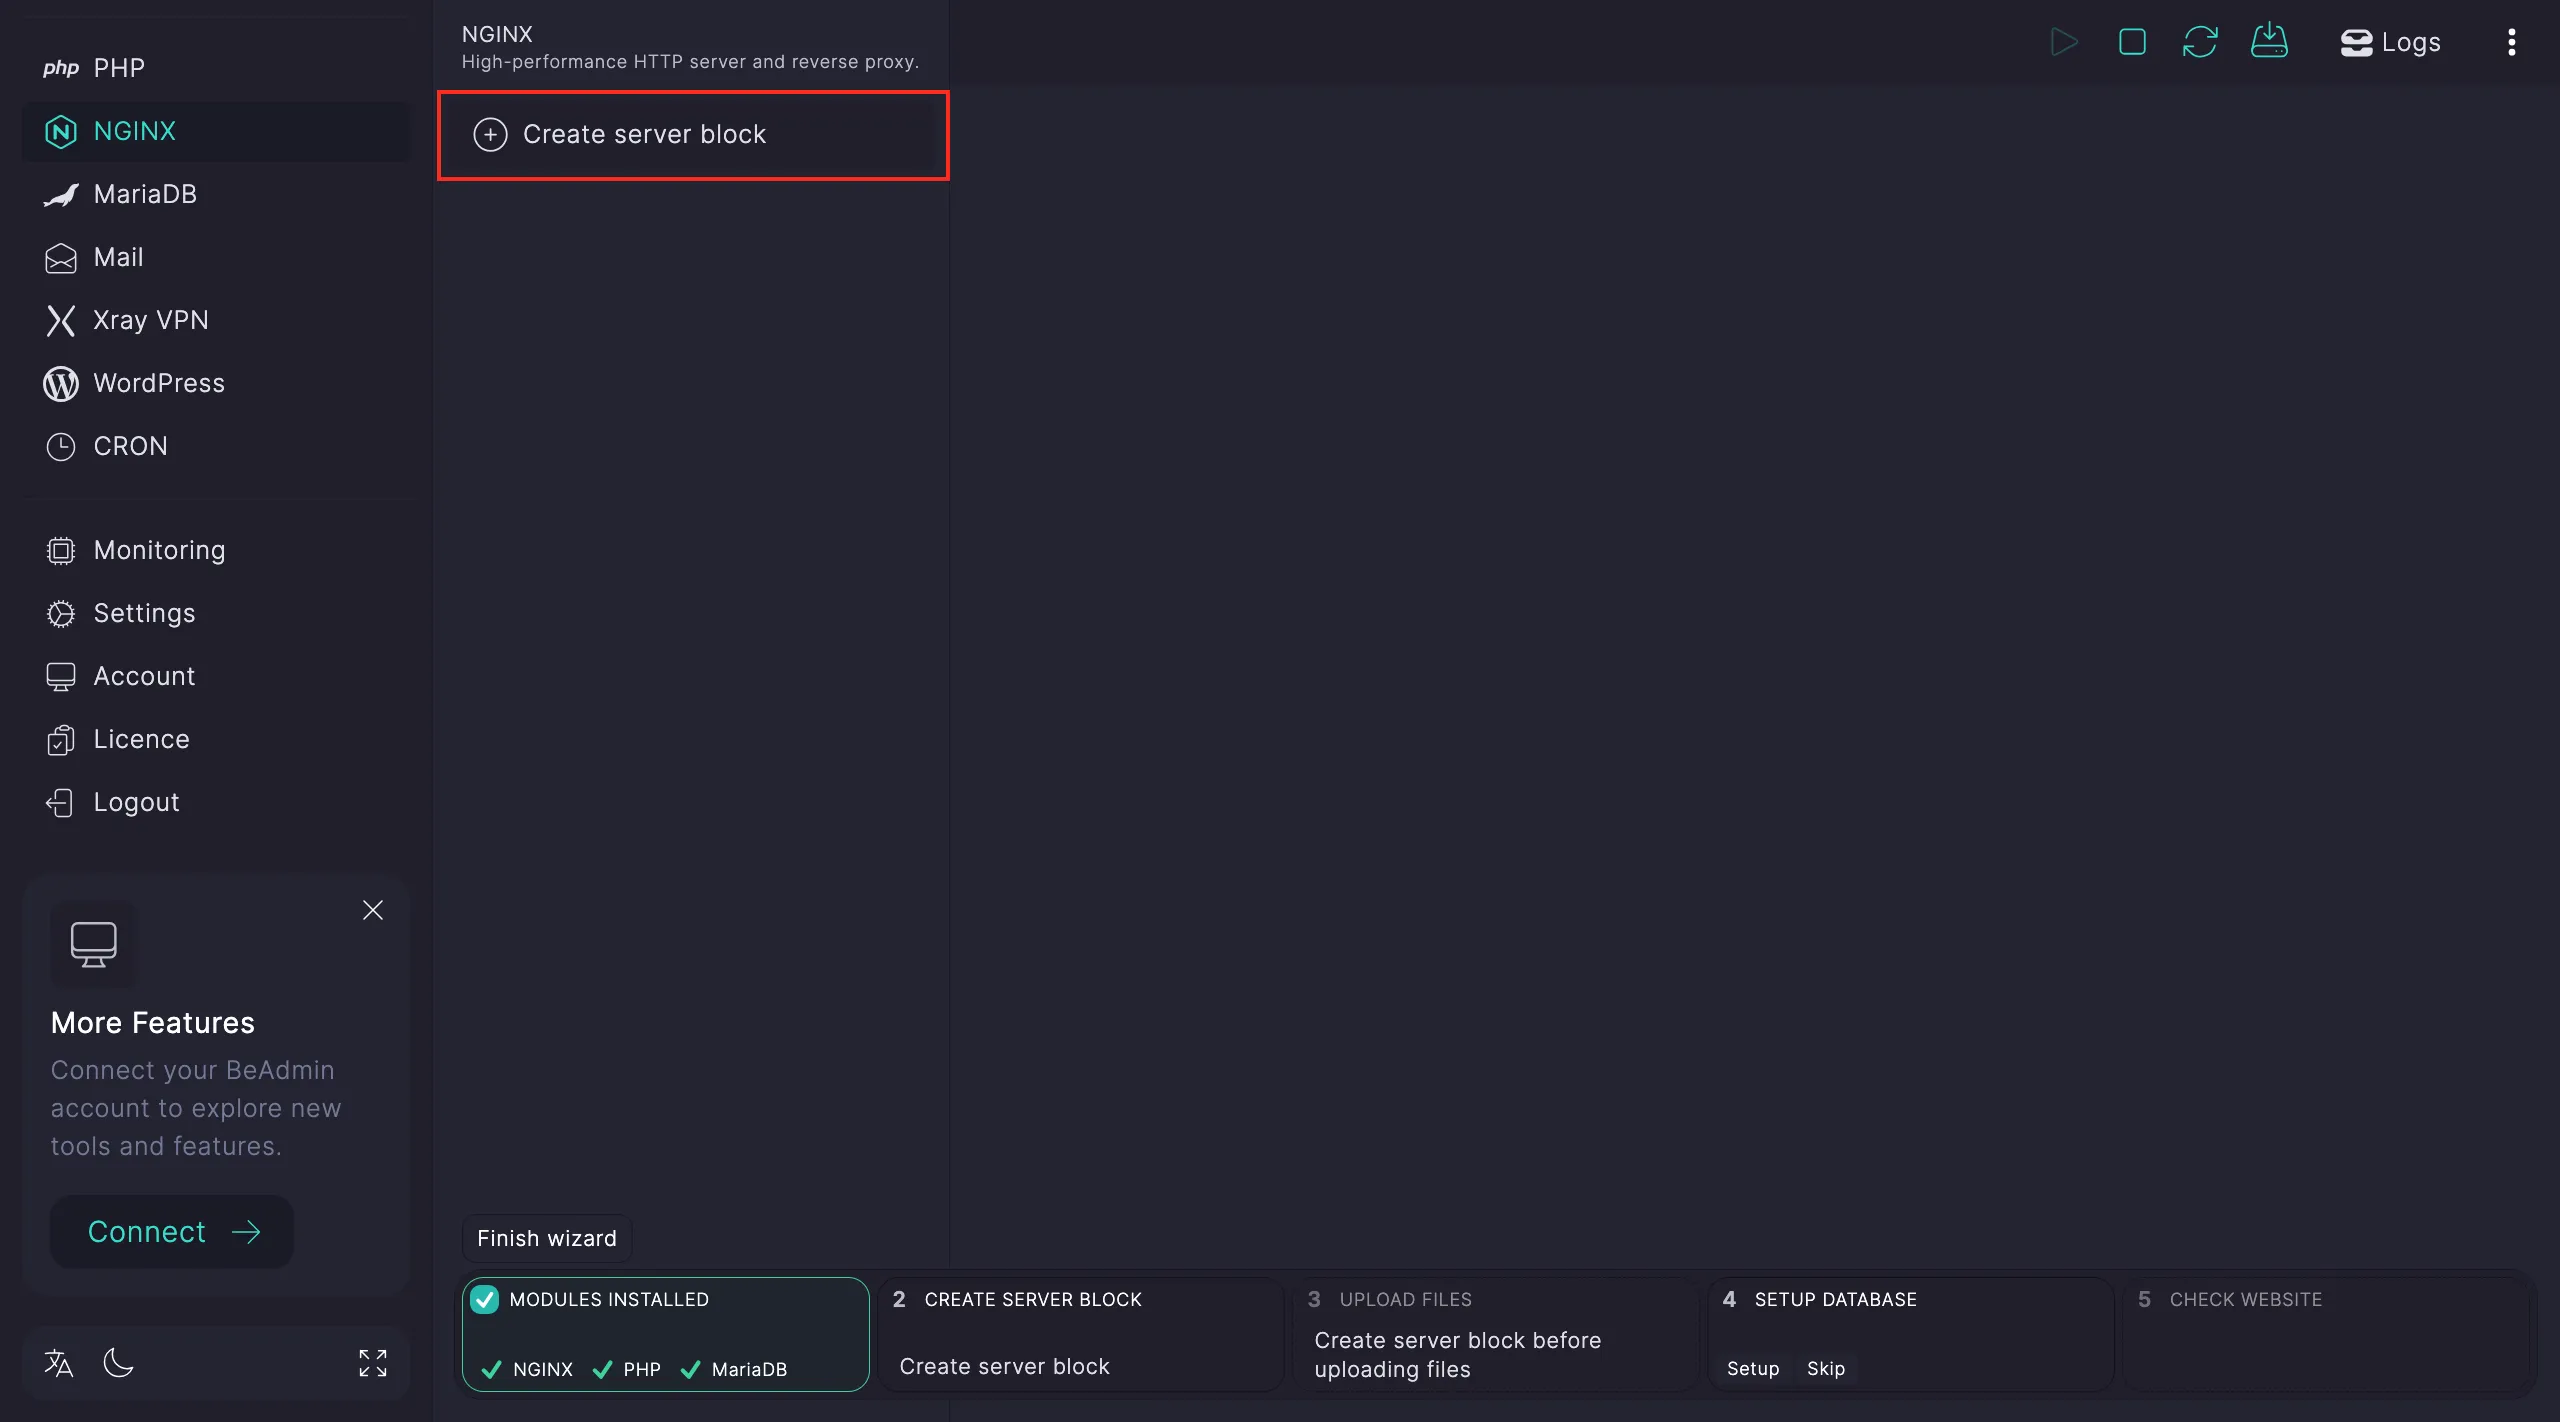
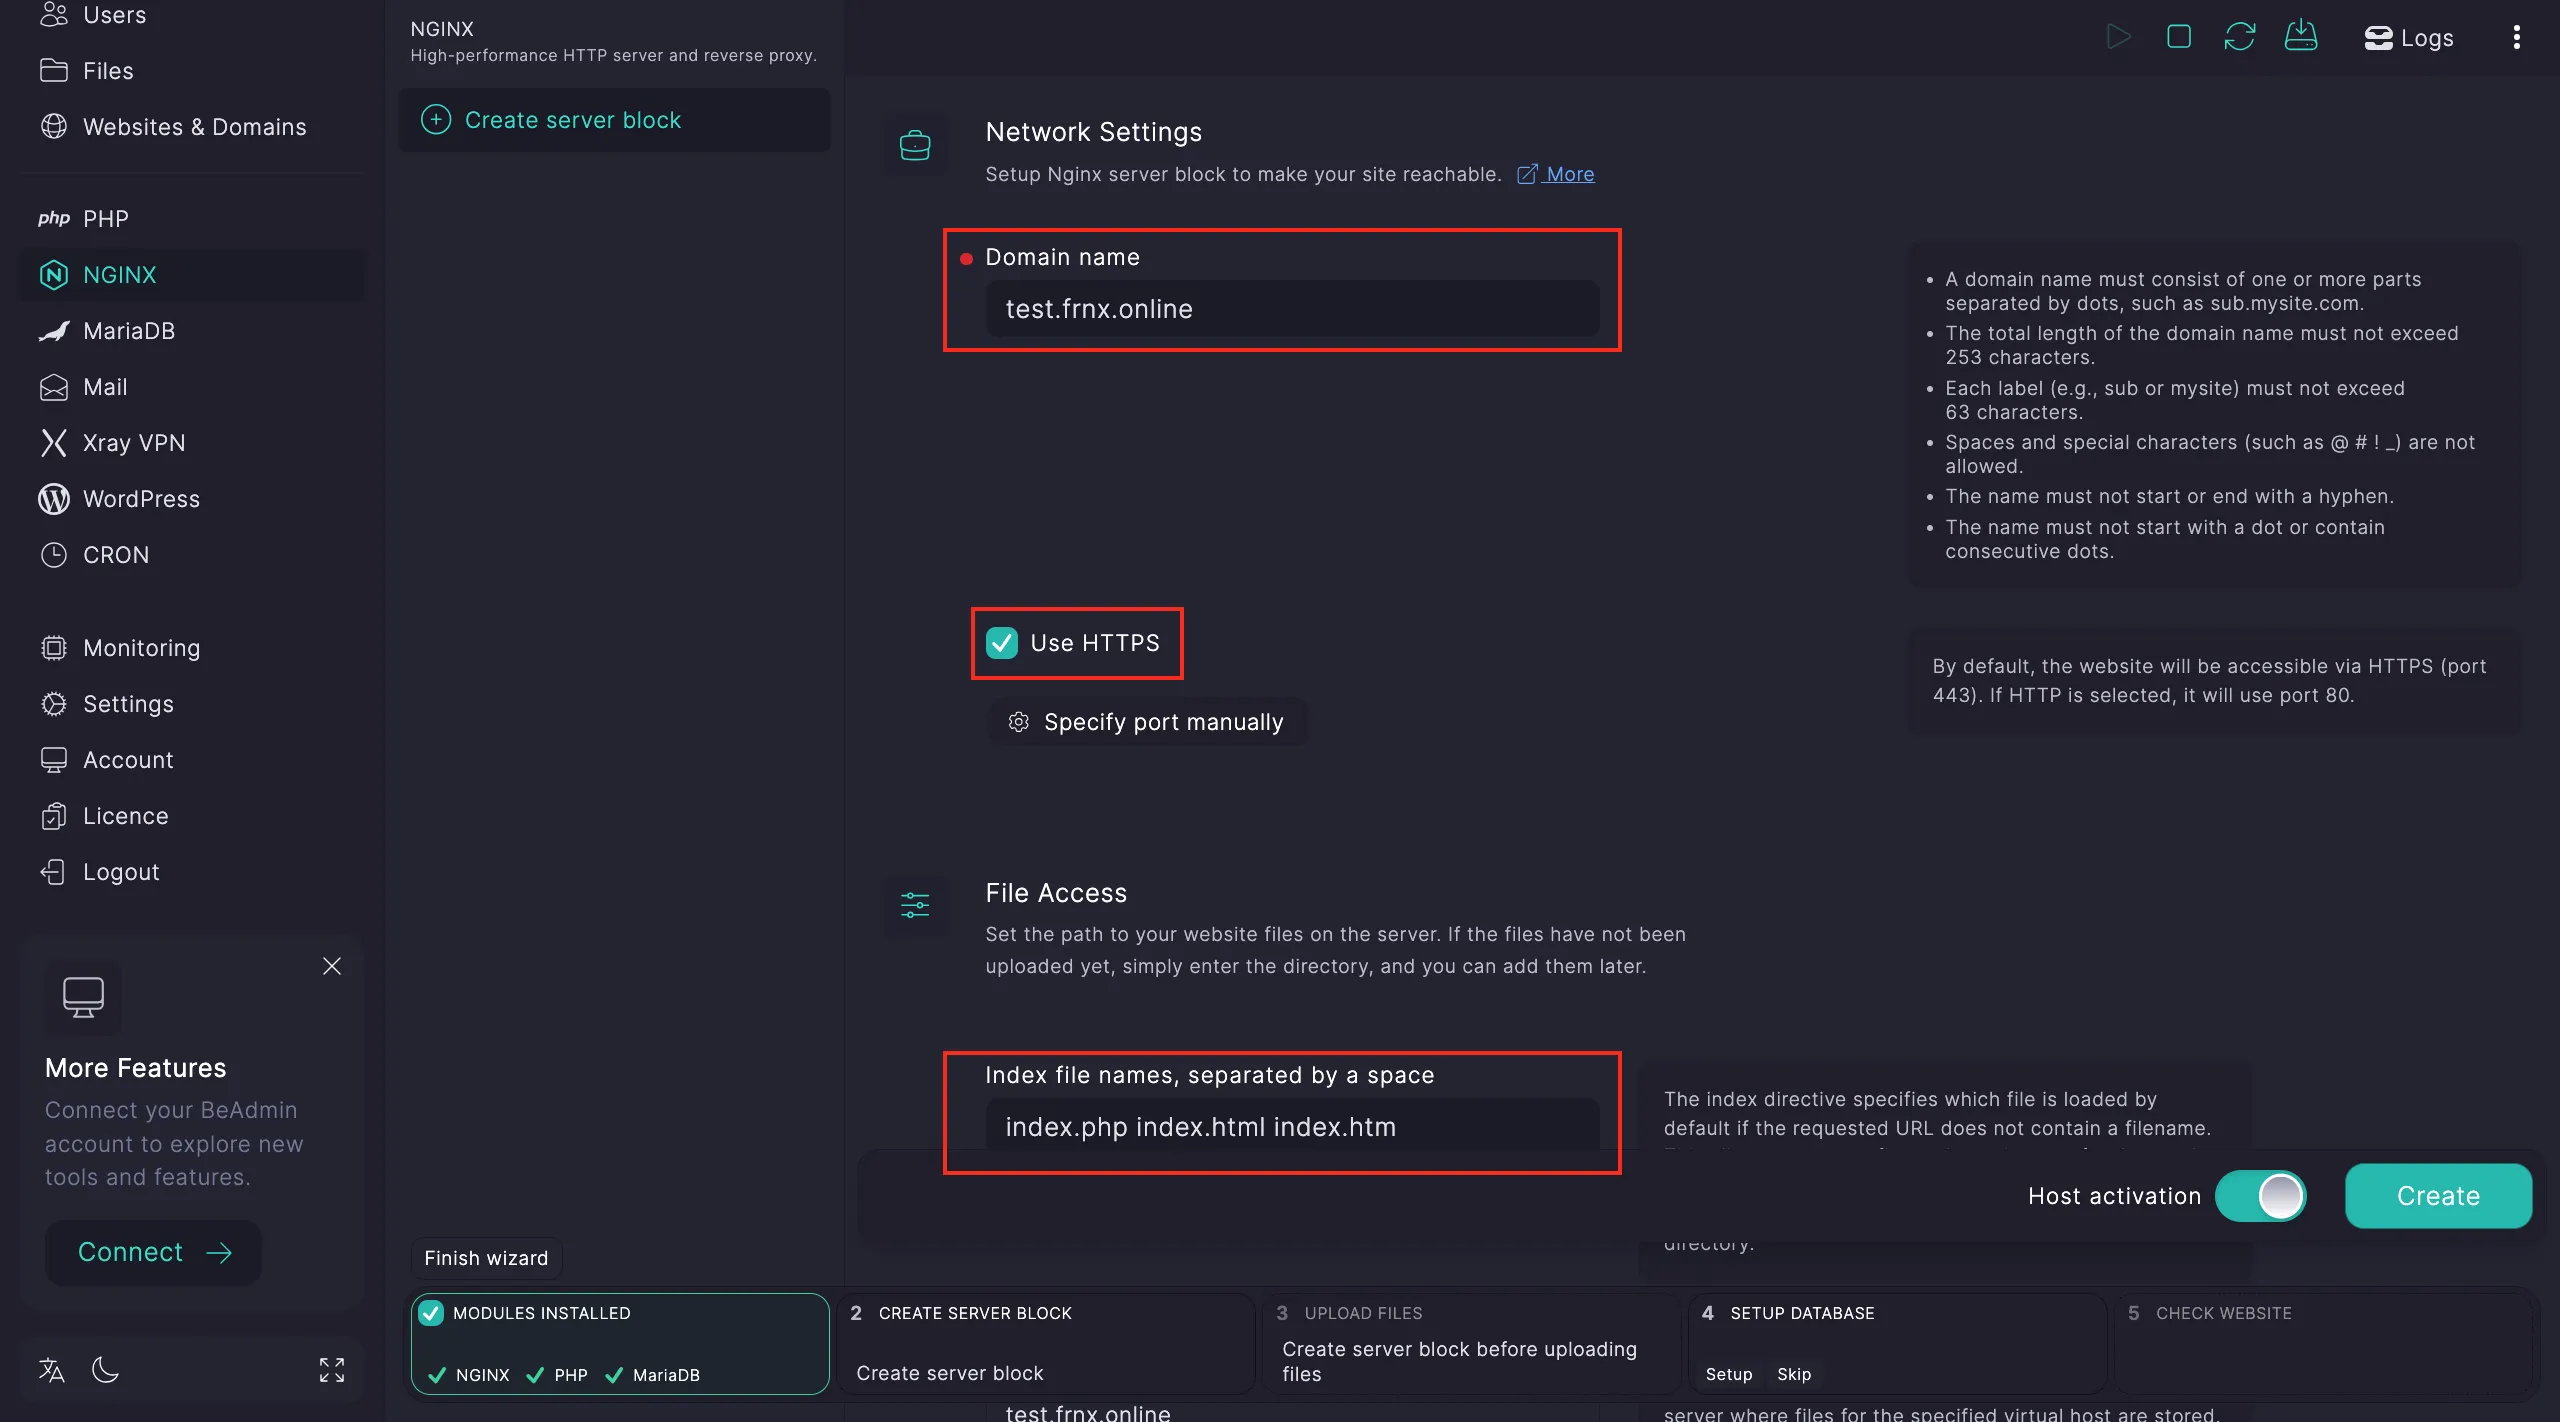
In step two, you’ll need to set up a virtual host. Click Go to hosts → Create virtual host.
In the window that opens, fill in the following:
- Domain name of your site.
- Select HTTPS or set a custom port.
- Add
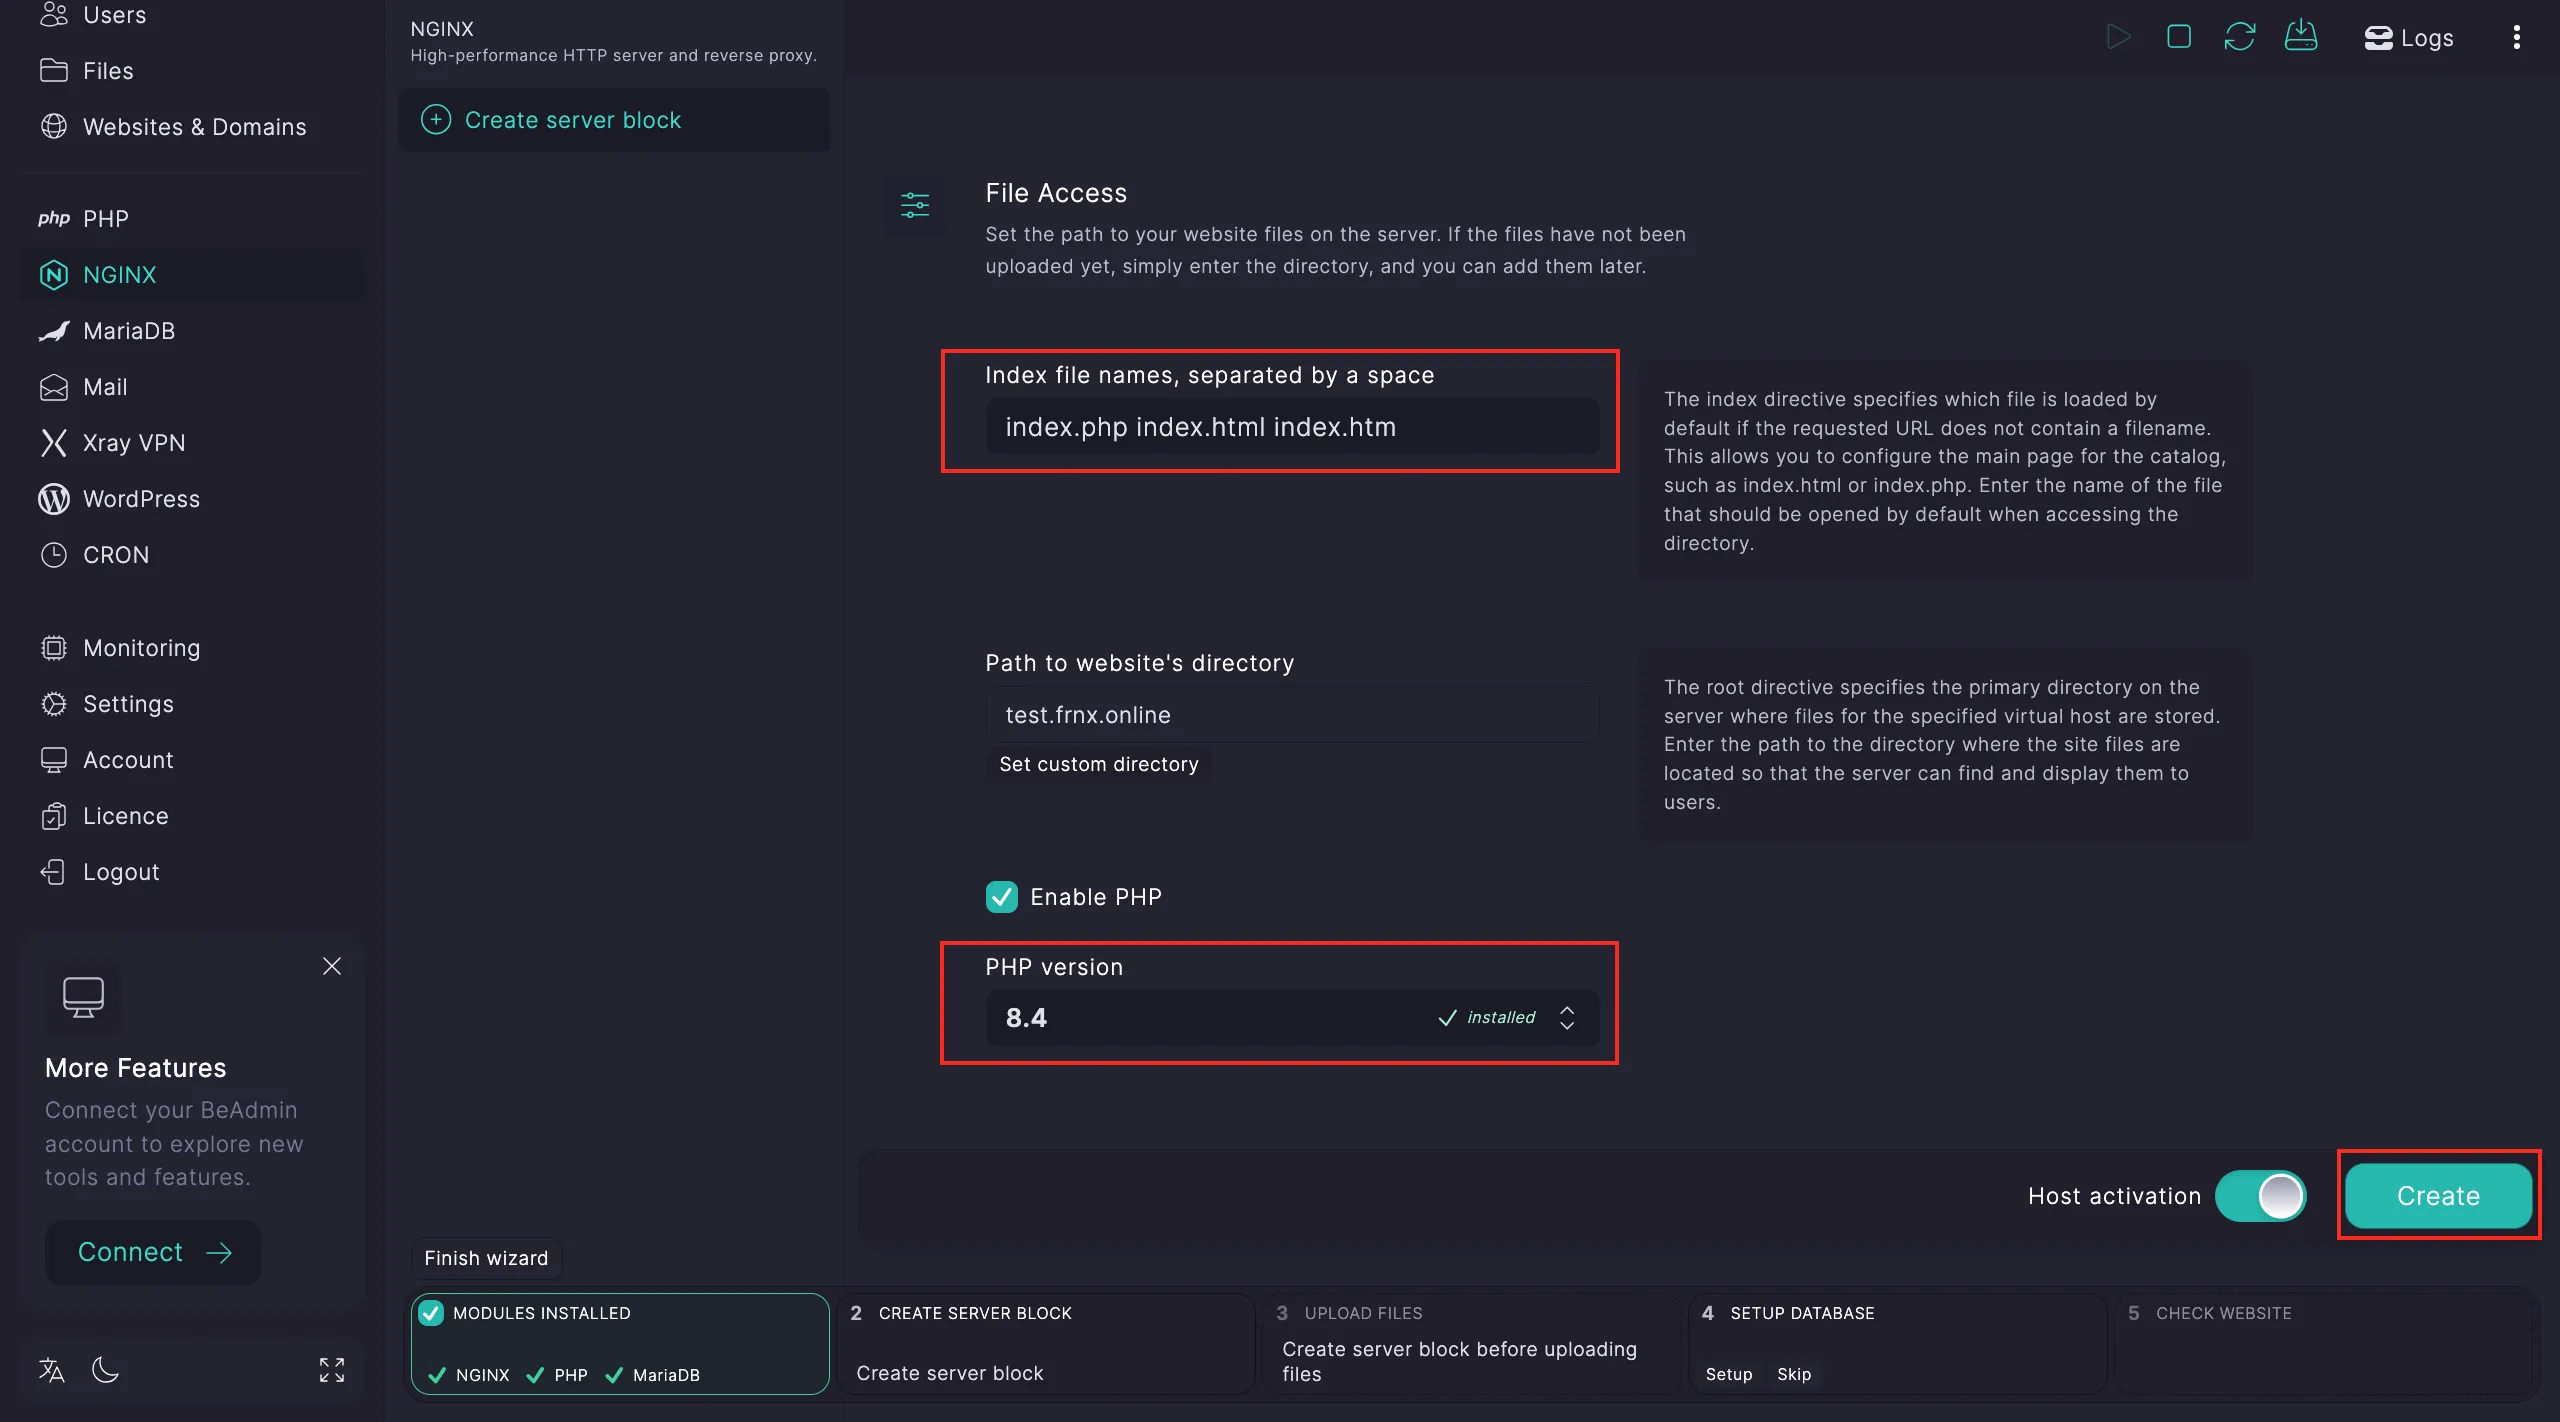
index.phpat the top of the index files list. - Leave the default folder for files or choose/create your own.
- Pick the PHP version you want (if it’s missing, BeAdmin will offer to install it).
Note
If you choose HTTPS while creating the host, the system will automatically generate an SSL certificate. Make sure your domain points to the server’s IP where the panel is installed.
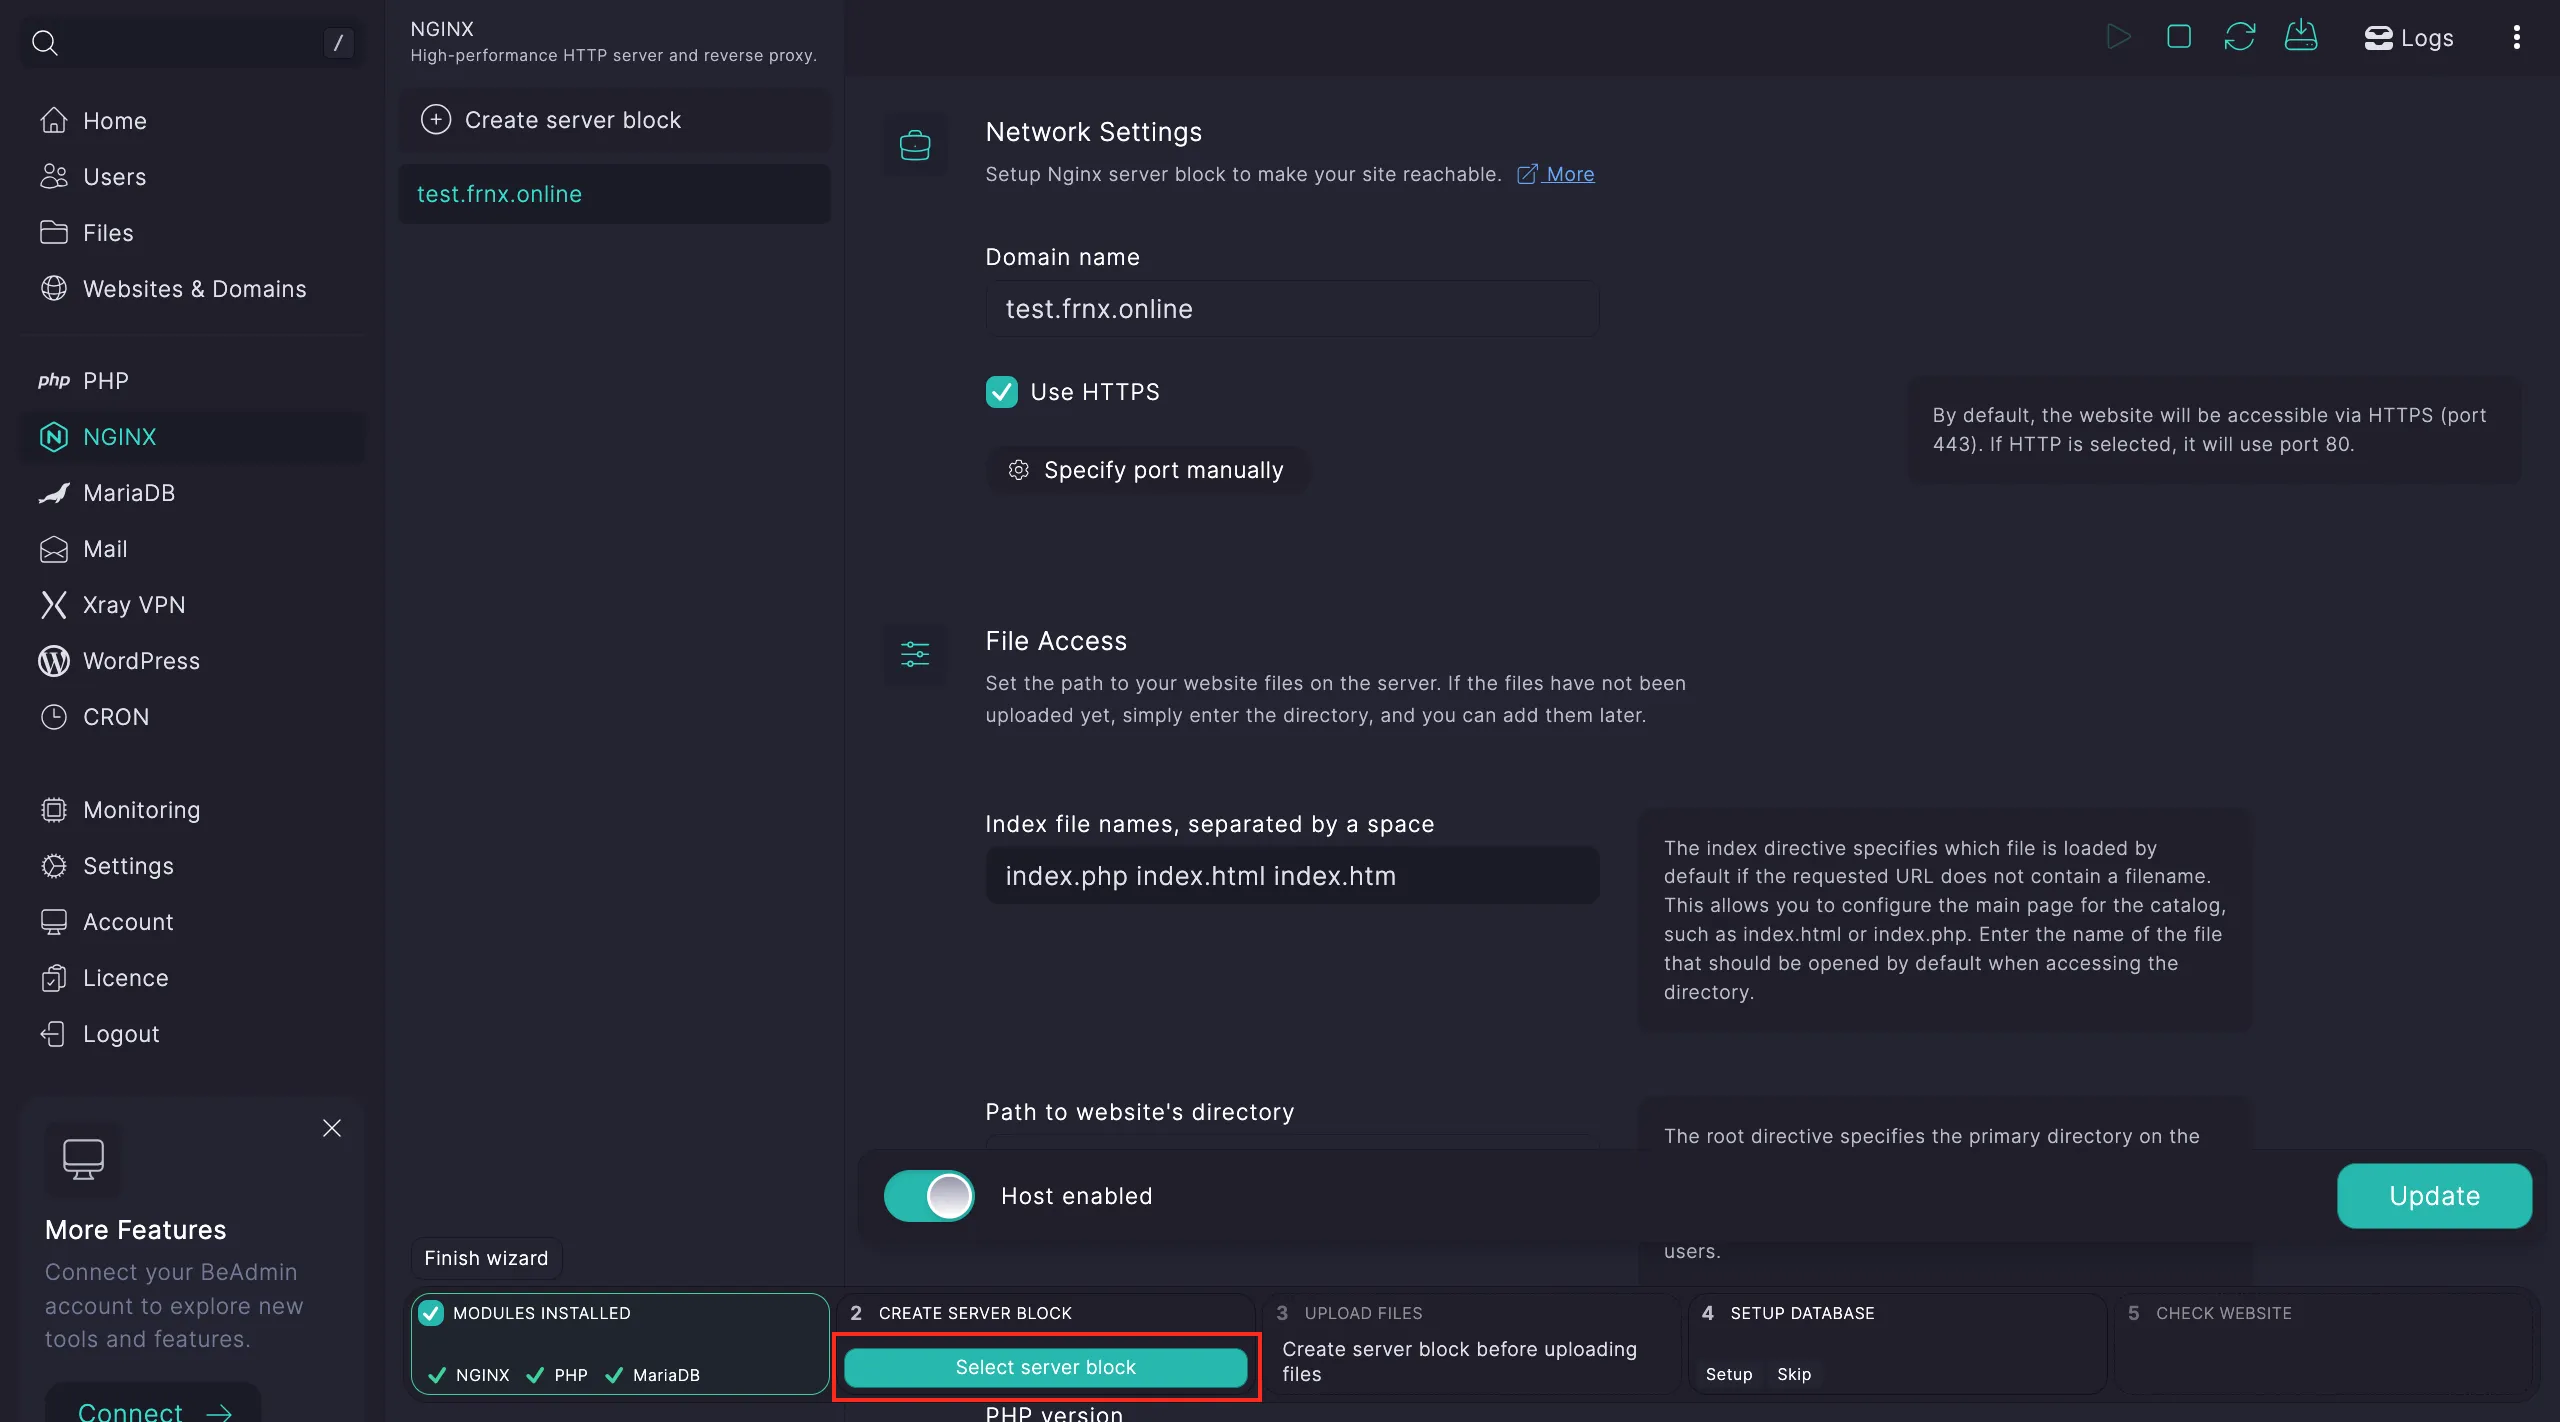
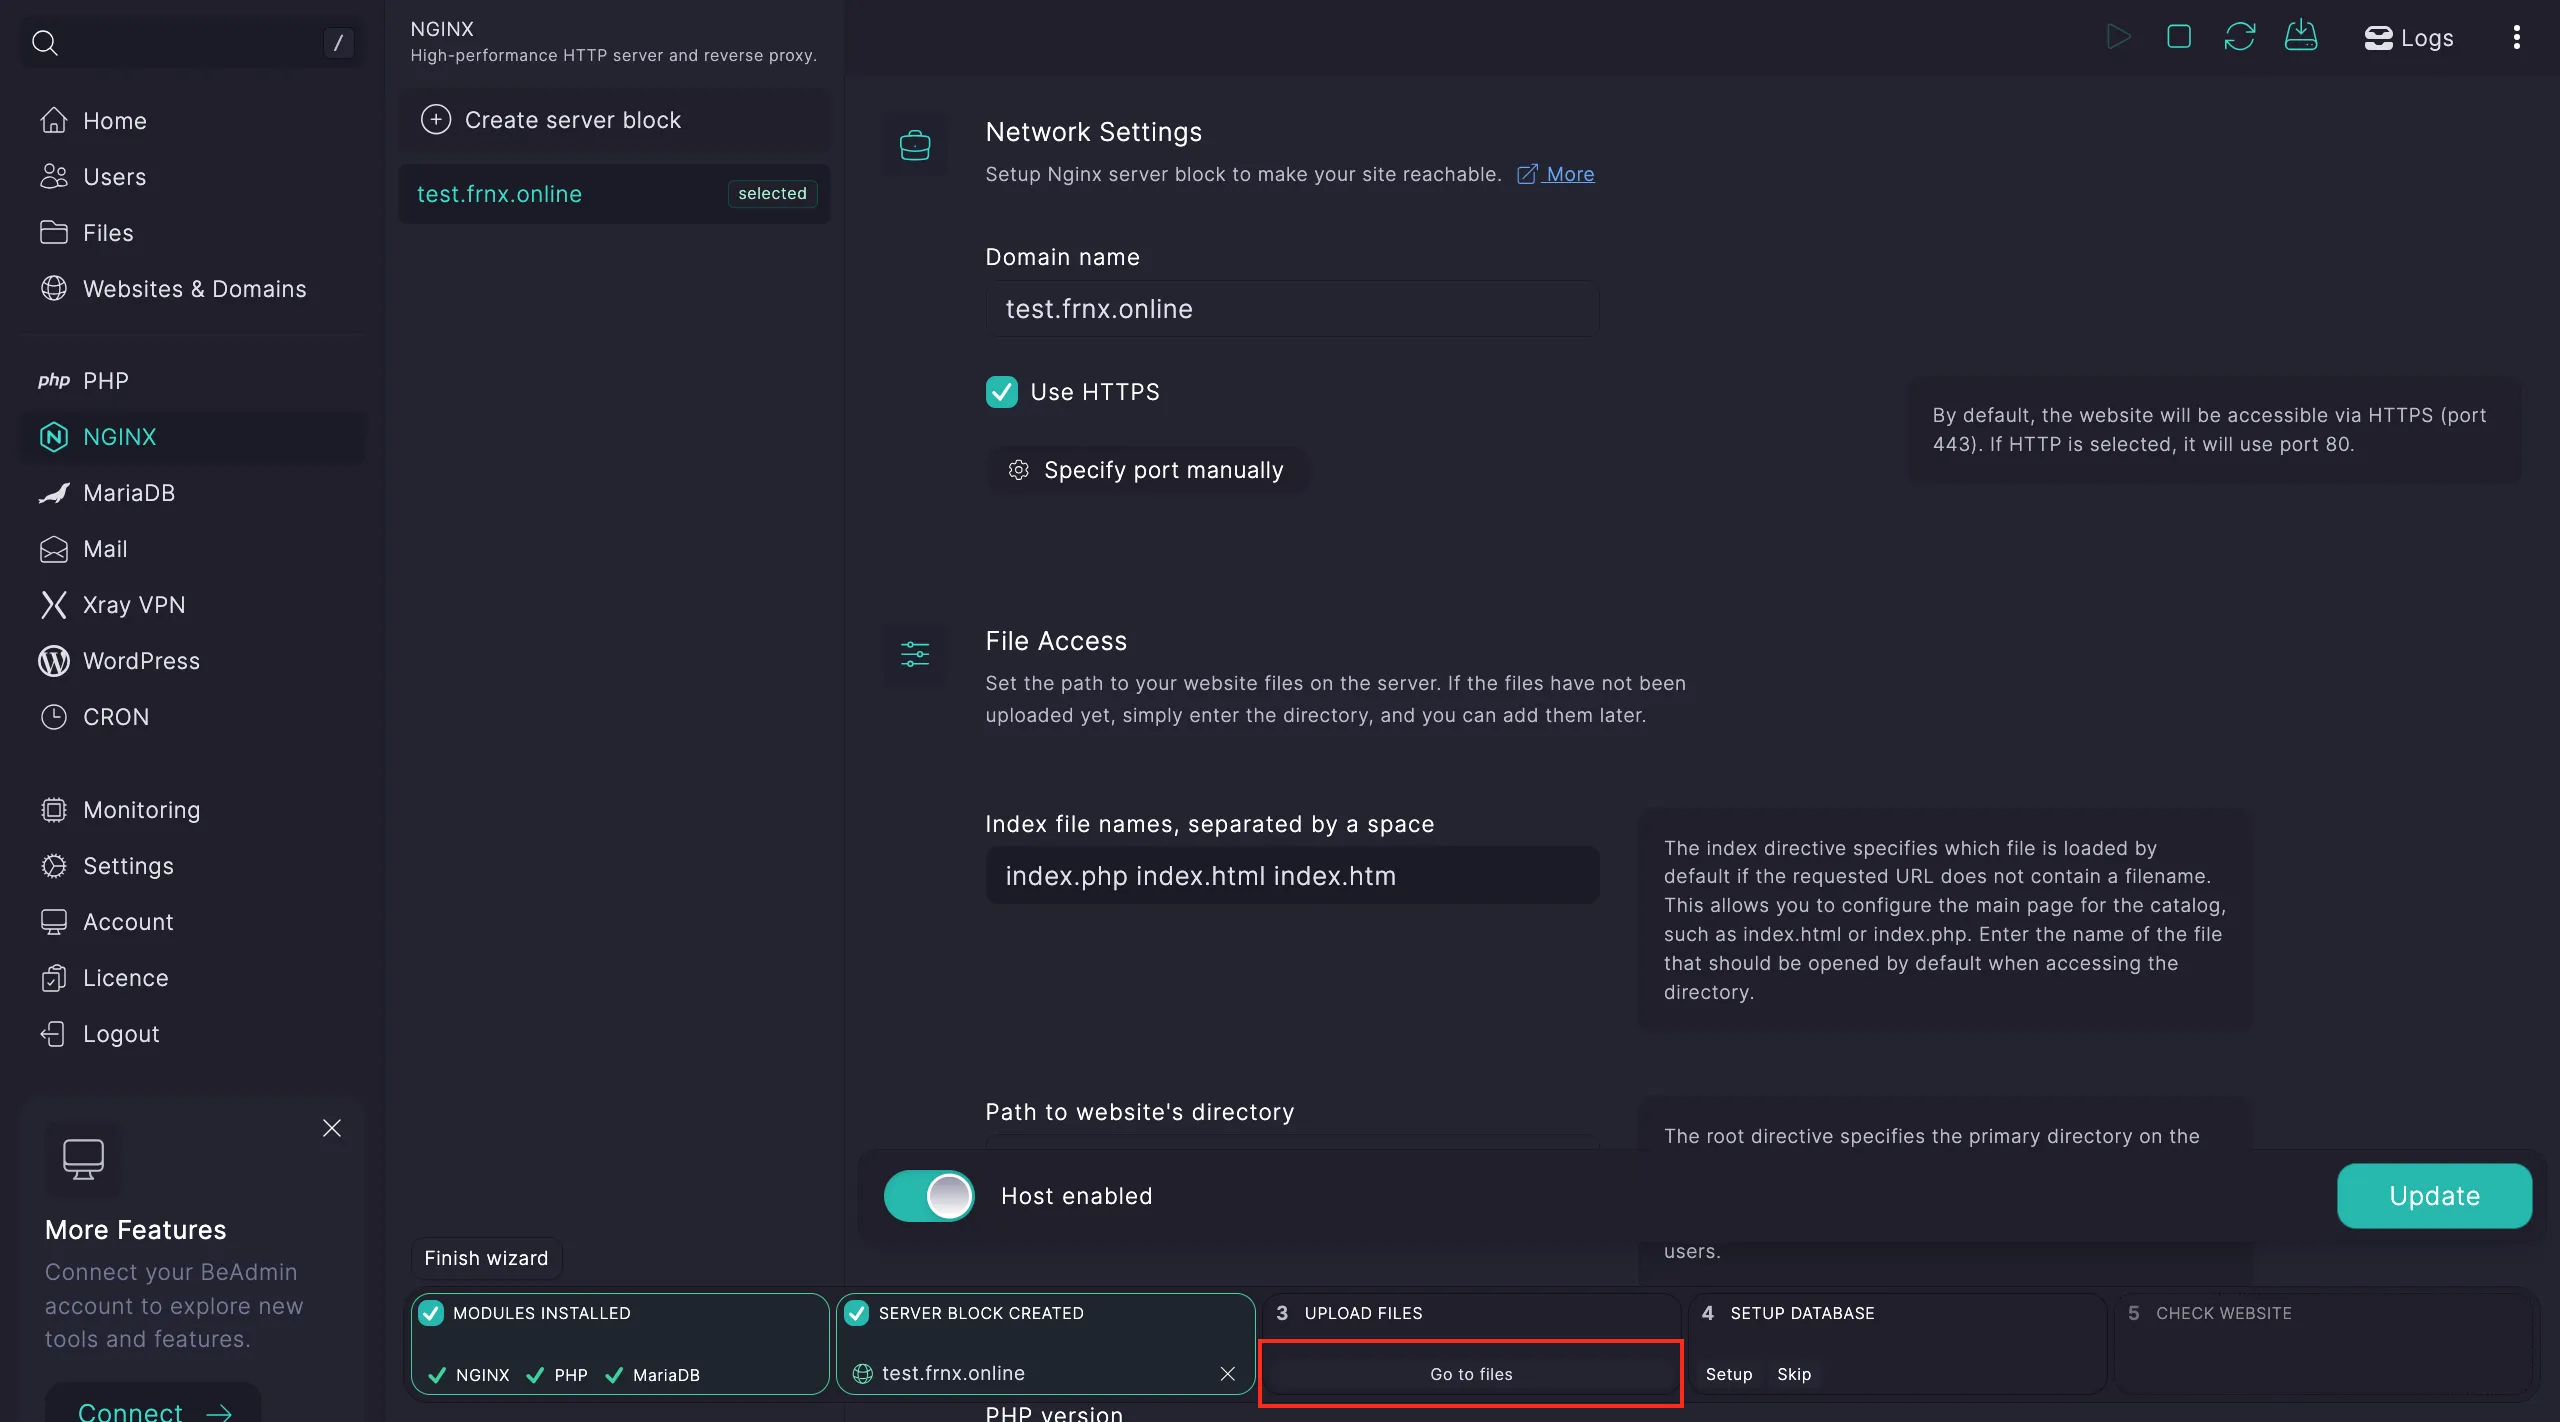
After creating the host, select it and click Use this host.
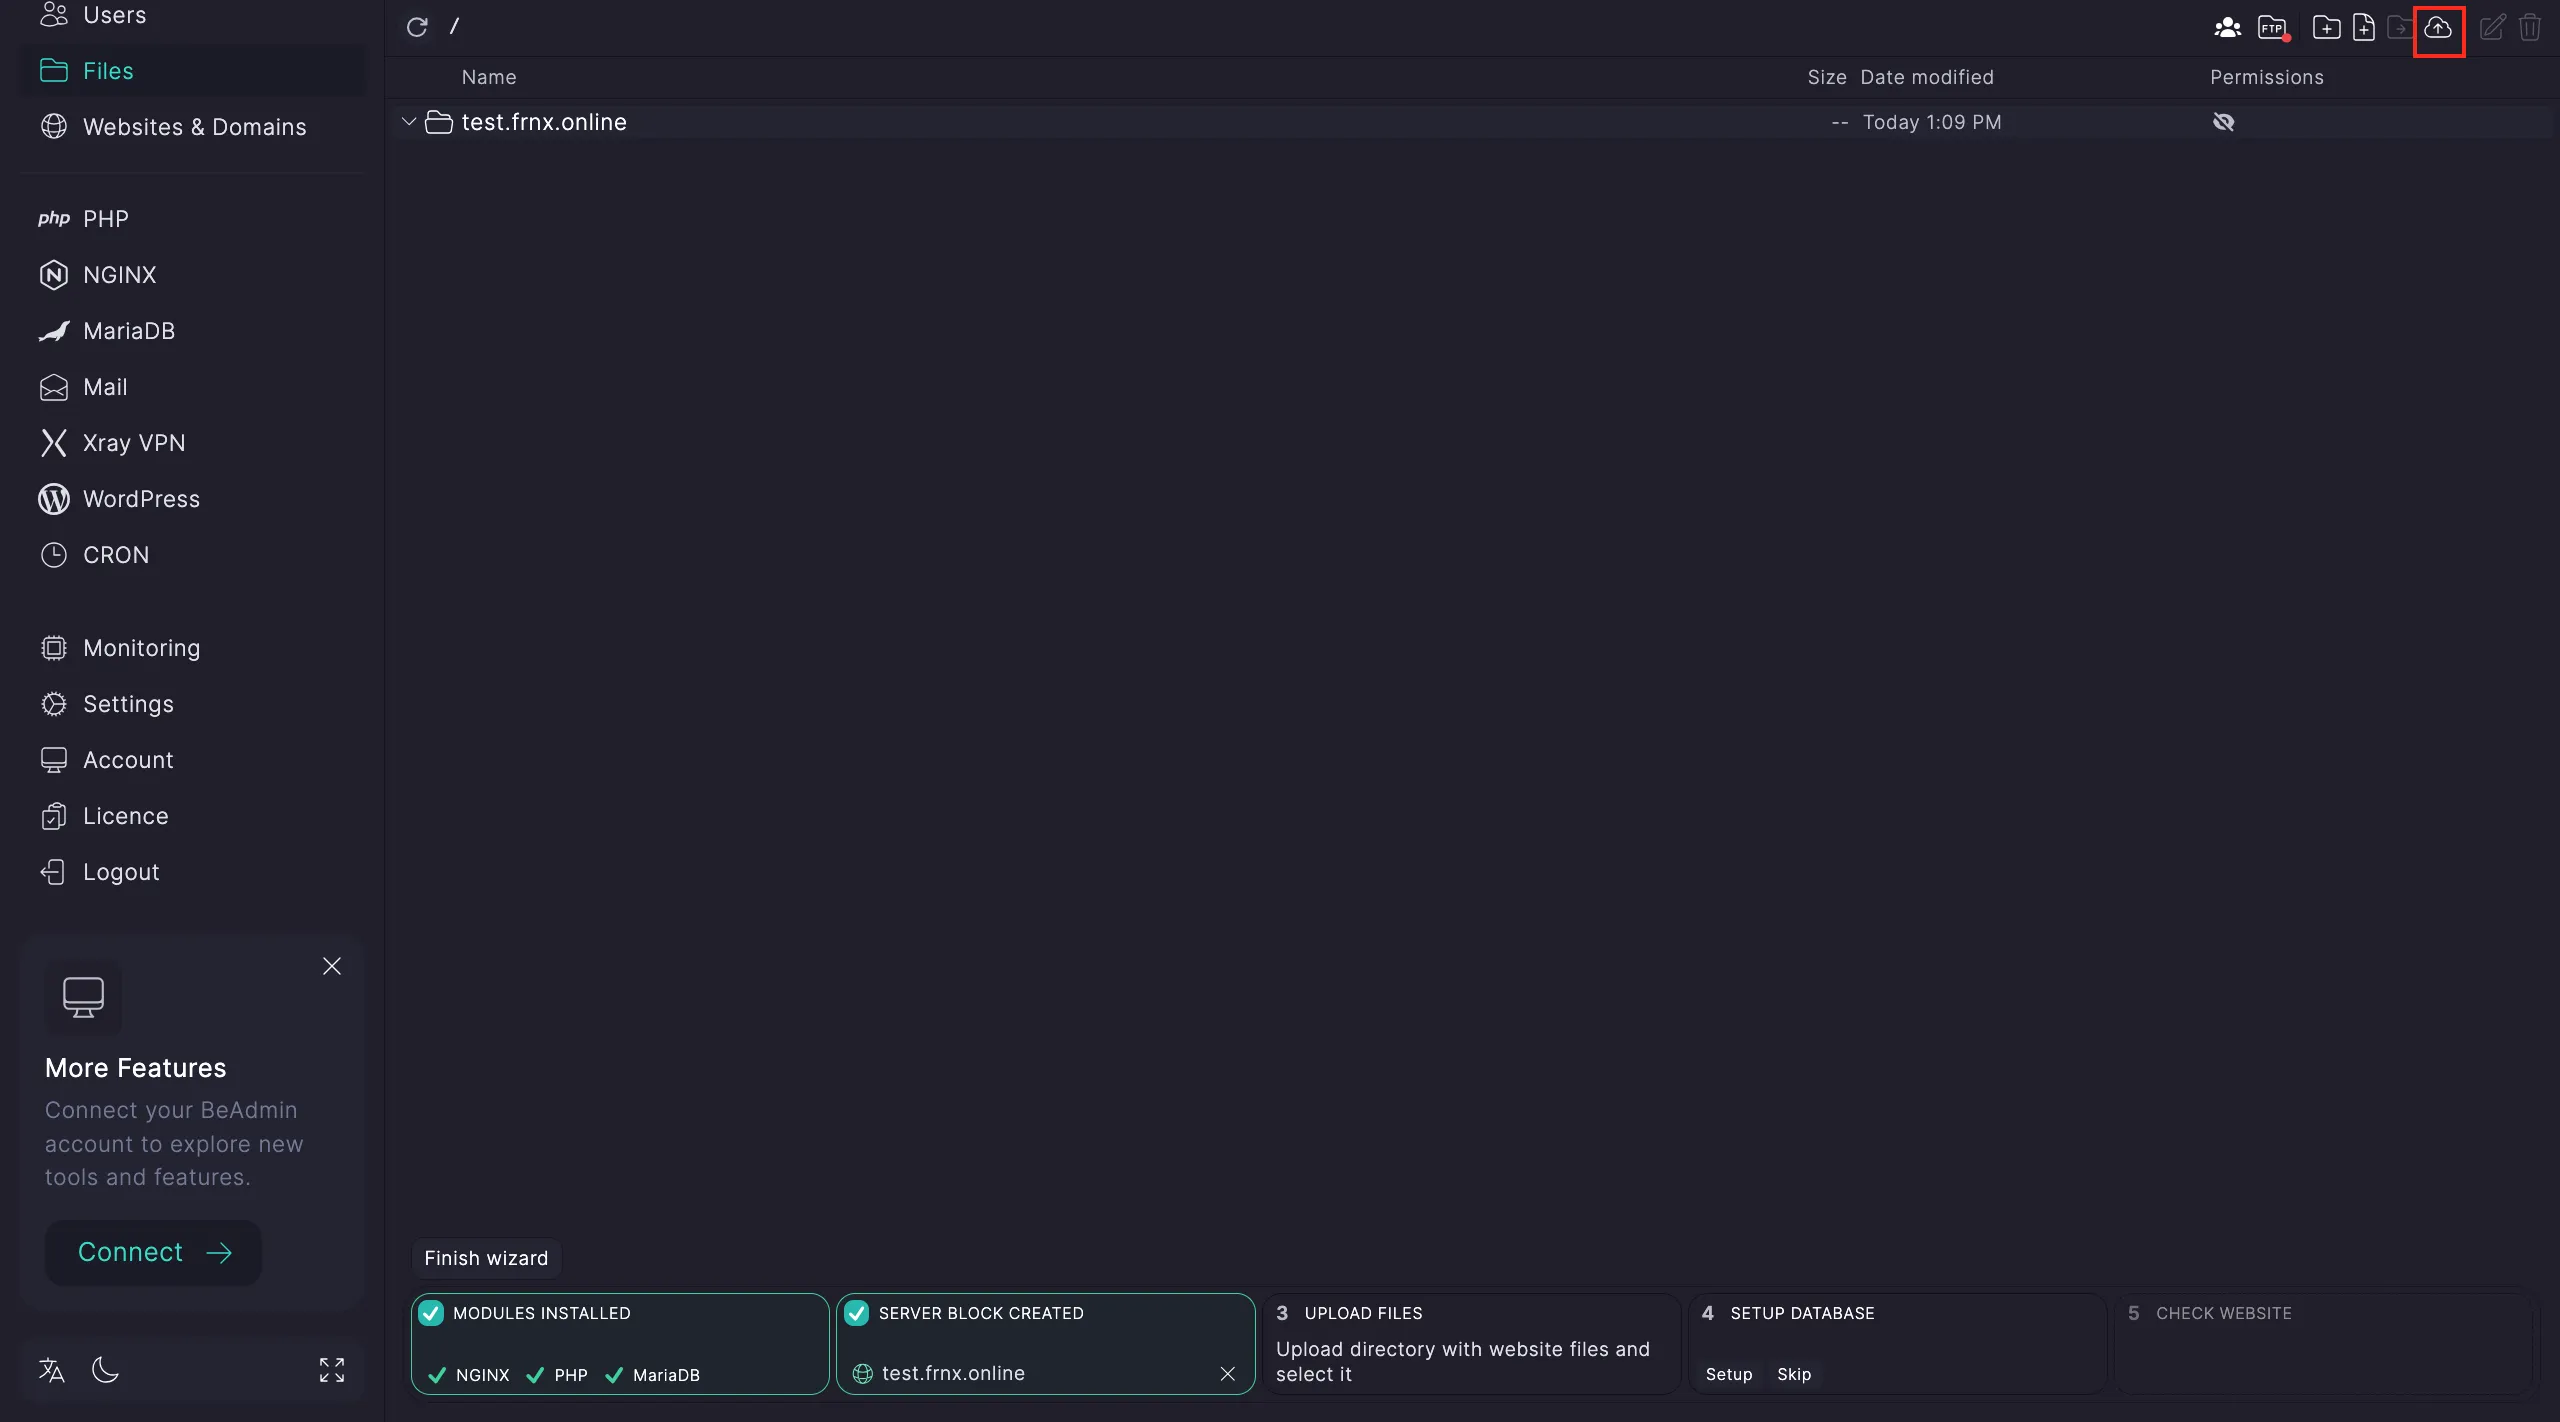
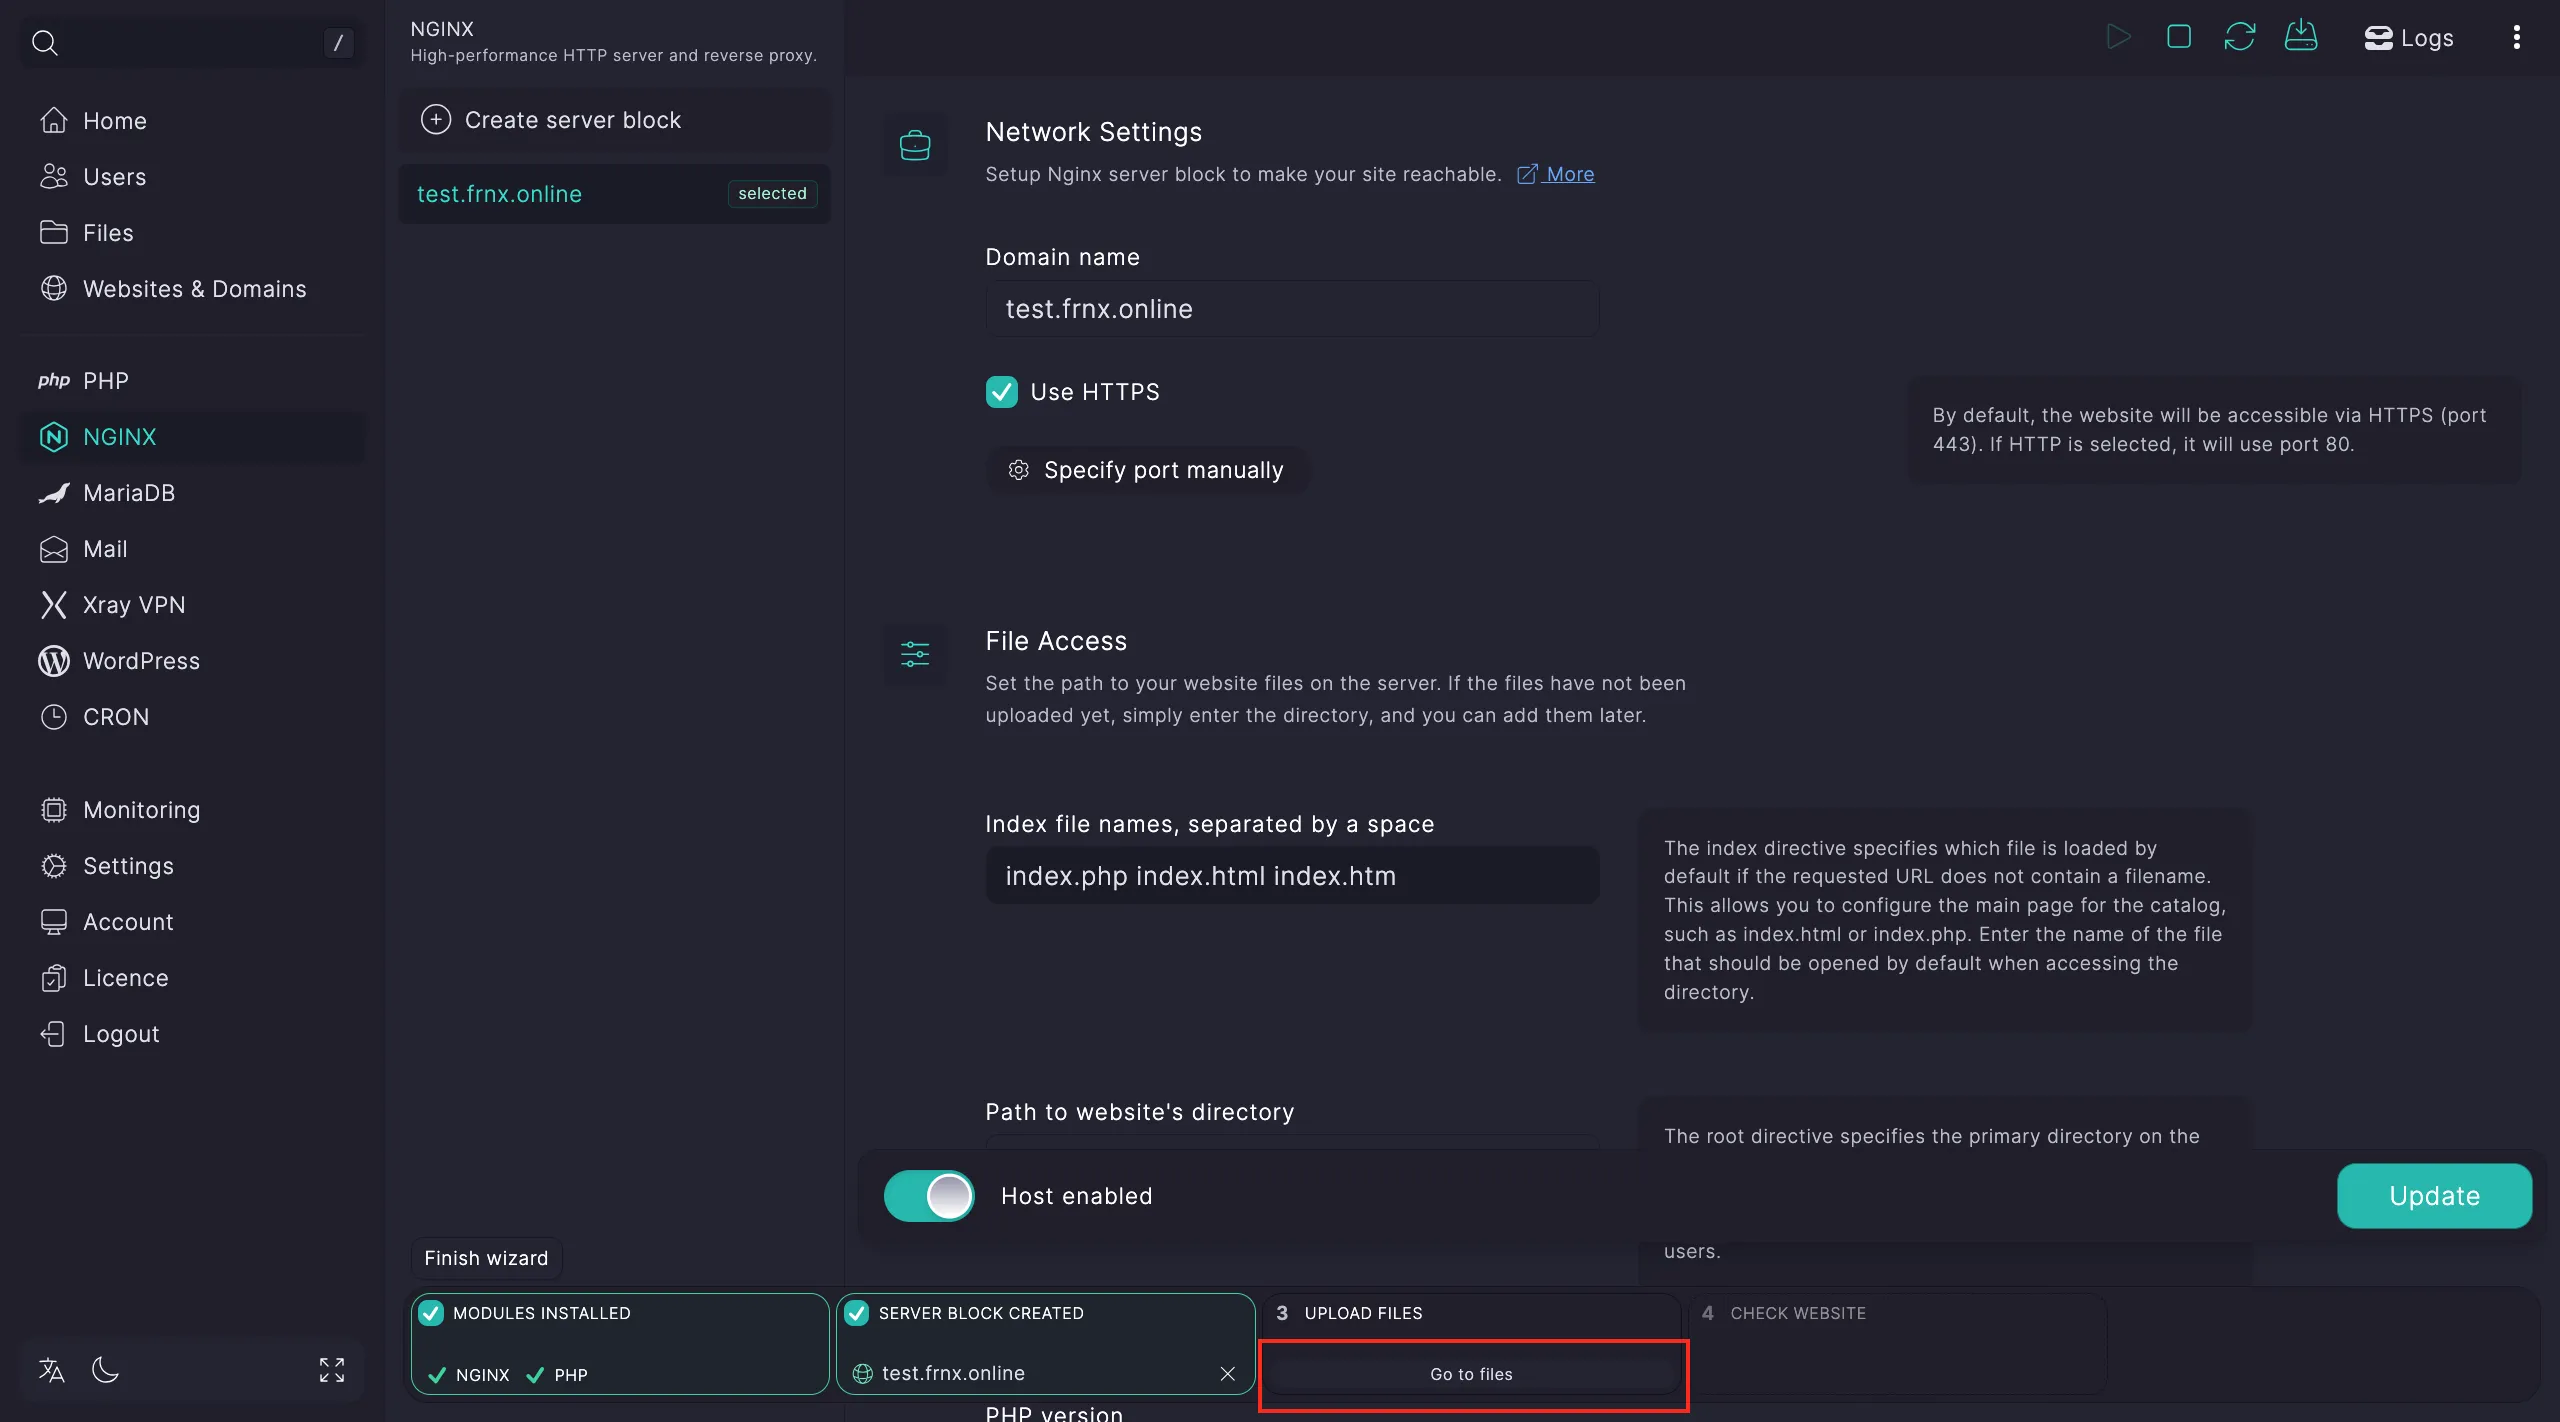
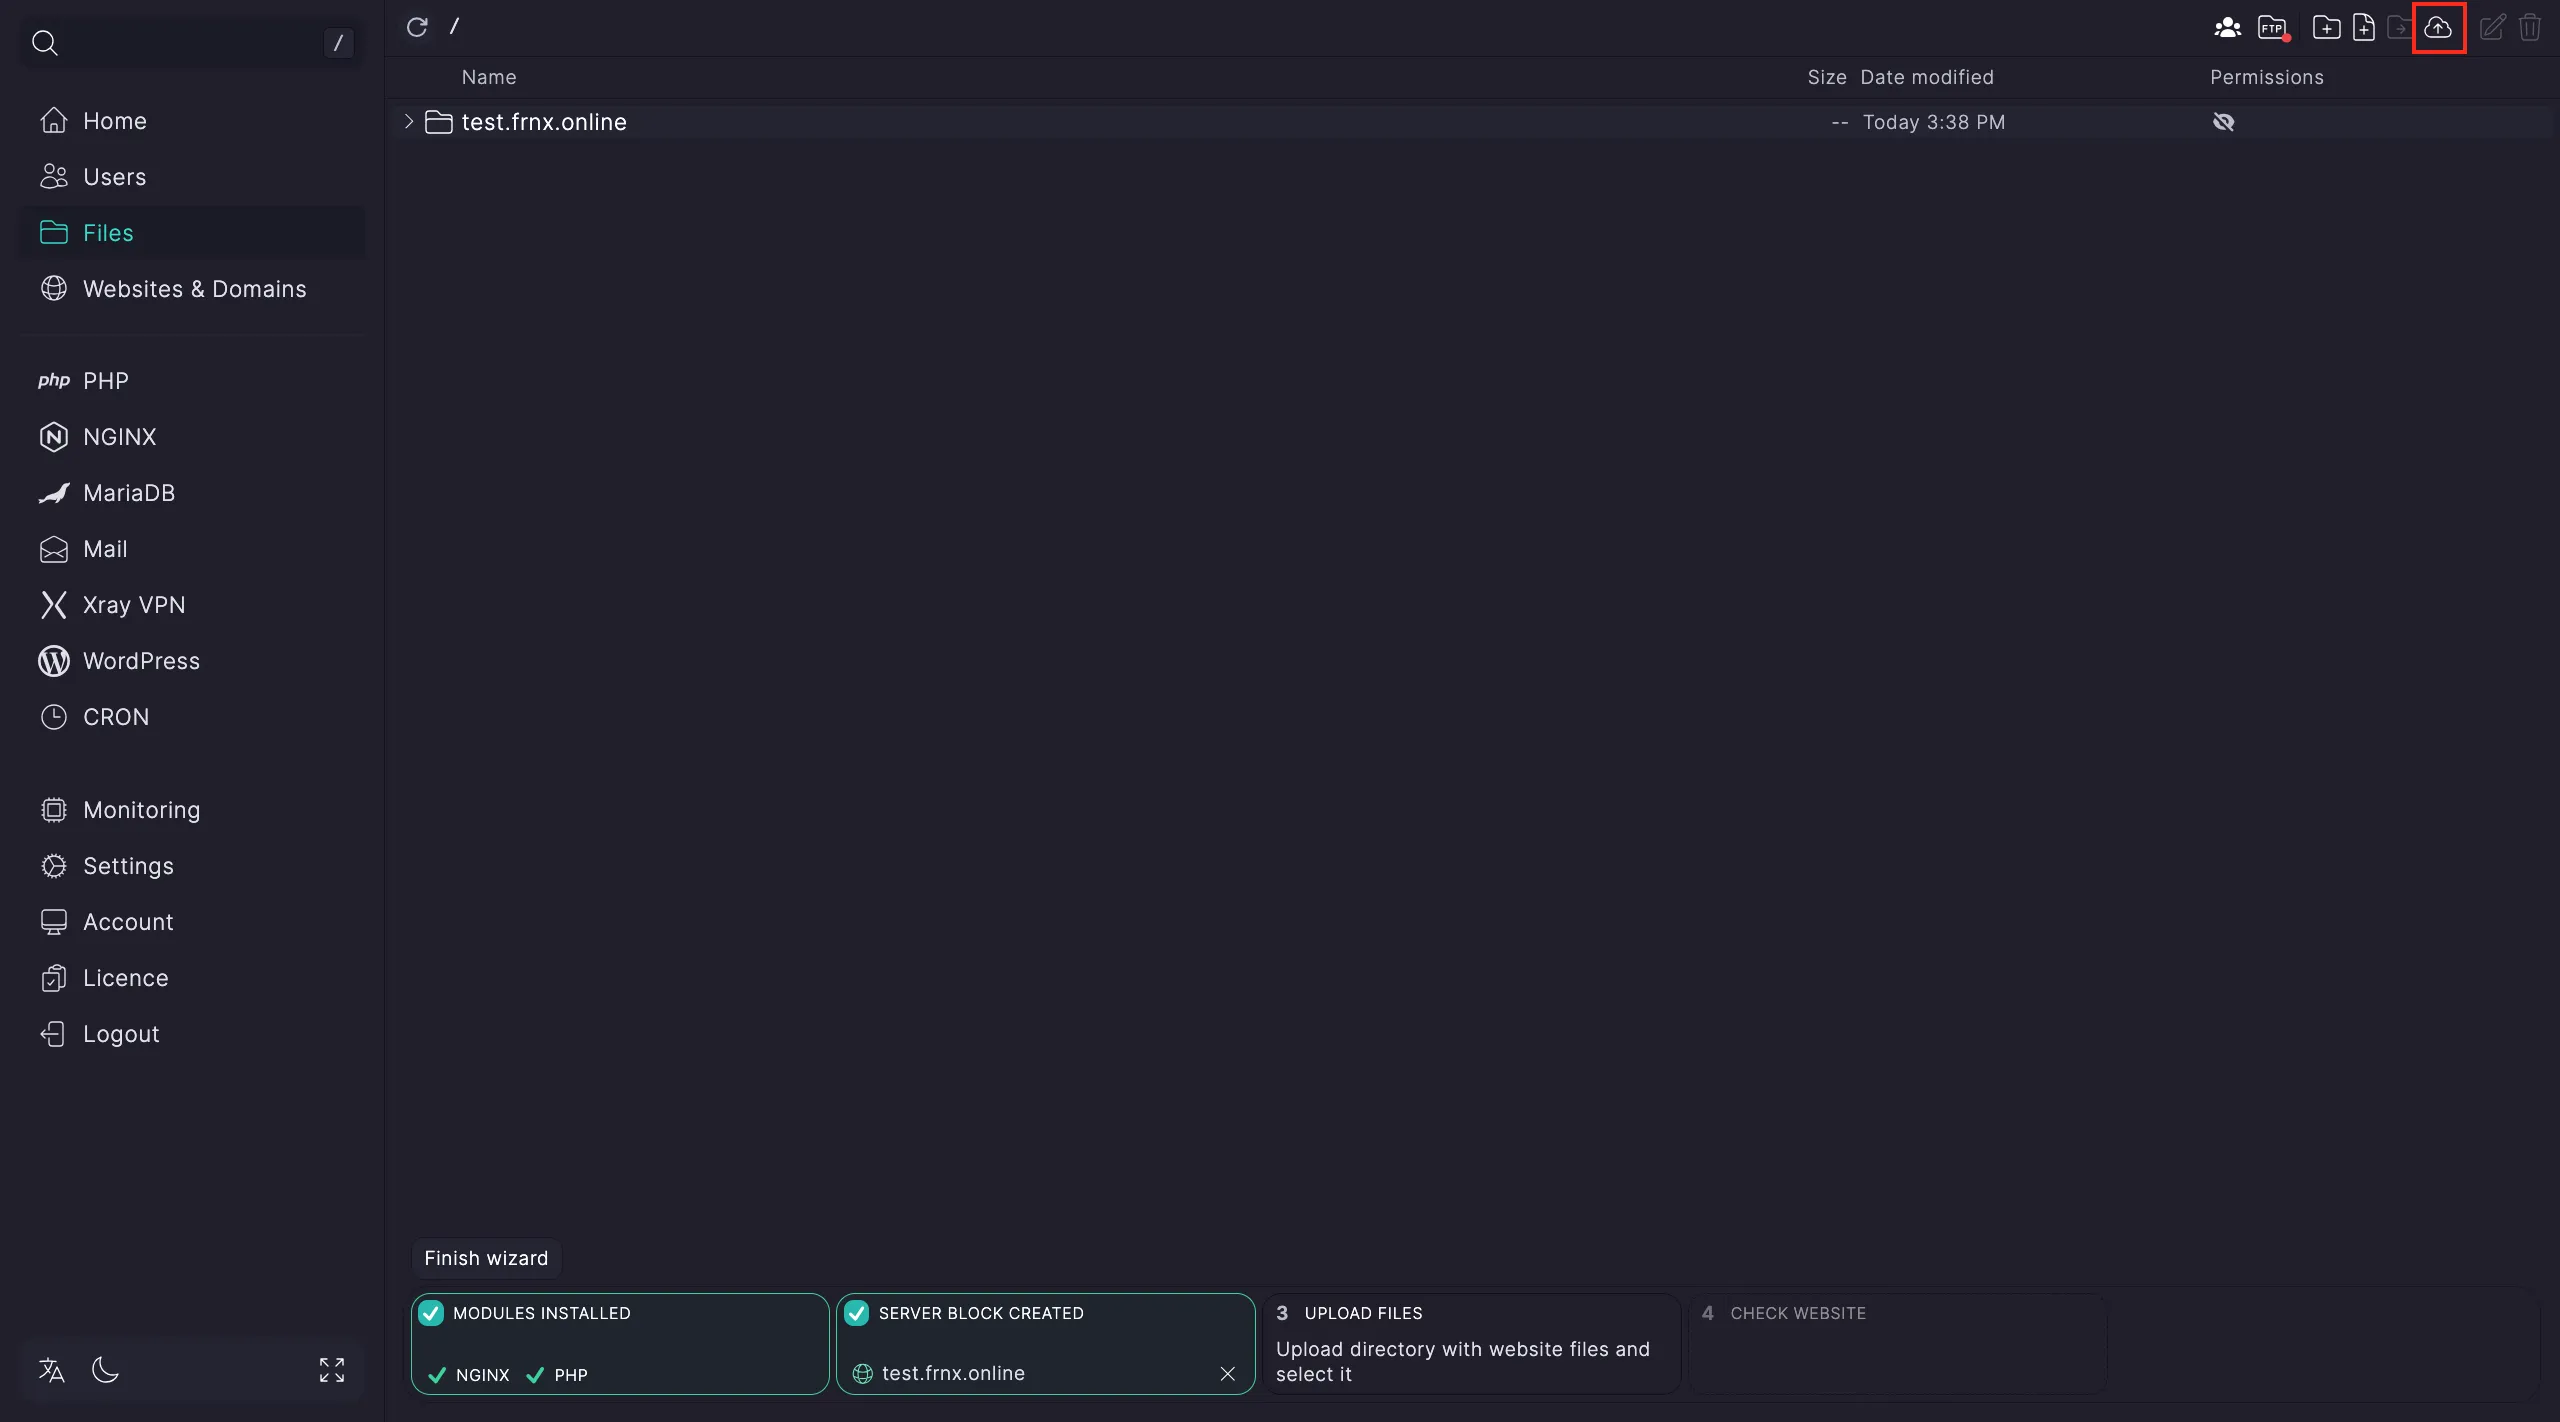
Now let’s move to step three. Click Go to files.
Upload your website files into the virtual host’s directory by clicking Upload.
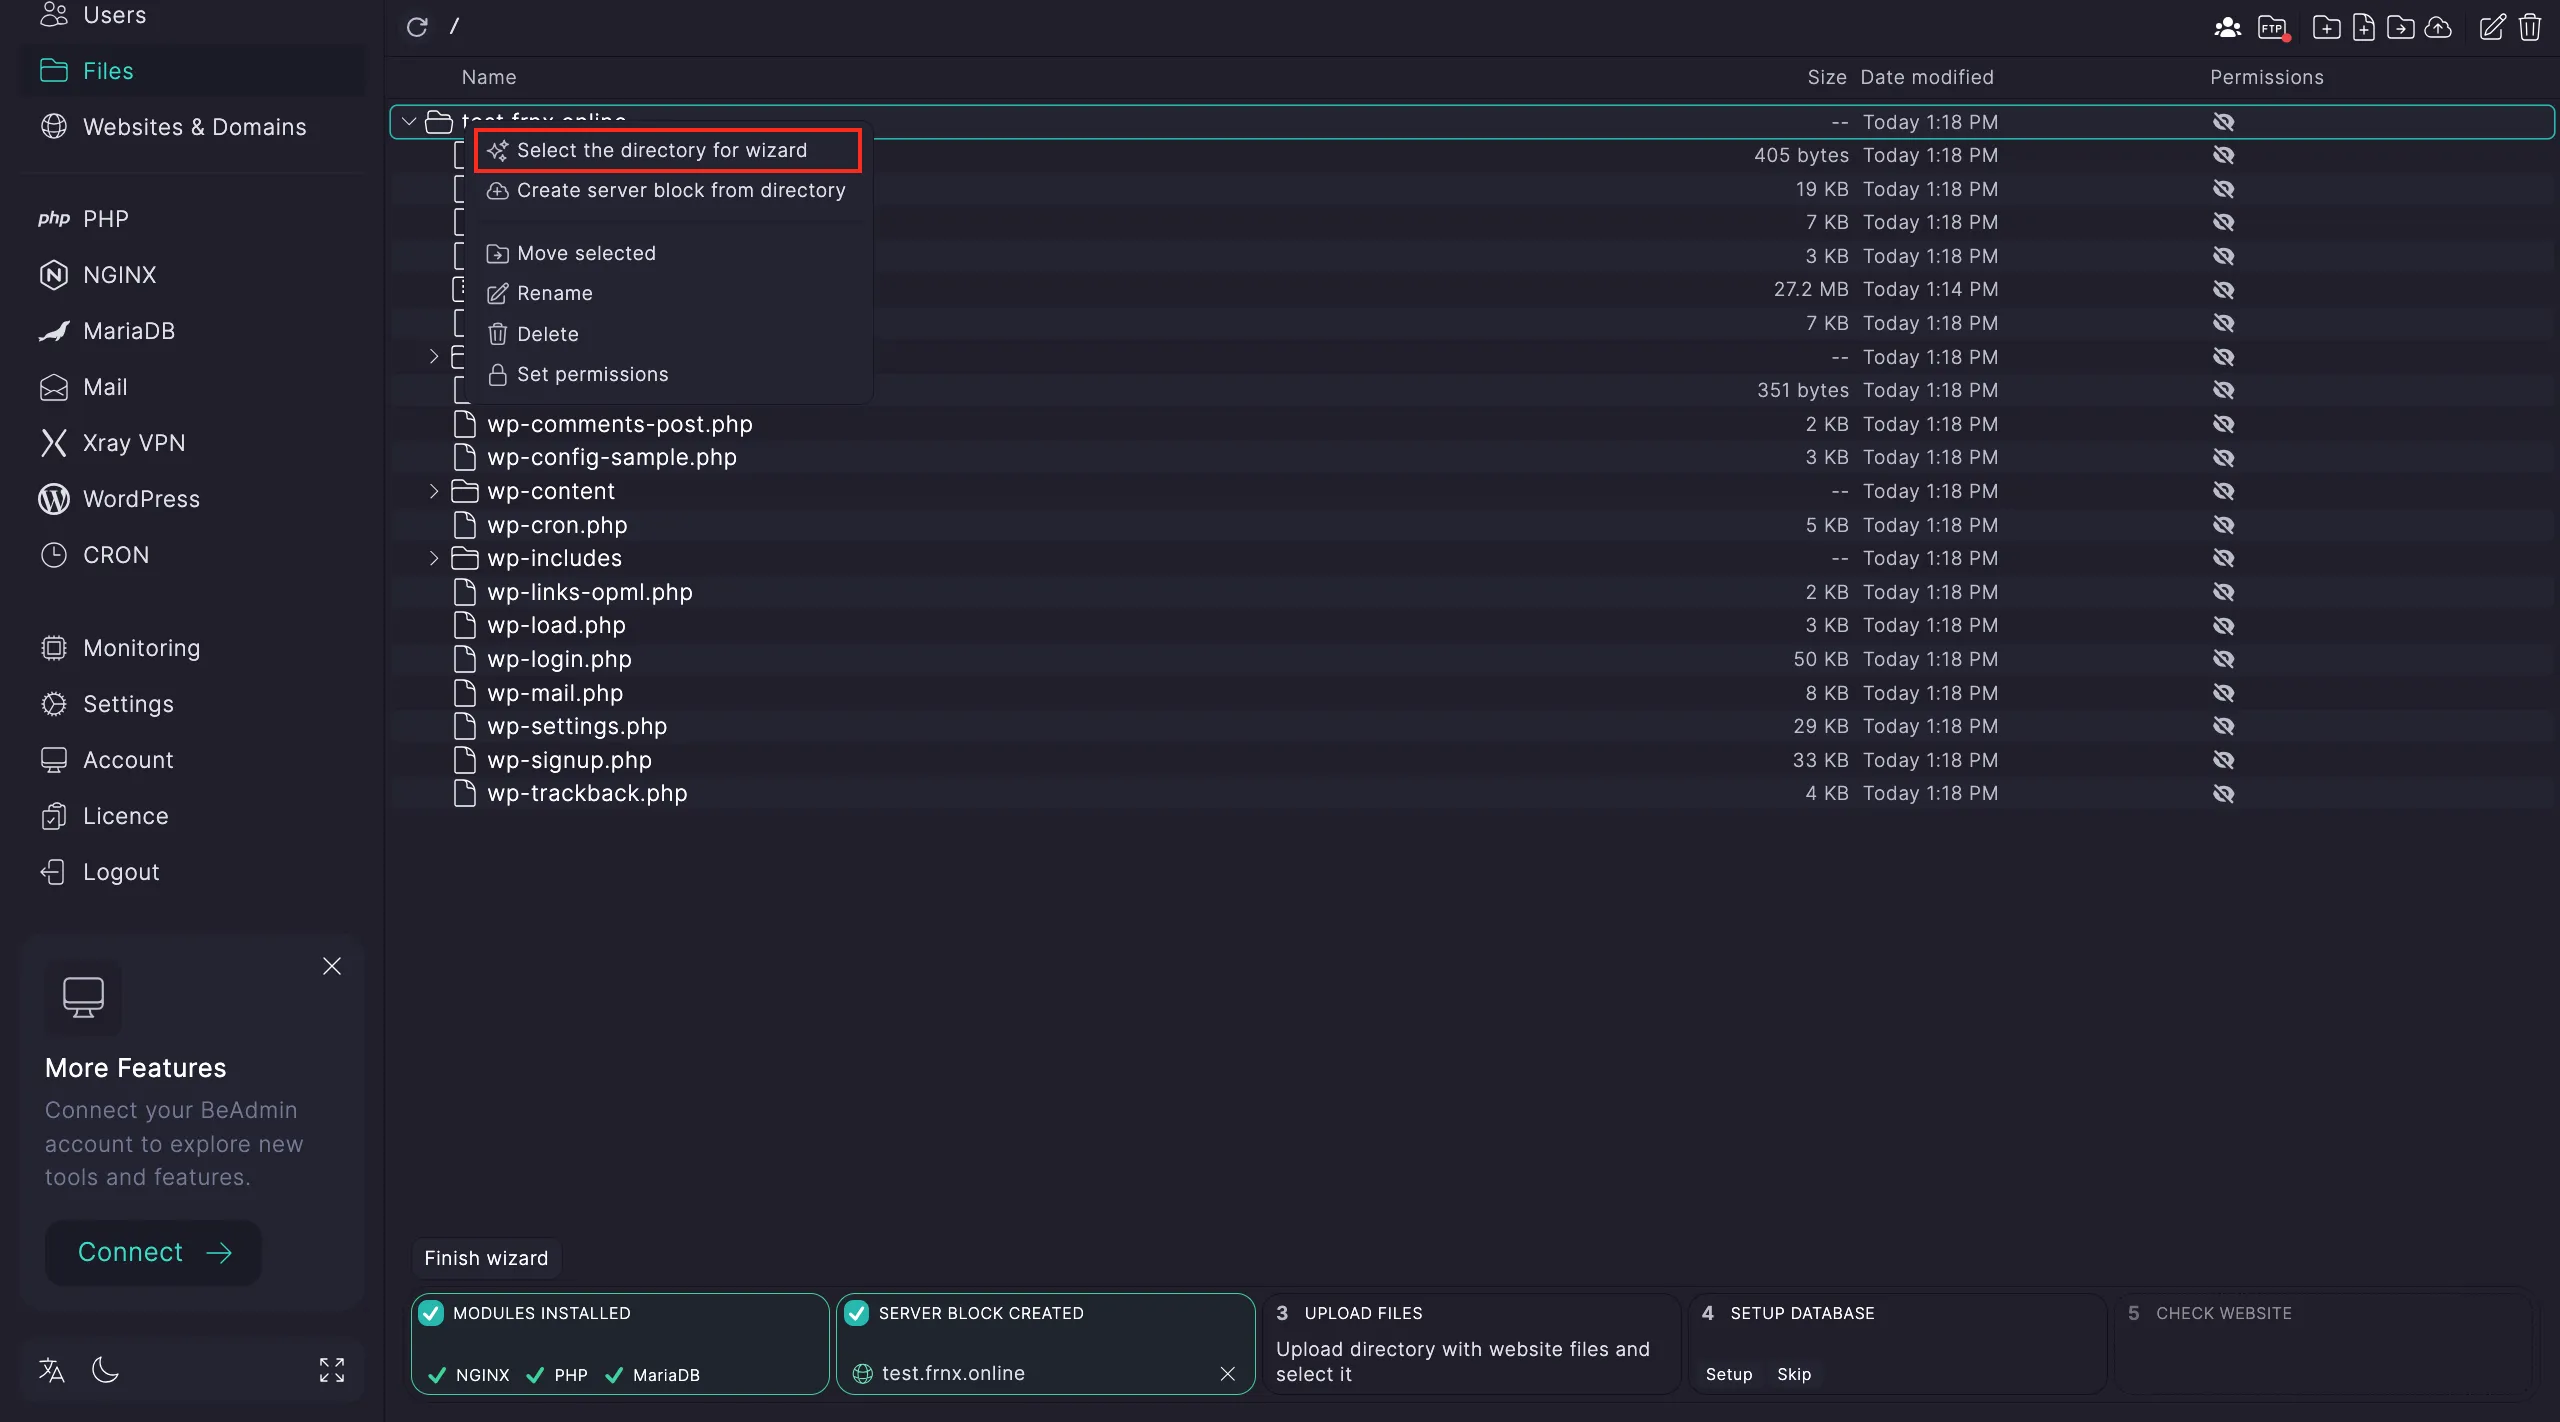
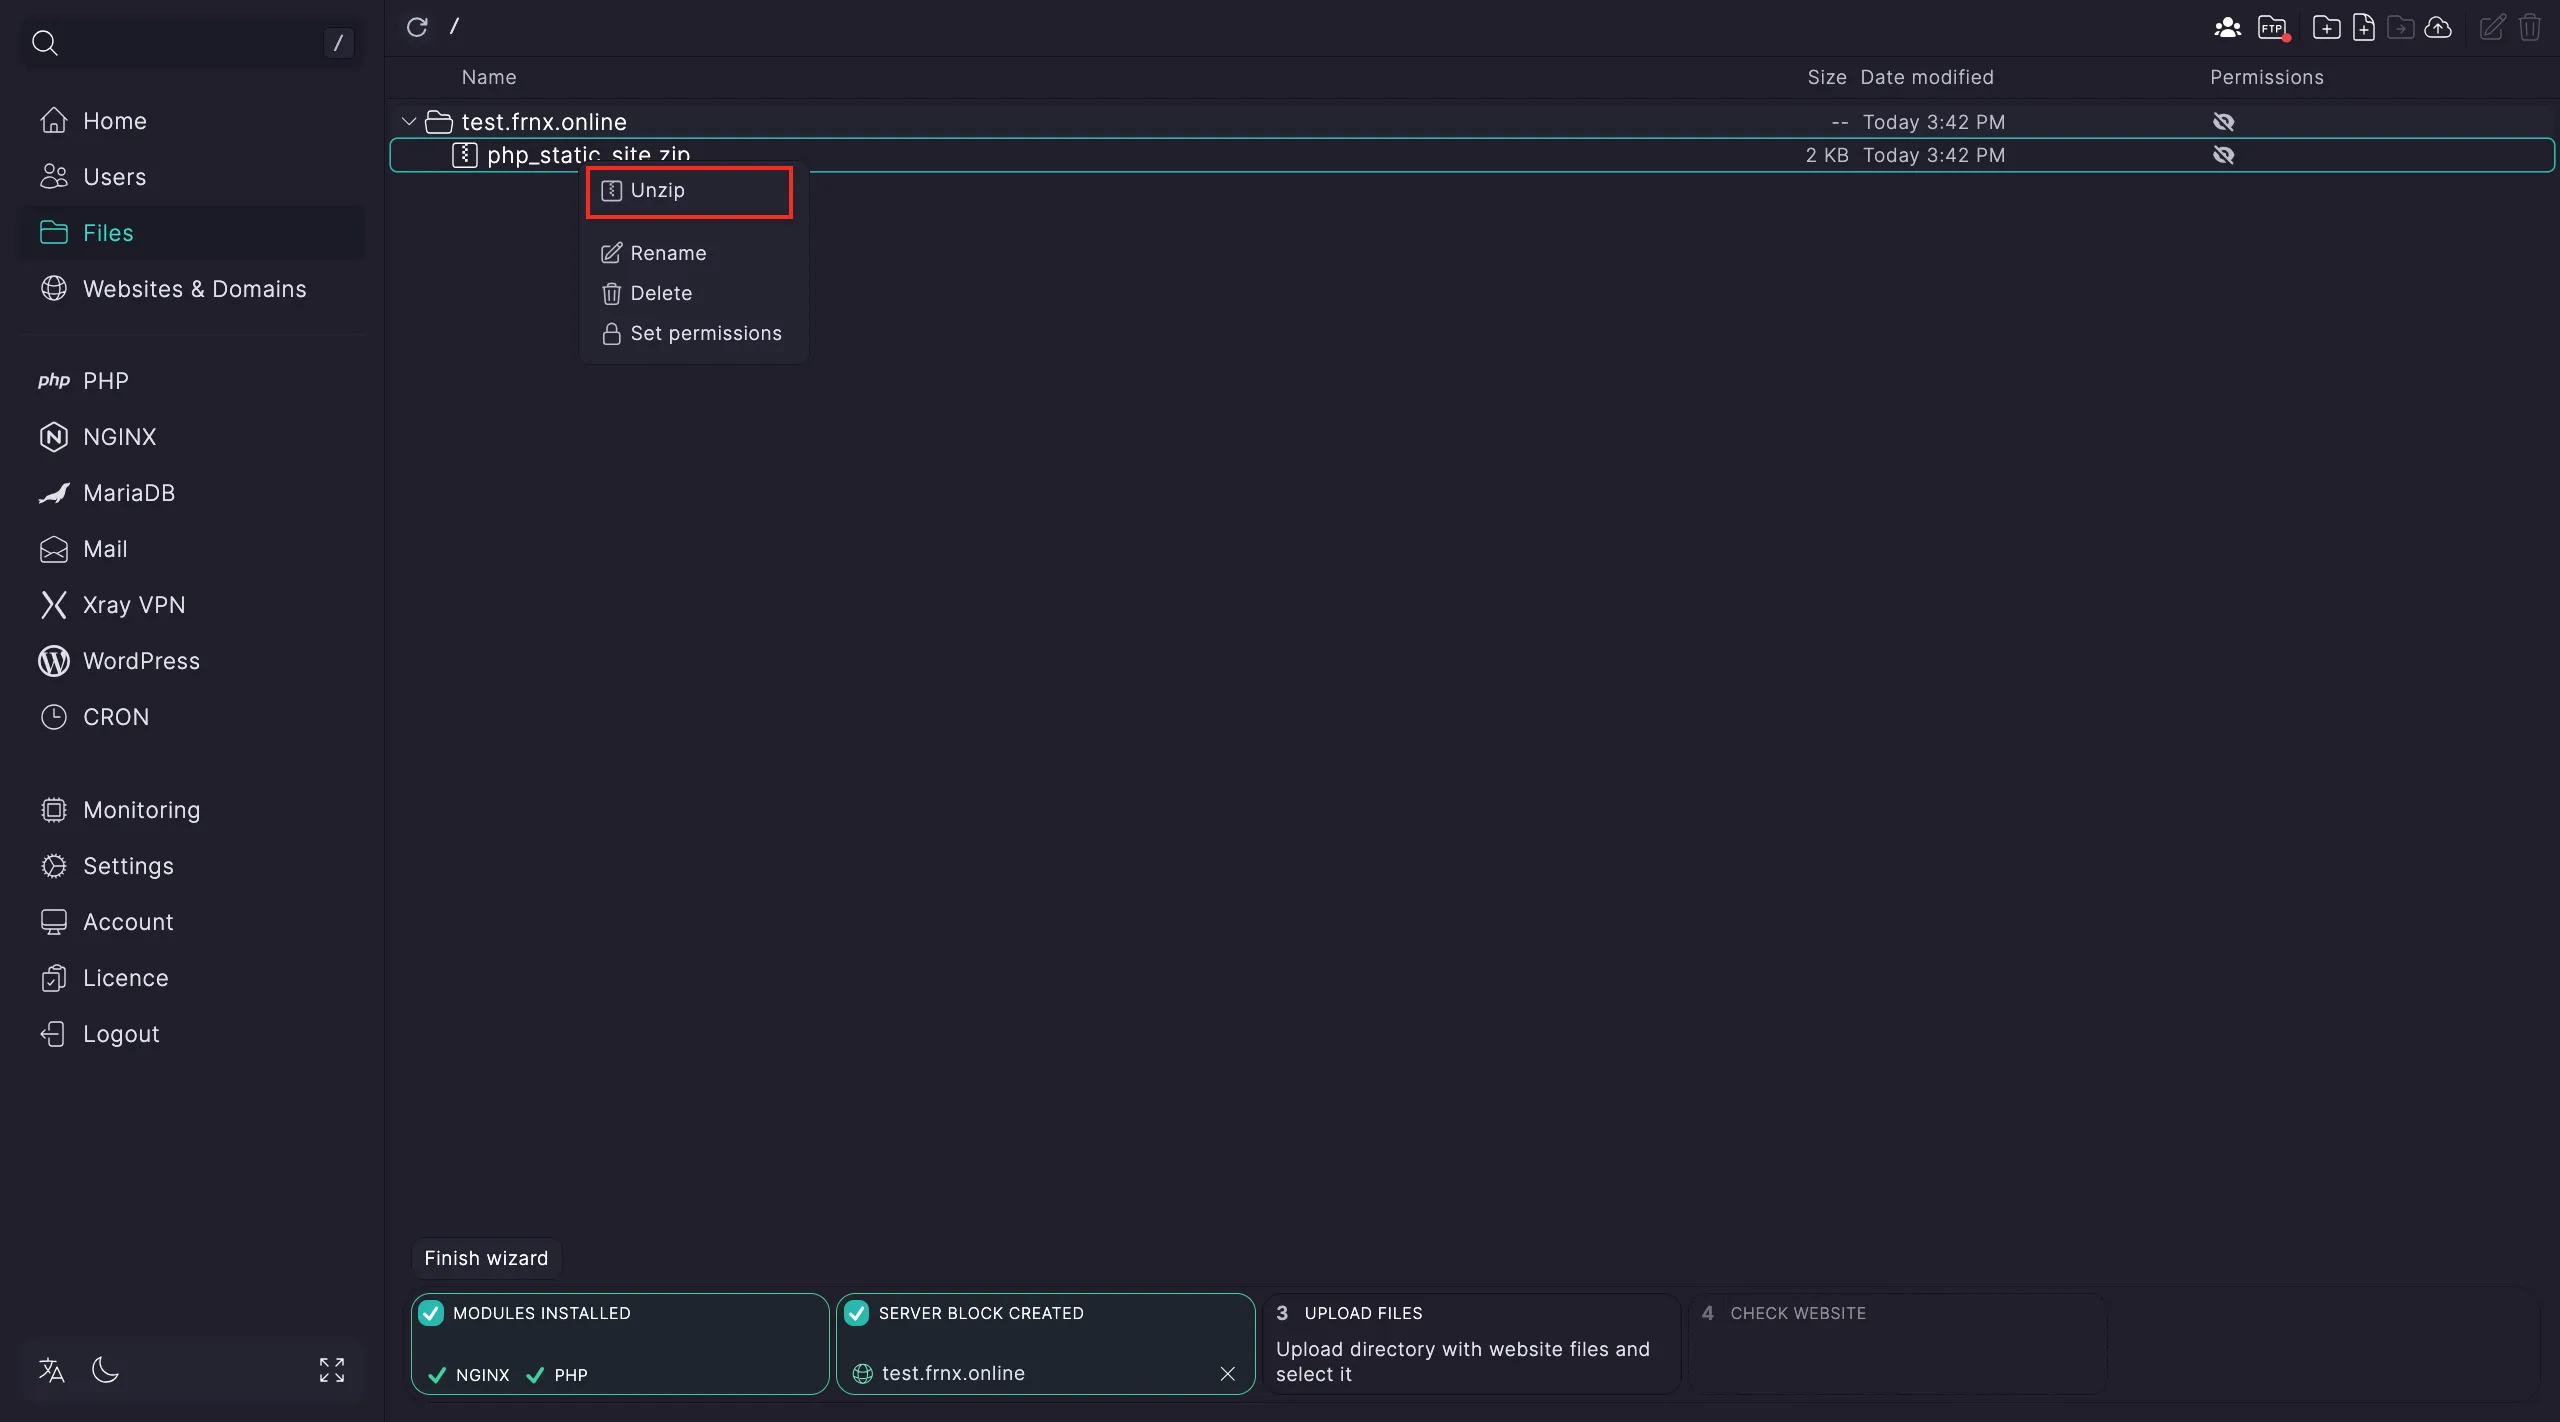
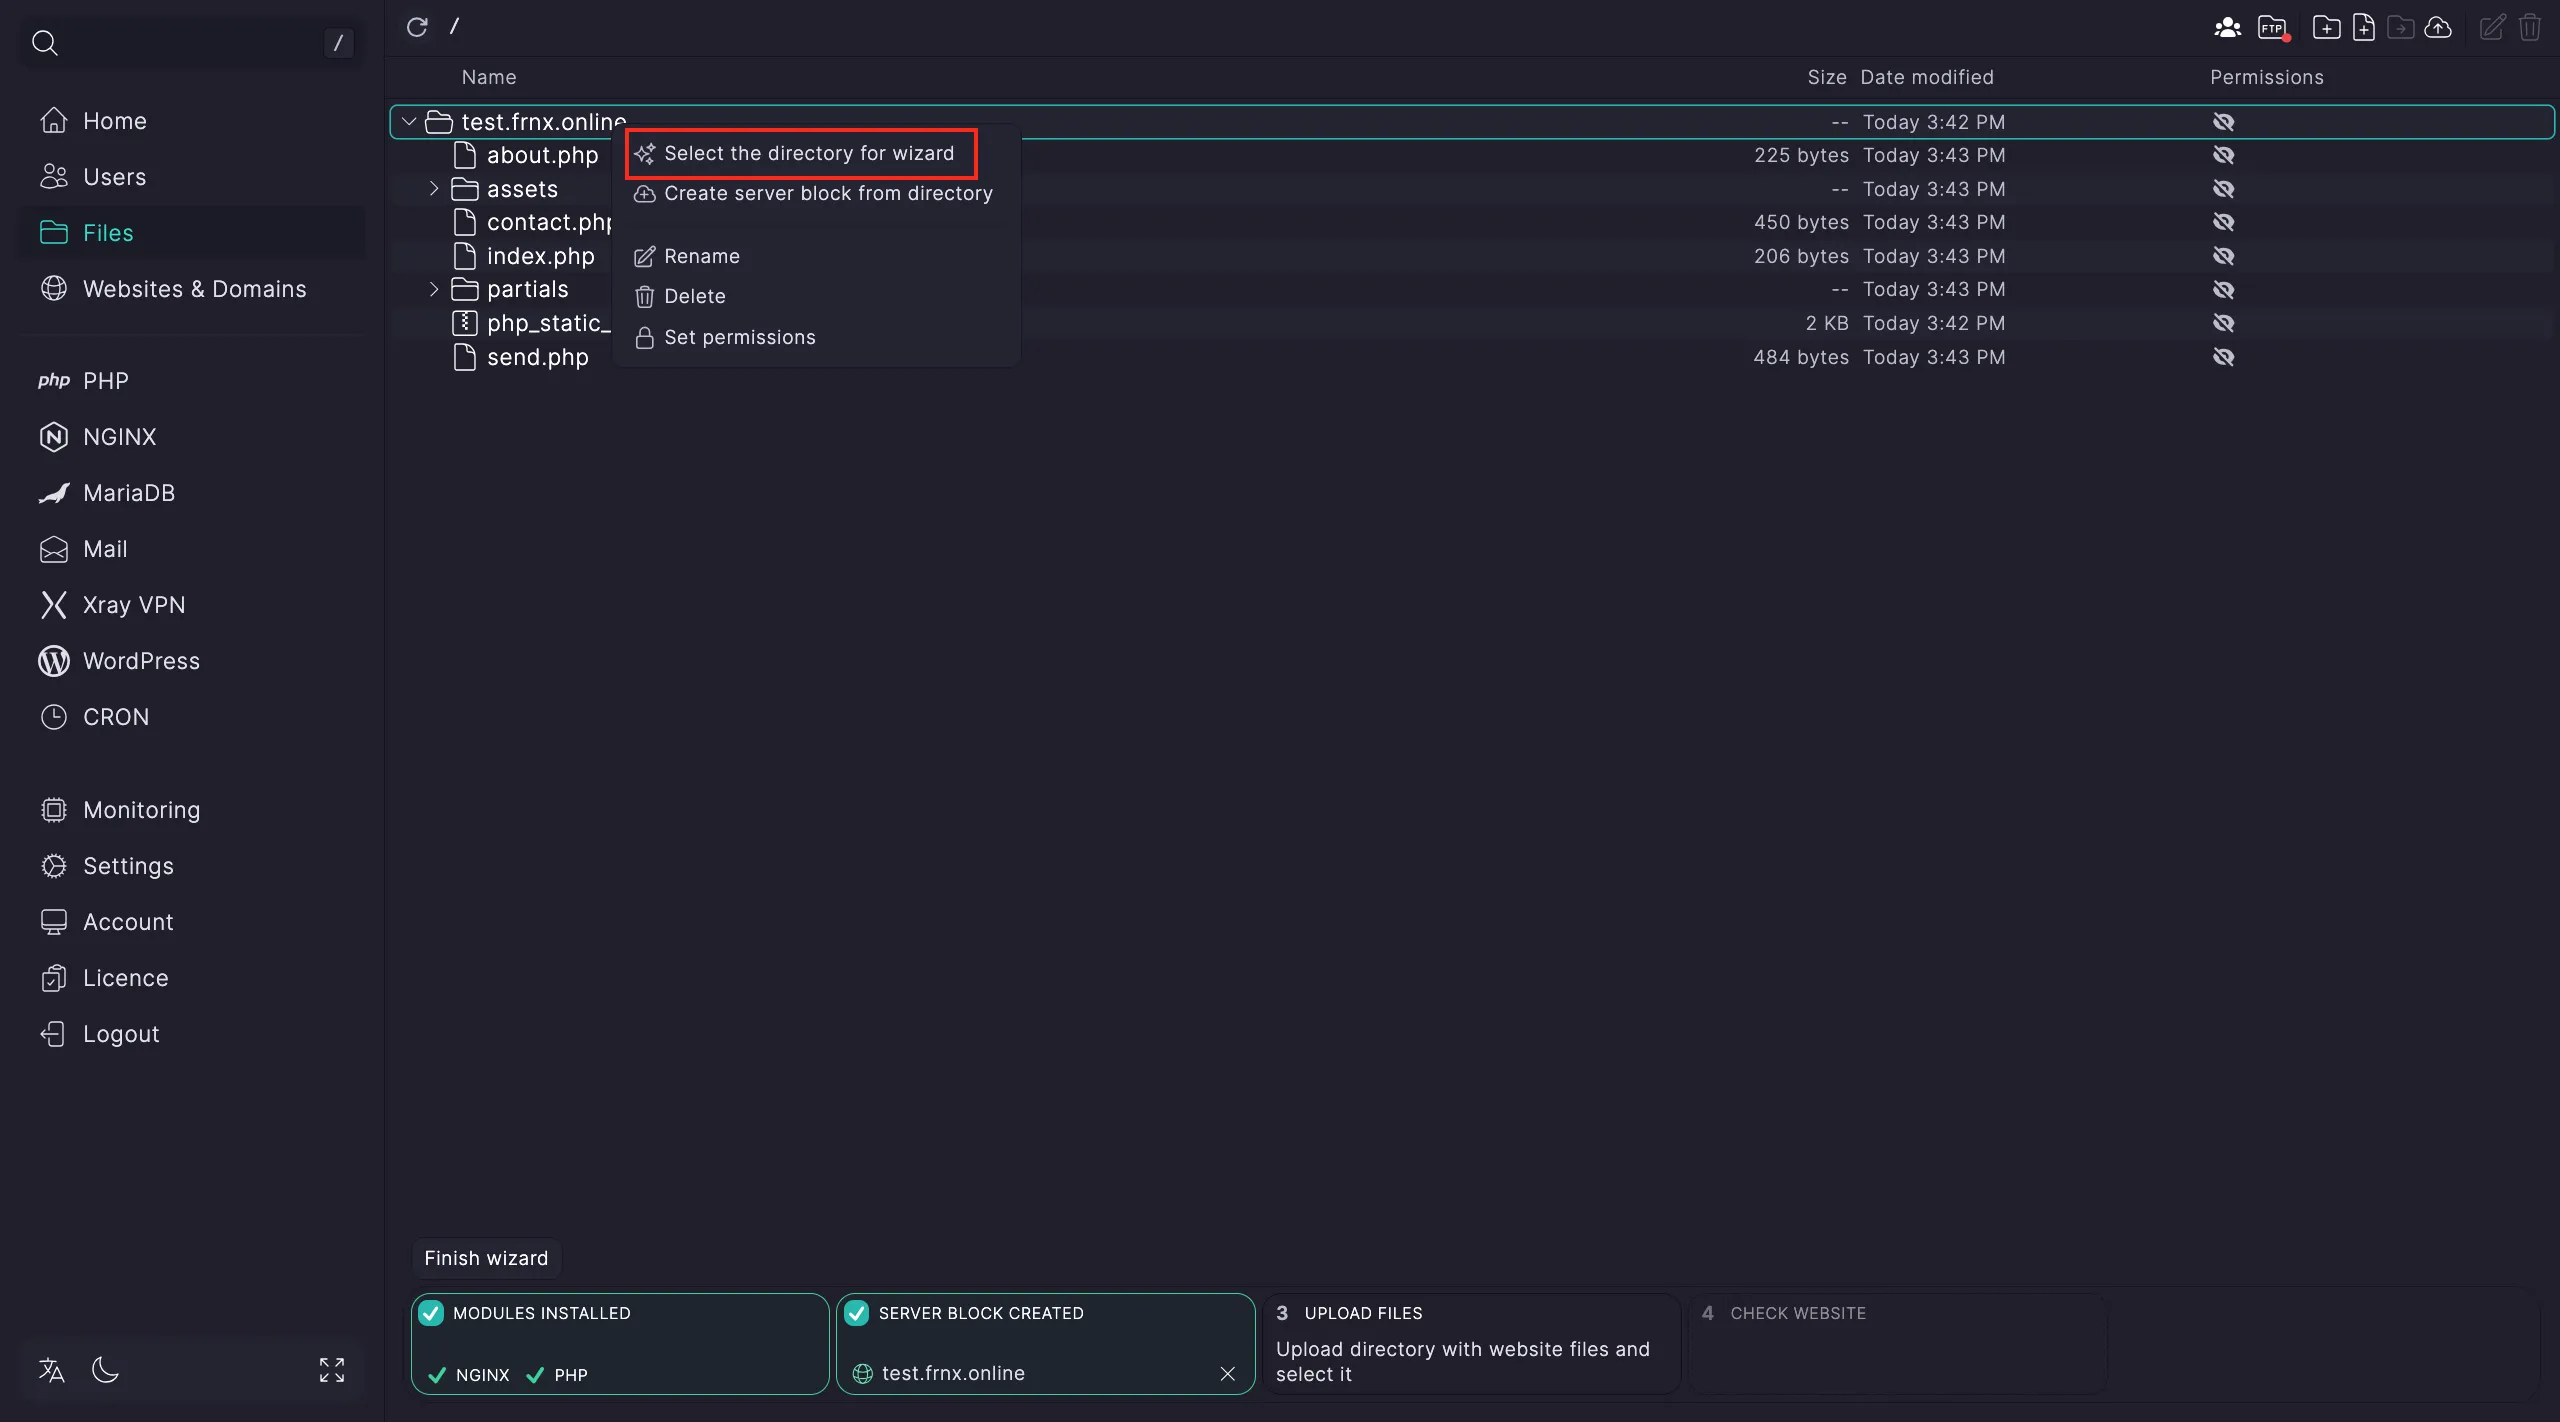
If your files are in an archive, unpack it and point to the folder for the site setup wizard.

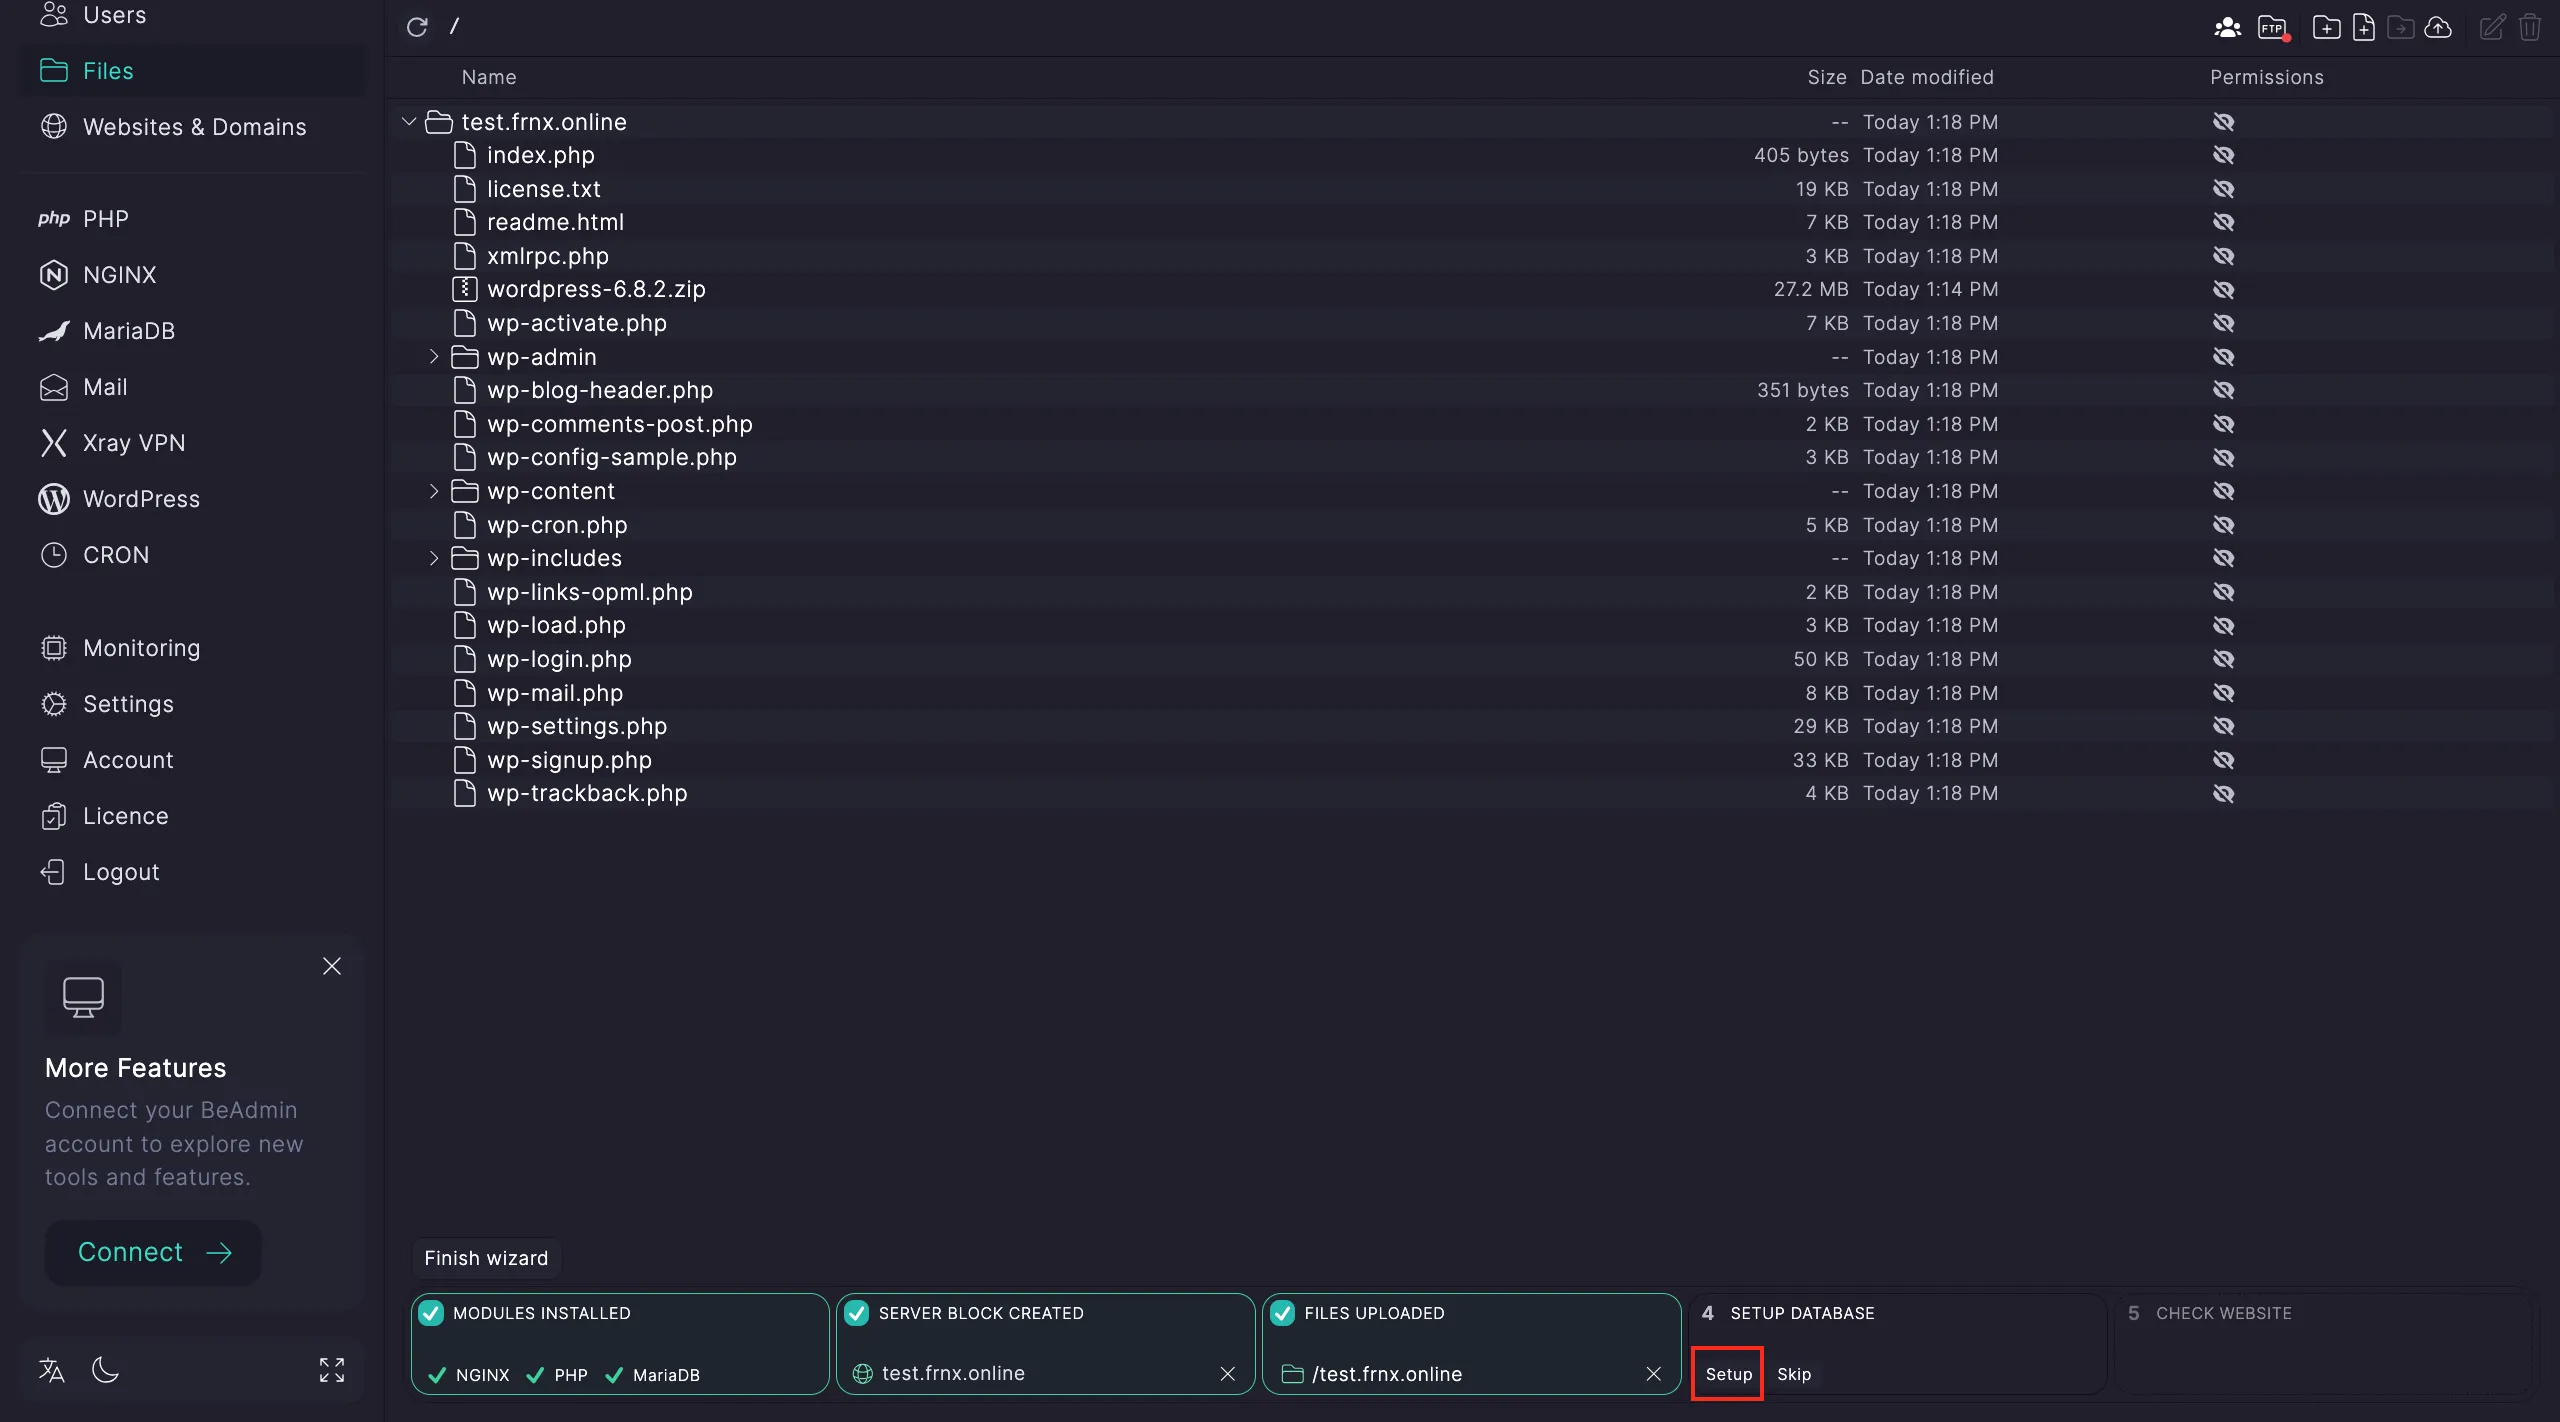
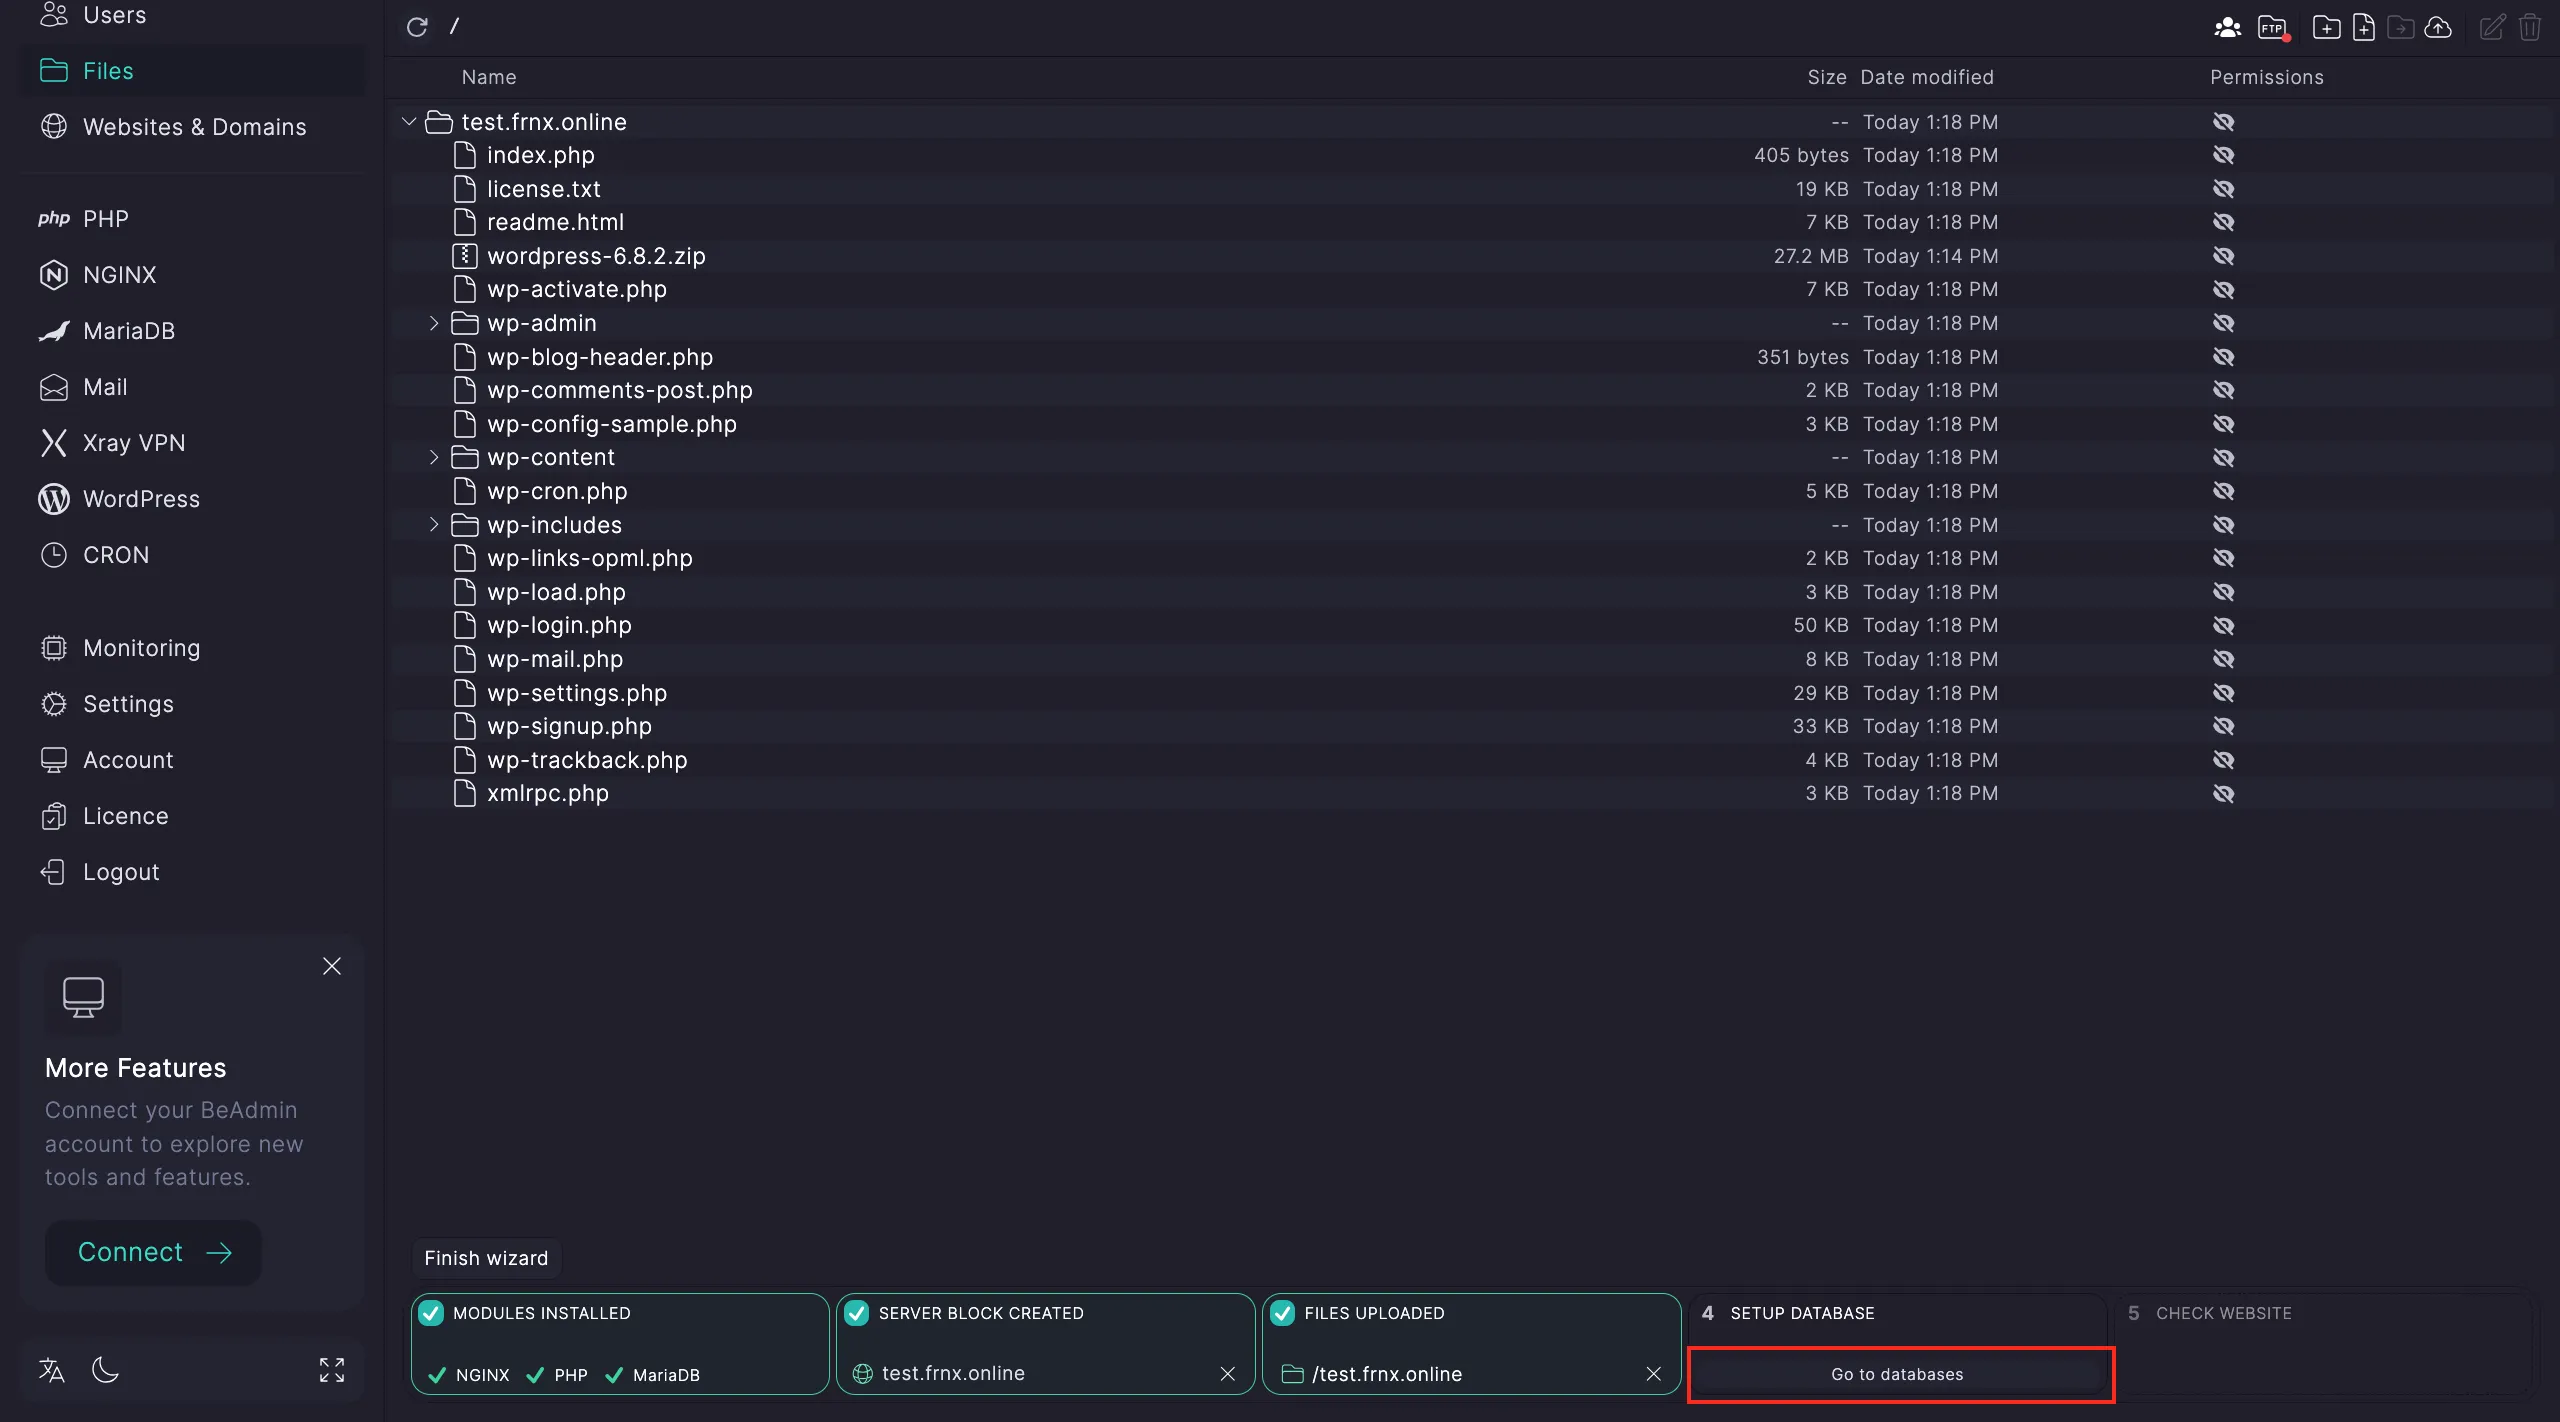
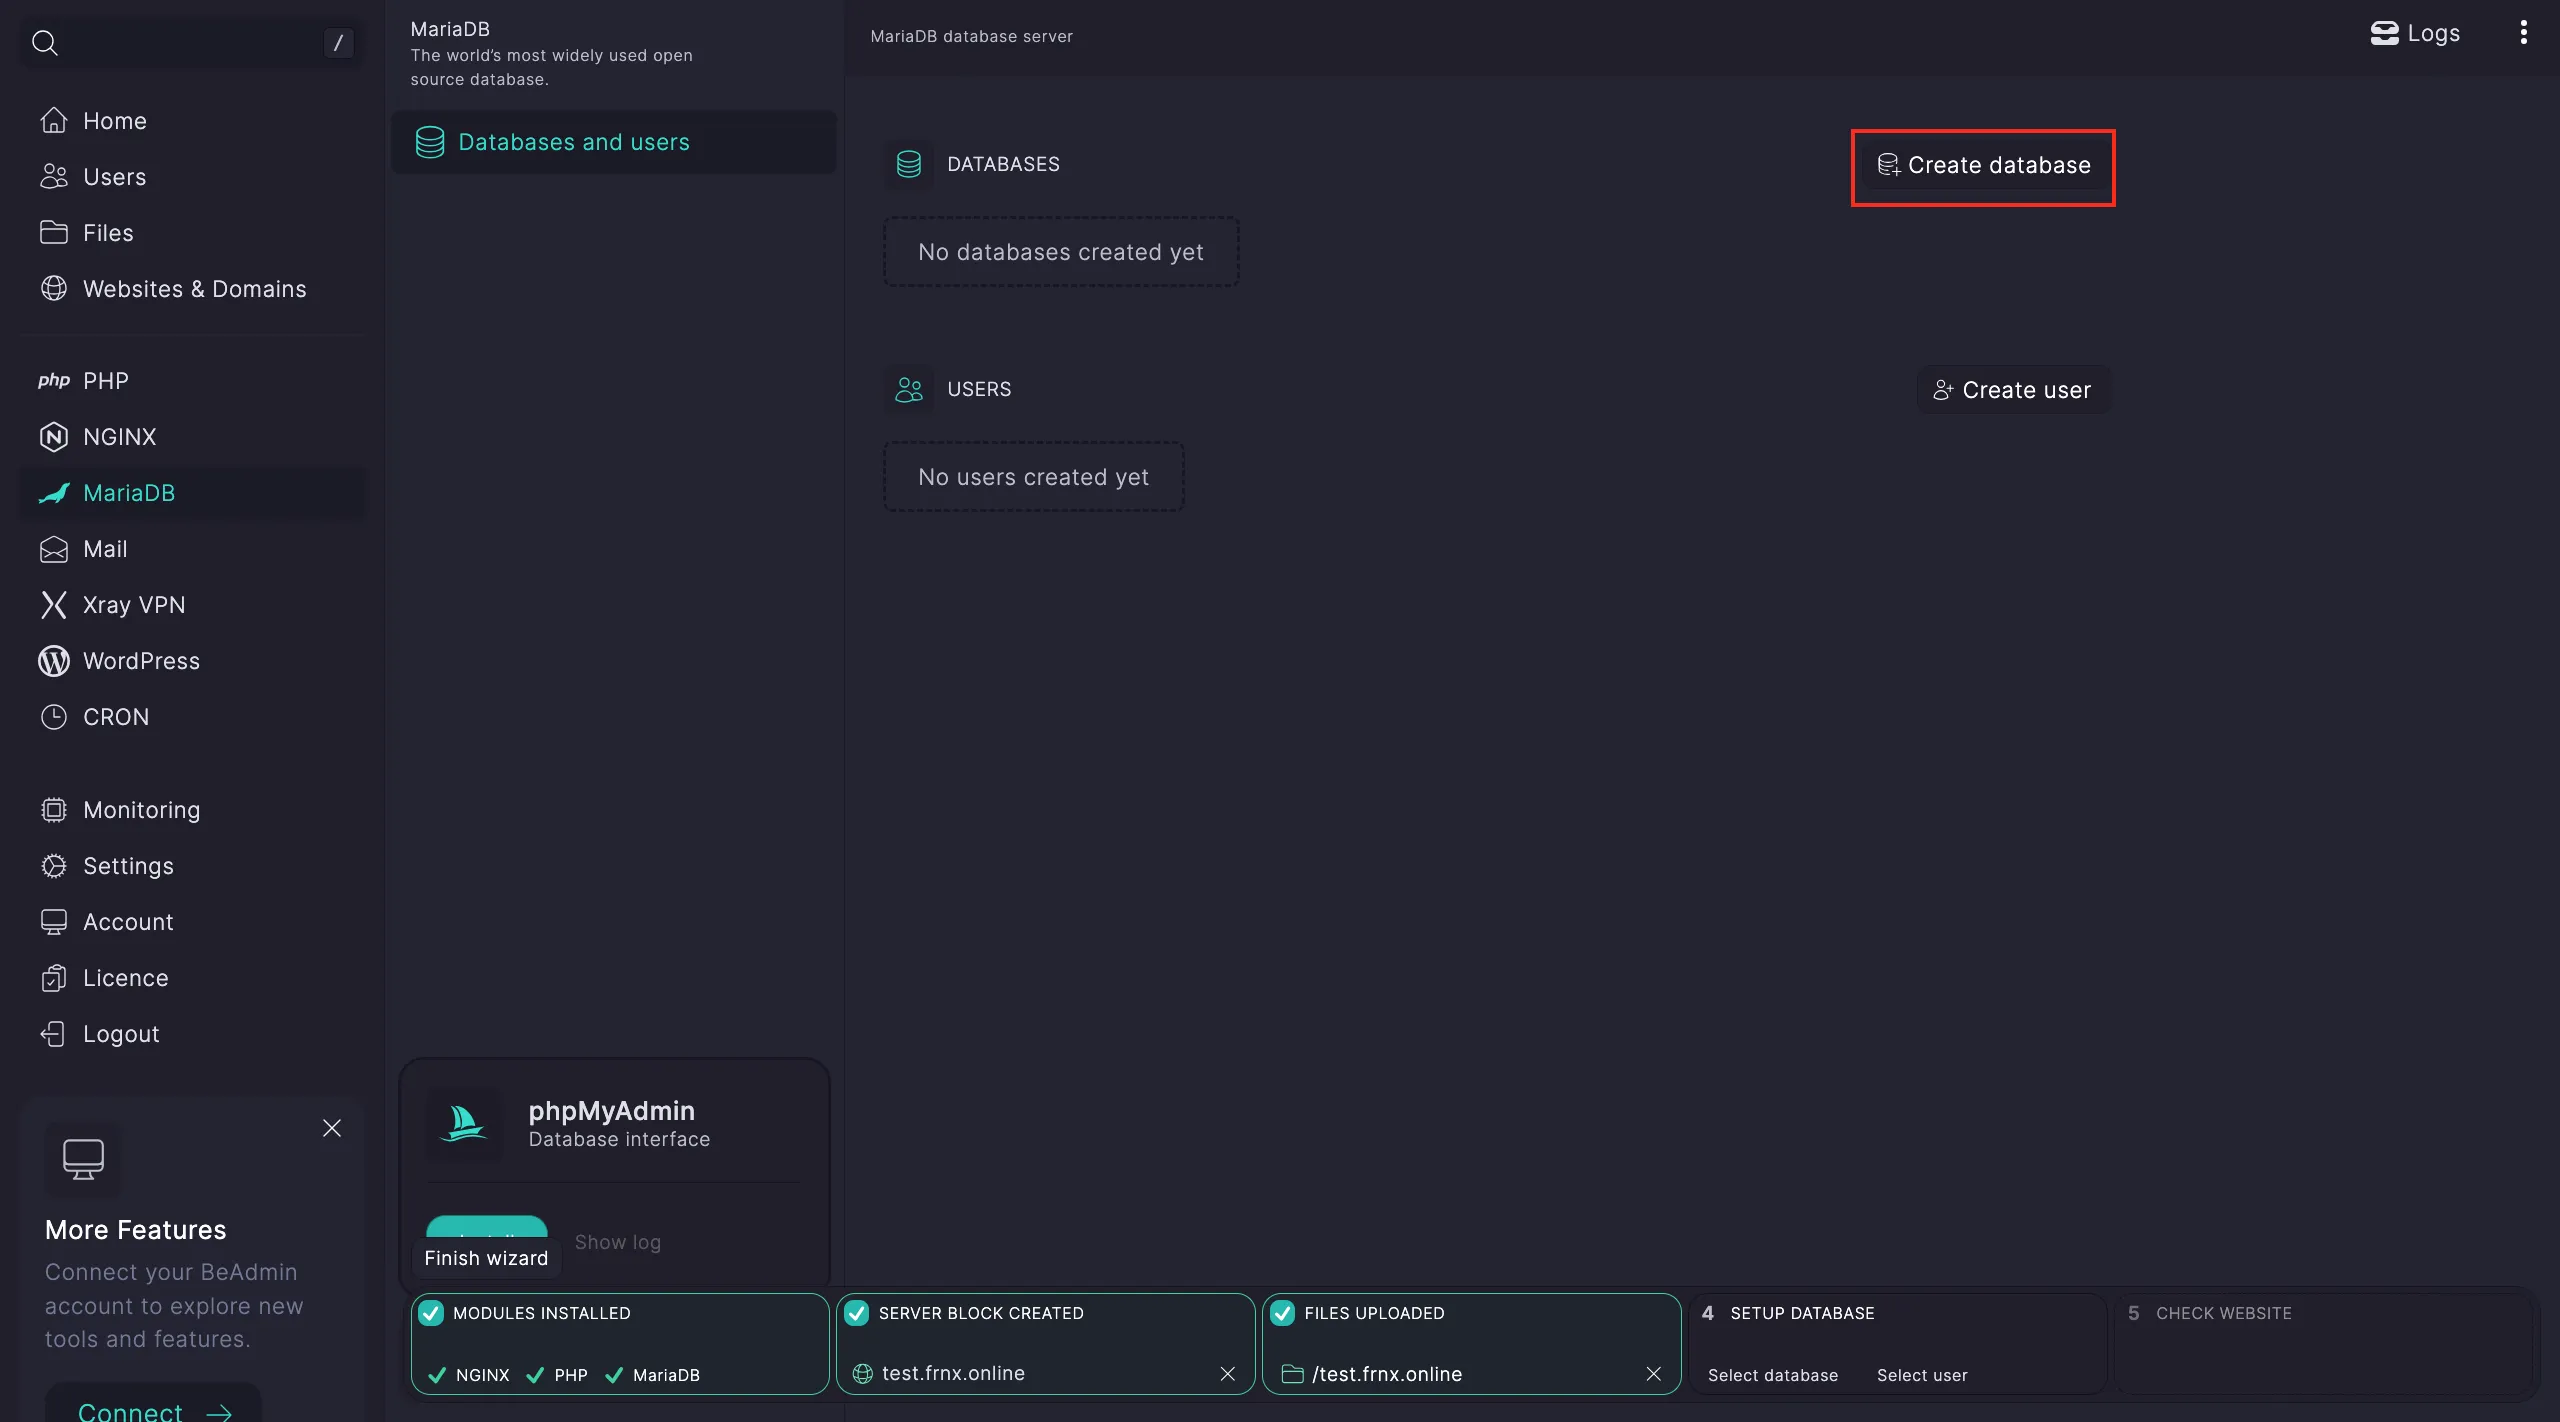
Step four: Database setup. Click Set up → Go to databases.
Create a new database:
- Enter a name.
- Click Create.
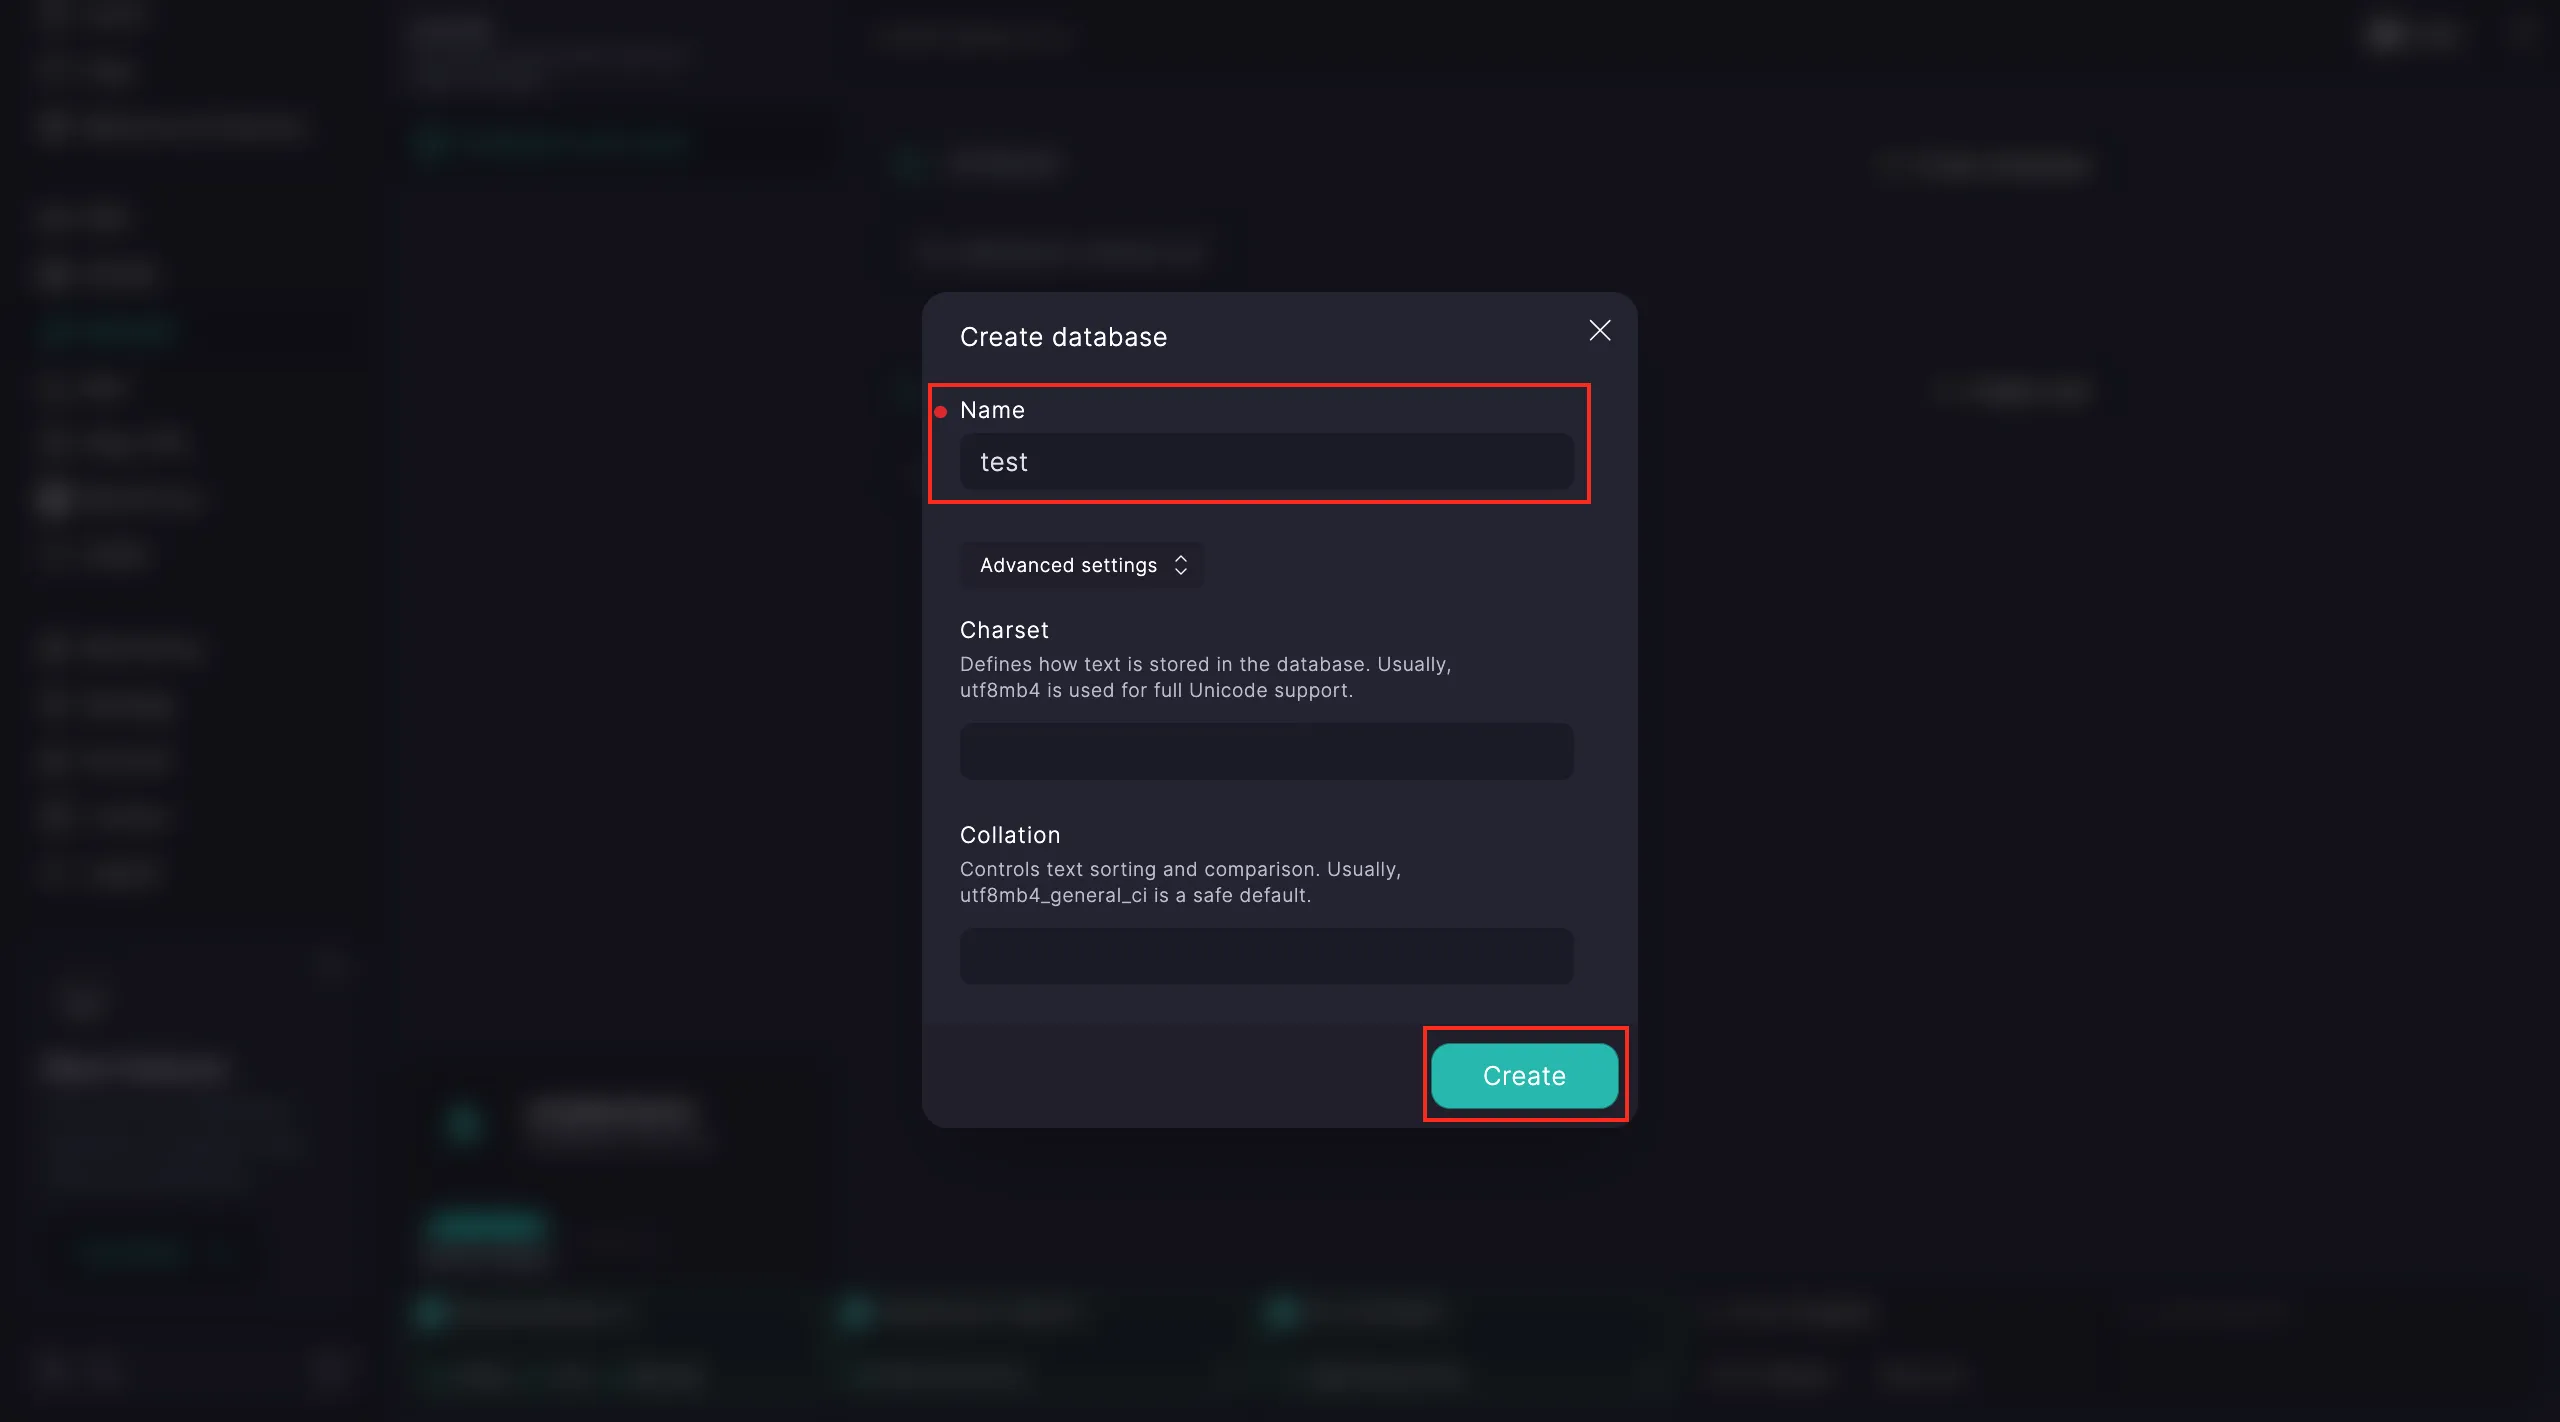
Note
When creating a database, you can also set advanced options like collation and encoding.
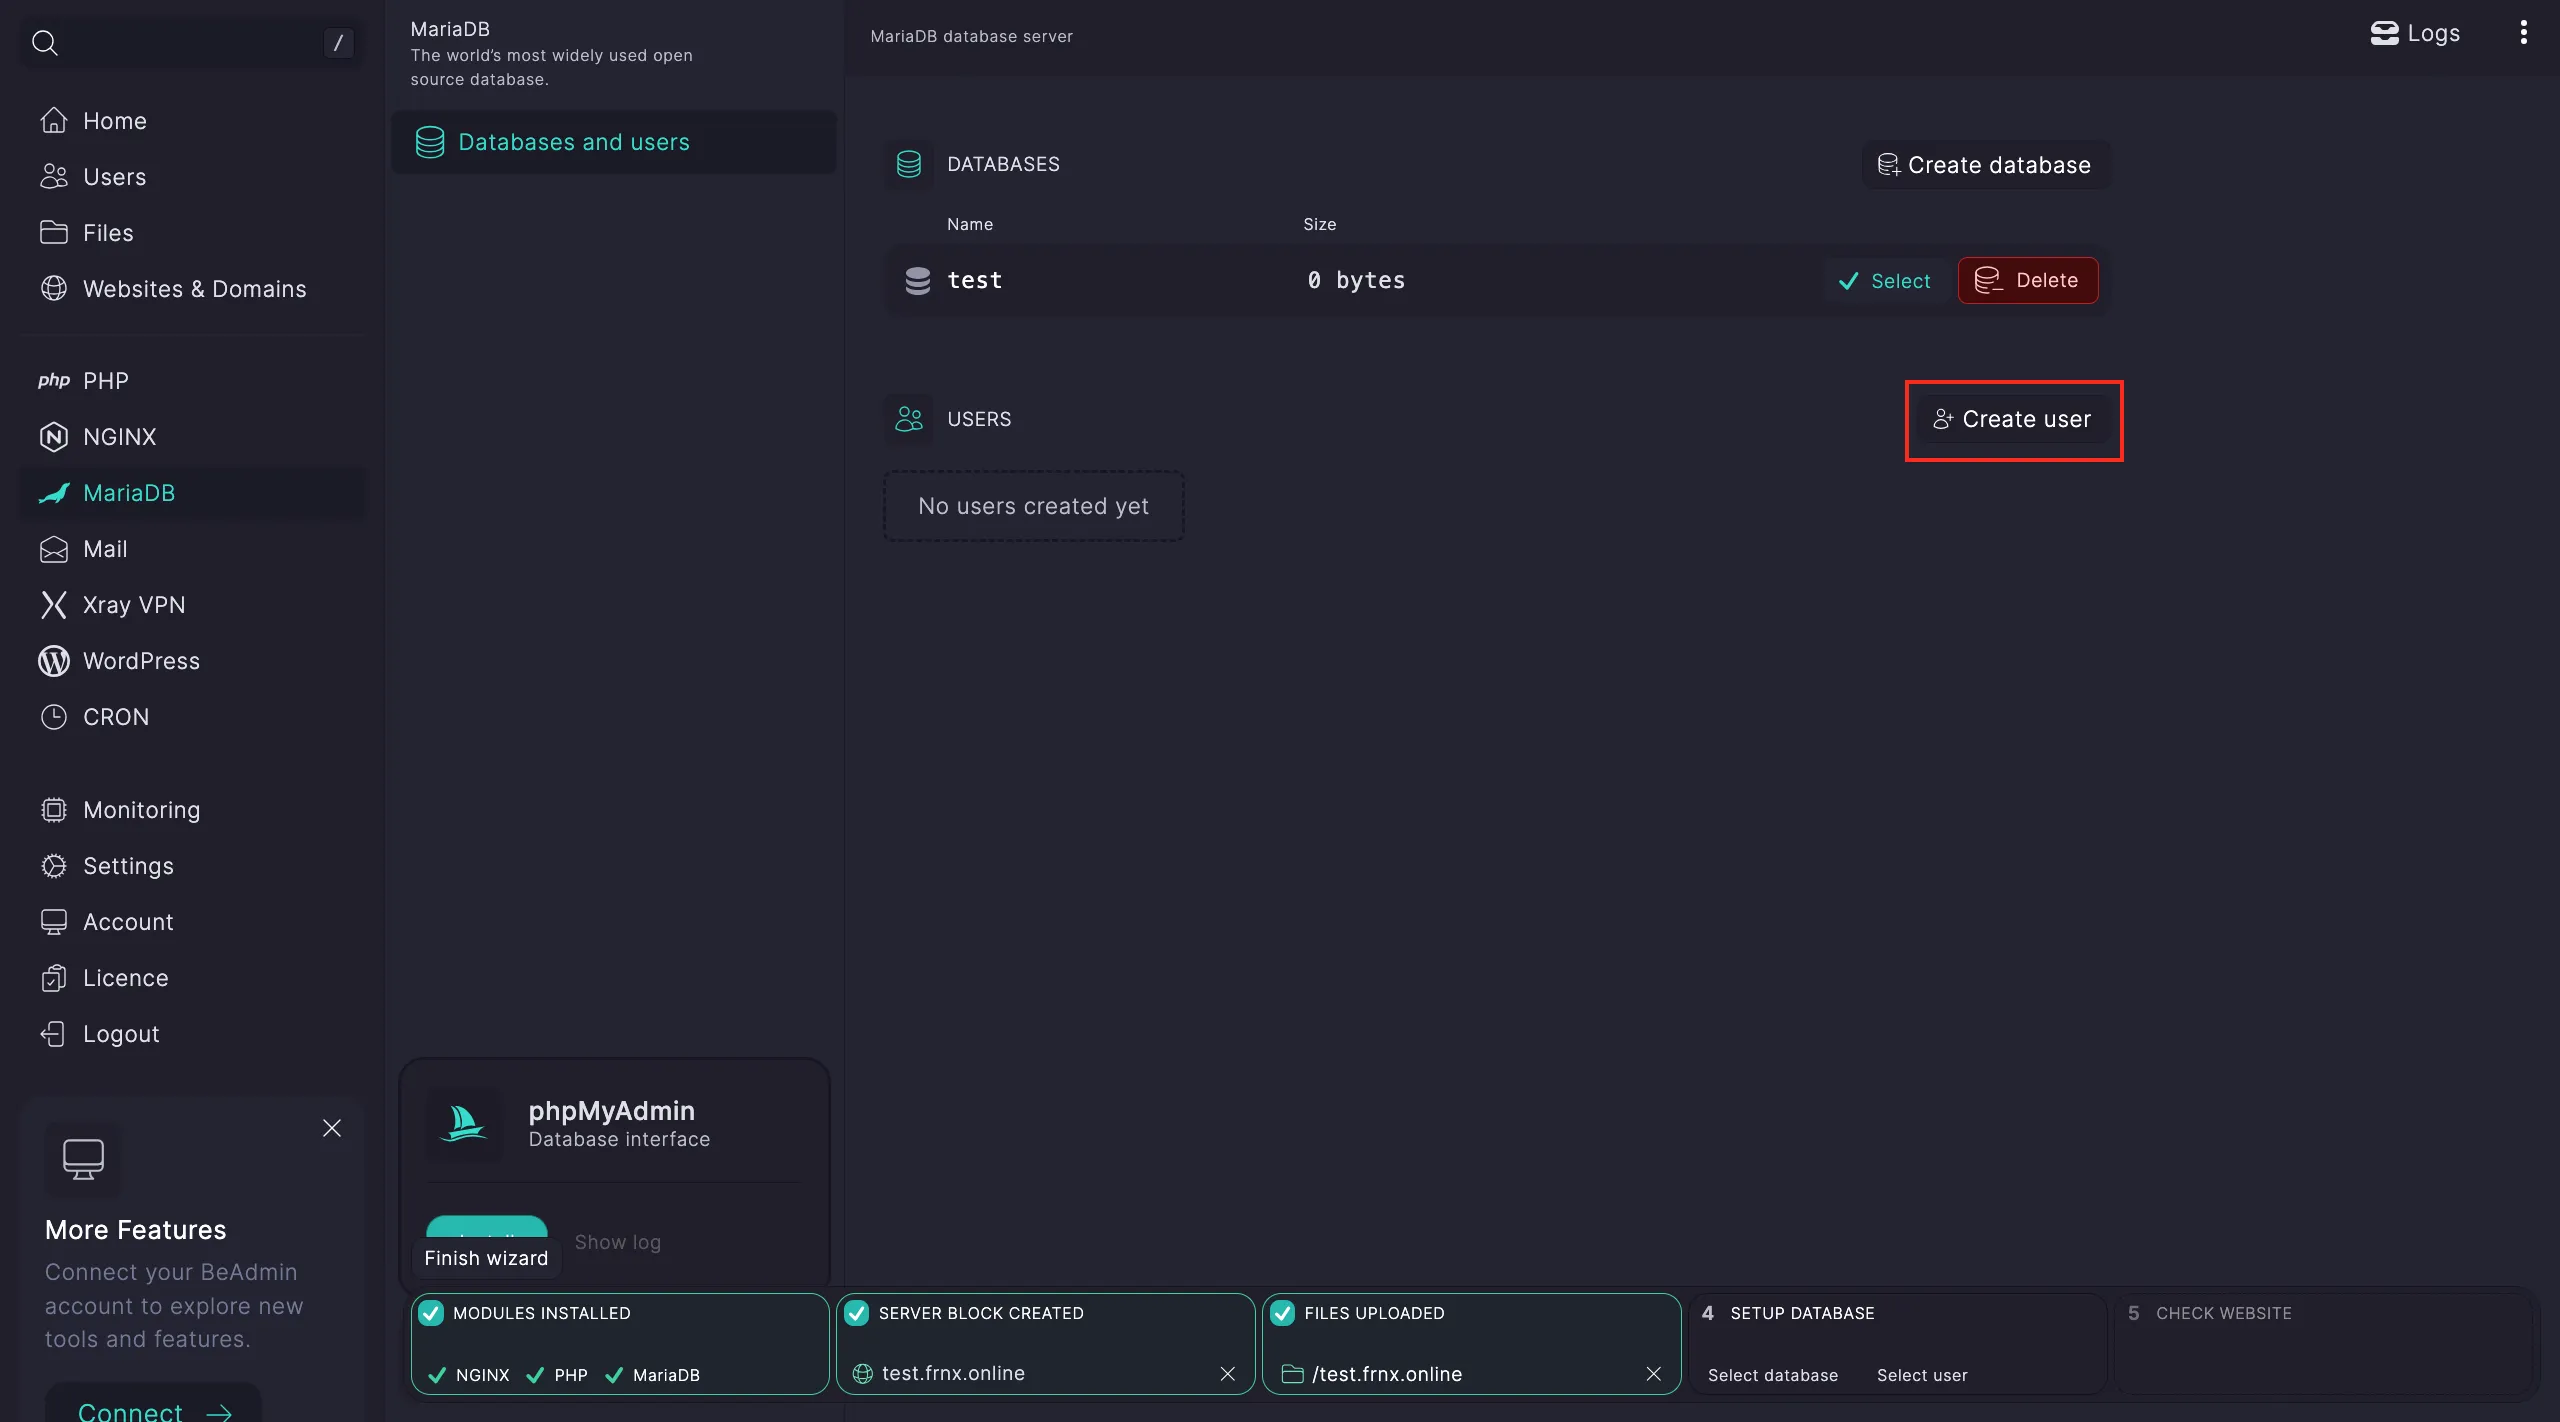
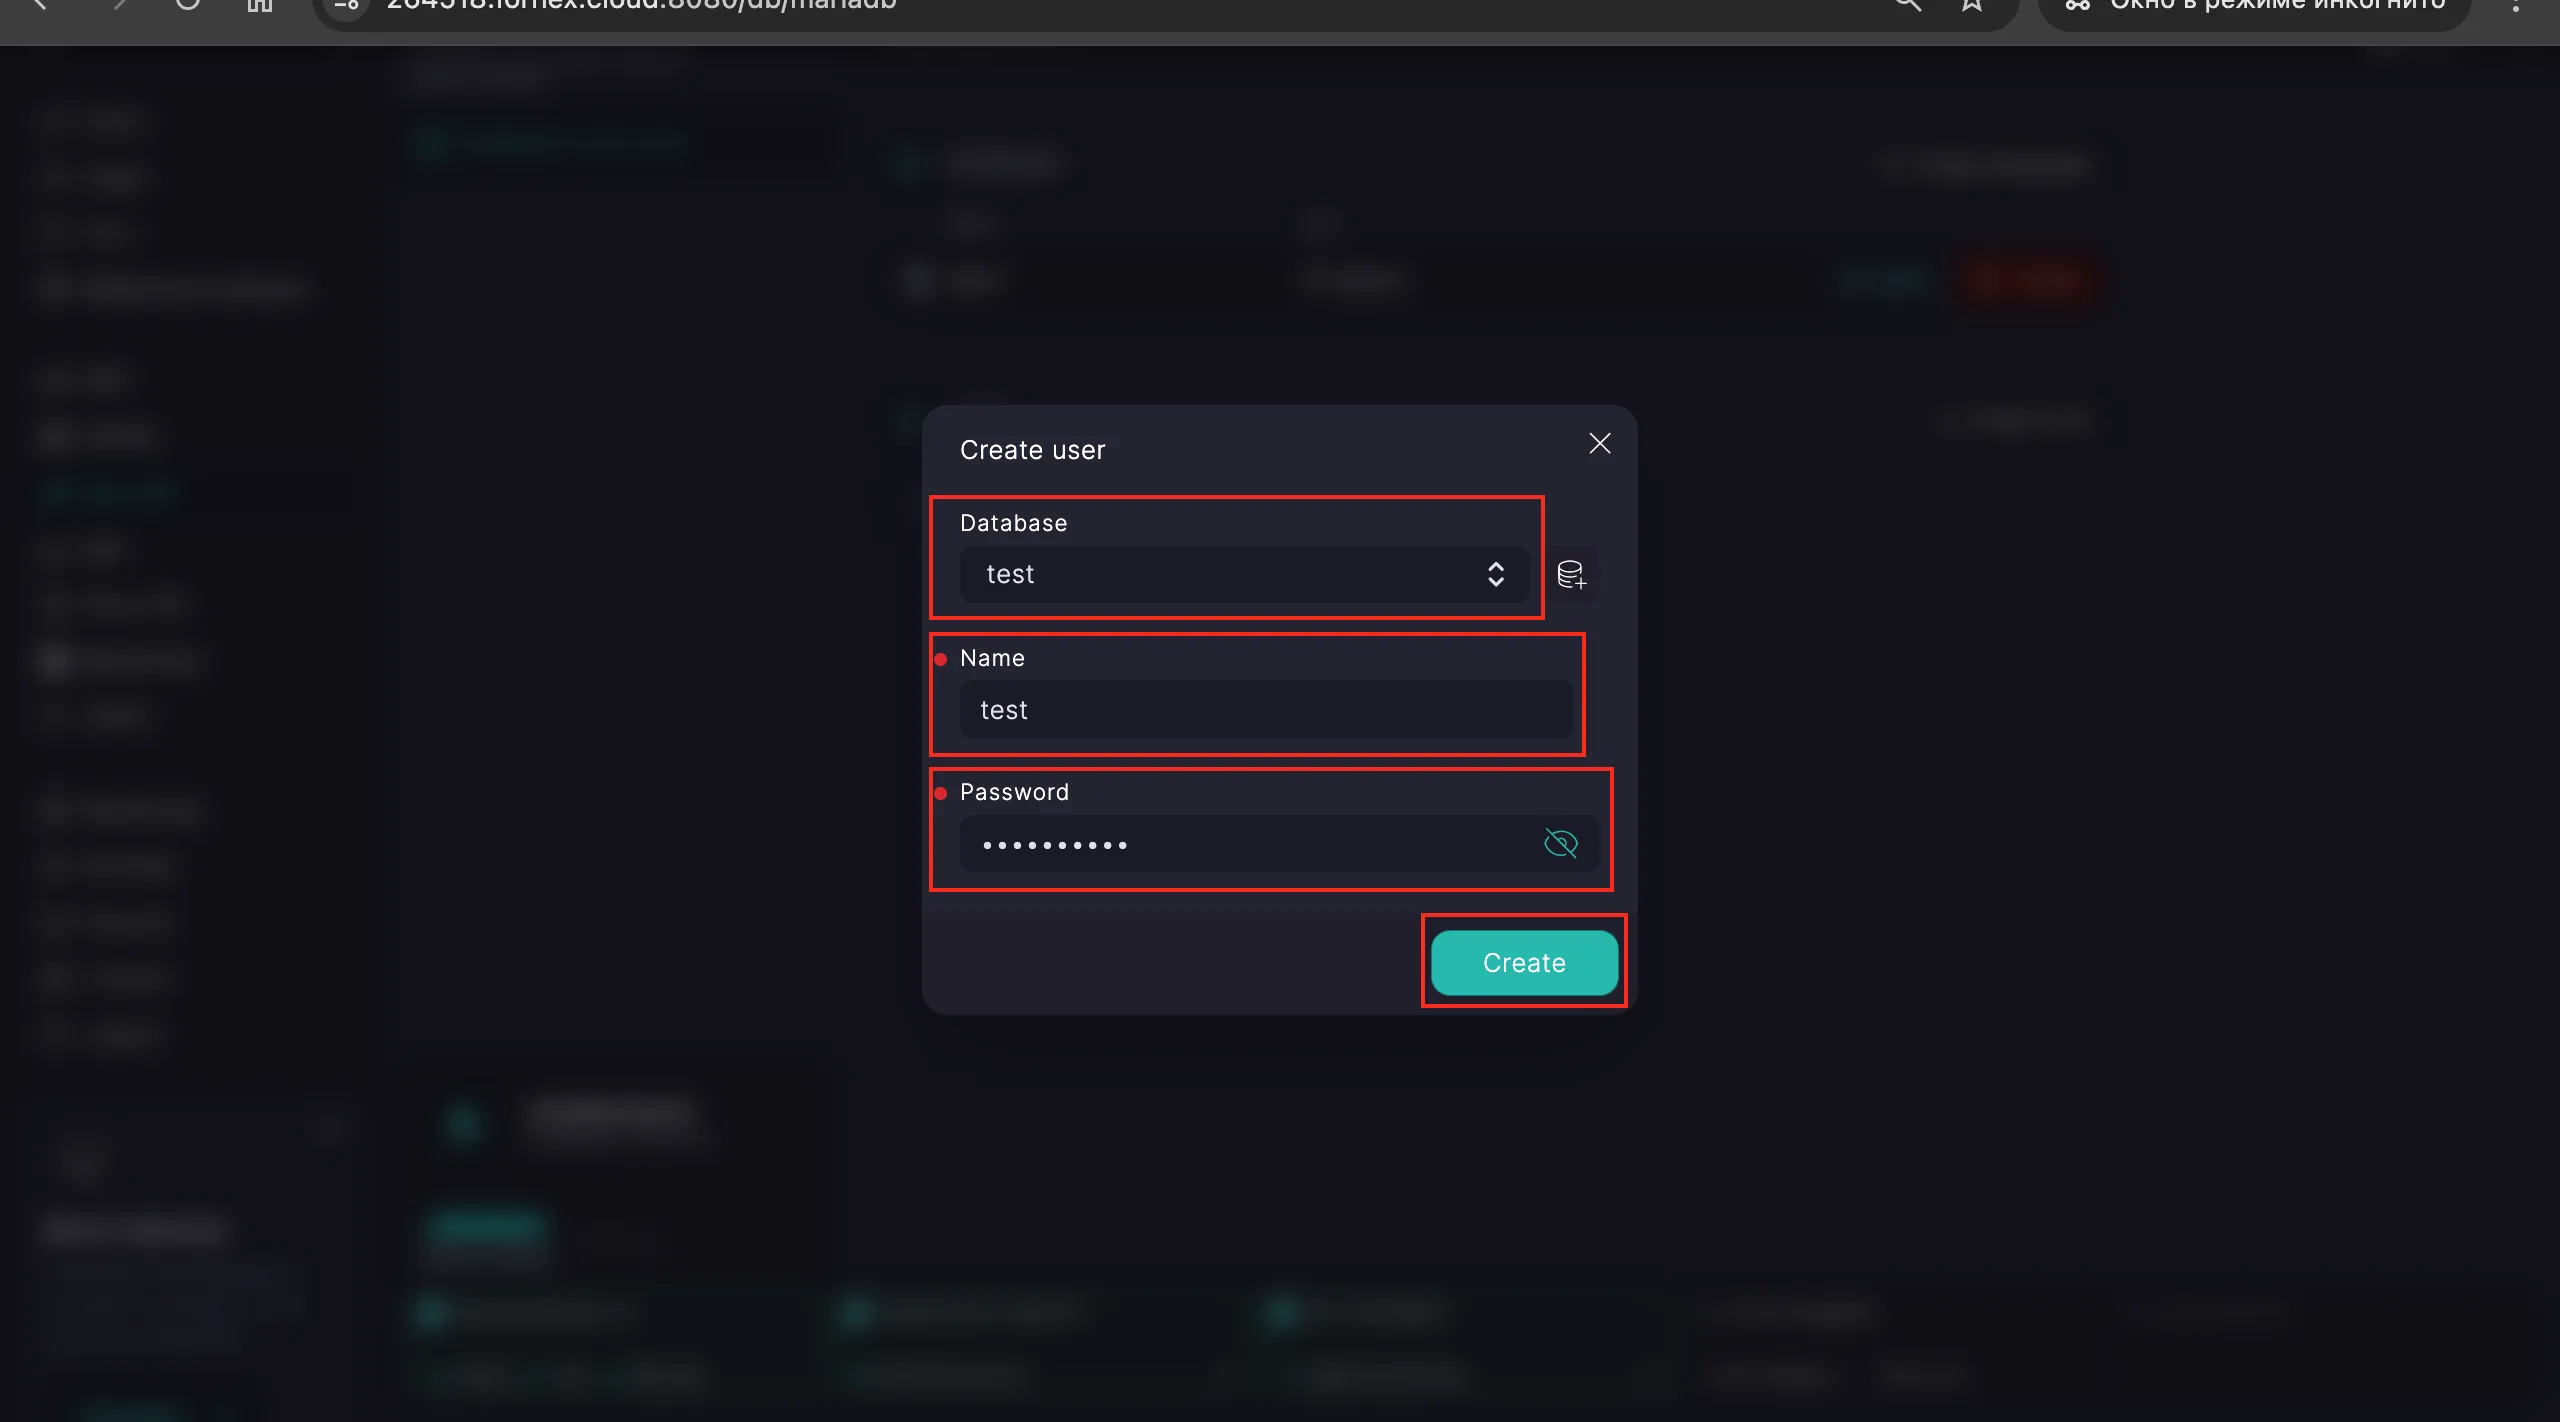
Add a user:
- Pick the database, enter a username and password.
- Click Create.
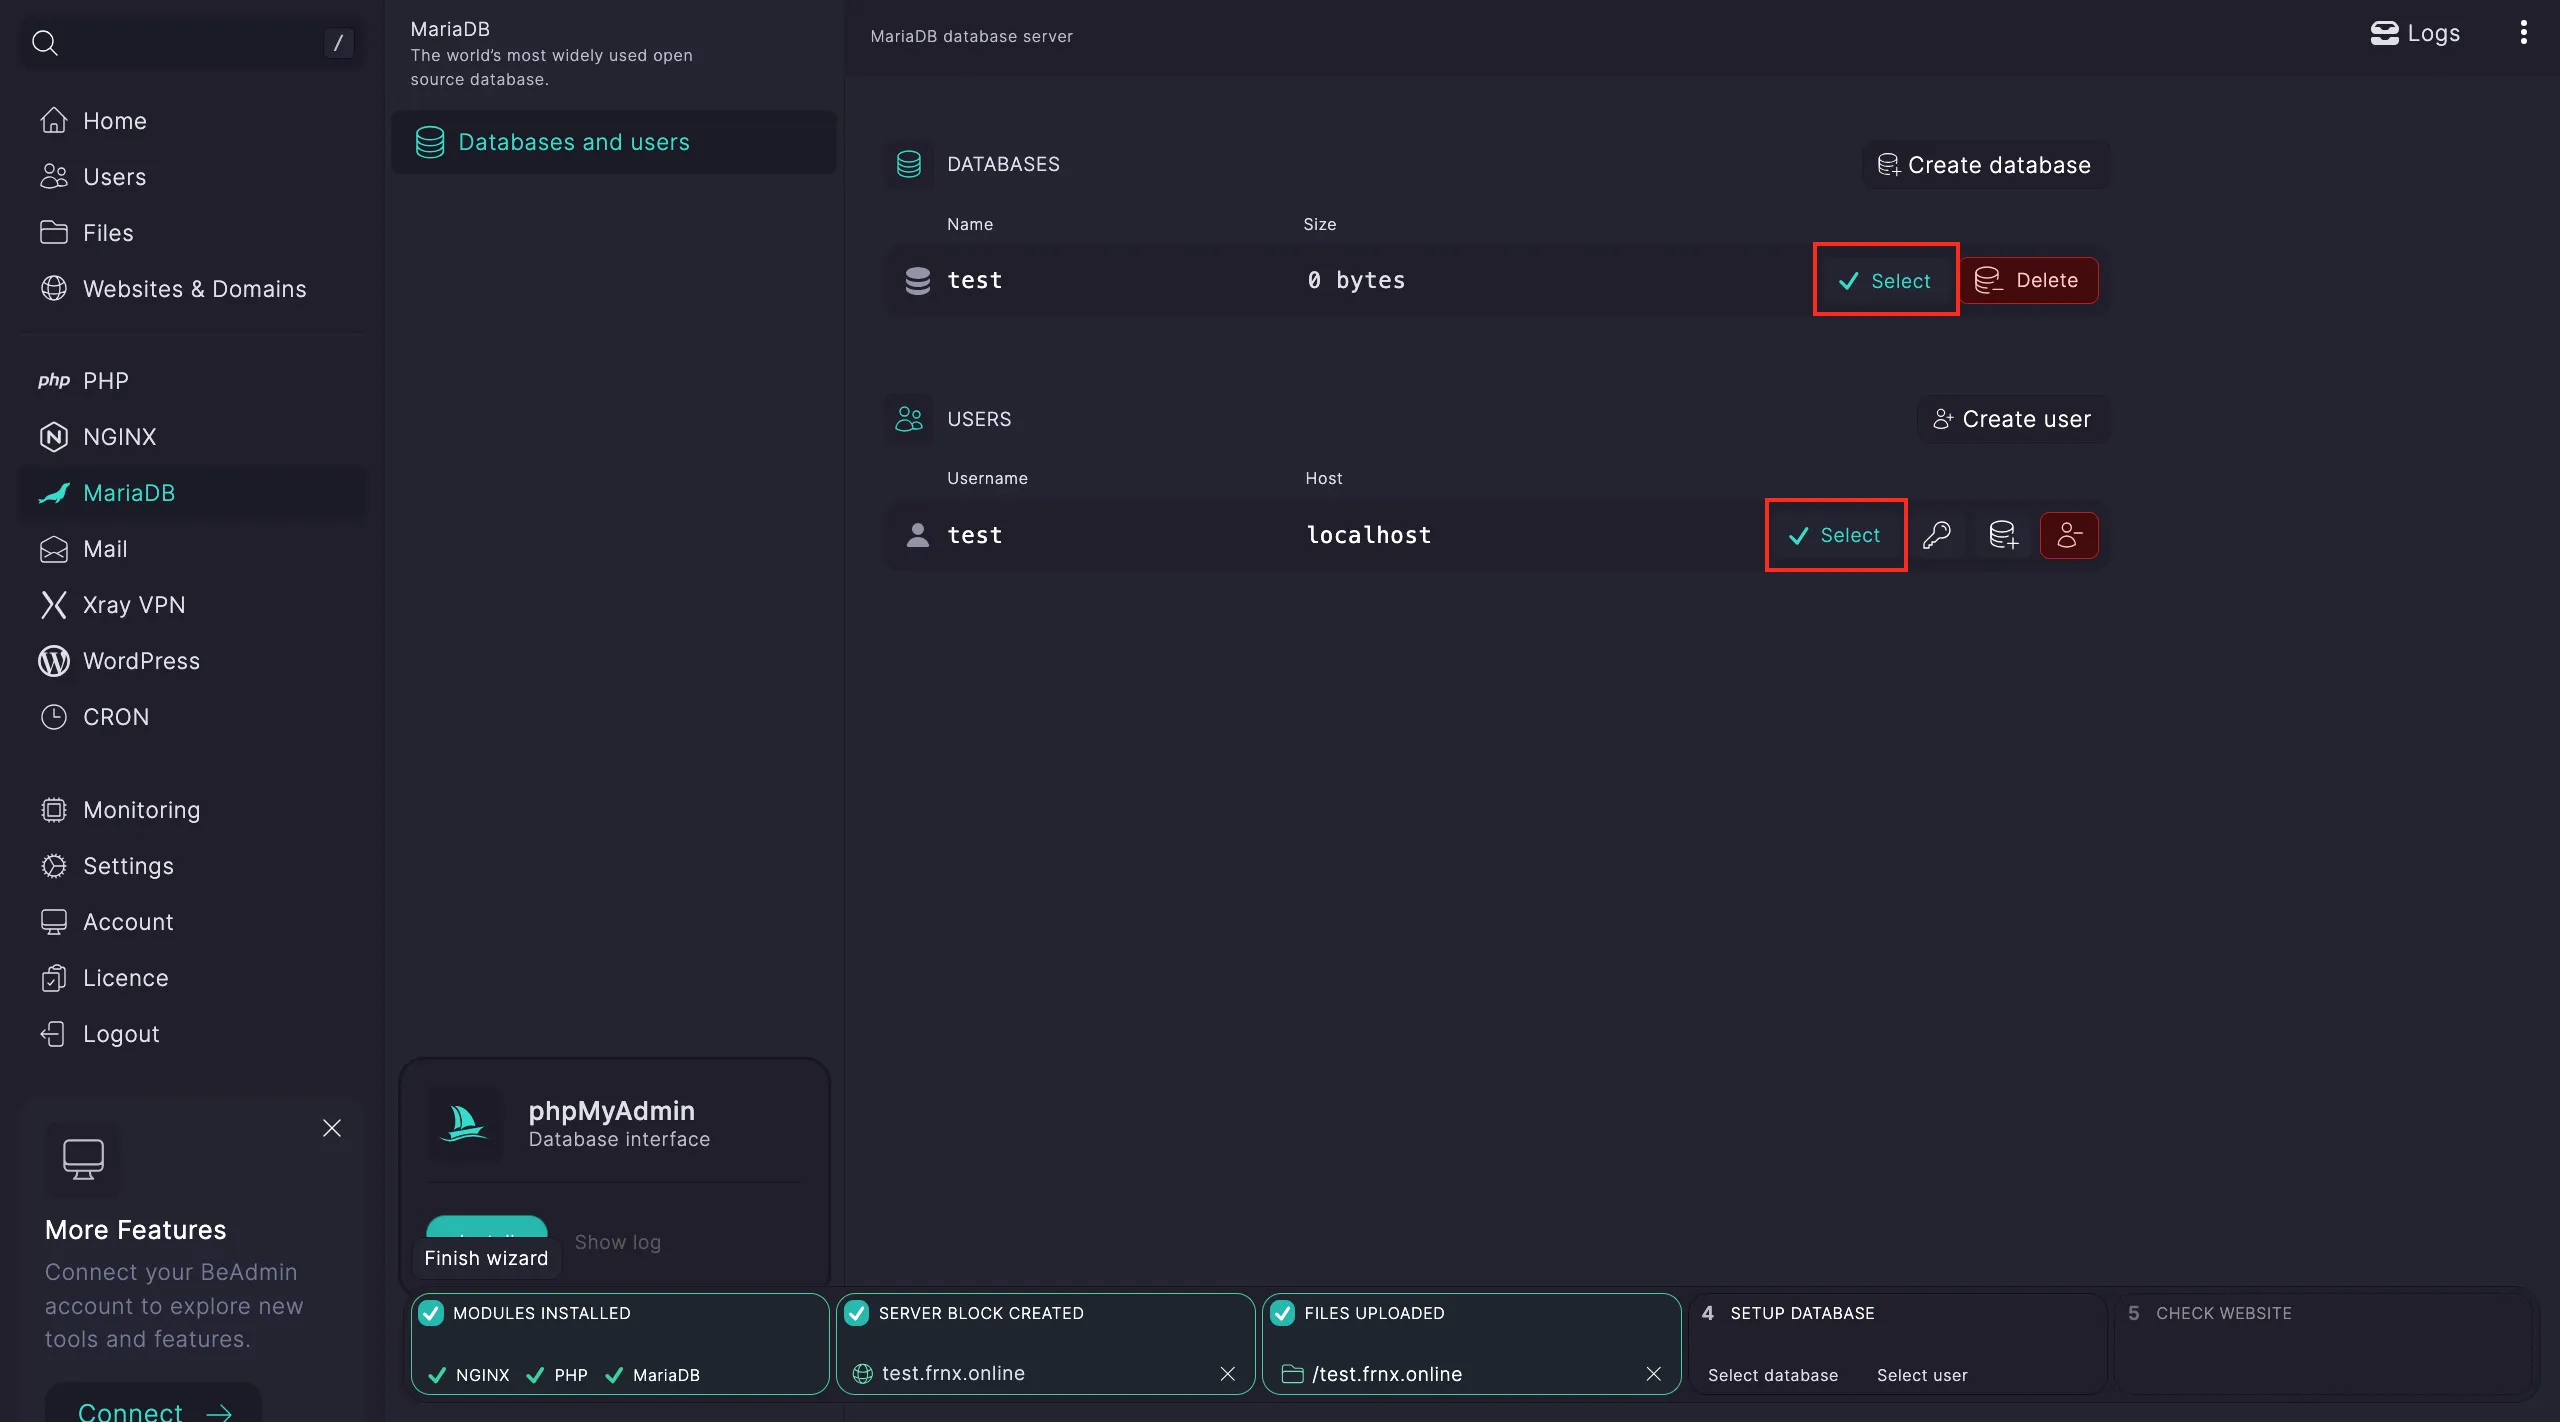
Select the database and user with Choose.
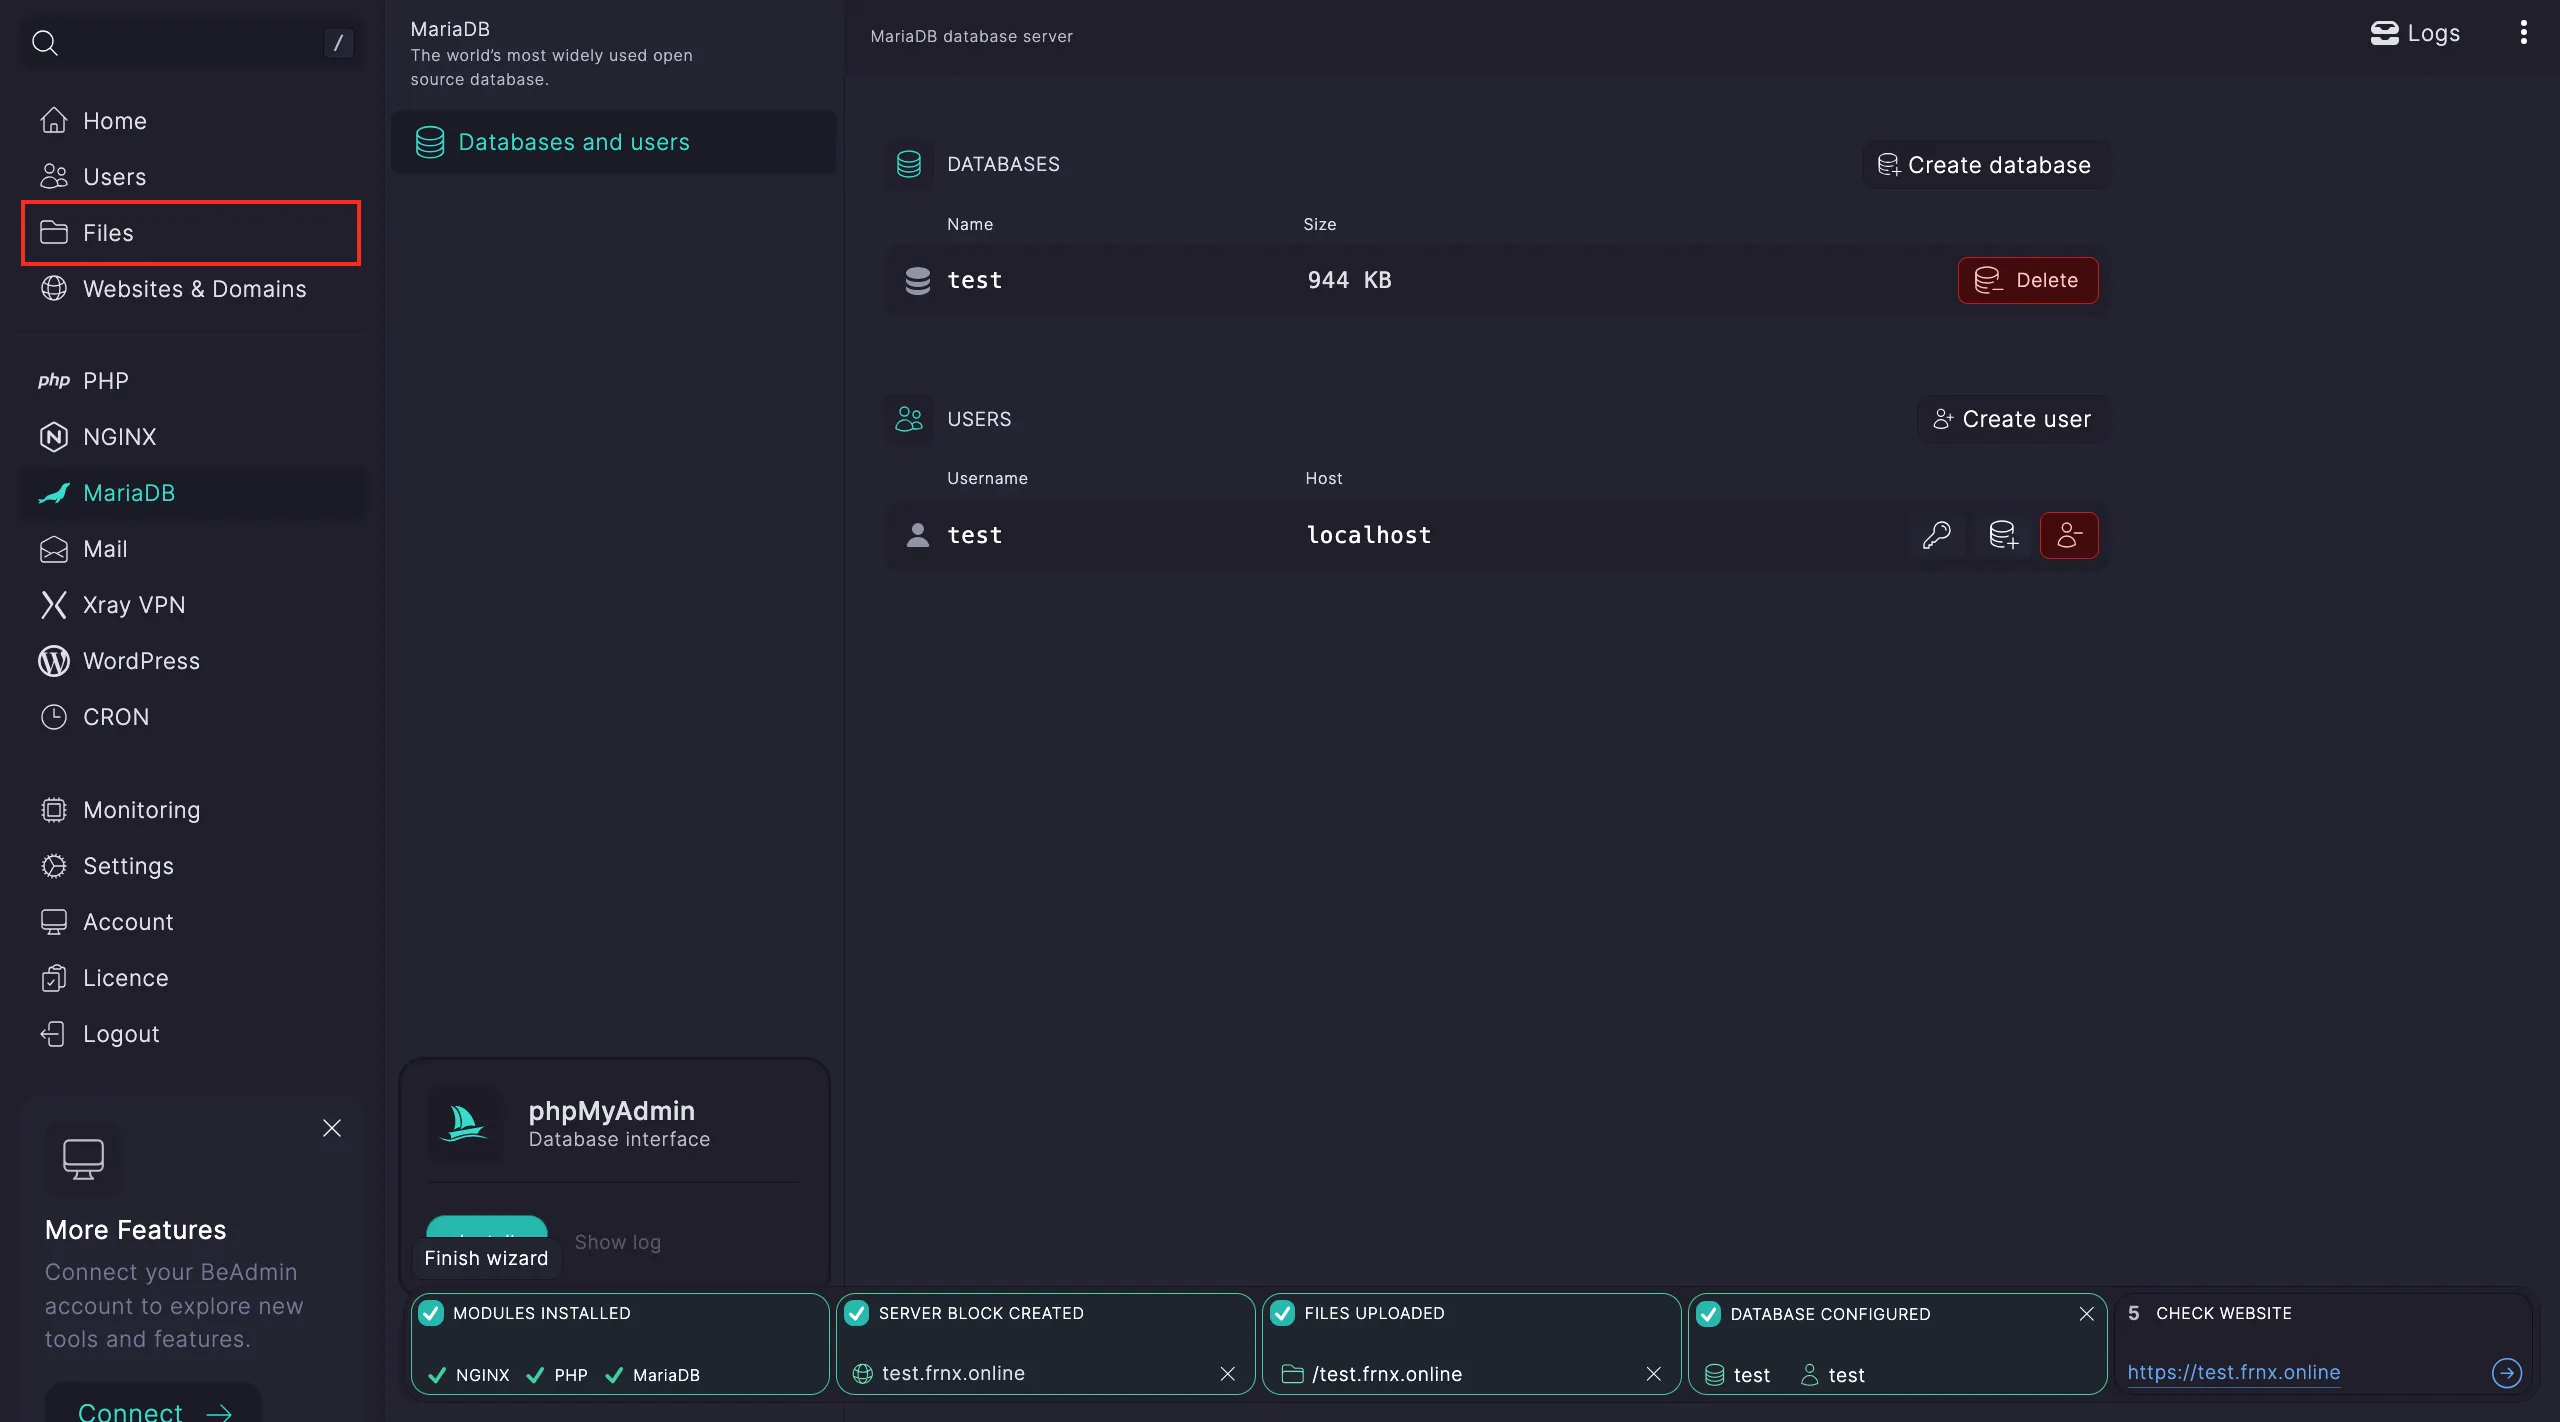
If you need to restore a database from a dump, go to Files and upload the dump.

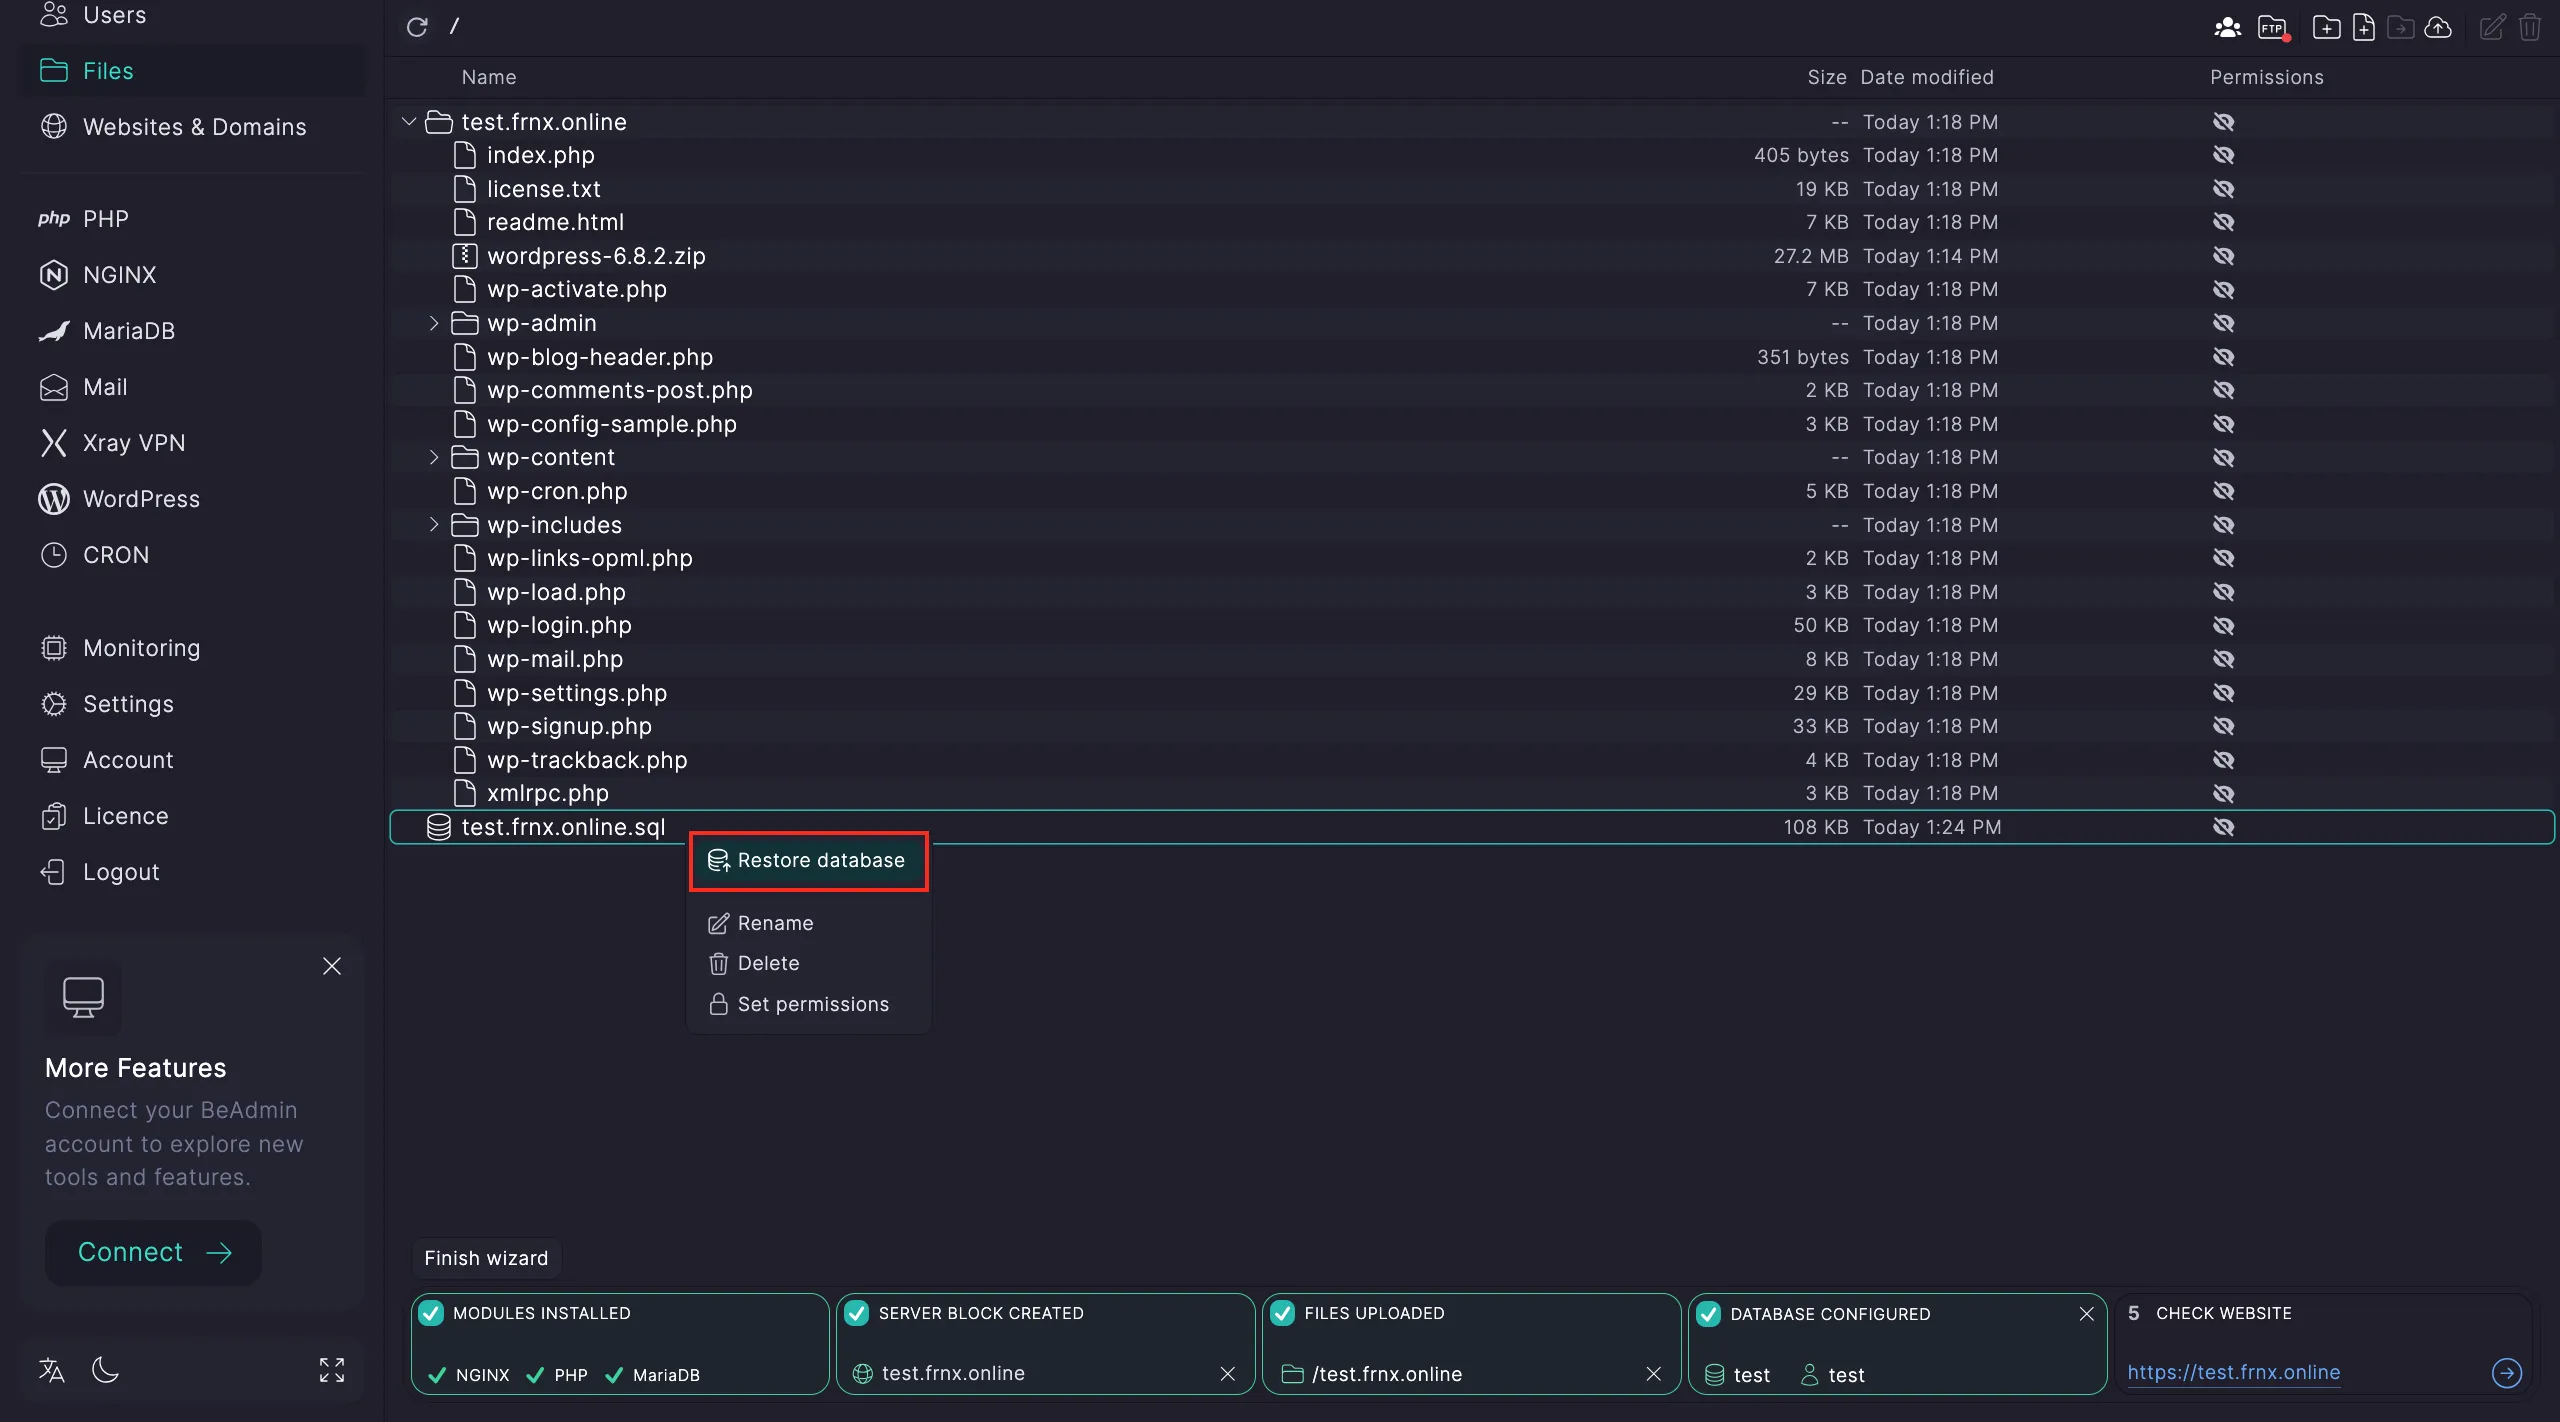
Right-click on the dump → Restore.
In the window that opens, select the database you created.
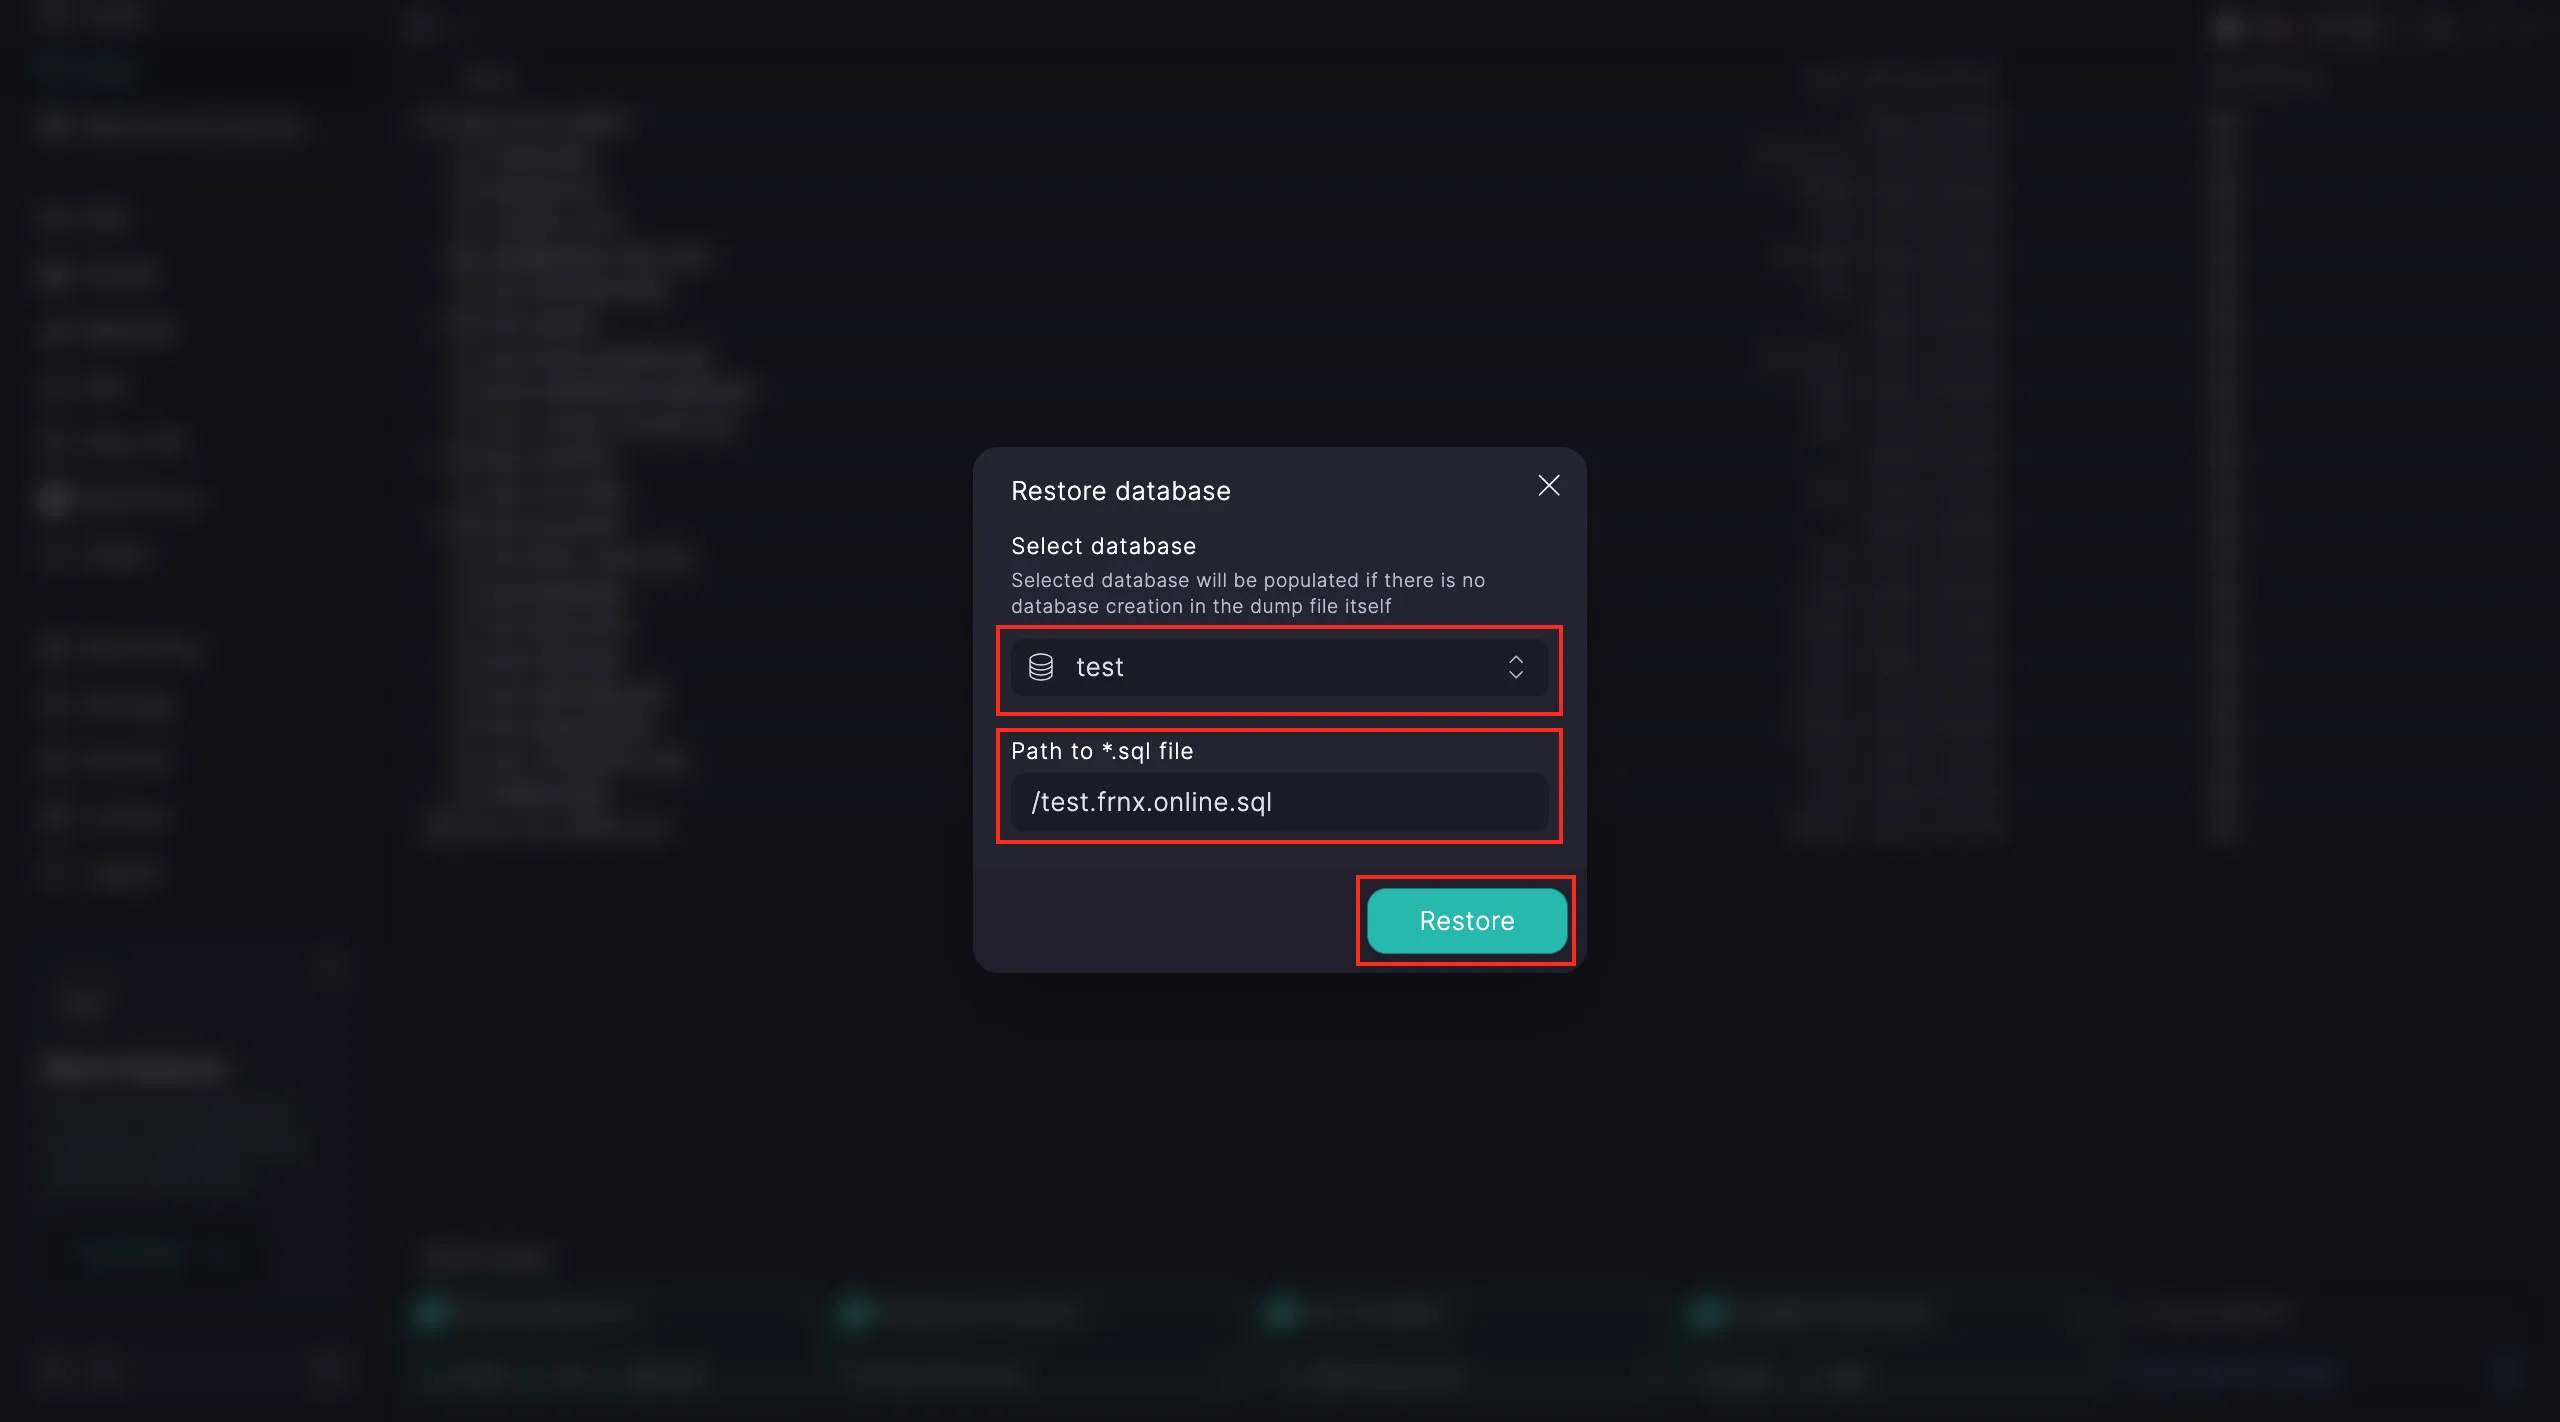
That’s it! Your setup is complete. Check if your site is working using the link from step five.
Static Website
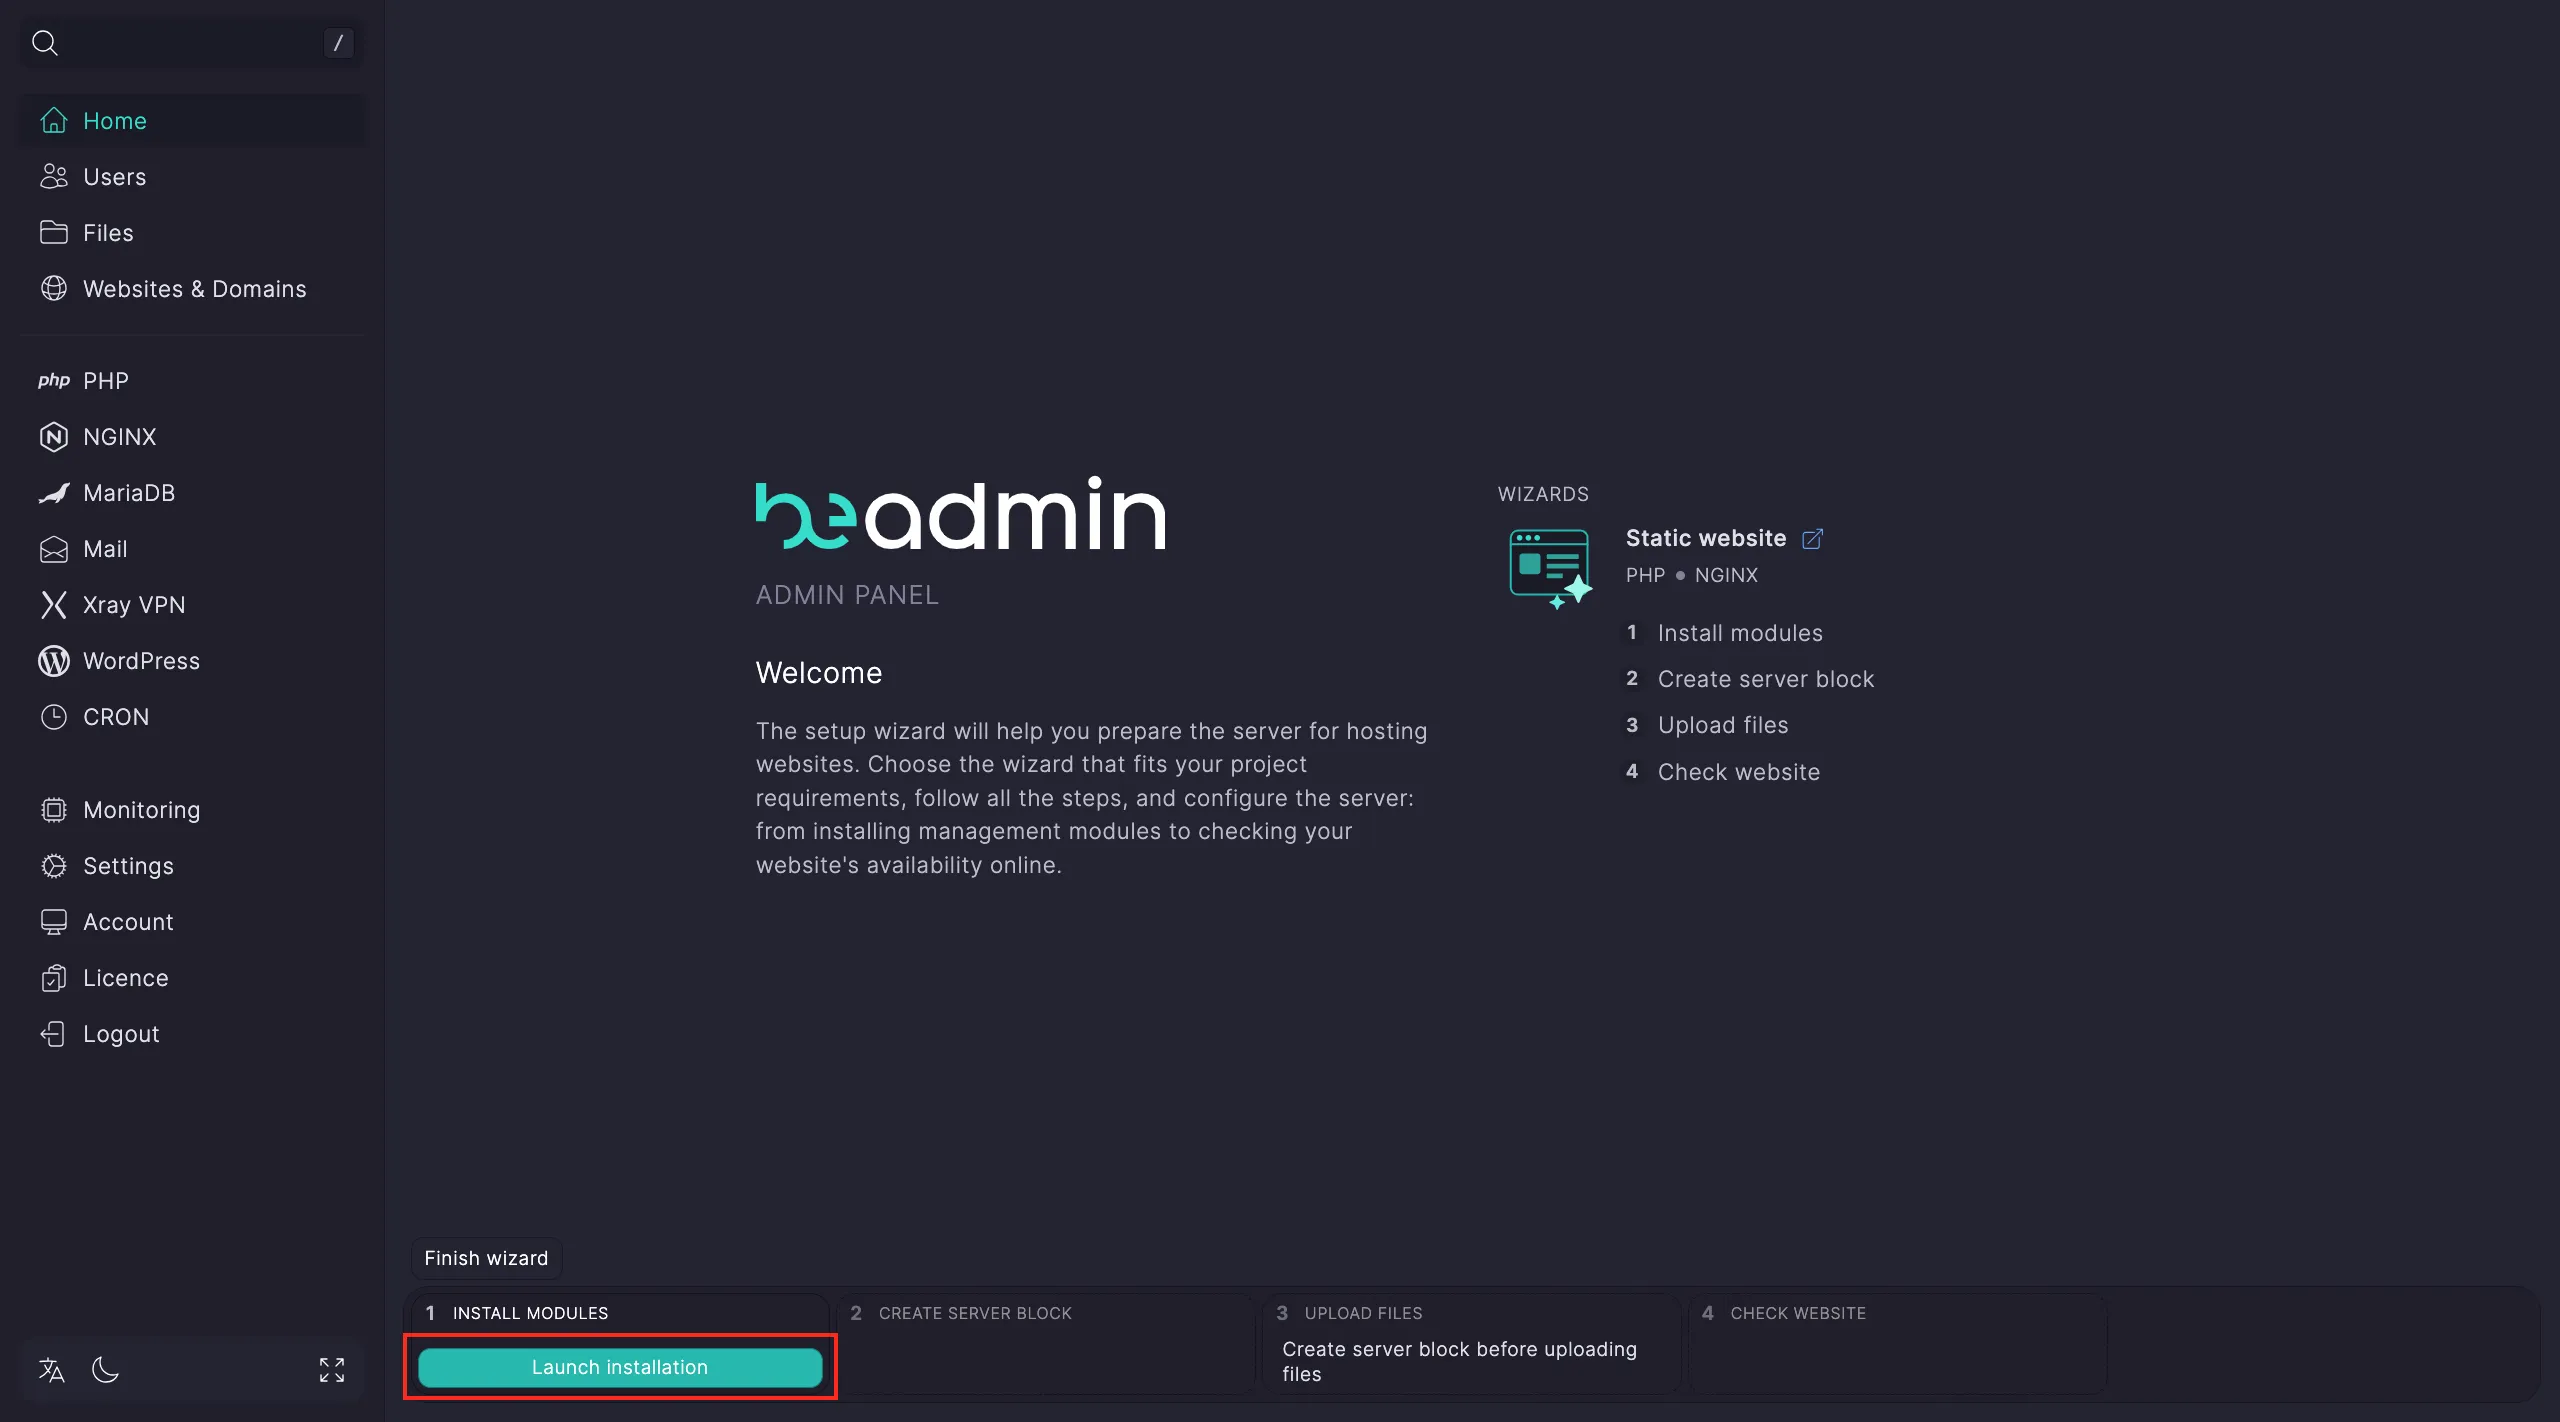
Go to the dashboard and select the Static Website scenario. Click Start.

Step 1. Install required modules Click to begin installation.
Note
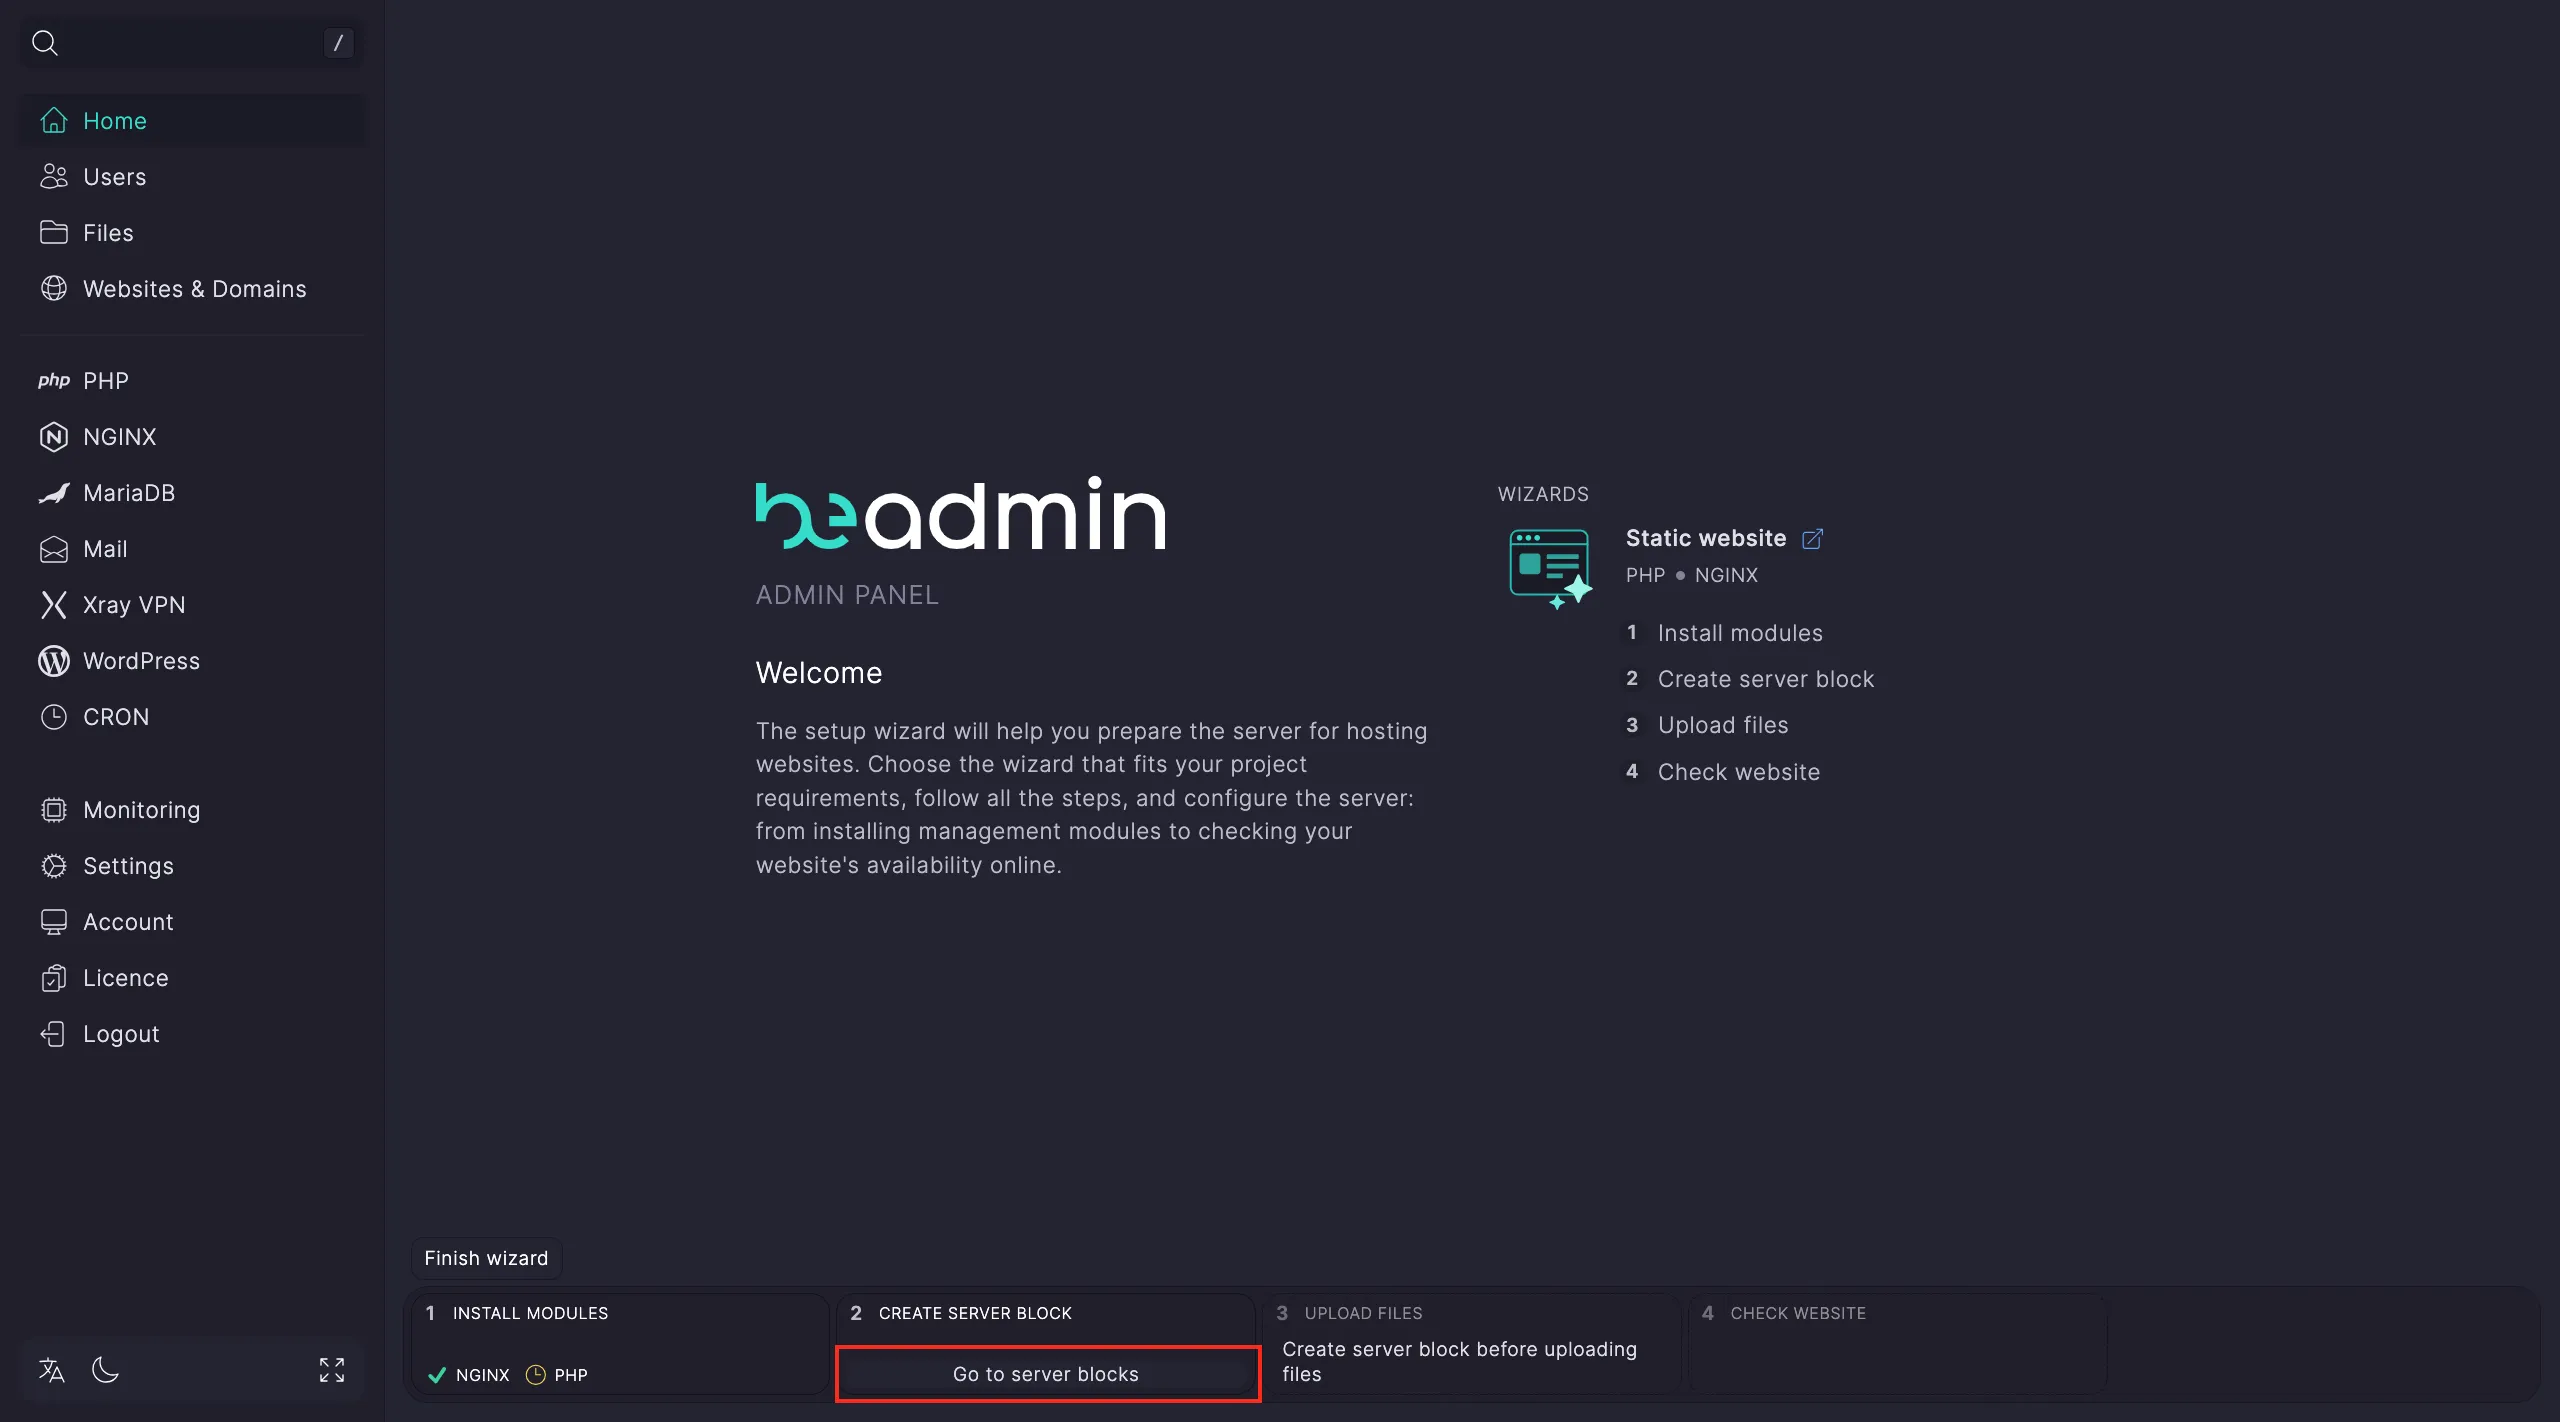
Installing Nginx usually takes about 15 seconds. Once it’s done, you can continue to the next step — the remaining modules will be installed automatically.
Step 2. Configure a virtual host Click Go to Hosts → Create Virtual Host.
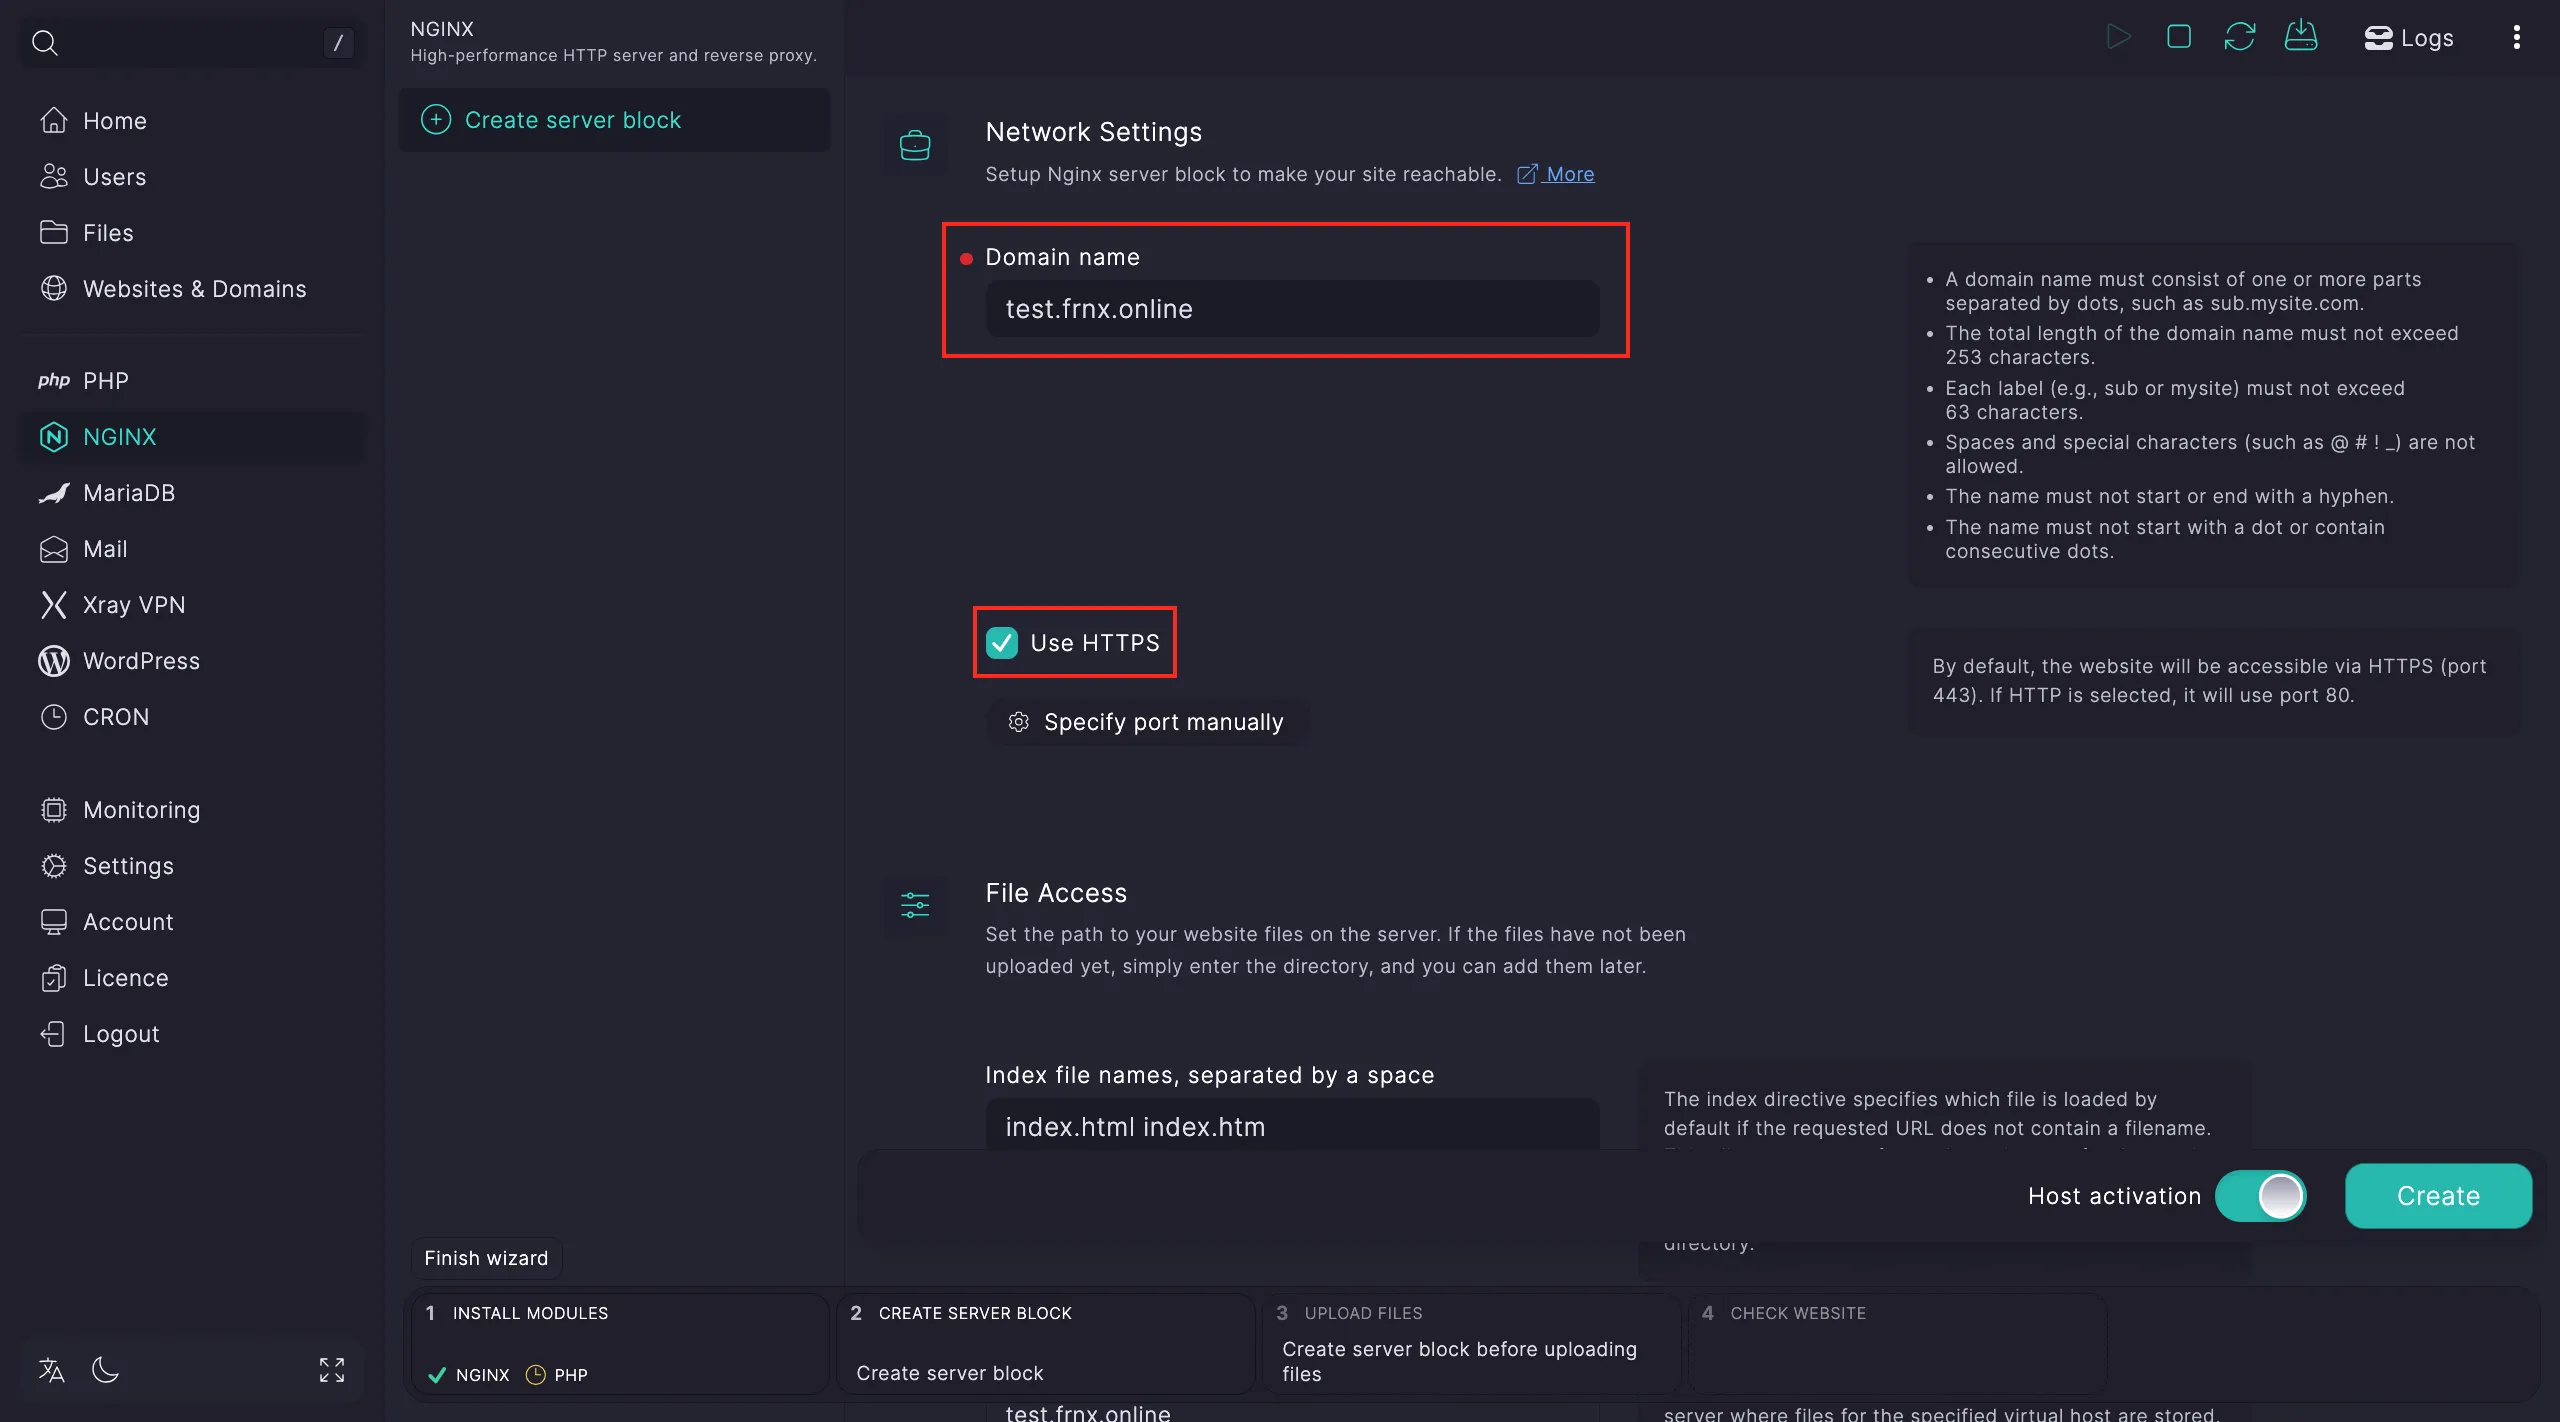
In the configuration window, enter:
- Your site’s domain name.
- The connection type: HTTPS or a custom port.
- (Optional) The PHP version — if the selected version isn’t installed yet, the system will offer to install it.
Note
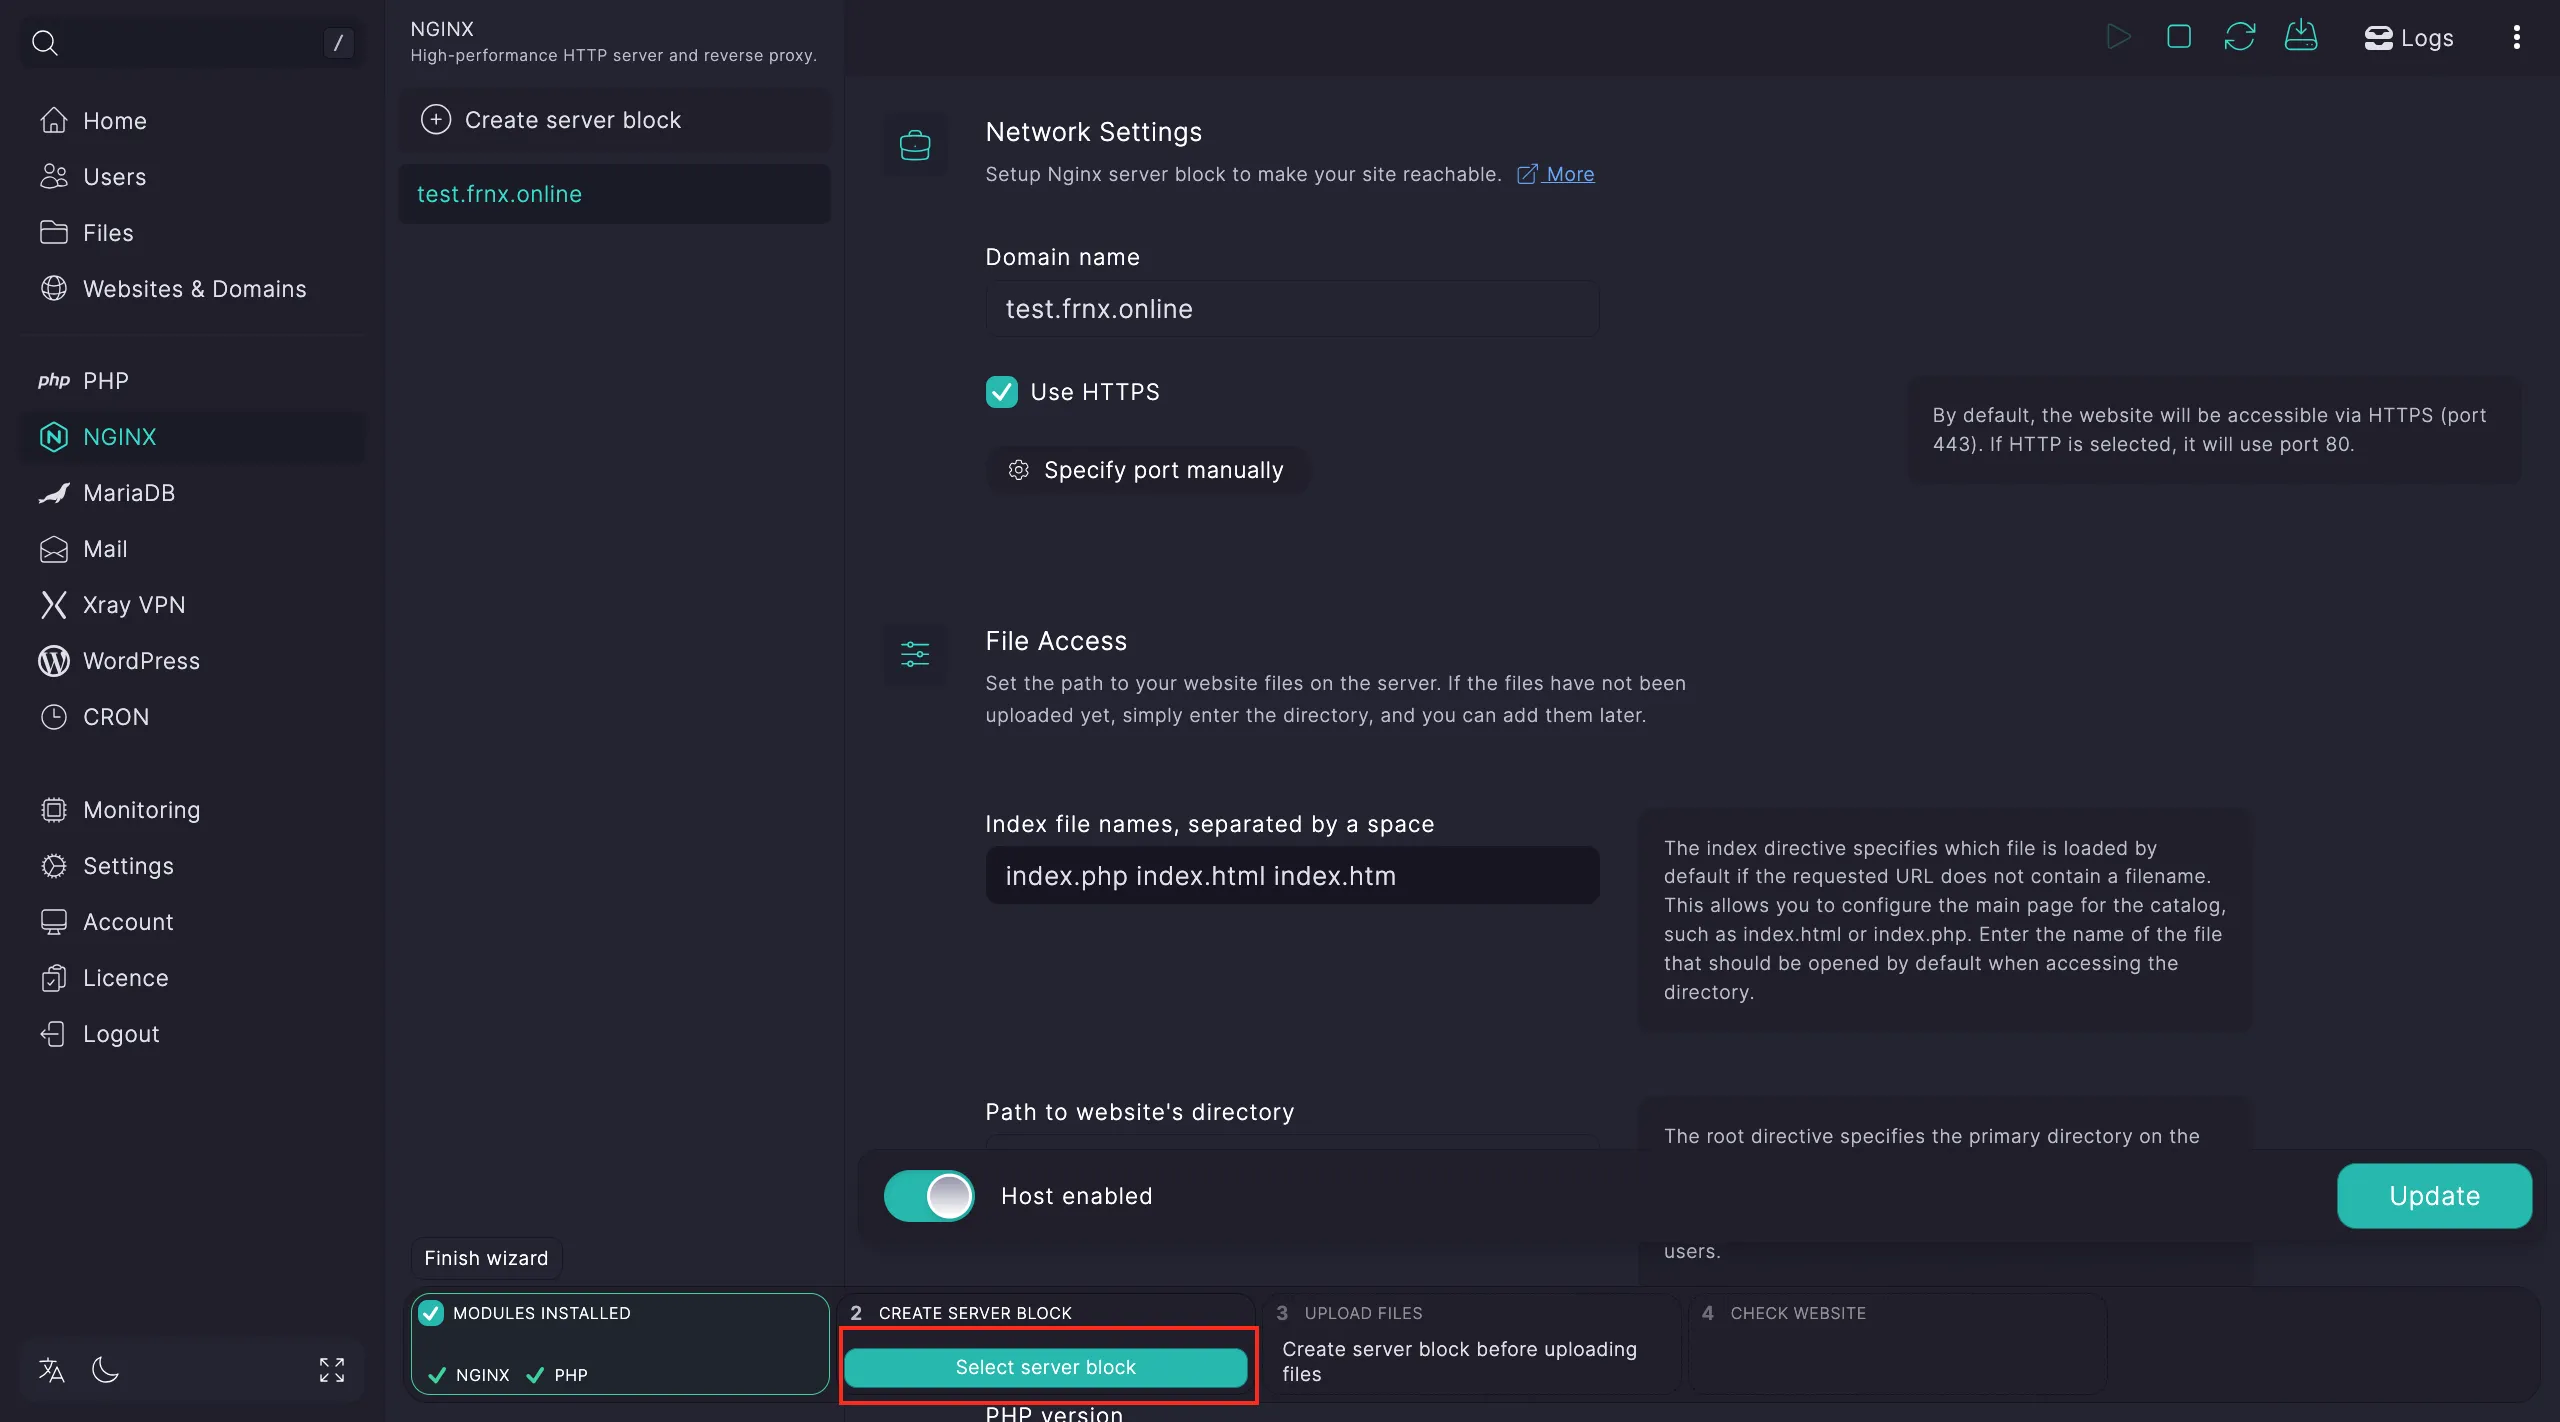
If you choose HTTPS, the system will automatically issue an SSL certificate. Make sure your domain is already pointing to the server’s IP address where Beadmin is installed.

Once the host is created, select it and click Use this host.
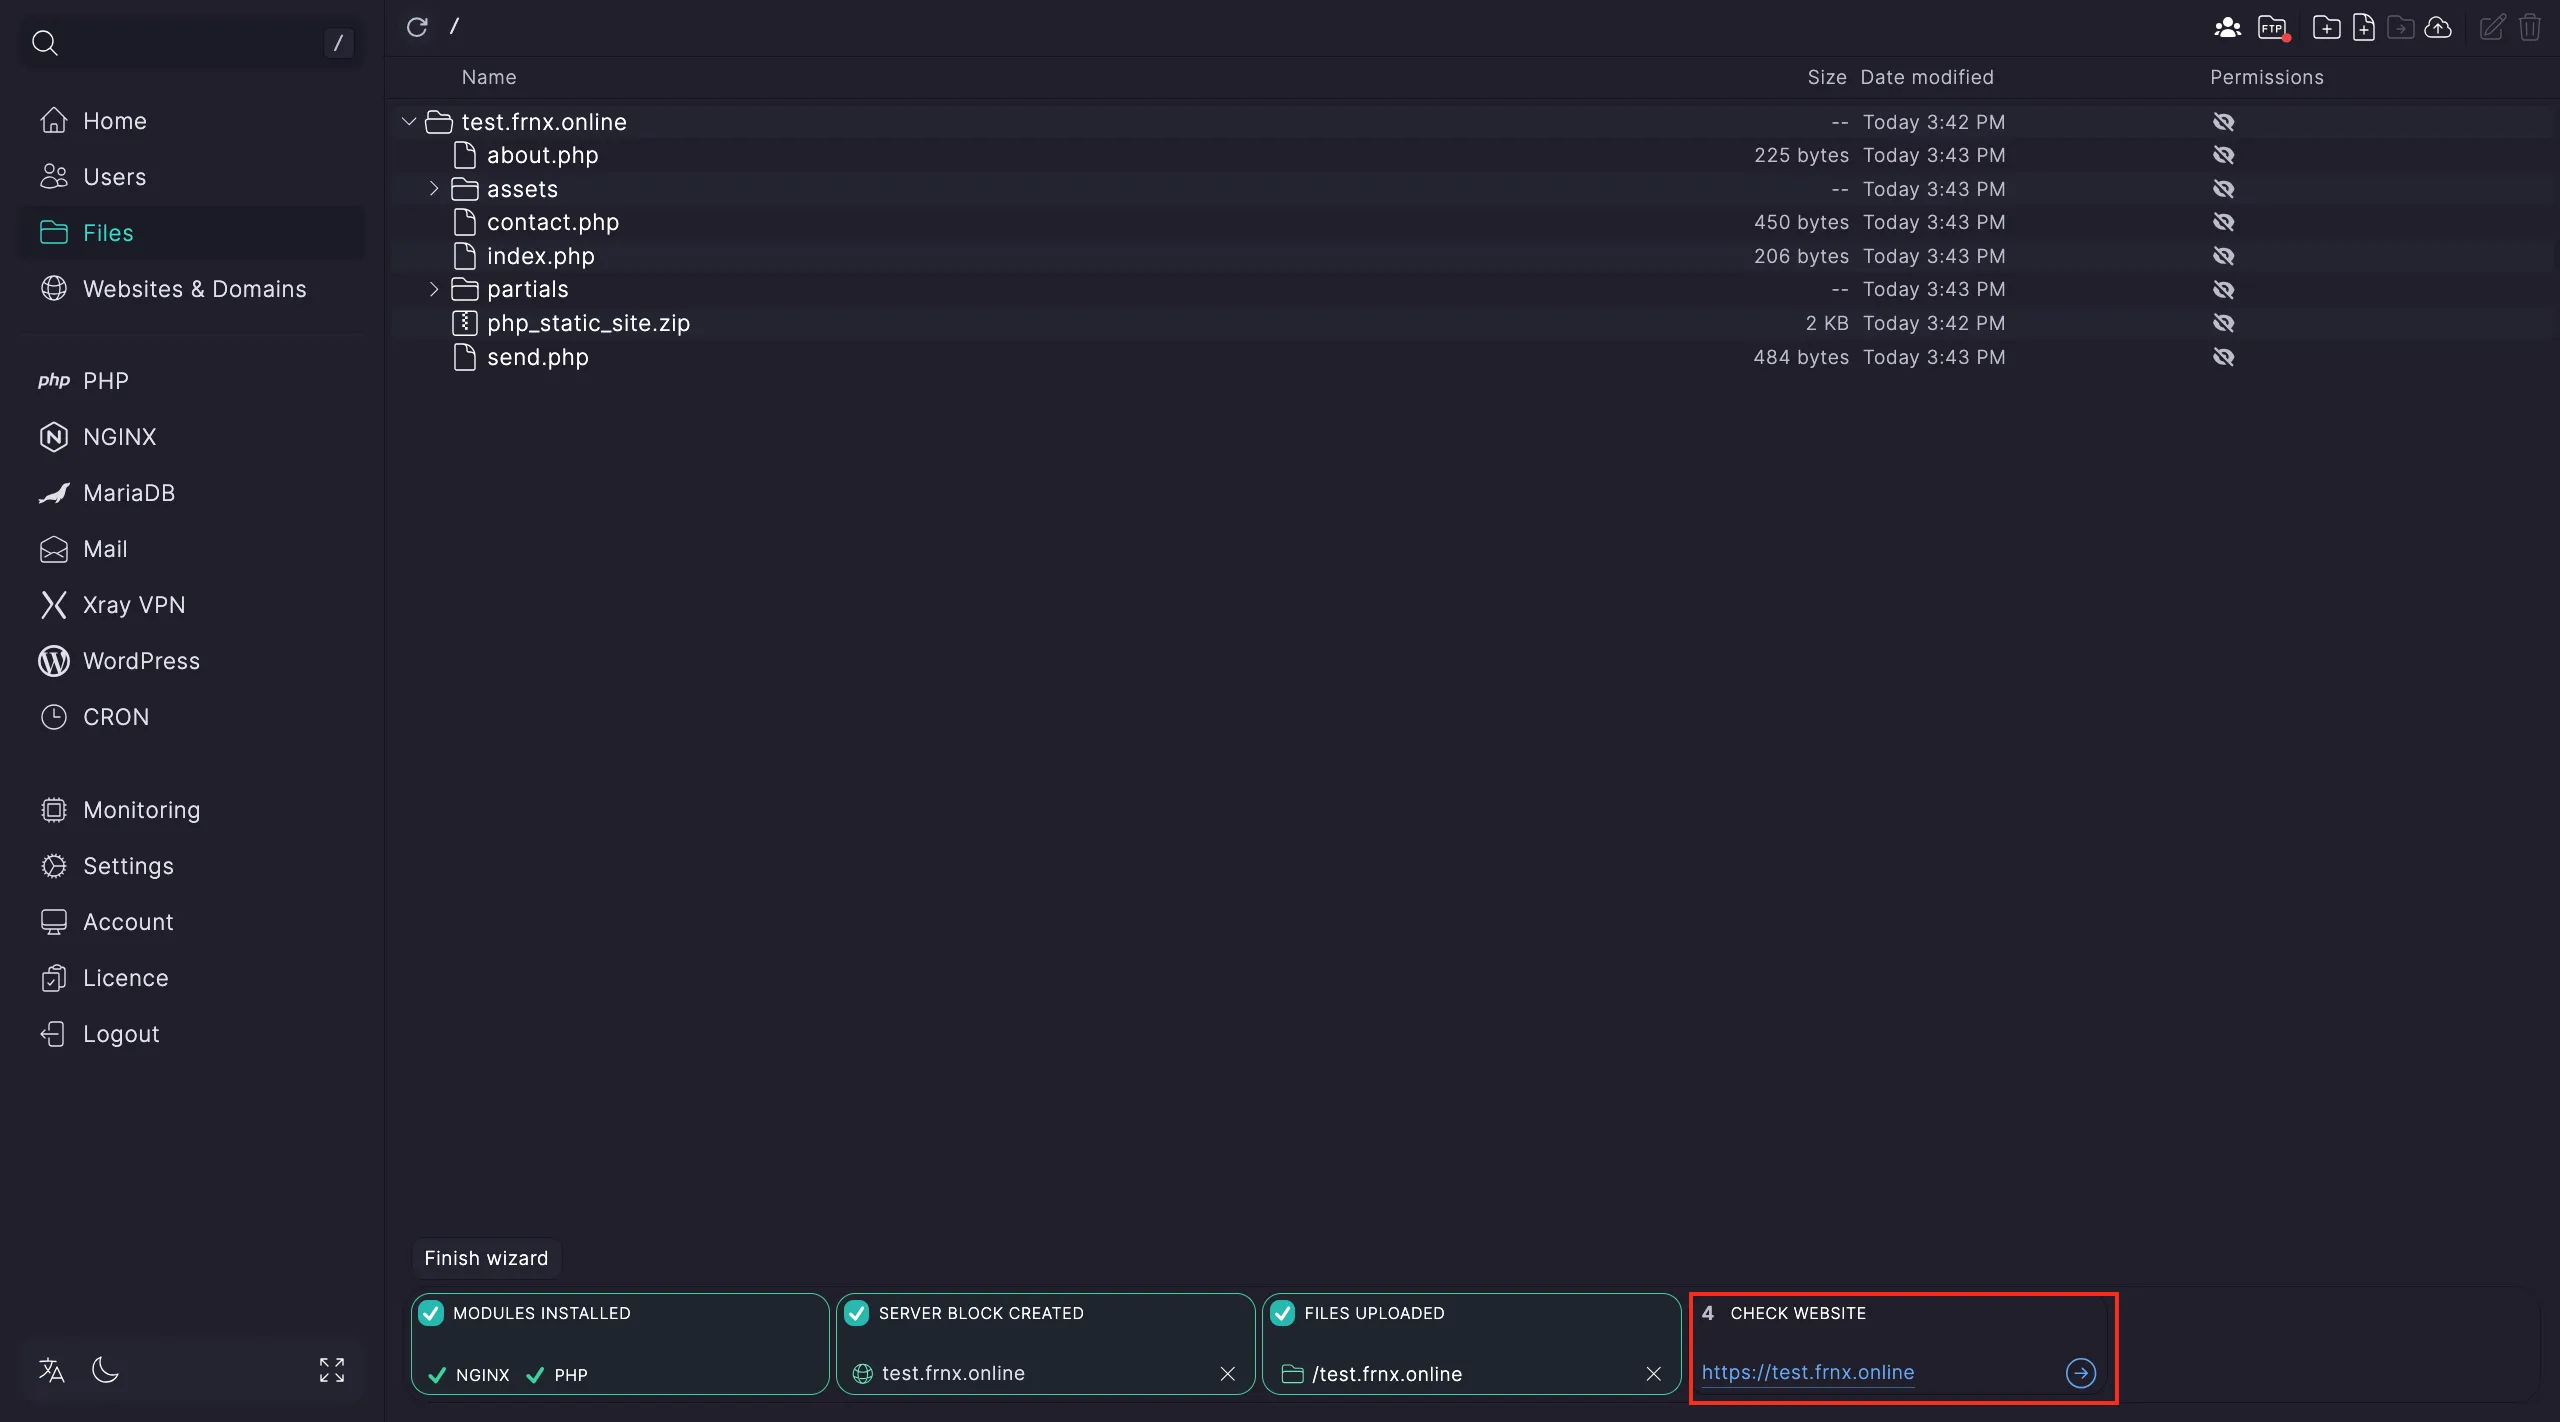
Step 3. Upload your site files Go to the file manager (Open Files).
Upload your website files to the host’s directory by clicking Upload.
If you uploaded an archive, extract it and point the setup wizard to the correct directory.
That’s it! Open the link provided in the final step to check your website.
Help
If you run into issues or need assistance, just open a ticket via our support system — we’ll be happy to help.