Installing a free SSL certificate from Let's Encrypt in Vesta
Instructions on how to install an SSL certificate from Let's Encrypt using the embedded plugin in the Vesta control panel
Let's Encrypt is a non-profit certificate authority that provides free X.509 certificates for TLS encryption through an automated process designed to replace the current complex process of manually creating, verifying, signing, installing and updating certificates for secure websites.
Thanks to the connected "Lets Encrypt" script in the "Vesta CP" panel, creating and attaching certificates to a site is reduced to a minimum
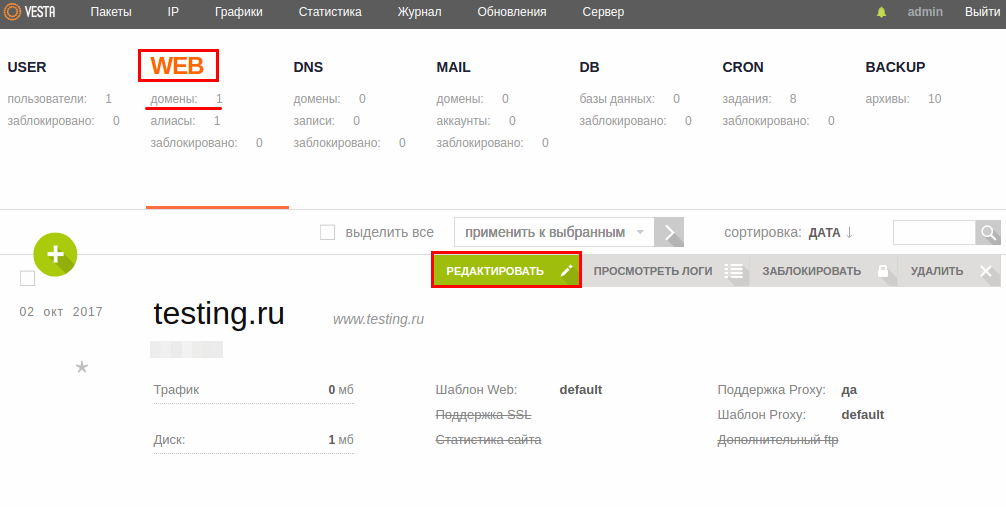
To connect a certificate to the site Go to the "WEB" tab
- Press the "Edit" button on the desired site.
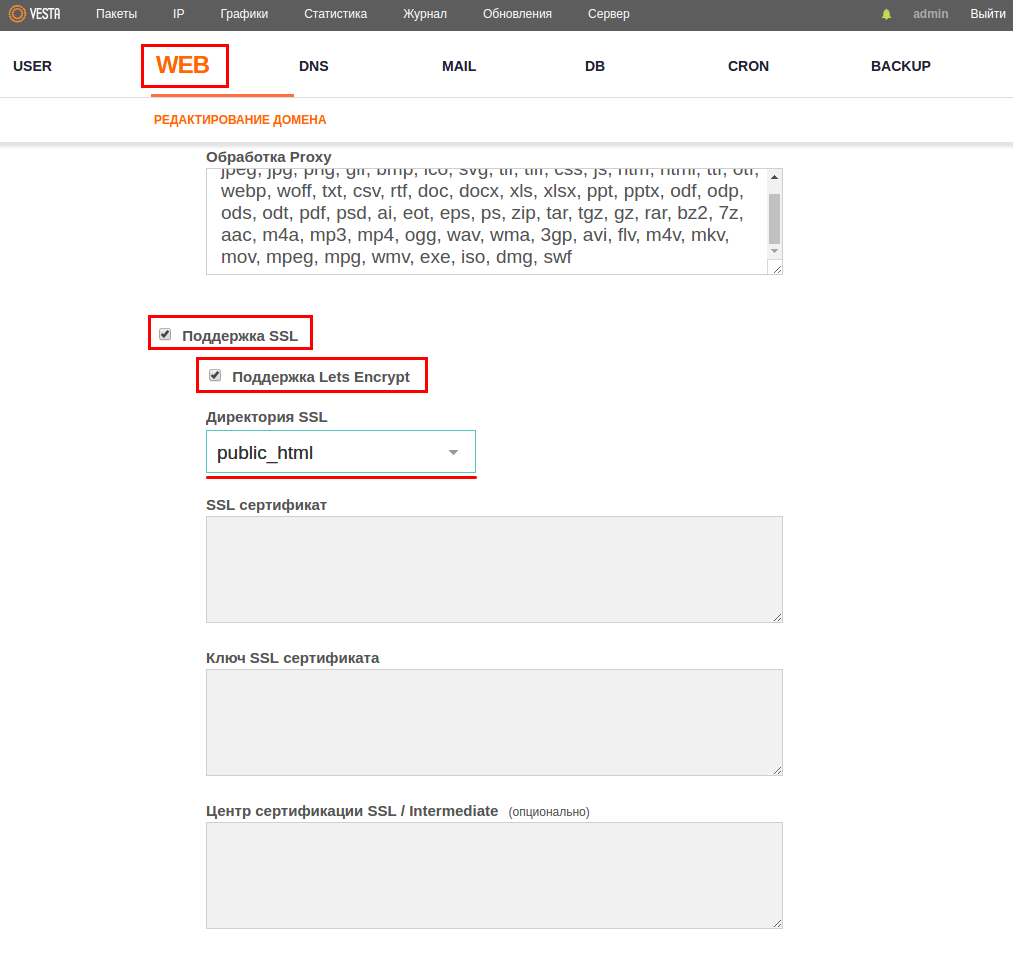
- In the new window, find the "SSL support" item.
- Check "Lets Encrypt Support".
- Choose directory where the site is located.
- Save changes.


- That way a request will be automatically sent, all the data will be recorded and a corresponding task will be added to the Cron to check the SSL renewal and it will be renewed automatically.
To check installation, go to https and make sure the certificate is installed and everything works fine.
You can also check if the certificate is installed correctly using this service.
After installing the certificate, the site is available at both addresses - from http and https. But we need the site to always open at https. Unfortunately, by default, Vesta Cp does not automatically redirect http to https. We will have to set it up ourselves.
To do this, go to file ".htaccess " in the directory of your site and add lines in it:
RewriteEngine On
RewriteCond %{HTTPS} off
RewriteRule (.*) https://%{HTTP_HOST}%{REQUEST_URI}
That's all, now you will have https working.