Protecting the WordPress admin panel
Methods to protect the CMS admin panel.
To keep your WordPress admin panel secure, it’s important to consider not only software-based protection methods but also the infrastructure your site is hosted on. Whether you’re using web hosting, a VPS, or a dedicated server, proper server configuration and security measures can help minimize risks. In this article, we’ll go over the key ways to protect your WordPress admin panel that can be applied to any hosting type.
In order to protect your WordPress admin panel, you can:
-
Set IP access restriction
-
Insert Google Recaptcha on the login form to make it harder to brute force passwords
-
Change the login page address in the admin panel
-
Install additional authorization with .htaccess + .htpasswd
The advantages of the above methods are that they provide a simple and necessary minimum of WordPress security
But if you need a comprehensive solution to protect the site, it can be the use of special plugins:
LIMITING ACCESS BY IP.
Restrict access to the site from IP-address 111.111.111.111 in .htaccess:
<FilesMatch  "^(wp-login|wp-config)\.phpquot;>
  Order deny,allow
  Deny from all
  Allow from 111.111.111.111.111
</FilesMatch>
Restricts access to the site from all addresses except 111.111.111.111:
Order Deny,Allow
Deny from all
Allow from 111.111.111.111
Restrict access via Nginx can be found here
PROTECT ADMIN PANEL FROM PASSWORD BRUTE-FORCING
An easy to install and effective way to protect against password brute-forcing is the Login Lockdown plugin.
Download the [Login Lockdown] plugin (https://ru.wordpress.org/plugins/login-lockdown/) from the official WordPress.org repository
Its working principle is that if you reach a certain number of unsuccessful authorization attempts, your IP is blacklisted and access to the site is blocked. You can use this plugin on any type of site:
- Install Login Lockdown plugin
- The plugin settings are located at https://example.com/wp-admin/options-general.php?page=loginlockdown.php.
You do not have to configure the plugin, but if you want you can enter your own settings:
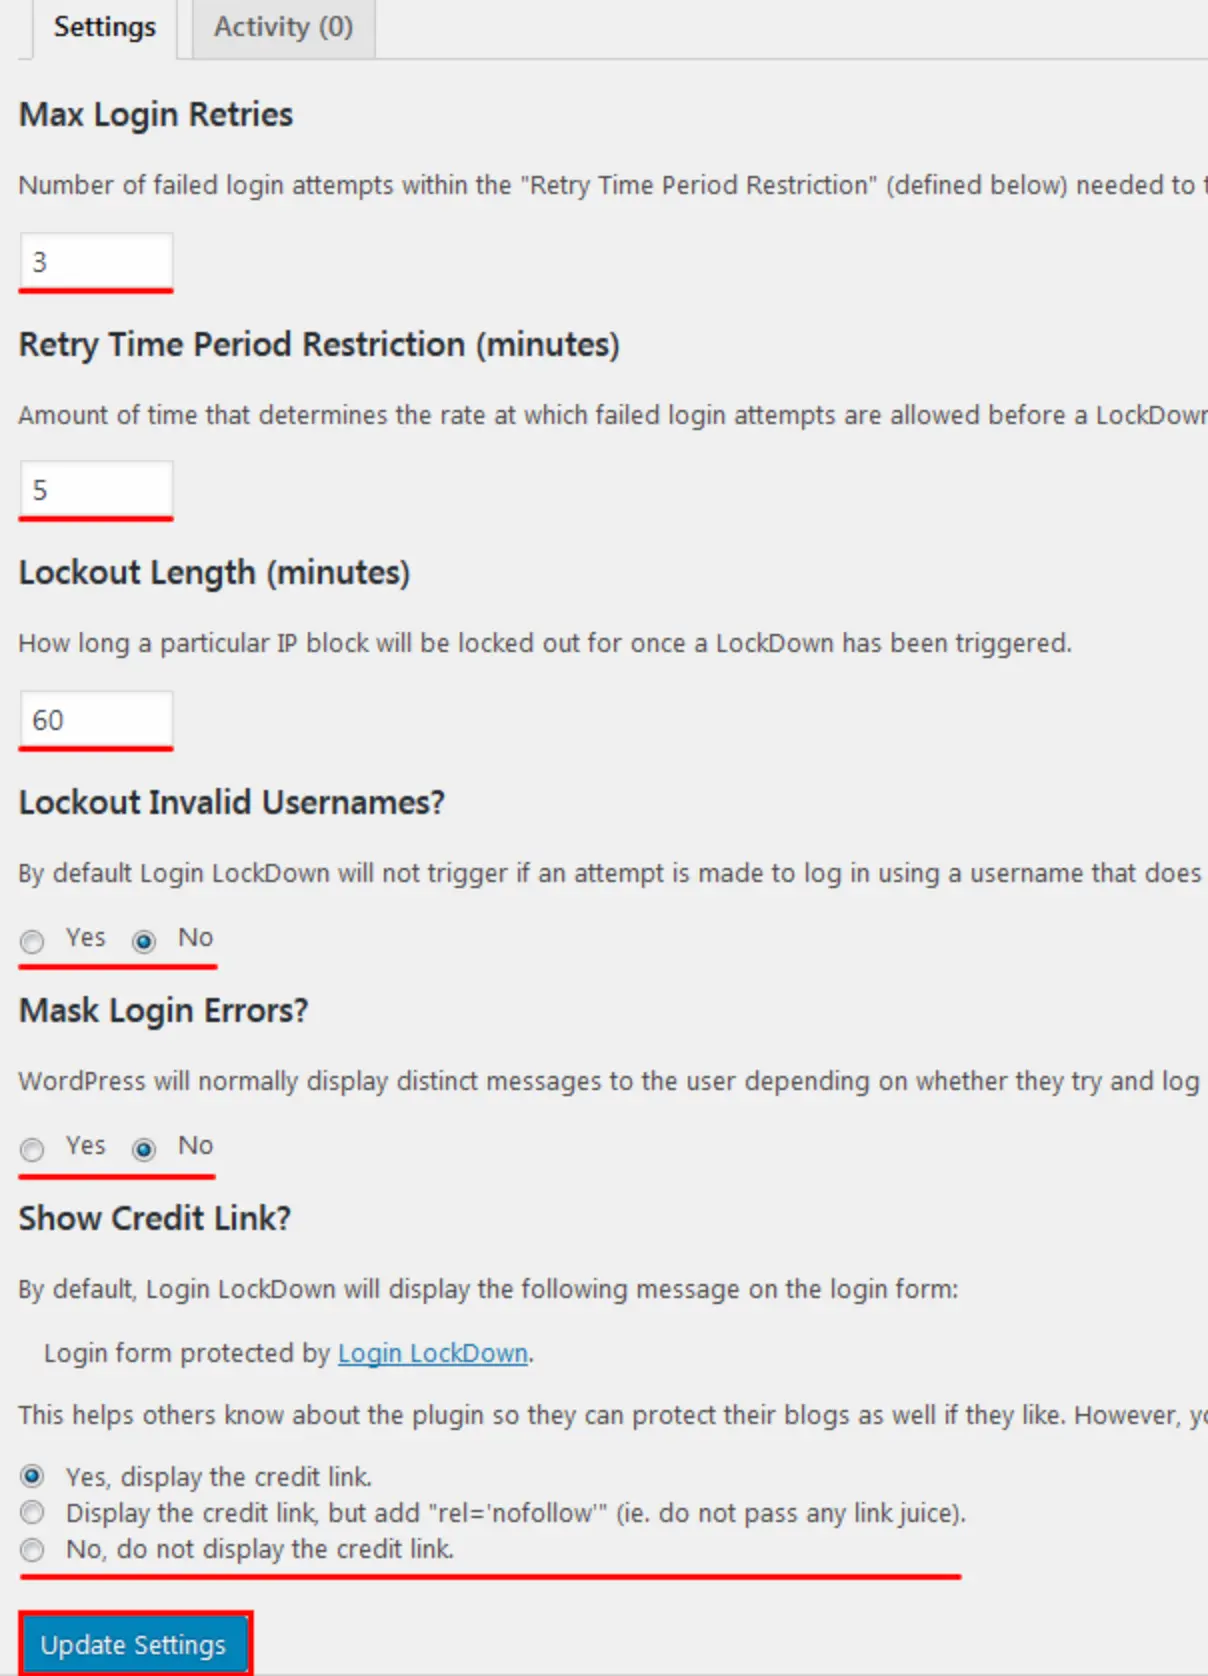
Login Lockdown plugin settings
- Max Login Retries - The maximum number of failed login attempts after which IP access is blocked. By default, there are 3 attempts.
- Retry Time Period Restriction (minutes) - During which period you are allowed to make a mistake the above number of times (by default 5 minutes). If you make 2 mistakes with the password, you need to wait for 5 minutes, otherwise you can get into the ban.
- Lockout Length (minutes) - How many minutes to block access to the site. By default, access by IP is blocked for 60 minutes.
- Lockout Invalid Usernames? - Whether to use the Login LockDown filter to try to authorize as a user who does not exist. By default, no.
- Mask Login Errors? - WordPress usually displays separate messages to the user depending on whether they are trying to log in with an invalid username or with a valid username but an invalid password. Switching this option will hide if the login attempt fails.
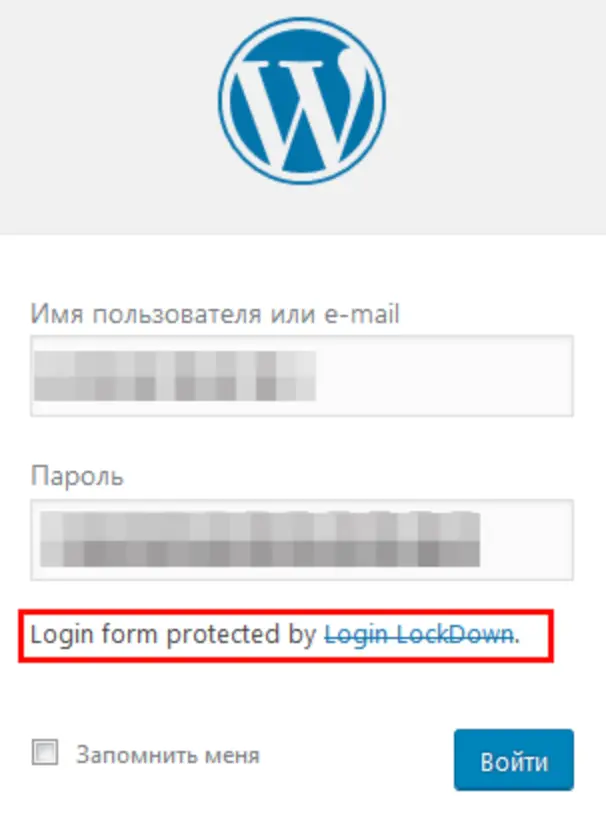
- Show Credit Link? - Whether or not to show the Login Lockdown page link on the login page. By default, it is there, but you can disable it.
When you authorize, we will see that the site is secured:
PROTECTING ADMIN PANEL WITH CAPTCHA.
The Google Captcha (reCAPTCHA) plugin is a security solution that protects your WordPress site forms from spam, allowing real people to pass captcha with ease. It can be used for login forms, registration, password recovery, comments, popular contact forms, and many other forms.
Install Google Captcha (reCAPTCHA) plugin
Go to the settings of the plugin http://example.com/wp-admin/admin.php?page=google-captcha.php
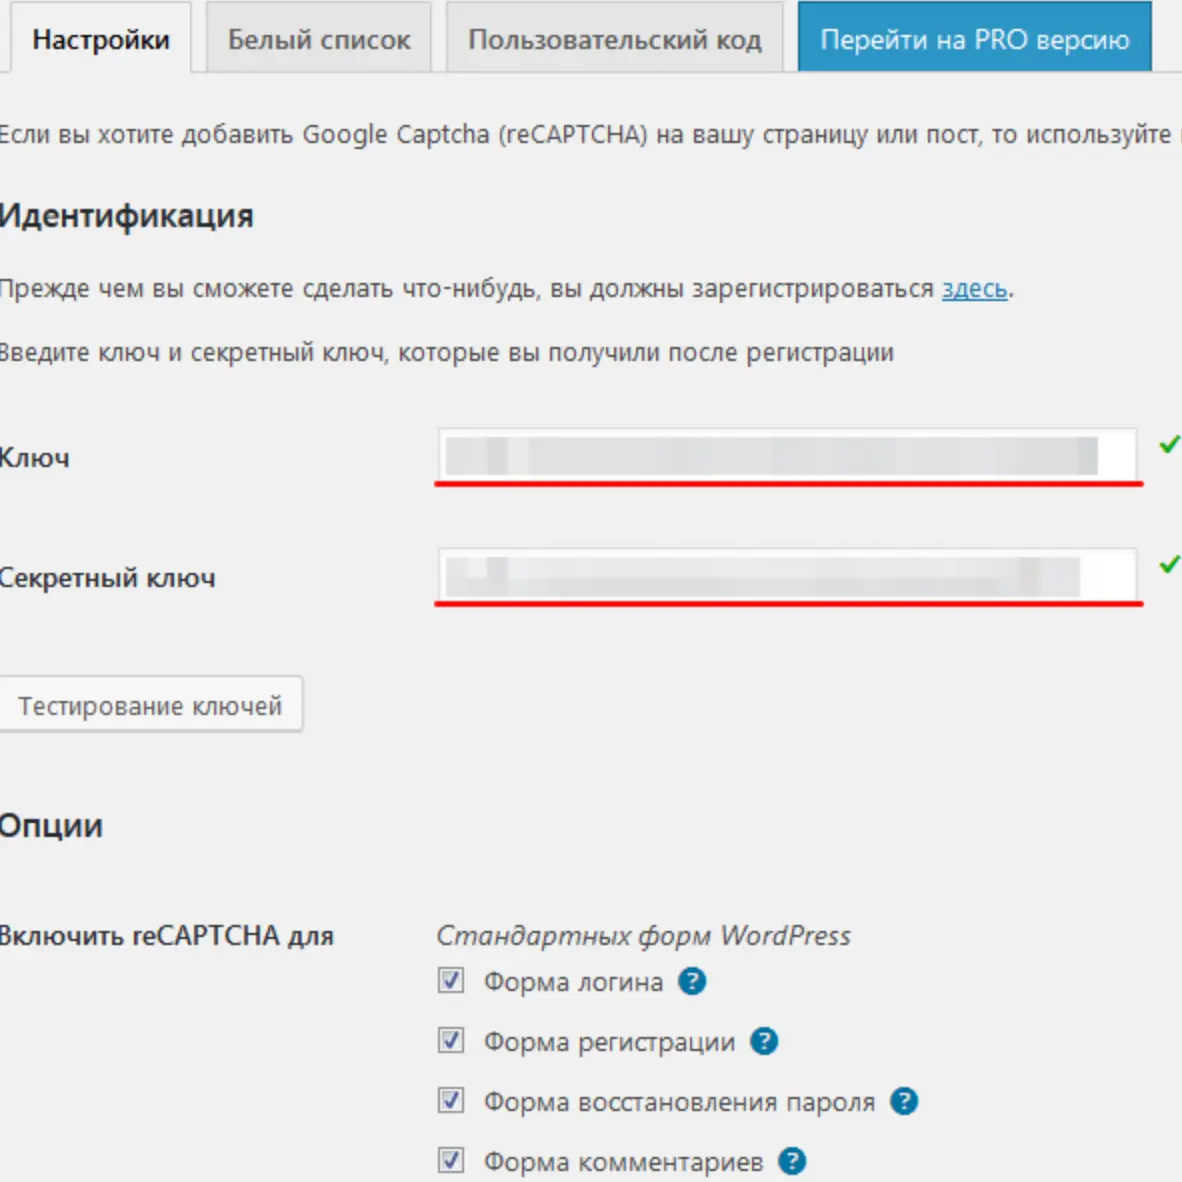
Sign up at Google Recaptcha, add your site, get the keys and enter them in the fields shown in the screenshot
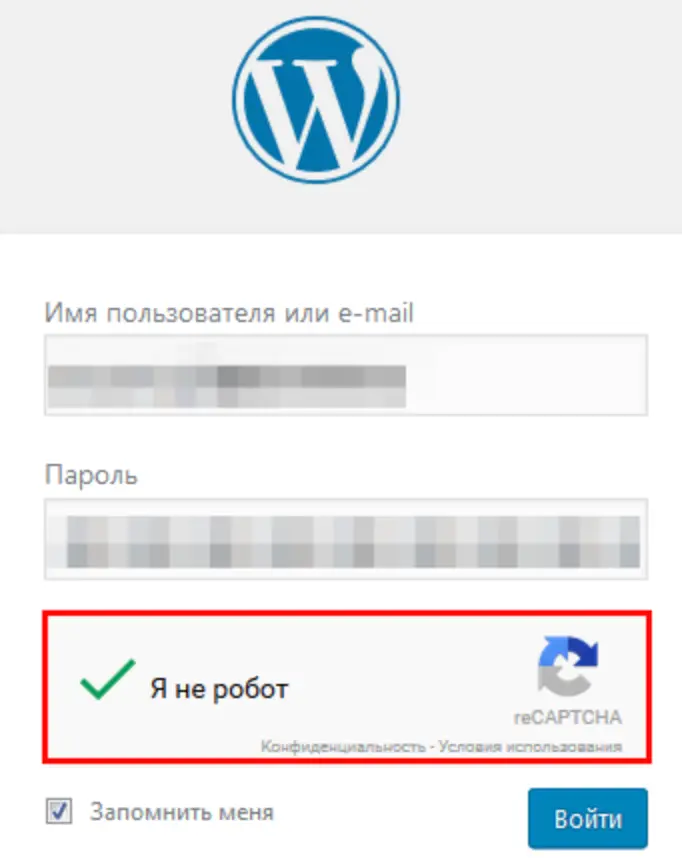
When logging in and comment form, we see that the captcha check has been added.
HOW TO HIDE THE ADDRESS OF THE ADMIN PANEL BY CHANGING IT.
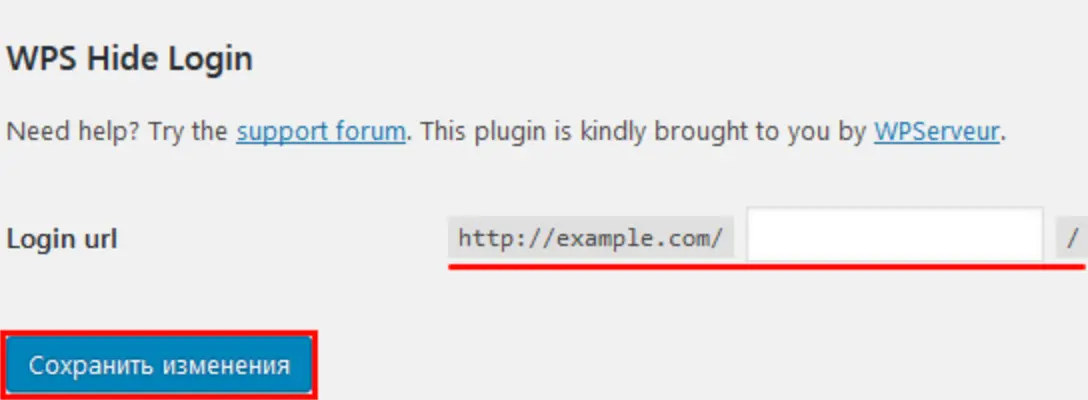
WPS Hide Login is a plugin that allows you to easily and securely change the URL of your login form page to anything you want. It does not literally rename or change files in the kernel, and it does not add overwrite rules. It simply intercepts page requests and works on any WordPress site.
Install [WPS Hide Login] plugin (https://ru.wordpress.org/plugins/wps-hide-login/)
Next, in the plugin settings http://example.com/wp-admin/options-general.php#whl-page-input specify a new authorization address in the WordPress admin panel and save the changes.
PROTECTING THE ADMIN PANEL WITH EXTRA AUTHORIZATION
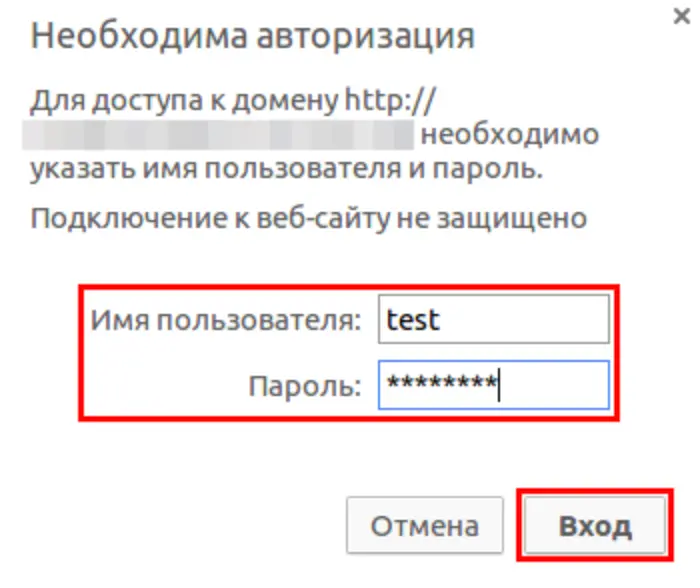
The process consists of two steps
.htaccess First, we create the file .htaccess in the directory of the site which we want to password protect. Since we were talking about the WordPress admin, we create the file in the /wp-admin folder.
AuthType Basic
AuthName
AuthName "Protected Area"
#Path to the file with users and passwords .htpasswd
AuthUserFile /home/f45454/mysite.com/public_html/wp-admin/.htpasswd
require valid-user
- AuthName
- Authorization name. The message will be displayed in the login and password box. Alternatively, you can simply change this message to reset the saved passwords in your browsers.
- AuthUserFile
- Absolute path on the server to the file with logins and passwords (just .htpasswd). To find it out, use the PHP function getcwd() (Get Current Working Directory).
.htpasswd A file with users and passwords of the form user:password. Password must be in encrypted form.
Example:
admin:$apr1$7C3cBu2Z$0ulE5W3hyDTNCCGYaJHlu.