In this section you can use various functions to manage your mailboxes.
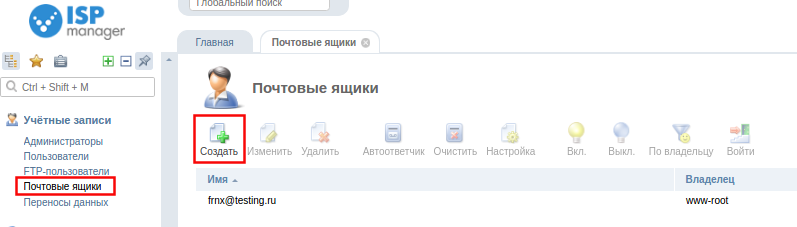
Looking at the list of mailboxes
-
Name is the name of the mailbox.
-
Properties - current status of the mailbox, displayed as icons.
-
Size - disk space usage by this mailbox (used volume/maximum size of disk space that can be occupied by the mailbox contents)
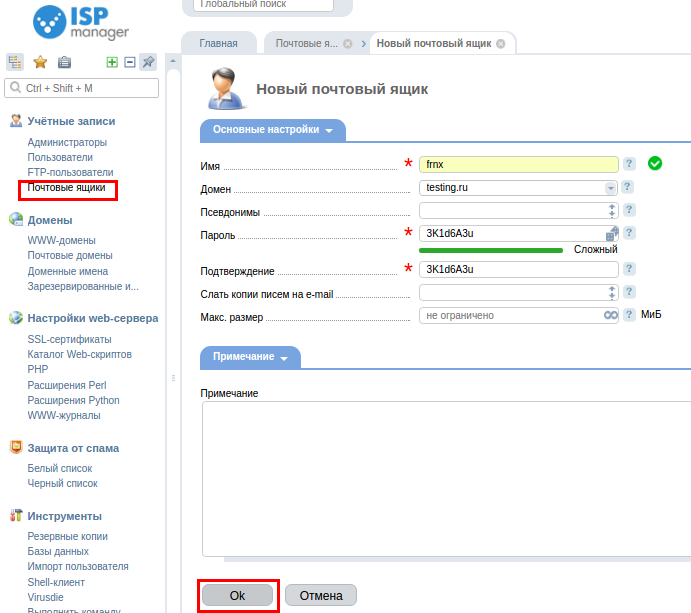
Creation of a new mailbox
To add a new mailbox, click the Create button and fill out the form consisting of several tabs:
-
Name - Specify the name of the box that will come before the @ sign in the email address. You can use lowercase Latin letters, numbers, a dash, and a period.
-
Domain - from the list, select the domain name to use after the @ sign in the email address.
-
Alternames - specify additional email addresses you can use for this mailbox. Mail sent to one of these addresses will be automatically redirected to the user's mailbox. Specify multiple addresses here, separated by a space. The main mail address (Name@Domain) does not need to be specified. All aliases work for the primary mailbox domain only, so the domain part of the mailbox does not need to be specified.
-
Password - specify the password to enter the mailbox.
-
Confirmation - repeat the password to make sure you entered it correctly.
-
Max size - specify the maximum size of the disk space that the contents of your mailbox can take up.
-
Send copies of messages to email - specify email addresses or local user names to which copies of all incoming messages for this mailbox will be automatically redirected.
-
Do not save to a mailbox - select the checkbox to prevent forwarded mail from being saved in the local mailbox. If you don't want to save mail to a mailbox, specify at least one forwarding address in the "Send mail copies to e-mail" field.
Edit Mailbox Settings
To edit the parameters of an existing mailbox, select it from the list, click the Edit button, and then edit it. The form for editing is the same as for creating a new mailbox.
You can't change the name of the existing mailbox or the domain where it's created.
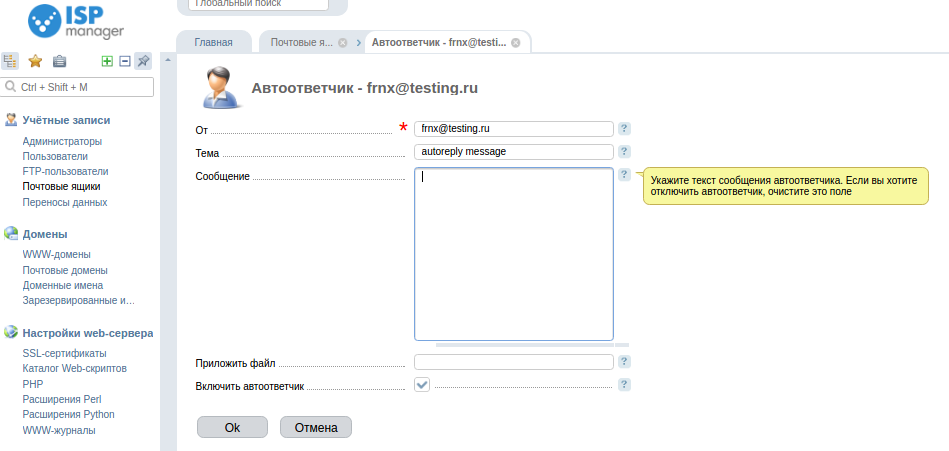
Autoresponder setup
You can set up your mail server so that it automatically sends a message in response to incoming email.
To do this, you can use the mailbox autoresponder. Highlight the desired mailbox in the list, click Autoresponder and fill out the fields in the following form:
-
From - Specify the name and email address that will appear in the sender address of the autoresponder message.
-
Topic - this line will be specified in the subject of all autoresponder messages.
-
Message - the text of the answering machine message. If you want to disable the answering machine, clear this field.
-
attach file - select the file you want to attach to the answering machine message.
-
Enable answering machine - select the check box to enable the answering machine.
After creating an email account, select it and click "Settings ", you will be given all the information you need to set up your email.


Deleting mailboxes
To delete a mailbox, select it in the list and click Delete. To prevent accidental deletions, the control panel will ask you to confirm or cancel your action. If you click Ok in the confirmation window, all selected mailboxes will be deleted.
Deleting mailbox contents
This function is used to clear the contents of the mailbox. To do this, select the desired mailbox from the list and click the Clear button. To prevent accidental deletion, the program will ask you to confirm or cancel your action. After you press the OK button, the contents of the selected mailbox will be deleted.
Go to the panel with mail user rights
If necessary, the administrator can enter the control panel with the rights of another account, for example, if he/she has any questions regarding the operation of the panel. To switch to the user level, select it in the list and click the Log in button.
Detailed information can be found at official website ISP system.
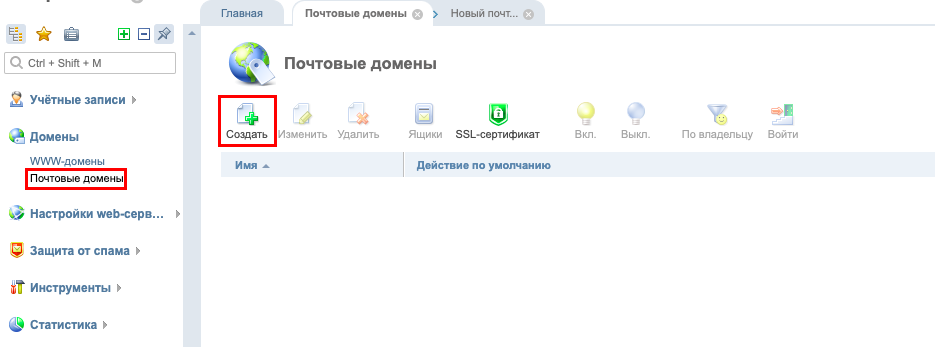
Before you can create a mailbox, you must create a Mail Domain.
A mail domain* is a collection of mailboxes linked by the same domain name. Each mailbox has an email address in the form of an "<имя ящика>@<доменное имя>"
To do this, go to the menu: Domains → Mail Domains → Create
- Specify Mail Domain Name.
- Owner - specify the user who will own the mail domain.
- IP address - specify IP address from which mails will be sent. Or select "get automatically" to create a mail domain at the freest IP address.
- Default action - this action is performed by the mail server if a message has arrived to a mailbox that doesn't exist on the mail domain:
- Error message - the sender of the message will receive an error that the mailbox does not exist;
- Ignore and delete - the sender of the message will receive an error that the mailbox doesn't exist. The message will be accepted by the mail server and deleted;
- Redirect to address - the message will be sent to the e-mail that is specified in the Redirect to field;
- Redirect to domain - the mail server will try to find the mailbox in the mail domain, which is specified in the Redirect to field.
To configure the DMARC mechanism for a mail domain, activate the Enable DMARC for domain option. This mechanism sets the policy for checking incoming mail in the domain. If you enable this option, a TXT resource record will be created for the domain name of the mail domain
To secure data transmitted through mail, enable the Secure connection (SSL) option. The SSL protocol is used for secure data transmission and encryption. It requires a certificate for the email domain
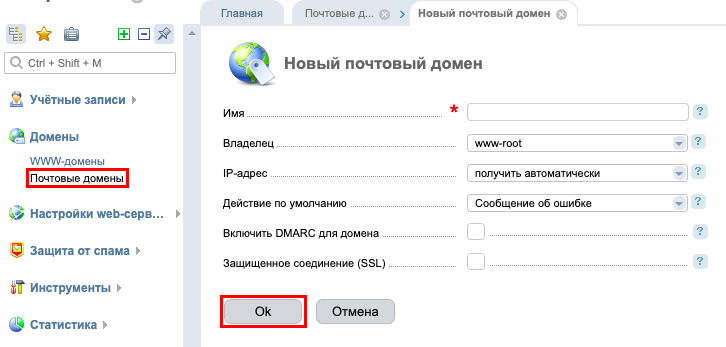
Click Ok to save.
This guide for the updated version of ISPmanager5, is available here.