Дополнительный FTP аккаунт в cPanel
Руководство по созданию и редактированию вашего FTP аккаунта в панели управления
Добавьте и настройте учетные записи FTP, чтобы быстро предоставить доступ к вашему веб-сайту другому человеку. FTP позволяют управлять файлами, связанными с вашим веб-сайтом, с помощью клиента FTP, например FileZilla.
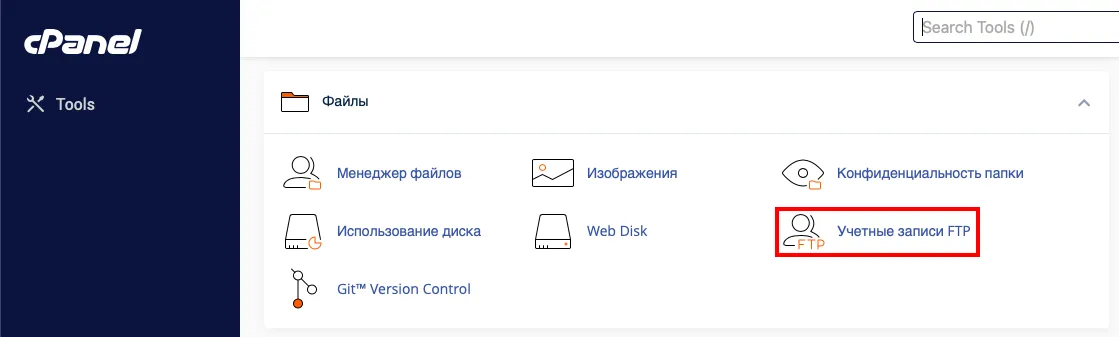
Для добавления аккаунта FTP переходим в раздел «Файлы → Учетные записи FTP».
-
В разделе «Добавить учетную запись FTP» в поле «Вход» указываем логин нового FTP пользователя.
-
В полях «Пароль» вводим пароль этого FTP аккаунта. Мы рекомендуем создавать «стойкие пароли» или воспользоваться автоматическим генератором паролей («Генератор паролей»).
-
В поле «Каталог» указываем папку, к которой будет иметь доступ пользователь FTP аккаунта или оставляем каталог по умолчанию.
-
В поле «Квота» указываем размер дискового пространства, которое будет выделено для нового FTP аккаунта или оставляем значение по умолчанию («Неограниченно»).
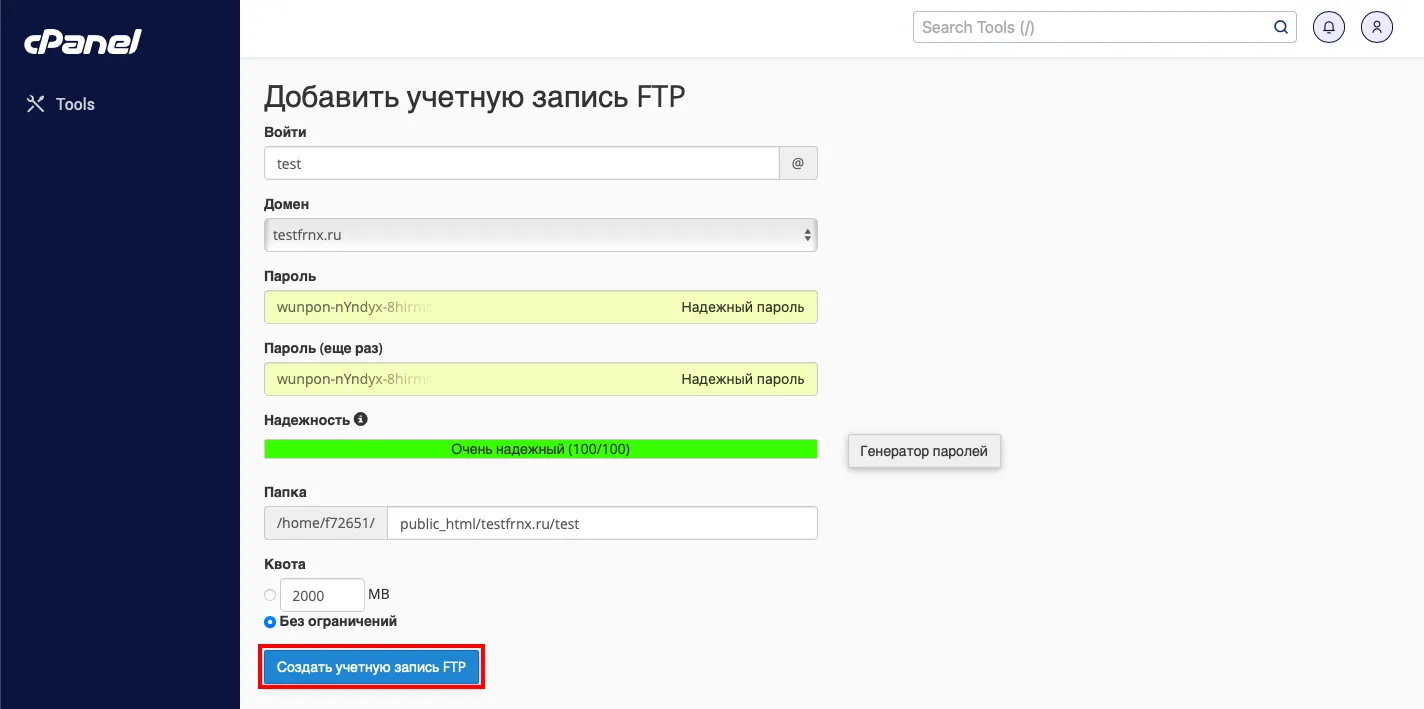
Нажимаем «Создать учетную запись FTP».
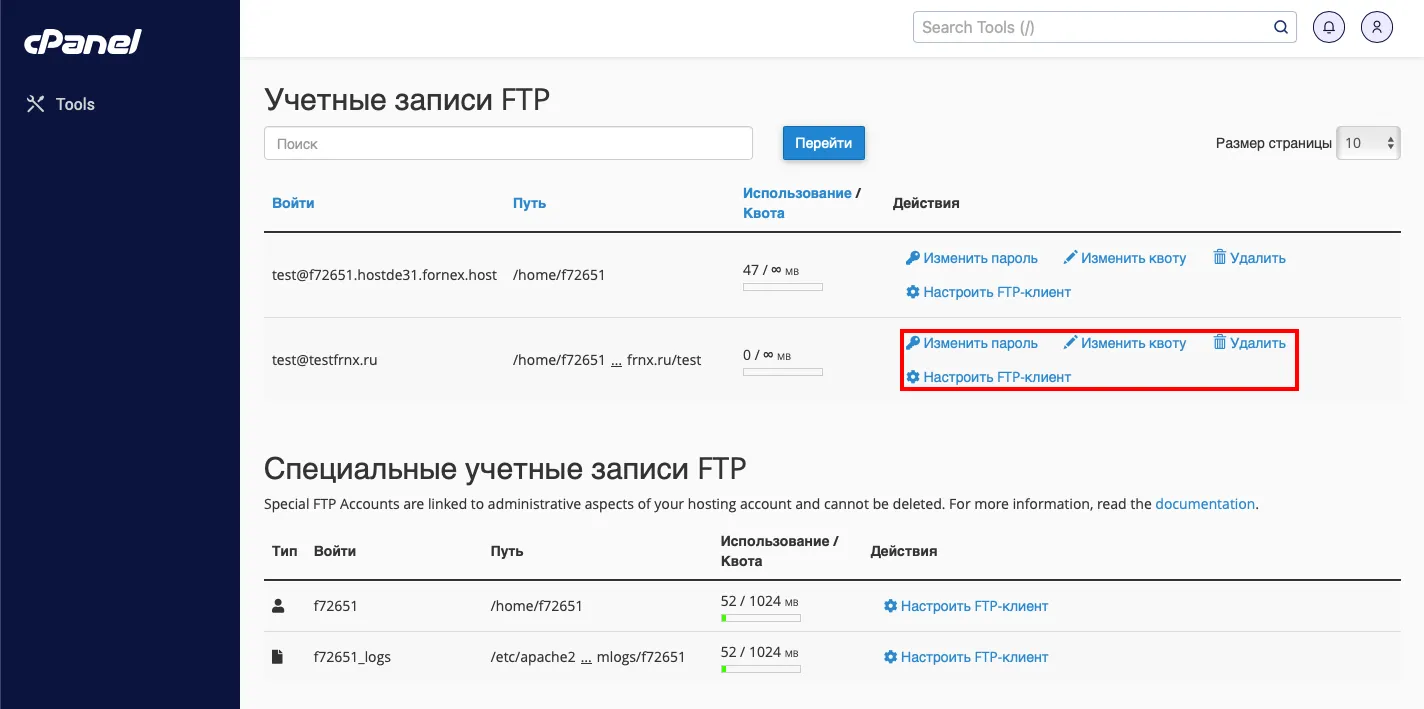
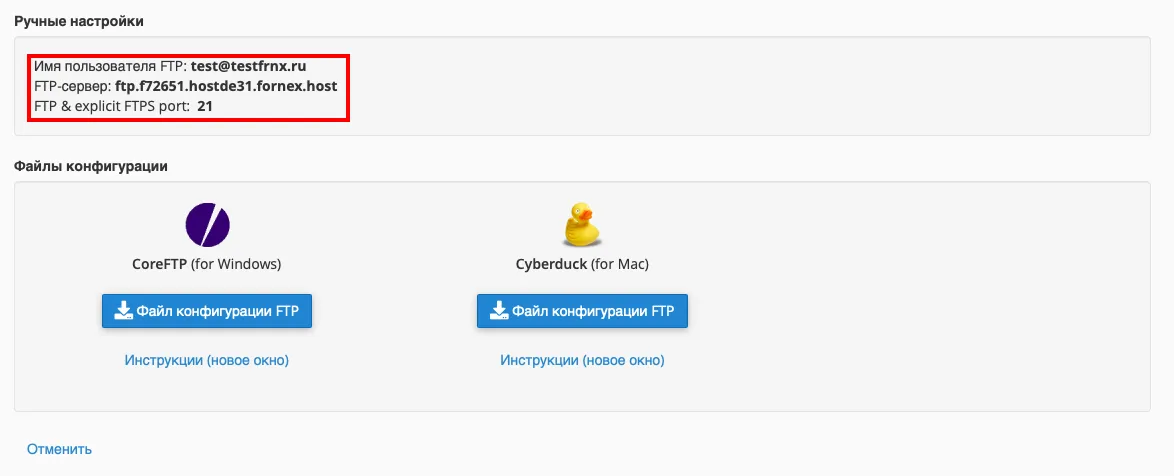
В этом же разделе мы можем управлять созданным FTP аккаунтом — менять пароль, устанавливать квоту (размер дискового пространства), удалить аккаунт или настроить клиент FTP (ввести ручные настройки или скачать файл конфигурации)
Выполним подключение к хостингу с помощью «FileZilla»
Запускаем клиент и переходим в меню «Менеджер Сайтов» с помощью сочетания клавиш «CTRL+S»:
- Нажимаем - «Новый сайт» и заполняем поля:
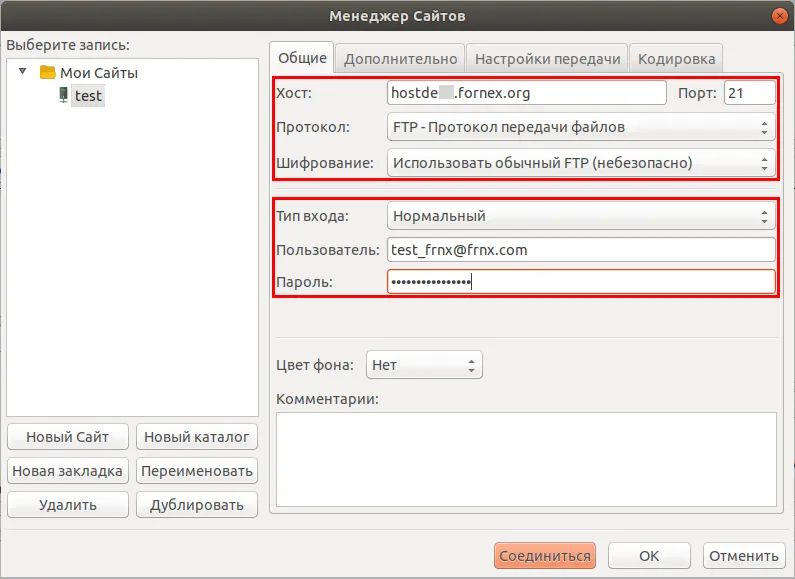
-
Хост - настоятельно рекомендуем использовать данные - имяхостинга.fornex.org, например hostde12.fornex.org или имяхостинга.fornex.host. Также, если Ваш домен направлен на IP-адрес заказа хостинга, то его тоже можно указать в качестве Хост;
-
Порт - стандартный порт протокола FTP «21»;
-
Тип входа - нормальный;
-
Пользователь - Имя созданного пользователя FTP;
-
Пароль - пароль для созданного пользователя.
Переходим в вкладку «Настройки передачи» и выбираем Режим передачи - «Пассивный»:
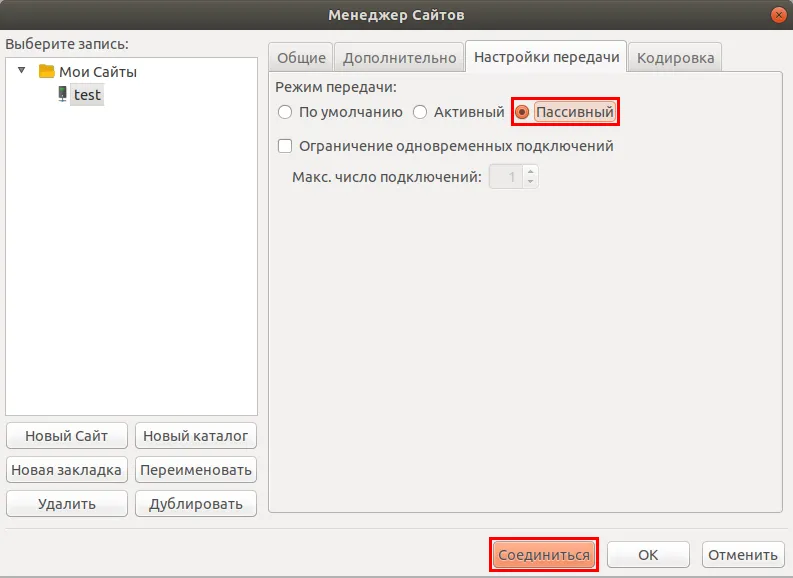
- Нажимаем «Соединиться».

Помощь
Если у Вас возникли трудности в настройке или появились дополнительные вопросы, вы всегда можете обращаться в нашу службу поддержки через систему тикетов.