Managing databases in BrainyCP
Step-by-step guide to creating and managing databases using the BrainyCP control panel.

BrainyCP control panel allows you to create and manage databases, as well as configure users with appropriate access rights.
Quick start
- To manage databases, log in to BrainyCP control panel on your VPS.
- Перейдите в раздел DB → MySQL Database.
Don't have a VPS yet?
Fornex offers VPS hosting with full root access, 24/7 support, and DDoS protection. Get a stable server with NVMe disks for fast and reliable operation. Find more details on the Fornex VPS page.
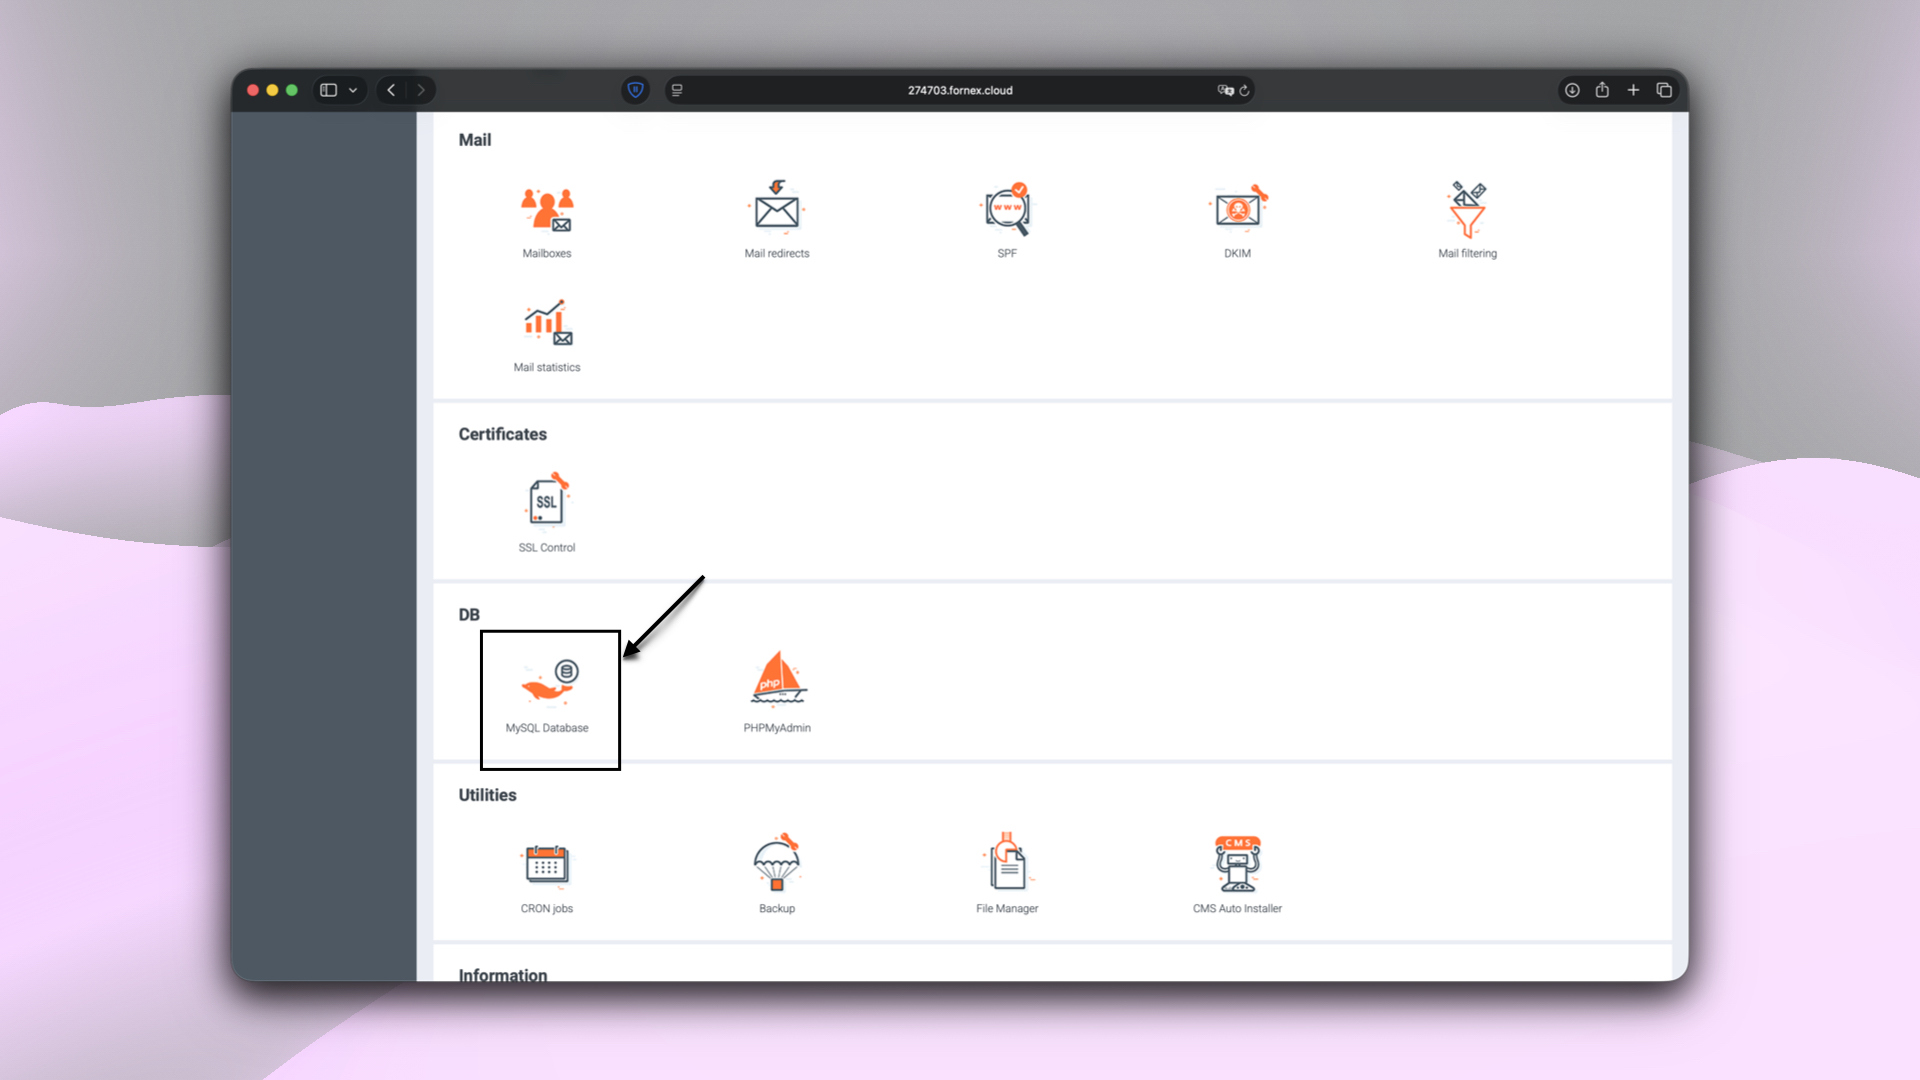 BrainyCP control panel sections
Create a database
- Create a new database user by specifying the required parameters:
- Login.
- Password.
- Create a new database by specifying its name.
- Click on Add User and Add Database respectively.
Note
When creating a user and a database, the admin prefix will be automatically added.
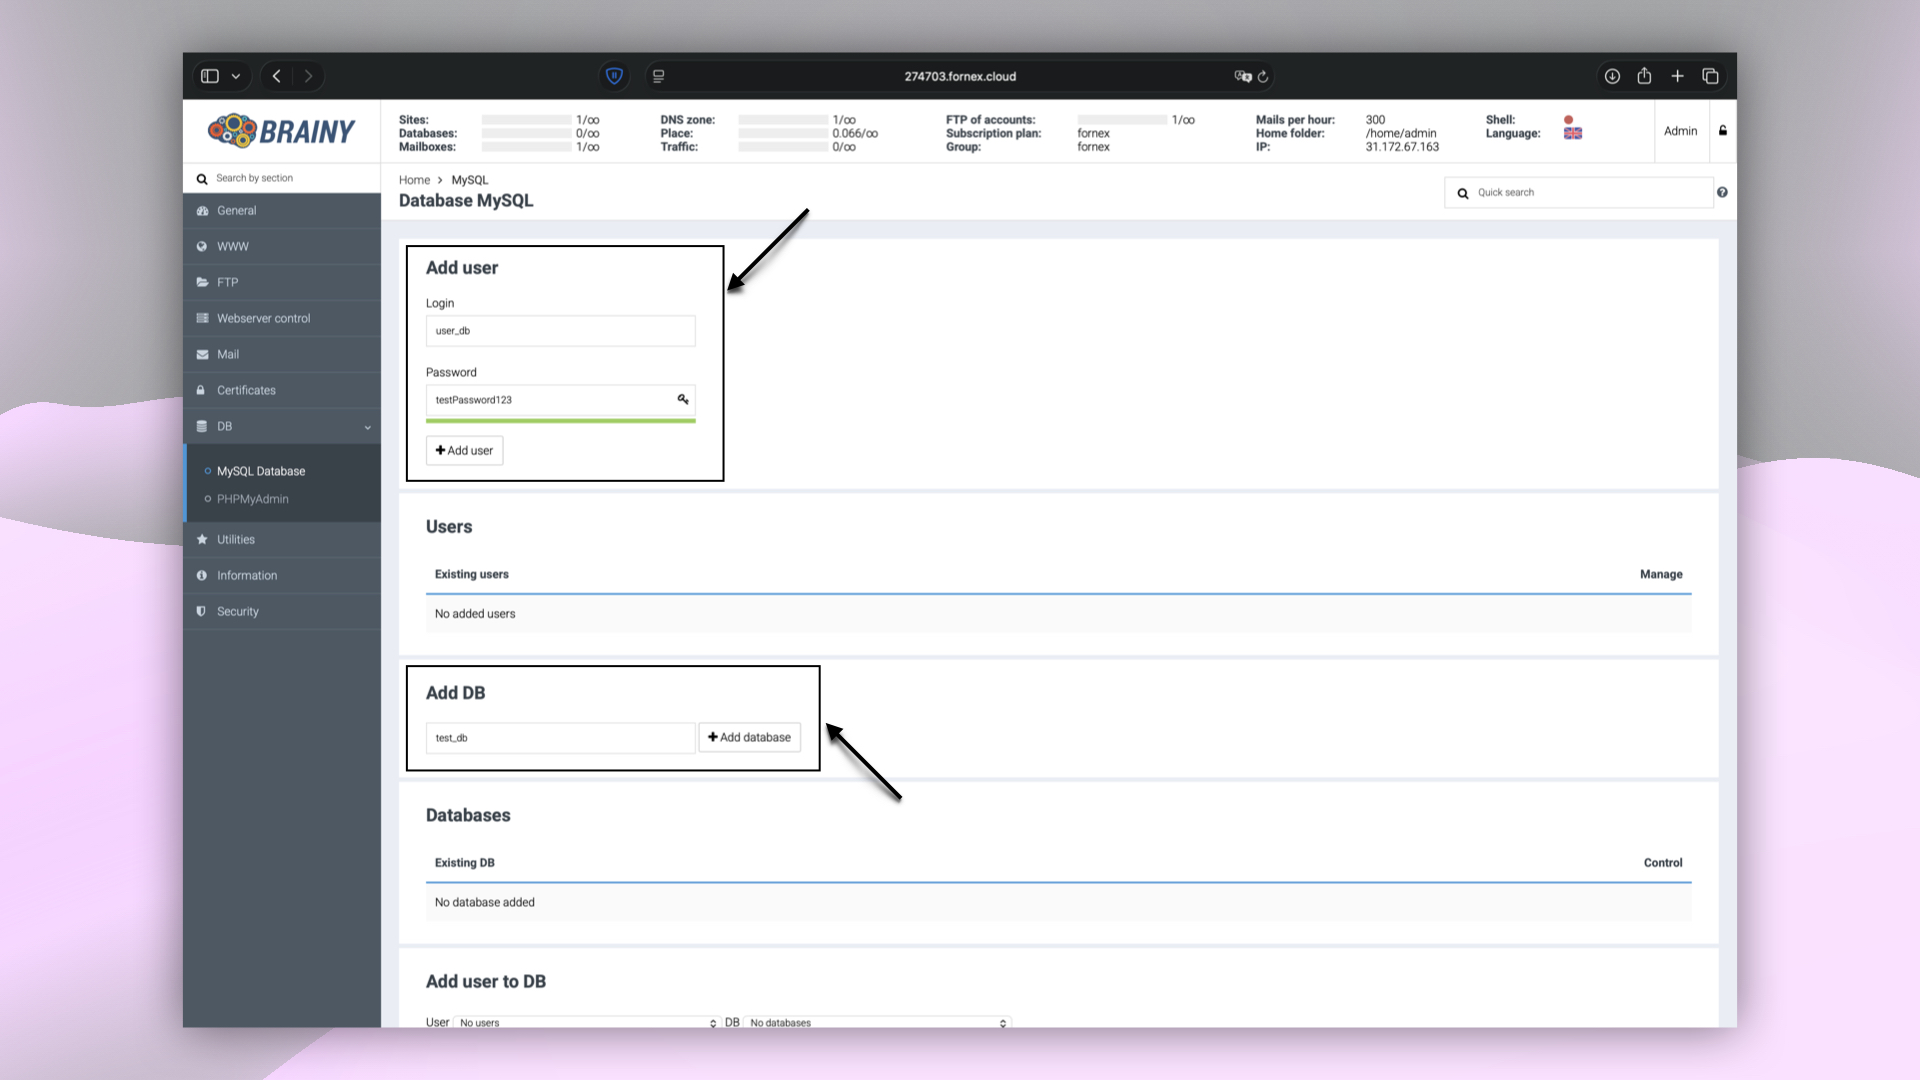 Creating a database and user in BrainyCP
After successfully creating the database and user, assign the necessary rights:
- Select the user.
- Select the database.
- Set all permissions.
- Save the selected parameters.
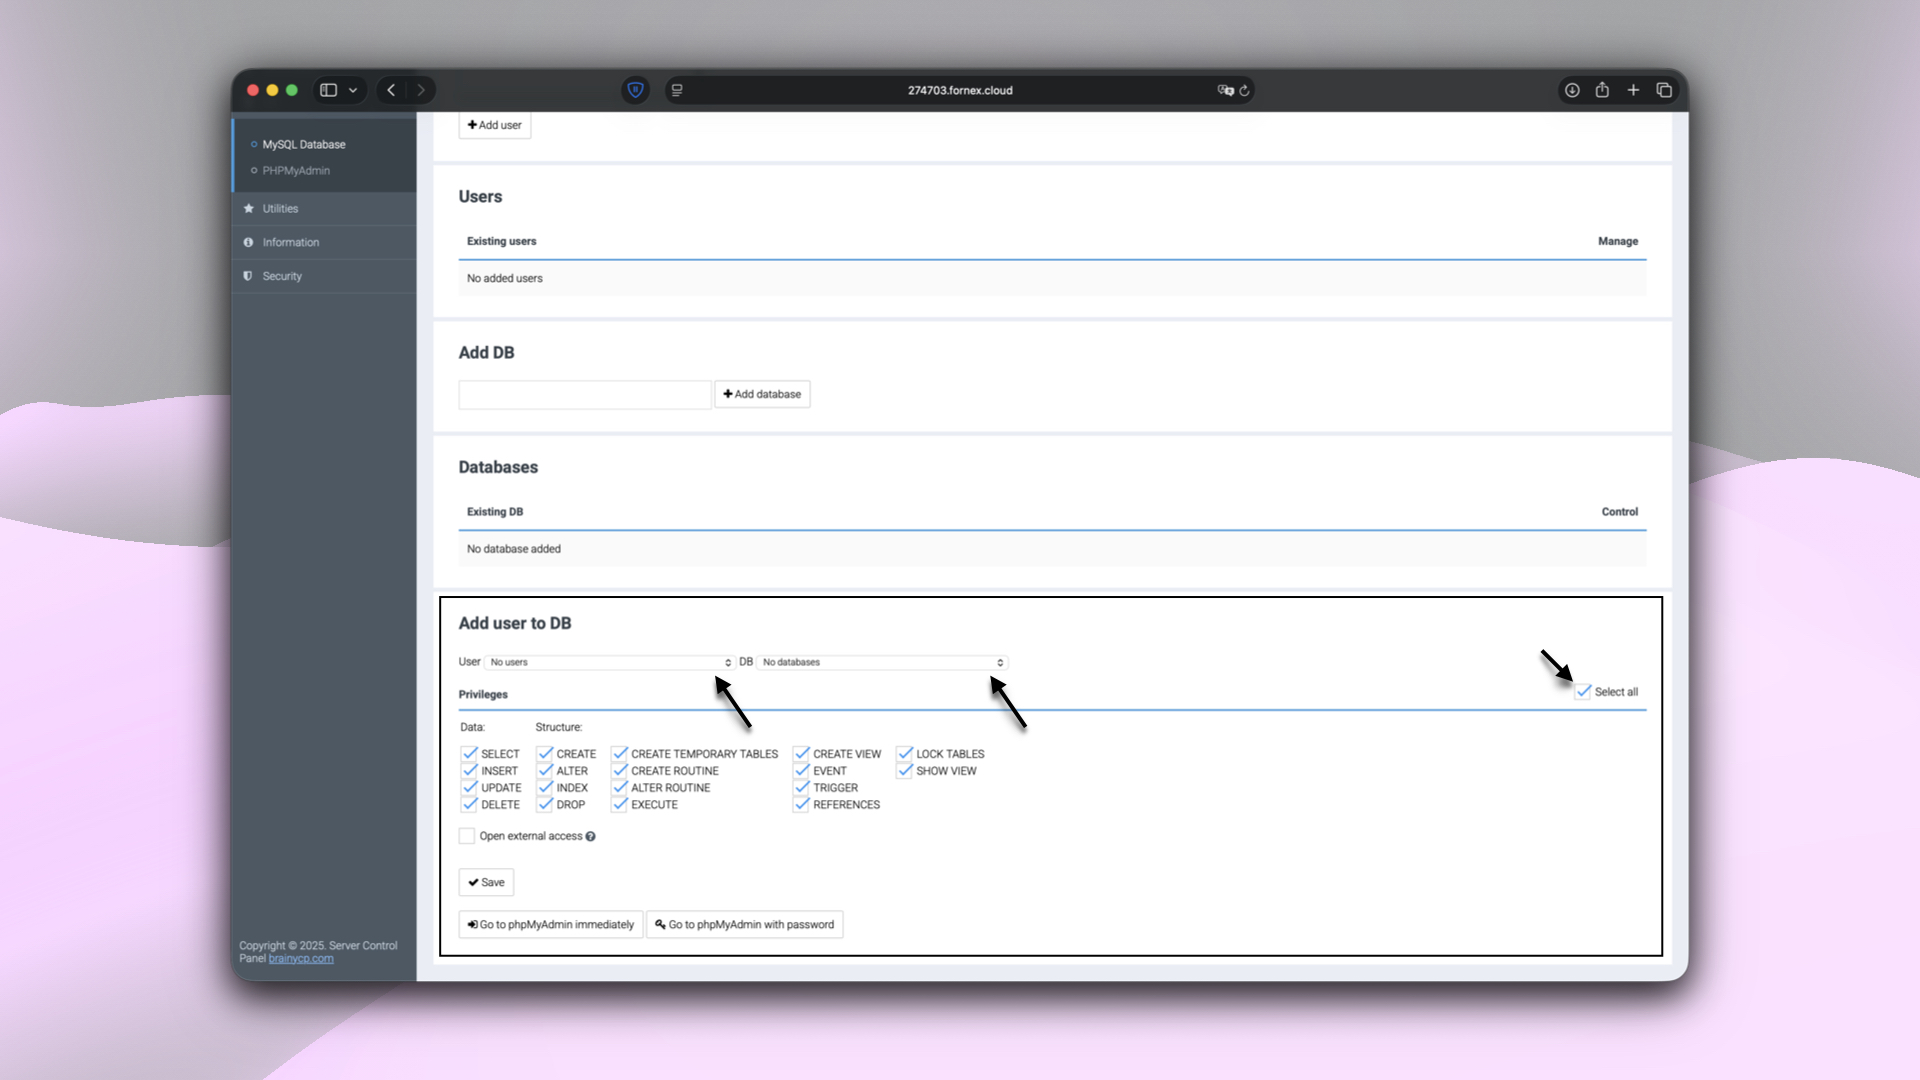 Configuring database user rights in BrainyCP
Manage a database
- To manage the database, go to the PHPMyAdmin panel (DB → PHPMyAdmin).
- Log in using the user data specified during the creation.
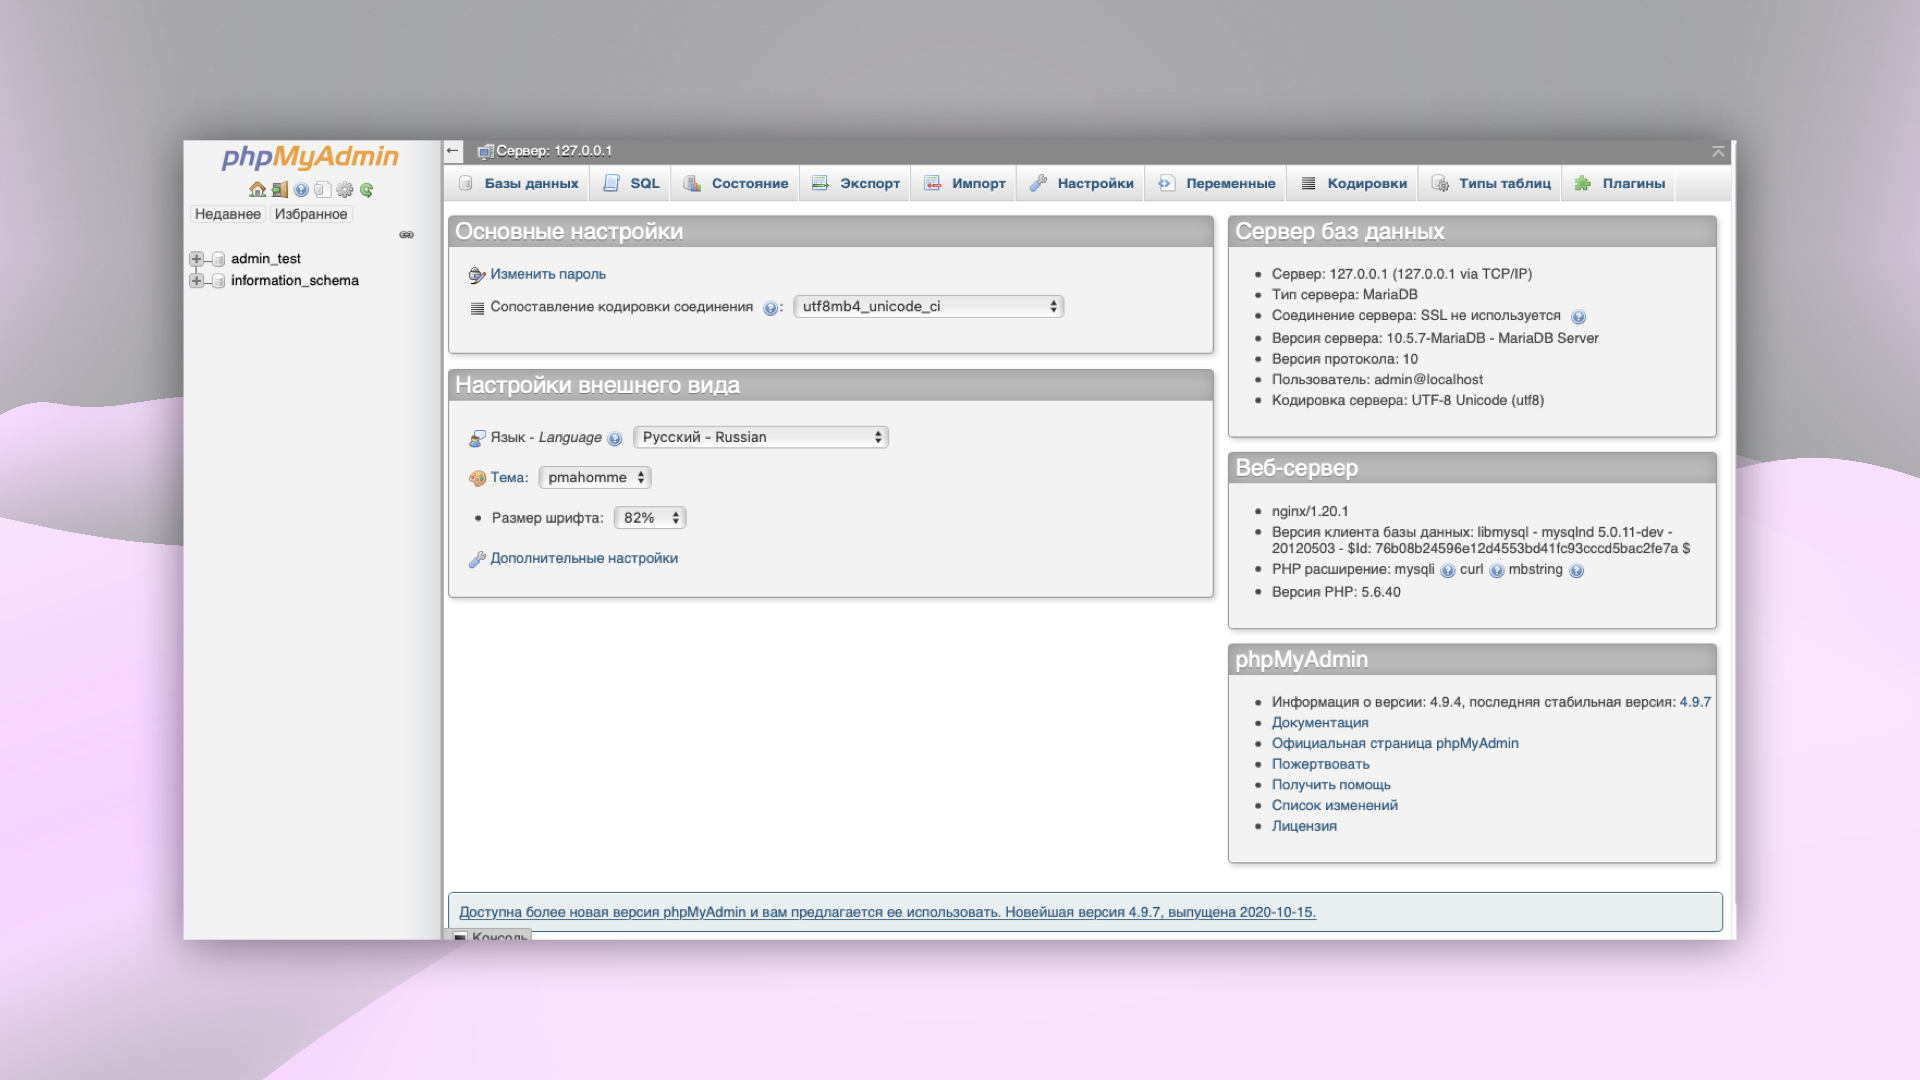 Logging into PHPMyAdmin from BrainyCP
Import a database
- In PHPMyAdmin, select the database to import and go to the Import tab.
- Choose the database file (e.g.,
bd.sql) or an archived file with the extensions:bd.sql.gzip,bd.sql.bzip2илиbd.sql.zip. - Specify the parameters:
- Partial import.
- File encoding.
- Format.
- Check foreign keys.
- Start the import process.
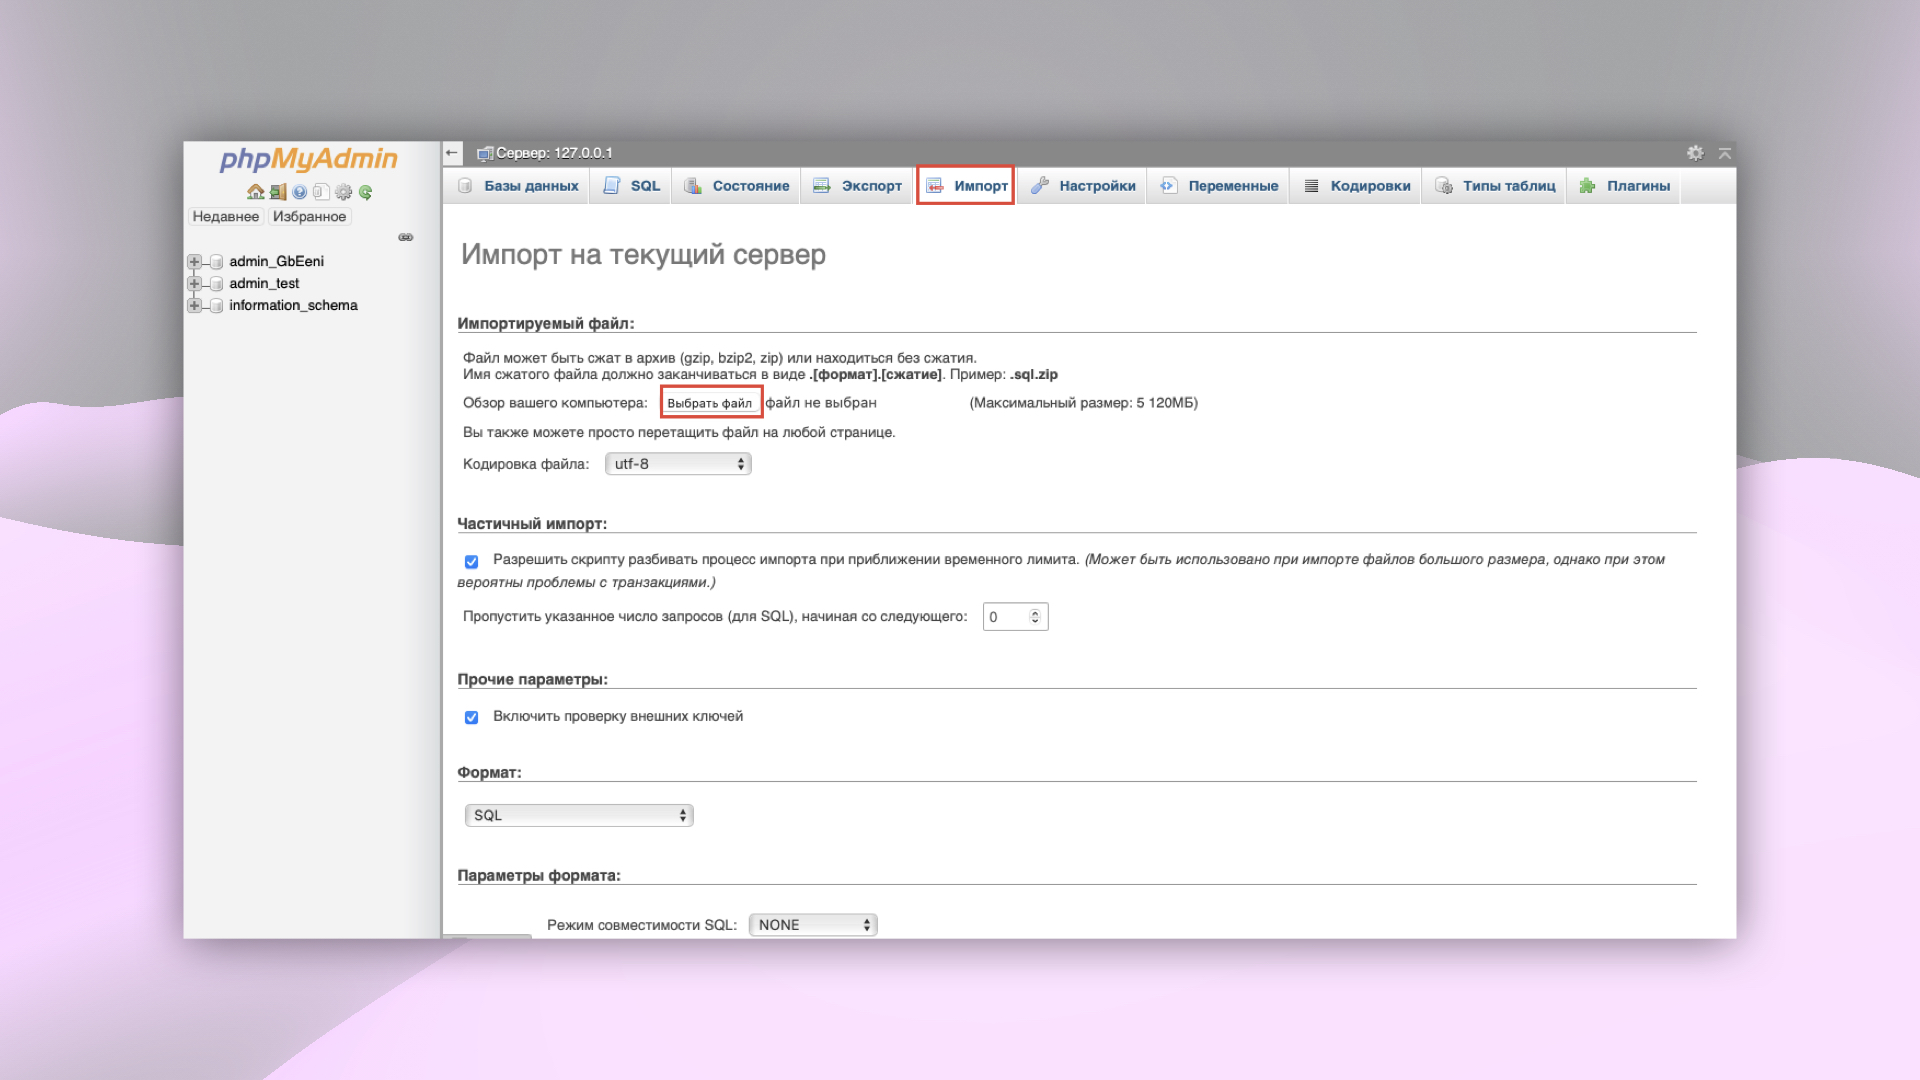 Importing a Database in PHPMyAdmin
Help
If you have any questions or need assistance, please contact us through the ticket system — we're always here to help!