Configuring backups in ISPmanager 5.
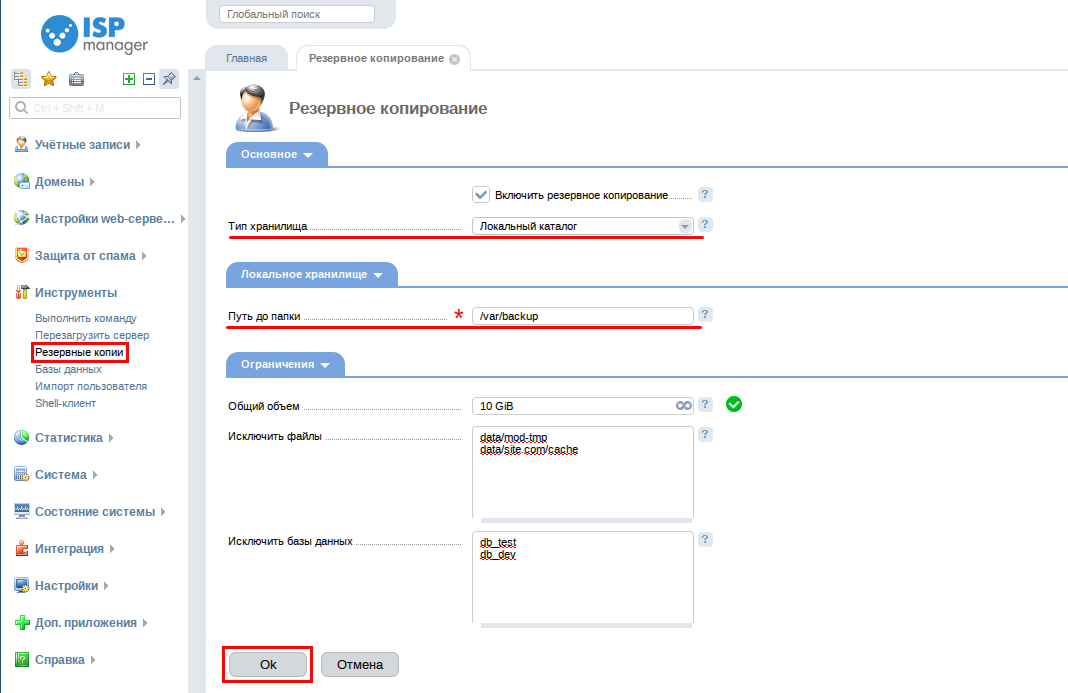
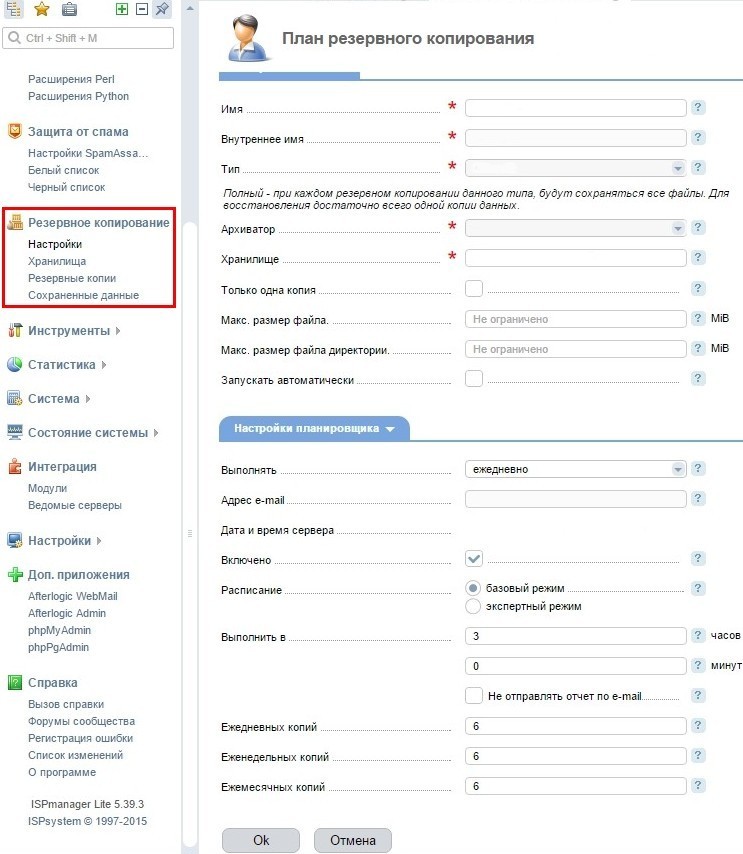
Backup configuration is done from the root user in menu "Tools → Backups". The general backup settings should look something like shown in the screenshot:
Description of the settings:
Storage type - choose local if you have no other sources to store your backups. This option is suitable for most users, but is insecure as it is not desirable to store backups on the same drive where your data resides.
Folder Path - the path in the directory where your backups will be stored. You can leave it unchanged - /var/backup
Total size - total size of your backups. This parameter determines the number of backups to be saved and the disk space taken up by the server. This is a very important parameter, we recommend that you always set it to less than the current amount of free disk space. For example, if you have a subscription plan with 10GB of disk space, of which 2.5GB are used by your data, then the total backup space should be set to no more than 7.5GB (GiB).
Exclude files - the list of files and directories you want to exclude from the backup. The path is specified relative to the user's home directory, usually it is /var/www/username. That is, if you plan to exclude a temporary directory at the path /var/www/username/data/temp/, then you should specify the following entry in this field relative to the user's directory - data/temp. We recommend that you always exclude temporary directories, site caches and other data that are not important for the backup. This will speed up backup creation and reduce the load on the server.
Exclude databases - a list of databases that should not be included in the backup. If you have test or temporary databases, we recommend excluding them, it will speed up the backup process.
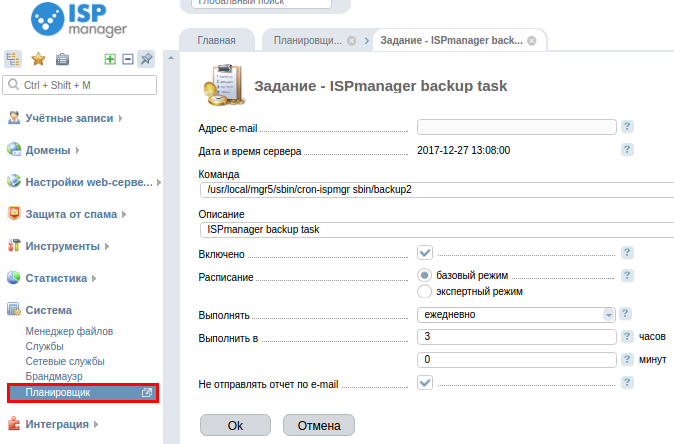
By default, a backup is created every day at 3 a.m. server time
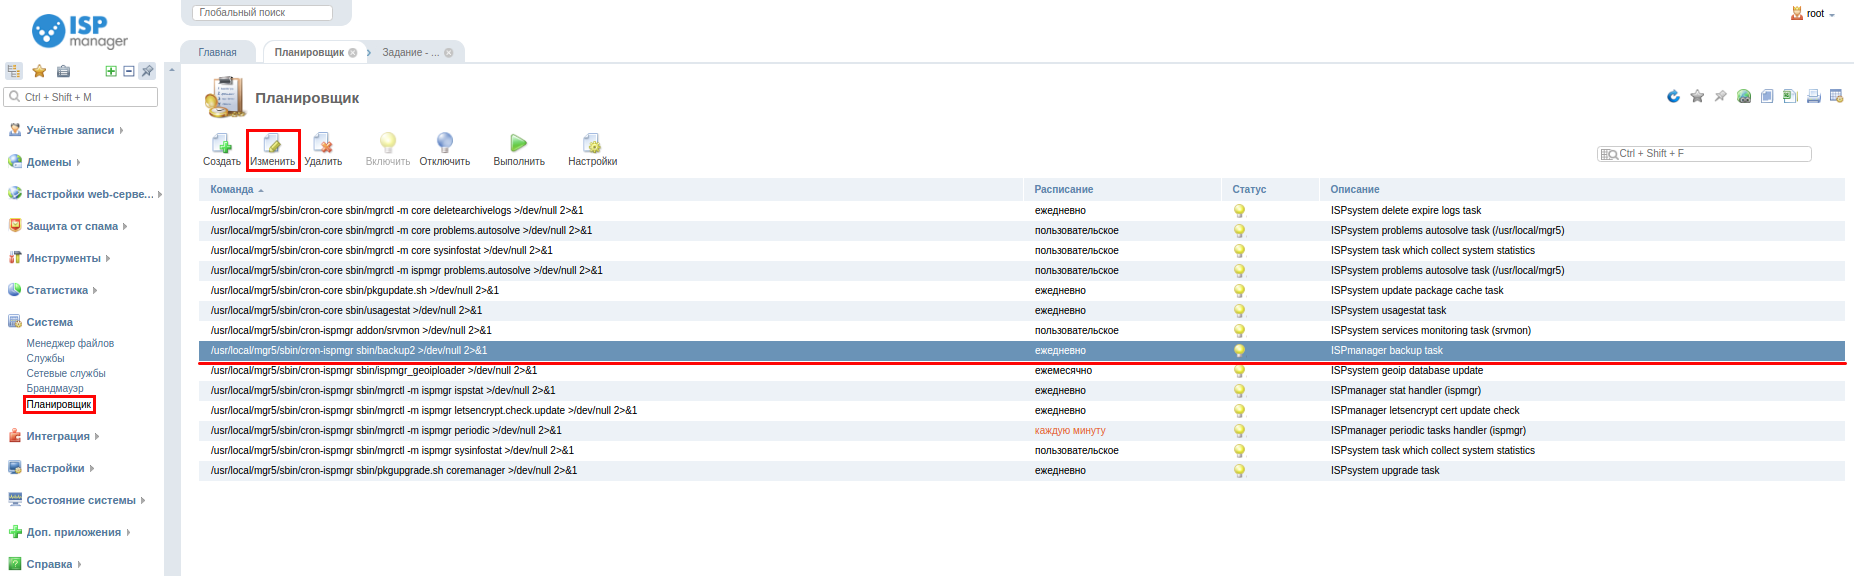
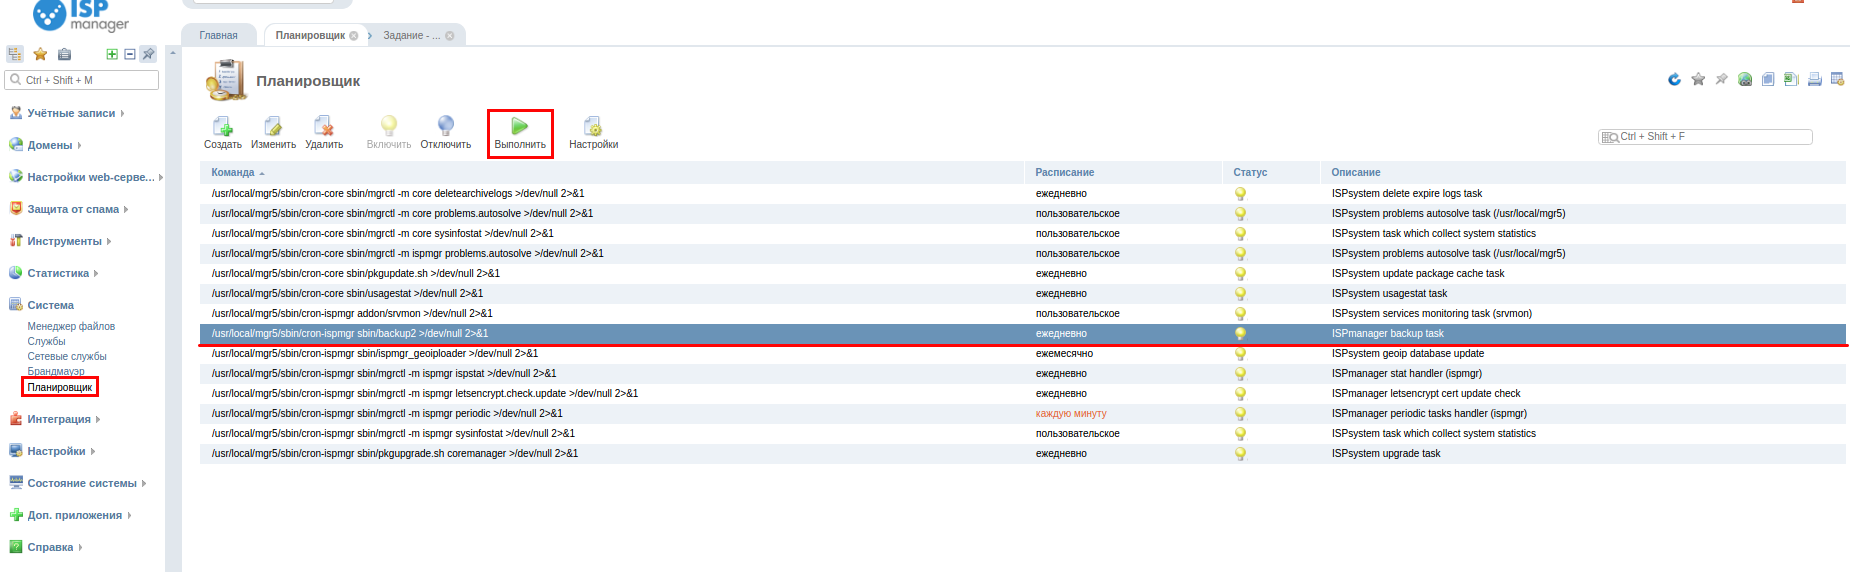
You can change the time and frequency of the schedule in "System -> Scheduler", select the task and press "Change" button
The name of the task is as follows:
/usr/local/mgr5/sbin/cron-ispmgr sbin/backup2 >/dev/null 2>&1 - ISPmanager backup task
Checking the backup work.
After setup, it is recommended to run the backup immediately and check if the backup was created correctly.
Run the task manually in the Task Scheduler, menu "System → Scheduler", select the task and click "Run"
/usr/local/mgr5/sbin/cron-ispmgr sbin/backup2 >/dev/null 2>&1 - ISPmanager backup task
Recovering data from a backup
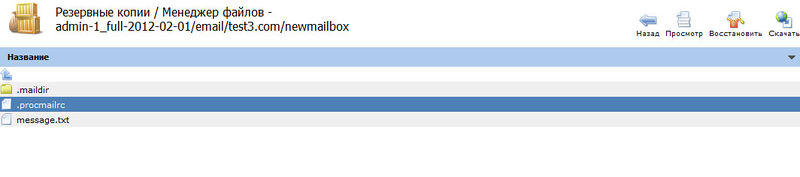
To restore a backup, highlight the backup for the desired date and click "Details":
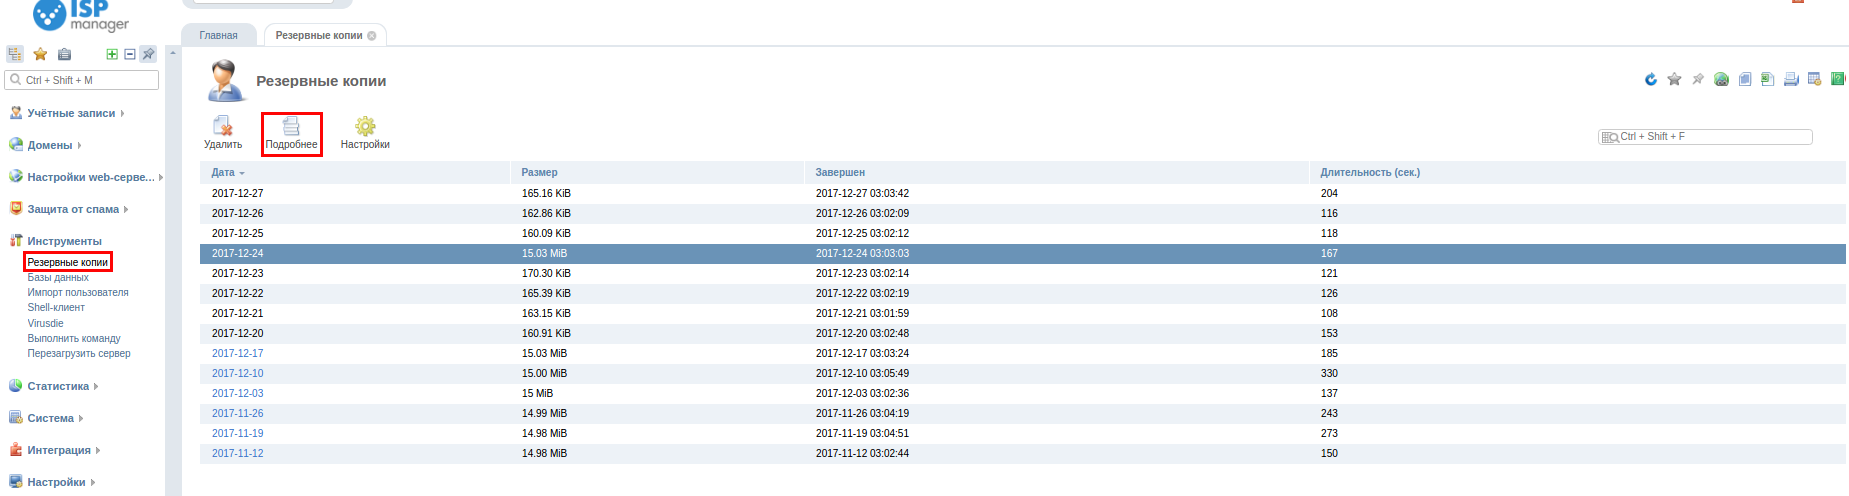
A list of users whose data has been saved will appear.
If you need to restore individual files or databases, go under the user - the "Login" button:
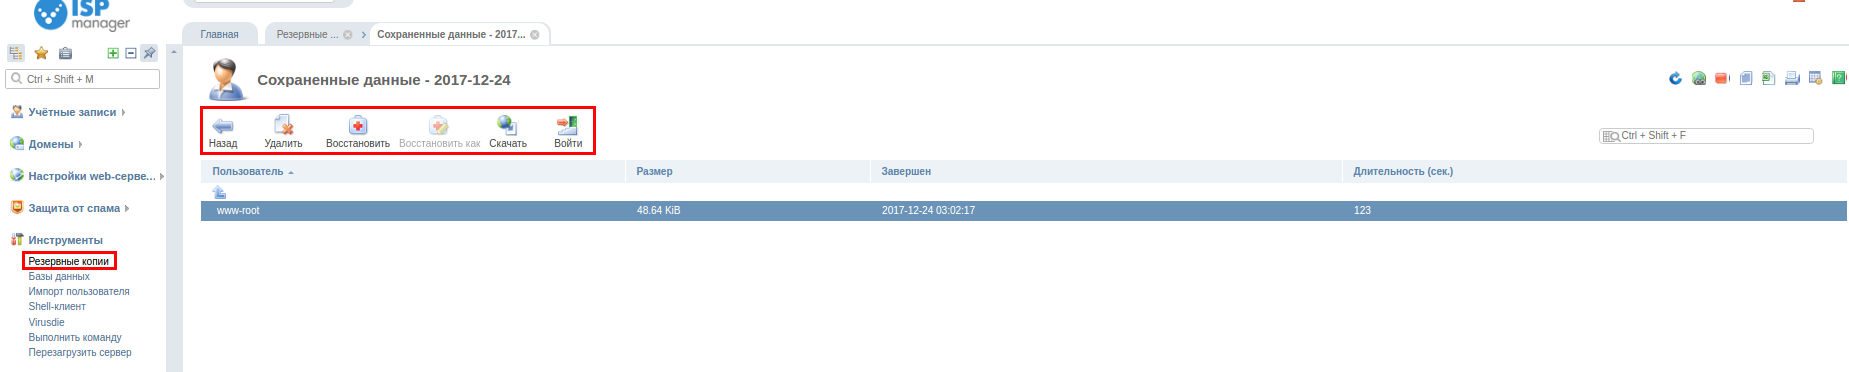
Select the desired file and click "Restore".
**Displays the old "Backup" section **
To enable the old view of the settings you need to add to the ISPmanager configuration file /usr/local/mgr5/etc/ispmgr.conf
Option EnableOldBackup
and restart ISPmanager
This guide for the updated ISPmanager5 design is available, here.
Configuring backups in ISPmanager 4.
The "Backup Settings" module allows you to manage backup jobs.
Here you can add a new task, change settings of an existing one, delete, start, temporarily enable or disable the necessary task, as well as view and configure backup data.
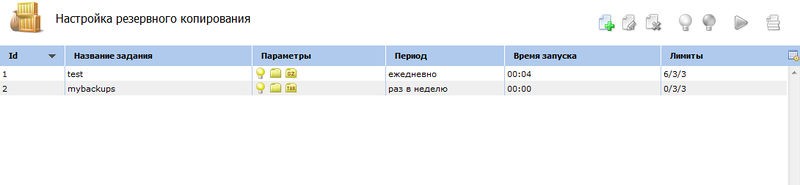
To create a new backup task, click "Create" and fill out the form fields:
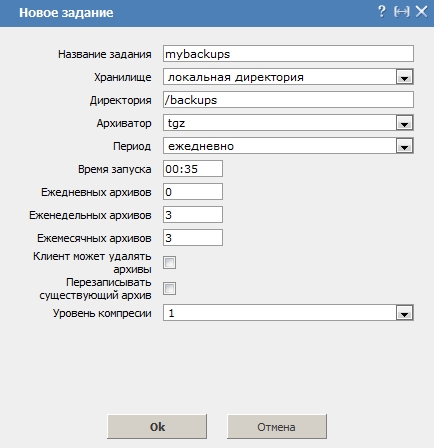
- Task name - specify a name that allows you to identify the backup task in the list.
- Storage - select a location for storing backup archives (local directory, FTP server, remote sFTP server by key, remote sFTP server by password). Depending on the selected storage location, the form fields may be different.
- Directory - specify the path to a local directory or a directory on a remote FTP server. If you specify any remote server, the following fields will be displayed:
- Server - domain name or IP-address of the remote FTP or SFTP server you want to store your backups on.
- Login - user name to access the remote server.
- Password - password to access the remote server.
- Directory - specify the directory on the FTP server to store your backups.
- Archivator - specify the format for storing backup archives. Currently the zip, rar, tar.gz and tar.bz2 formats are supported. Please note that zip does not support archives of over 2GB in size, so use a different format for storing larger archives.
- Period - choose from the list the periodicity of starting the task.
- Start time - specify the start time of the task.
- Daily archives - limit the number of daily archives created by this task.
- Weekly archives - limit the number of weekly backup archives.
- Monthly archives - restriction on the number of monthly archive files.
- Customer can delete archives - select the checkbox to allow the user to delete the archives himself/herself.
- Rewrite existing archive - check the box to allow pbackup to automatically overwrite an existing archive from the current date, if one exists.
- Compression level - specify the compression level of the archive, where 1 is the lowest level, 9 is the highest.
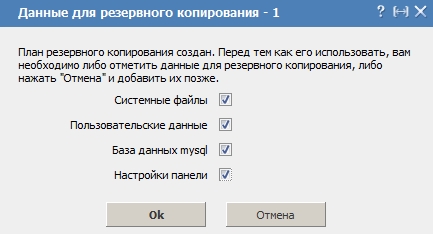
After creating a new backup plan, you will see the following form:
-
System files - set a flag to include system files in the backup plan.
-
User data - set the flag to include user data in the backup plan.
-
Mysql database - check the box to include the MySQL database in the backup plan.
-
Panel settings - check the box to include ISPmanager control panel settings into the backup plan.
To change the parameters of an existing backup task, select it from the list, click "Edit" and edit it. The form for editing is the same as for creating a new task.
Warning! You can edit a backup task, but after you change the name, archiver or storage plan, the old backups will not be available from ISPmanager
You can find more detailed information on the official website of the ISP.
Restoring data from a backup
All other operations with backups - view, restore and delete - are performed in Backup module. On the administrator level, this module contains all backups created in the panel, and on the user level - archives belonging only to this user.
In the "Backups" module select the backup you want to restore: it can be an entire archive or an individual folder or file.
To restore the entire account, select the necessary copy in the list and click the *Restore button
To restore a folder, select an archive in the list, press the "Data" button, then select the necessary folder in the archive and press the "Restore" button
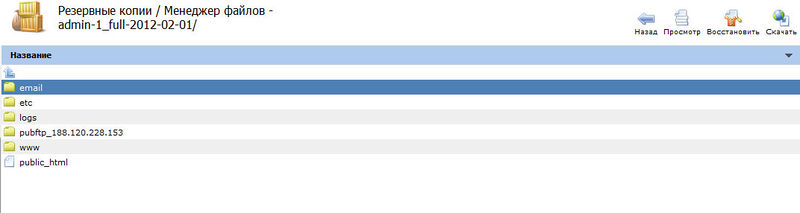
In the same way you can restore an individual file, but to do it you need to select the desired file in the folder.