Connecting to VPS or dedicated server via SSH on Windows
Guide to using PuTTY app for SSH connection on Windows.
PuTTY is a popular free SSH client for Windows. It allows you to connect to your VPS or dedicated server and manage it from the command line.
Connecting with Username and Password
- Launch PuTTY.
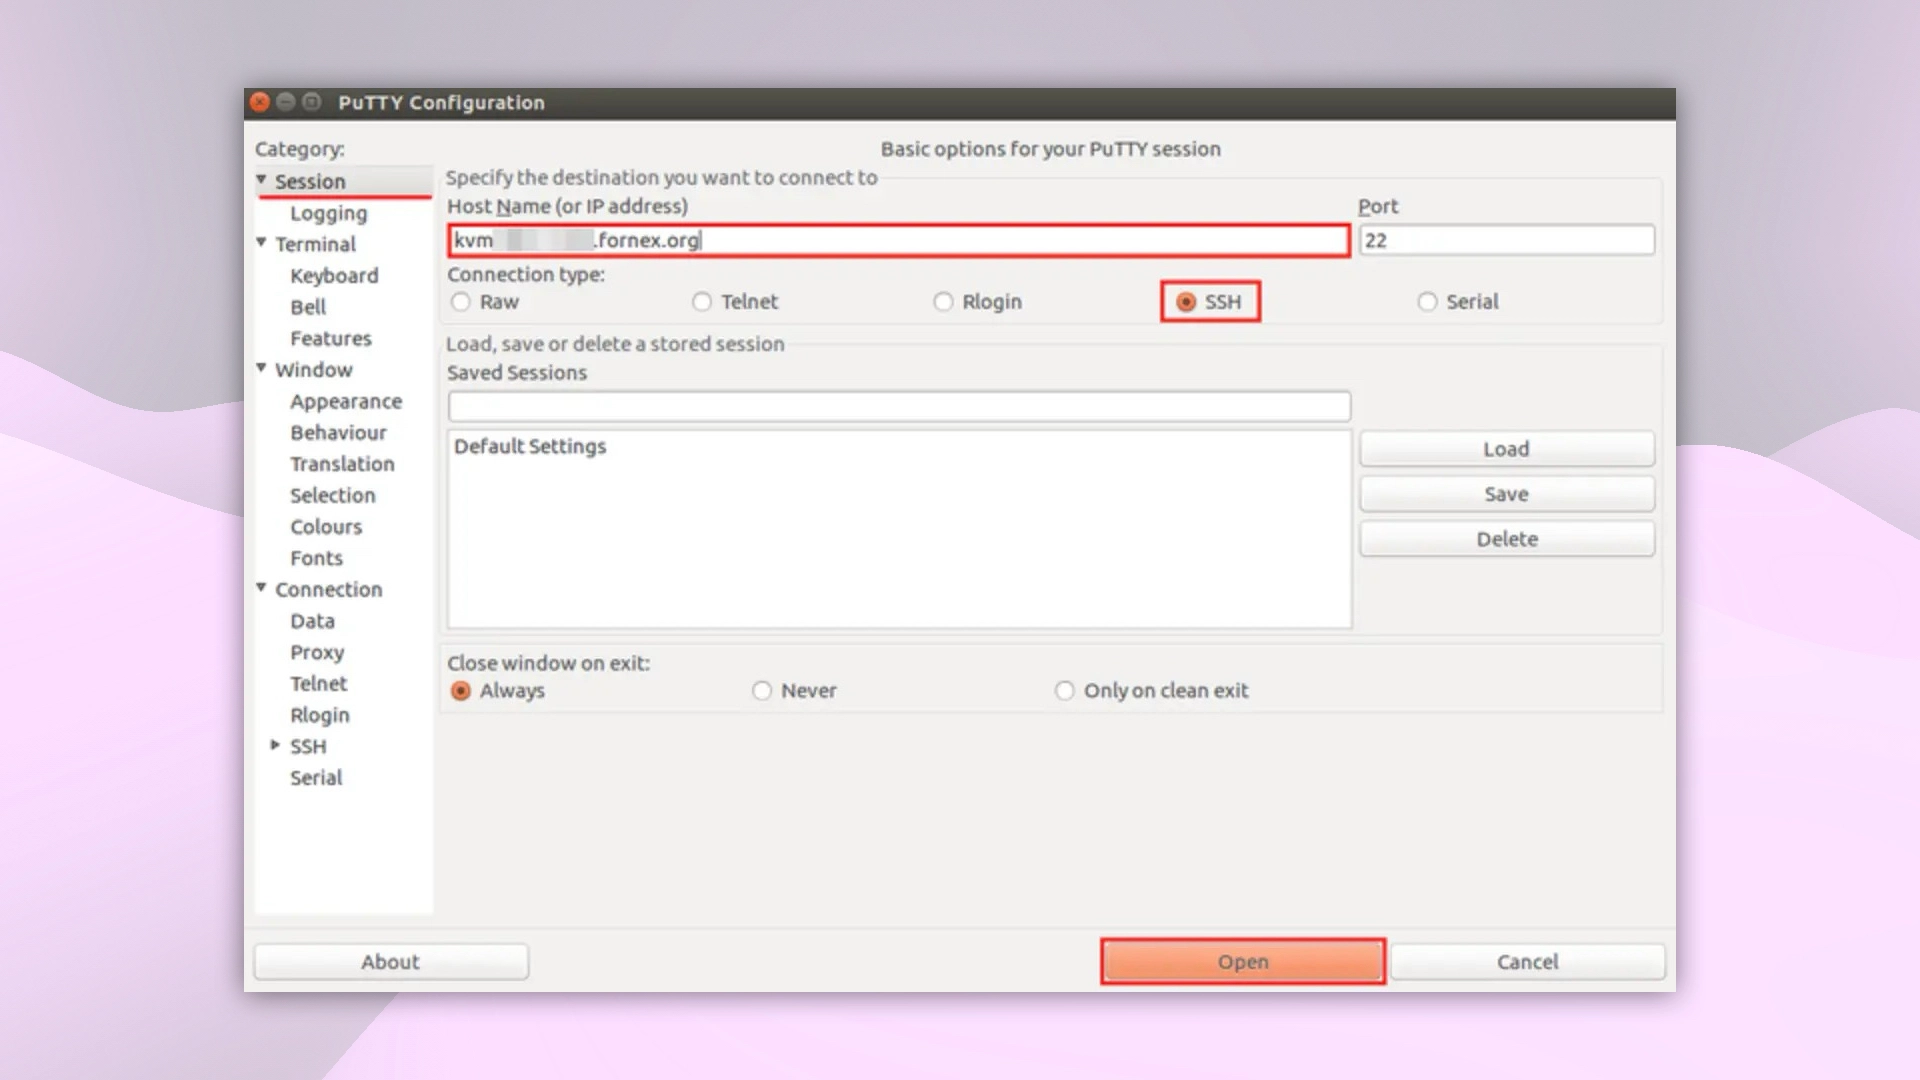
- On the main “Session” tab, fill in the fields:
- Host Name (or IP address) — IP address or hostname of your server (found in your Fornex dashboard under order details).
- Port — 22 (default SSH port).
- Connection type — SSH.
 Main PuTTY session configuration
- (Optional) In Saved Sessions, enter a name for this connection (e.g., “My VPS”) and click Save — this saves the settings for future use.
- Click Open.
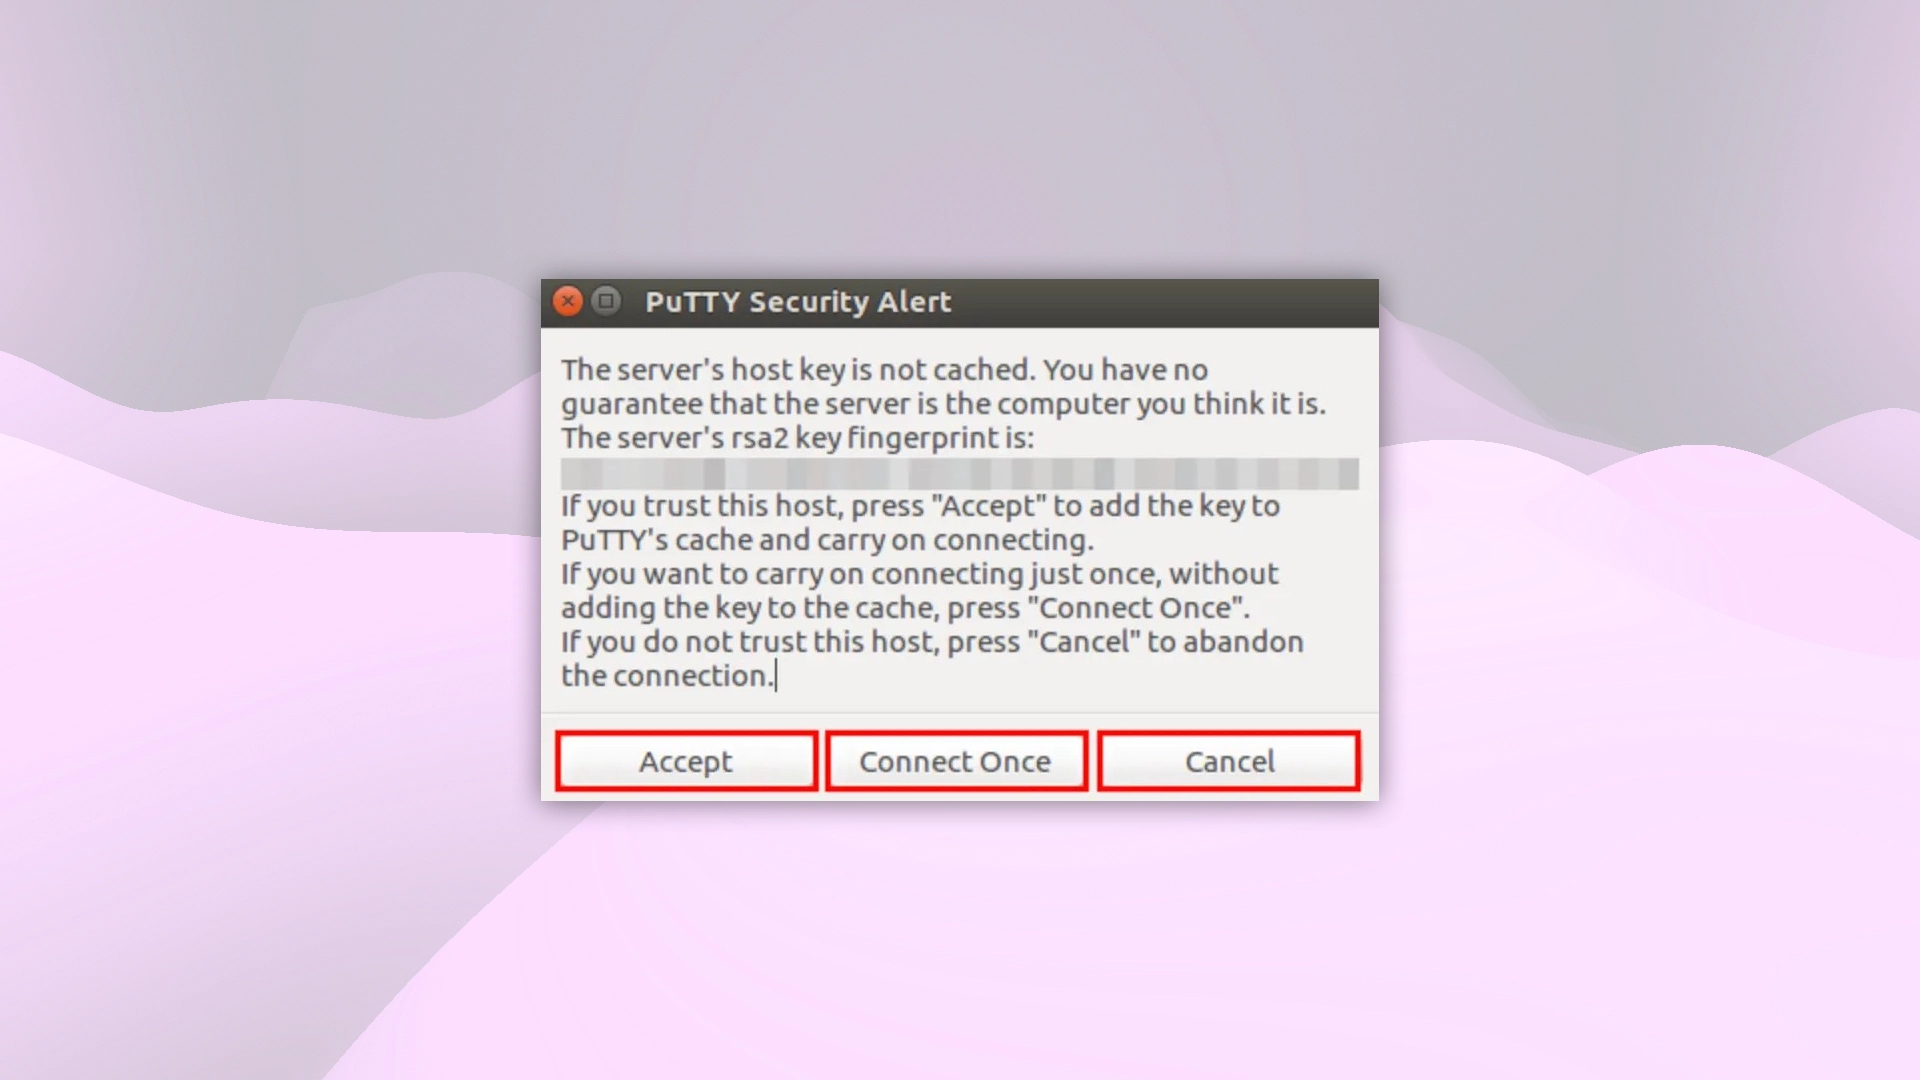
On first connection, PuTTY will show a security alert about the server's unknown key:
 Server key verification prompt
Click Accept to trust the key permanently, or Connect Once for a one-time connection.
- In the opened terminal window, type your login (usually
root) and press Enter. - Type the password for the account and press Enter.
- No characters appear on screen while typing the password — this is normal and done for security. Just type it and press Enter.
After successful login, you’ll be in the server’s command line (usually bash).
Connecting with SSH Key (Passwordless)
-
Generate a key pair using PuTTYgen (included with PuTTY):
- Launch PuTTYgen.
- Click Generate and move your mouse to create randomness.
- Click Save private key.
- Copy the public key from the top field (starts with
ssh-rsaorssh-ed25519).
-
Add the public key to the server in
/root/.ssh/authorized_keys:- Connect to the server using password (as in the previous section).
- Create the
.sshfolder if it doesn’t exist:
mkdir -p ~/.ssh
chmod 700 ~/.ssh
- Open the file:
nano ~/.ssh/authorized_keys
- Paste the copied public key on a new line.
- Save (Ctrl+O → Enter → Ctrl+X).
- Set correct permissions:
chmod 600 ~/.ssh/authorized_keys
chmod 700 ~/.ssh
chown root:root ~/.ssh/authorized_keys
For detailed key setup instructions: Setting up SSH key authentication on the server.
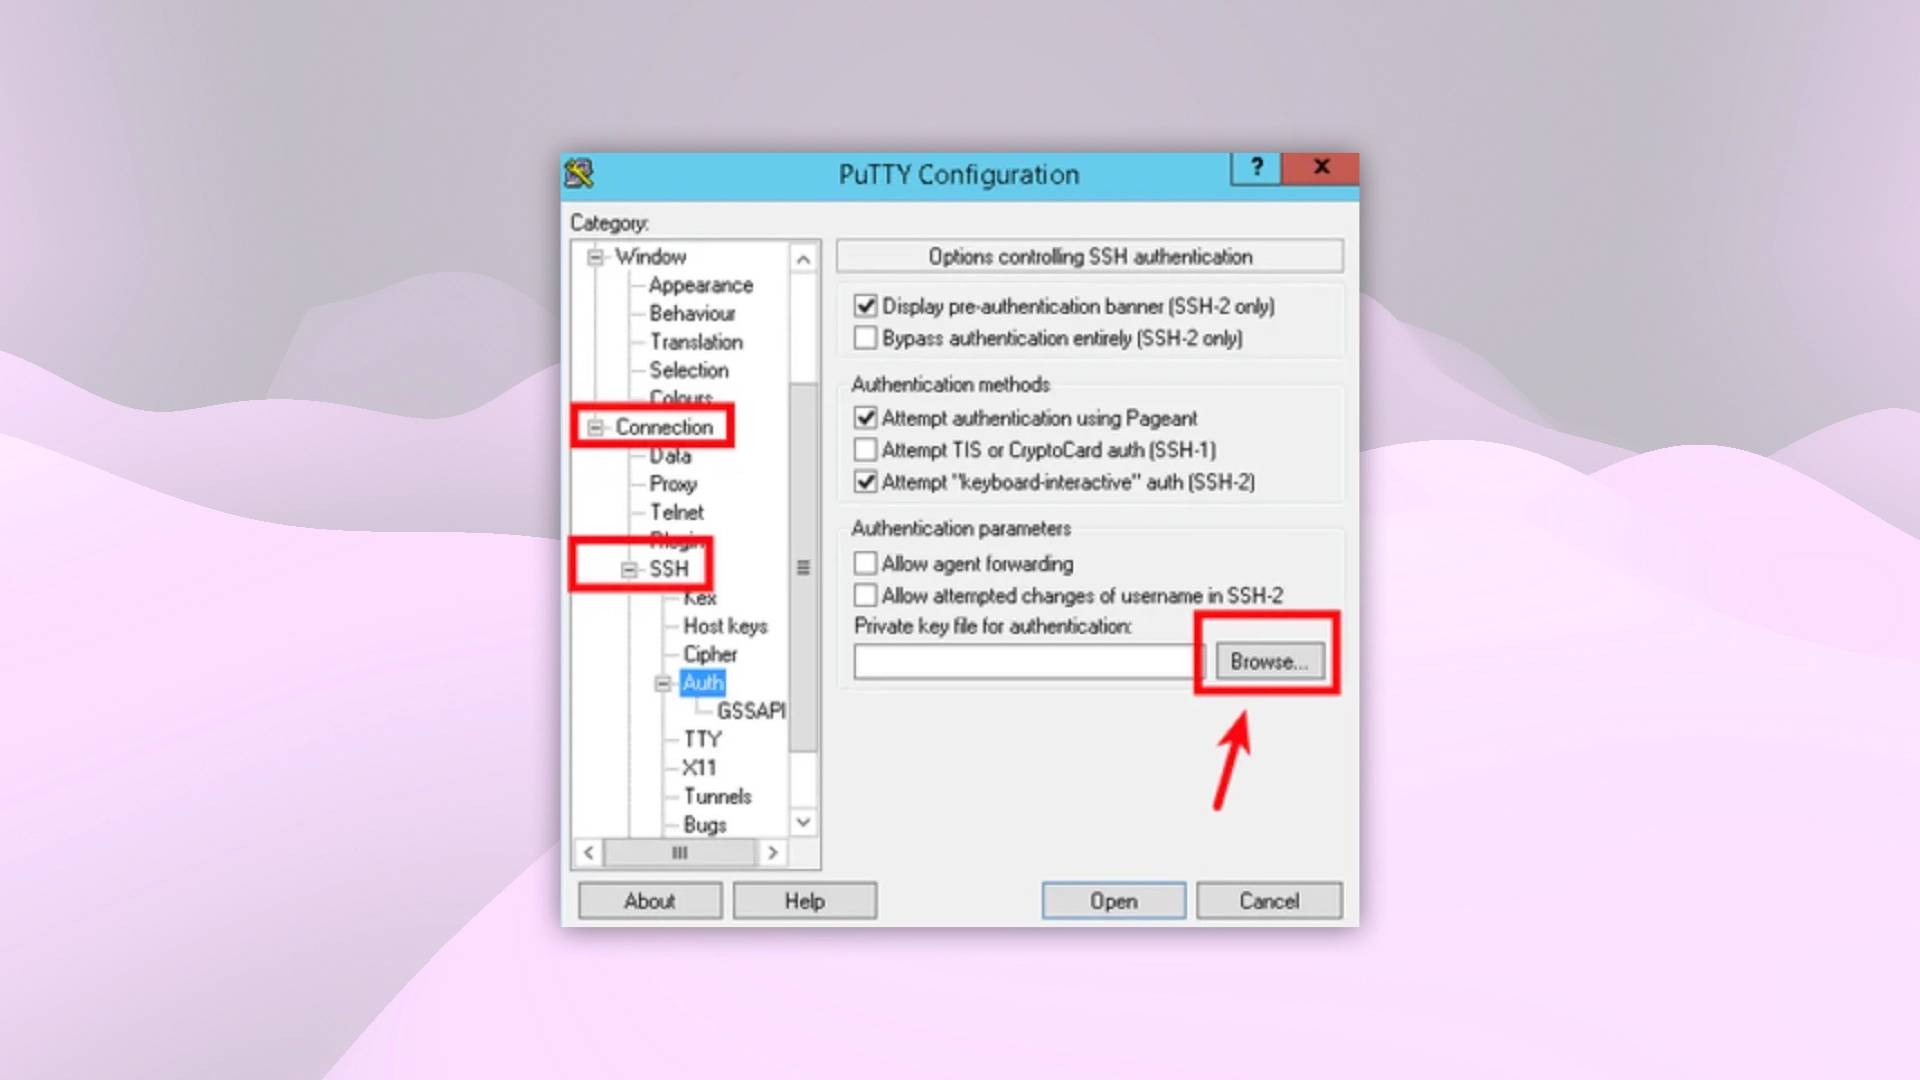
- In PuTTY, specify the private key:
- Go to Connection → SSH → Auth
- Click Browse and select your saved private key (
.ppkfile).
 Configuring the private key in PuTTY
- Save the session and click Open — you’ll connect without entering a password.
Help
If you have any questions or need assistance, please contact us through the ticket system — we're always here to help!